
10 Things I Love in My Studio that Make My Life Easier
This blog is about 10 things that I have in my studio which make my life easier, or more enjoyable when I am here working.
This blog contains Amazon affiliate links. As an Amazon affiliate, I earn from qualifying purchases. This is a great way for you to support me! Thanks!
I spend a lot of time here either shooting or working at my desk editing, doing paperwork, writing blogs, updating my website and speaking to clients. These are the things that I use most often and make working here much easier.
I haven’t included computer equipment as I find that’s quite a personal choice depending on what operating system you like to use. For the sake of just putting it out there, I edit using an M1 Mac and a BENQ monitor.
Here’s a list of ten items, plus one bonus which I have found have made my time in the studio, and at times, more enjoyable!
Paper Backdrops and Roller System.

Before I had these, I was using a backdrop stand with cloth backdrops and occasionally would use one of those curved photography tables that you can get to create an infinity curve but getting the backdrop system has been a real game changer.
The first massive difference it has made is that the amount of floor space I have has been drastically increased as I don’t need to have a pair of tripods set up all the time to have the backdrop cloths hanging, and furthermore, I don’t have steam or iron the backdrops every time I take one off the shelf that hasn’t been used for a while. The paper ones pull down and then roll away really easily when I have finished with them.
The first massive difference it has made is that the amount of floor space I have has been drastically increased as I don’t need to have a pair of tripods set up all the time to have the backdrop cloths hanging, and furthermore, I don’t have steam or iron the backdrops every time I take one off the shelf that hasn’t been used for a while. The paper ones pull down and then roll away really easily when I have finished with them.
I have a whole range of colours available to me which when they aren’t being used, can be stored out of the way in a cupboard where they are protected and not in the way. There are three of them permanently on the rollers and the rest stay neatly tucked away.
I also have a choice of which roll sizes to buy, which can help with the cost as the smaller ones are much cheaper, so if it’s one I might not use as often, I am often tempted to buy the smaller one as it makes more sense from a cost point of view. I do however, tend to buy the longer ones and then cut them to size (I lose about 10cm on the end of the roll).
The pros of these are that they are easy to install, are sturdy and provide a good, even solid colour to the images and they are reusable until you have worn them out. Look after them and they will look after you.
The drawbacks are that they aren’t portable, so I can’t do away with the cloth back drop system for now, but as most of my work is studio based, this isn’t a huge issue for me.
Links to the ones I use are here:
Canon Pro 1000 Printer.
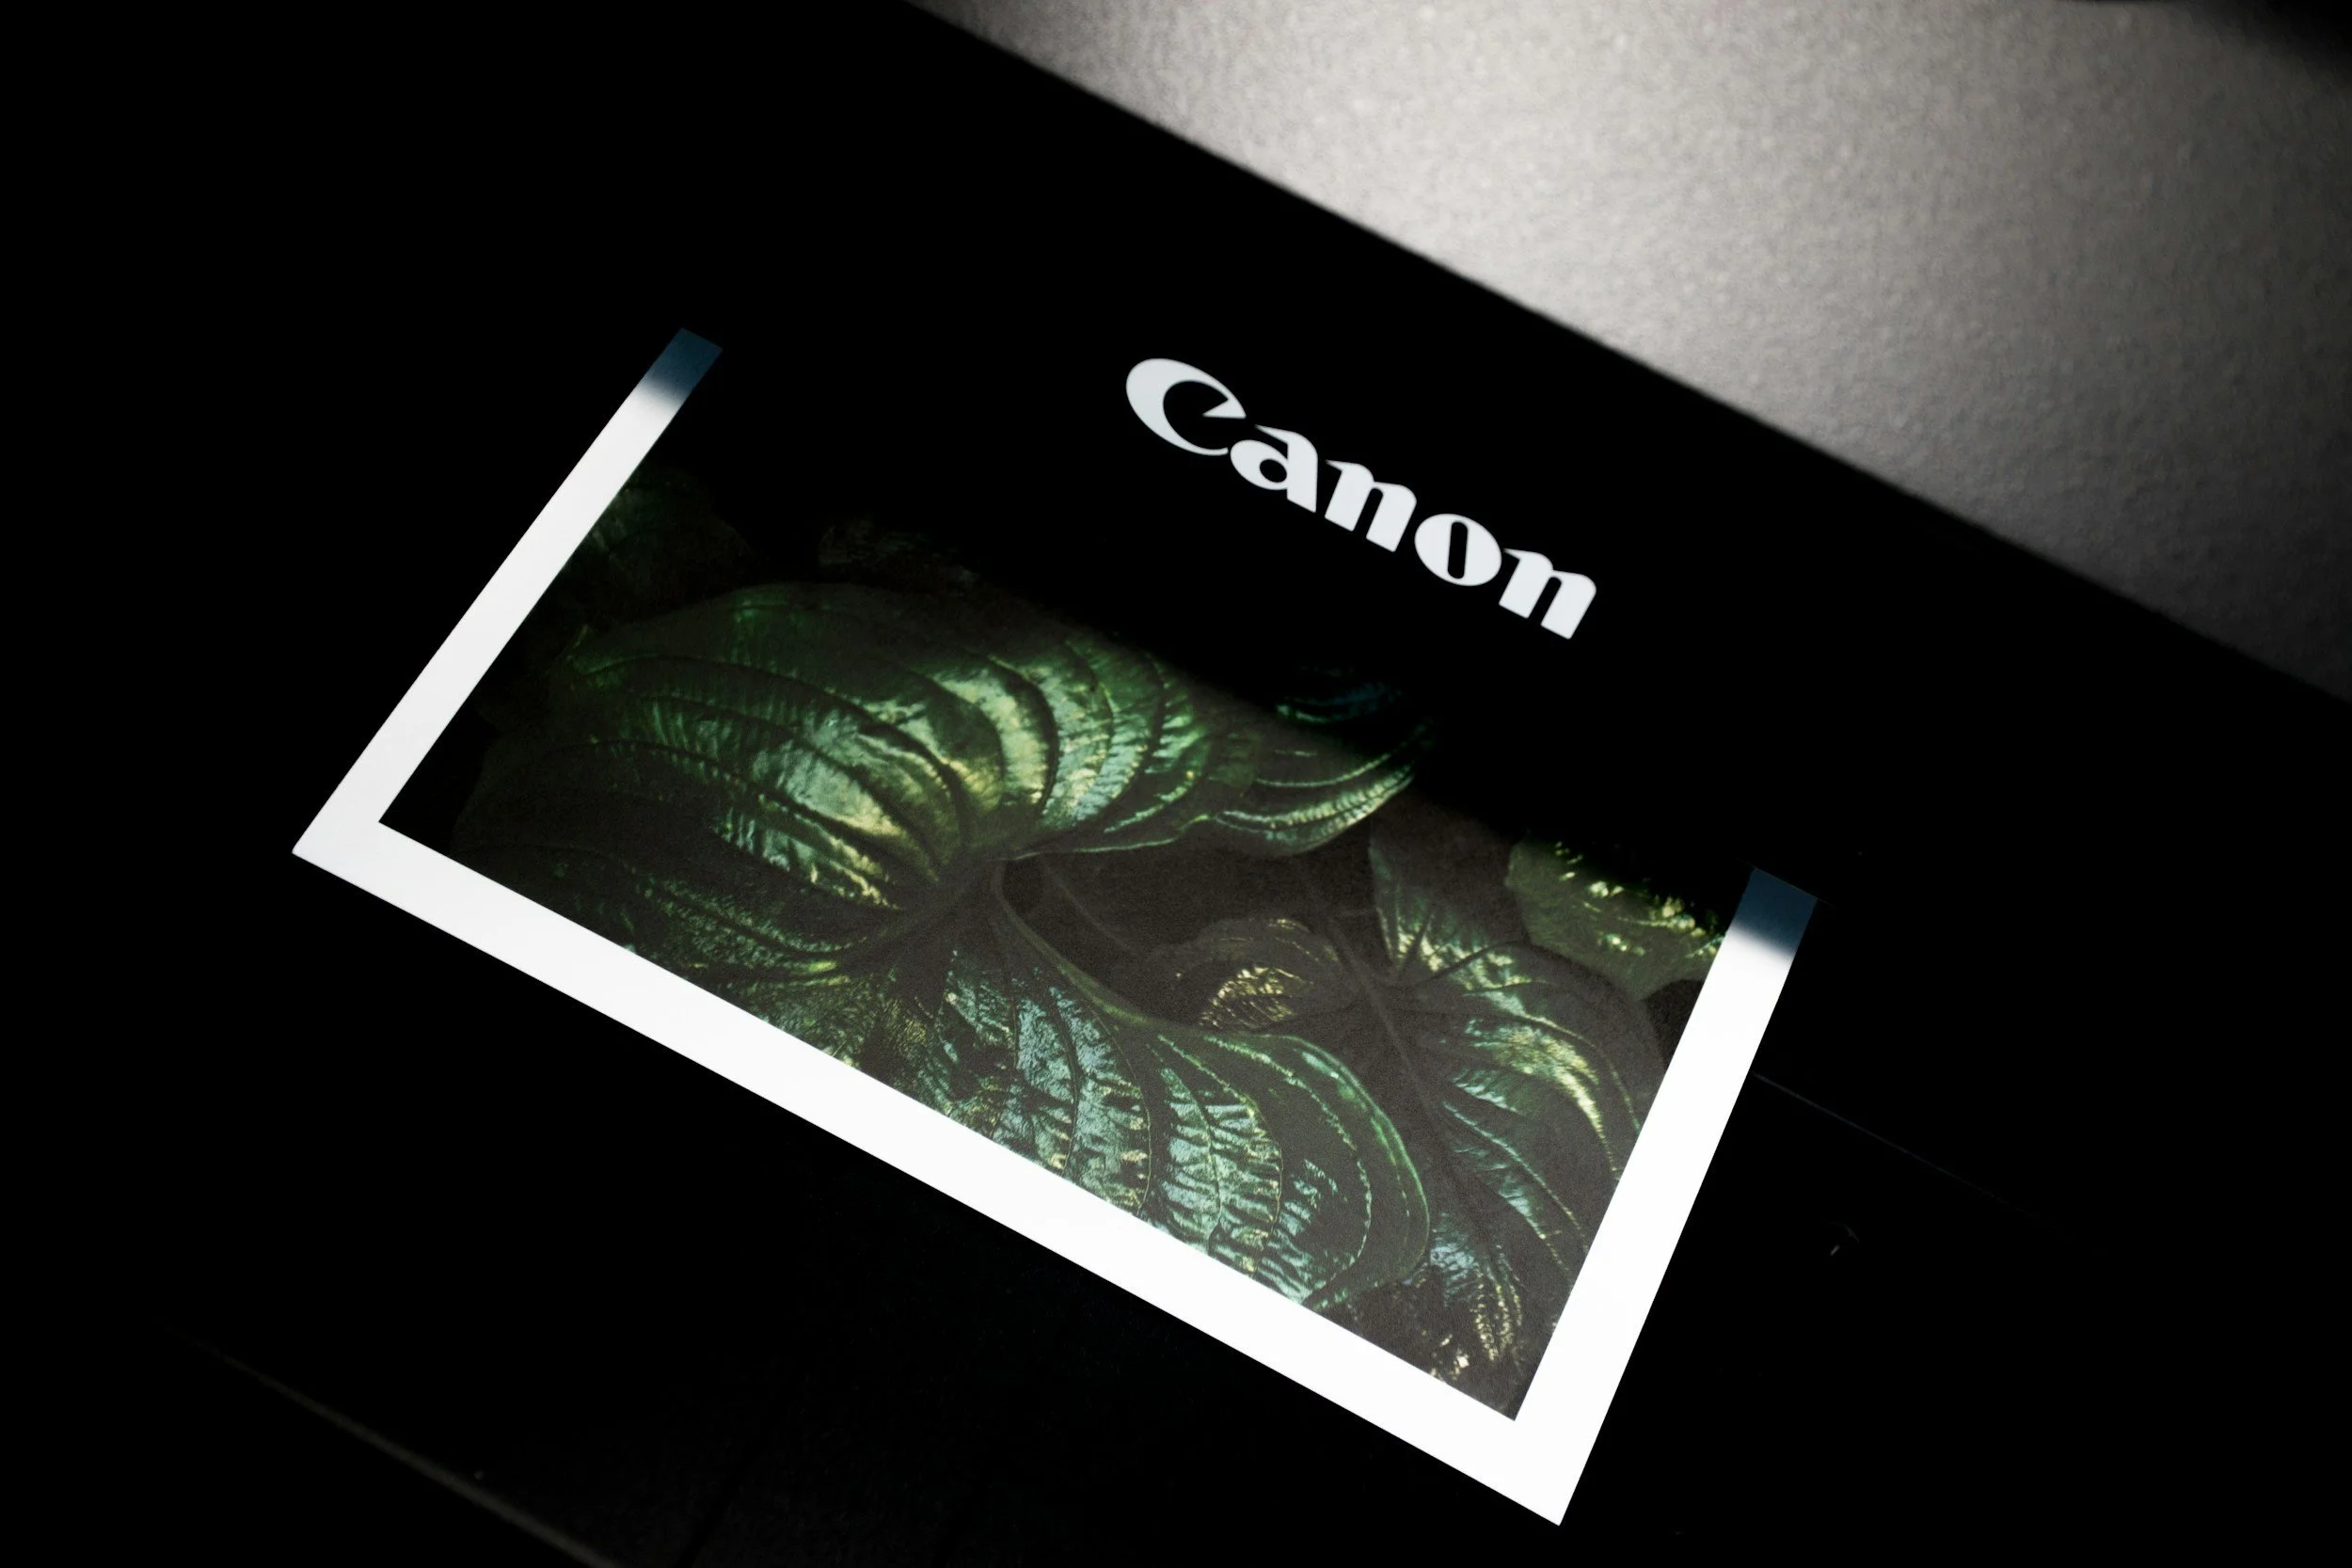
This is one of my favourite things I own, especially when it comes to being able to print my own images for sale. The process of shooting, editing, printing and sometimes framing means that I feel the photographic process is complete and I have something tangible at the end of the process.
I also love the fact that printing my own images has been one of the ways in which I have been able to improve my own photography, especially in the edit, as it has made me pay more attention to detail.
The downsides here are the initial cost, which is around £1000 and then the inks are expensive to replace (£500 for a full set), but this is offset by print sales and the fact that printing images, even at A2 size doesn’t use as much ink as you would think!
I have linked the printer I have in my studio and a smaller, slightly cheaper alternative if you budget won’t stretch to the PRO 1000 model:
Trolley

This has been one of my best purchases and was something I picked up in Ikea, but you can find similar ones all over the internet at a similar price point (around about £40).
The one I have is on wheels (this is important as you want to be able to move it easily) and has three, deep trays where I can put things and move them around the studio with me, rather than having to keep going back and forth. I keep it well organised so I know where to find things quickly when I need them and it means that I know where things are and that I have them to hand when I need them.
It can take a couple of days shooting to get the contents really dialled in as everyone’s needs are going to be different so get one, experiment and see what difference it makes to your workflow!
I got mine from Ikea, but a similar one on Amazon is much cheaper and almost identical:
Capture One Pro

This was an absolute game changer for me and my studio shooting. The tethered capture on here is far superior to the one in Lightroom and it makes file organisation an absolute breeze!
Shooting tethered capture in here is an absolute dream, the live preview is awesome and the whole process is STABLE!
There is also a course that you can complete to allow you to develop your skills in the software, which is led by industry experts so you know that you’re getting the best knowledge from people who use it on a day to day basis. It has transformed the way I used the software, and best of all, it was free!
The software is being constantly updated and I don’t resent one penny of the monthly subs because of how easy it makes it to shoot and organise my photos.
Full disclosure, I still edit the shots in Lightroom. This isn’t because I think it’s better, it’s because I have a workflow in here that I know and the process is much quicker for me. One of the things I want to do over the next couple of months is to learn the editing side of this software so that my workflow is even more streamlined.
You can download a free trial of the software here.
Tether Block

Probably the cheapest and possibly the dullest item on here, but also one the most useful.
The tether clip attaches to your camera and holds the tether cable in place.
This means that the cable isn’t 1) Wiggling about in the port on your camera pulling it away from what attaches it to the insides and 2) stops you from yanking the cable out of the cable accidentally and causing severe damage to the port.
There's not a lot else to say about this other than it could potentially save you a lot of money!
Trestle Table

This is something that I get a lot of use out of. I paid about £40 for a folding trestle table from Amazon. It’s six feet long, fold downs flat and halves in length, making it easy to store and transport. It has a really small footprint when it’s folded so you can stash it away well out of sight.
This is where I set up the majority of my shots in the studio. It has plenty of space, is sturdy, lightweight and it is easy to move around and store and doesn't break the bank.
Again, there isn’t a lot to say about this, because ultimately it's just a big folding table, but it's a very useful one that has already paid for itself.
They come in smaller sizes if your space or budget is limited.
You can see the one I have here.
Spring Grip Clamps

These are cheap plastic grips which I got from Amazon and they are used all the time in my shoots. Their biggest use was previously to pull the backdrops taught on my stand but now, they tend to be used to hold paper rolls in place when I am shooting on the table.
They can also be used to keep cables out of the way, hold flags in place, hold reflectors in place and also to prop things up when they keep falling over.
The ones I used are linked here.
Speakers

Maybe this is a weird choice for a photographer, and technically I didn’t buy them for this purpose as they are a hangover from my music production days but they have been a real benefit when I am editing video and doing things like making reels for social media.
I have a pair of KRK Rokit RP5’s which are mounted on stands at ear level, either side of my desk. These are powered speakers so you’ll need a power source close by to where you place them.
I sometimes edit using headphones/ear buds, but sometimes you don’t want to do this and your ears can get fatigued when you’re using them for a long time and at times they can be uncomfortable if you’re using them for a long time.
They are also great to have on when I’m shooting and want to have music going in the background!
You can find the latest version on Amazon, here.
Graphics Tablet
I have the medium Wacom Intuos Pro and the pen that comes supplied with it.

This is probably, after the printer, the thing that has made the biggest difference to my editing. Before I had this, I used to wonder how people managed to edit photos and retouch things just by using the mouse or trackpad so I researched some options, tried a couple out and then settled on this one.
The difference it made was huge. One thing I used to hate having to do was to clone out all of the blobs of chewing gum on the footpaths in some of my low angle and street portraits in London. It was always the last thing I did in the edit; it seemed to take hours and was just, quite simply, a nightmare.
The first thing I tried when I got the tablet set up was try doing the very thing that I hated, and within 5 minutes, it was done, such was the difference I found it made.
Whatever it is, the way you tell your story online can make all the difference.
The tablet is fully customisable from the size of the work area (meaning that you only use a portion of it and don’t have to move your hand so far across the page), the soft keys are fully programmable to Lightroom and Photoshop shortcuts (you can have them set up for both and the software knows which programme you’re in and changes them without you having to do anything), the scroll wheel makes zooming in and out of images a breeze and there are even buttons on the pen which you can assign shortcuts to.
My pen shortcuts are set up to undo actions and it makes things much quicker and easier!
If you’re editing skin then retouching is a dream and for everything else, you can just be so much more accurate that you can with a mouse.
Mine has been worth every penny.
Notebooks

Something completely non techy here but I always have a notebook with me in the studio (and at most other times of the day!) and there are a number of reasons for this.
I don’t use it just for photography (but that's a big part of it), but it has to do lists, “done lists” and other things like how much water I’ve had that day or what the weather was like, I supposed kind of like a diary, but not one that I have a one way correspondence with!
I think for me, it’s just a great way for me to write down ideas as they come to me, without having to pick up my phone - the less I have to interact with my phone the better as more often than not, I don’t just open up the notes app - it’s checking mails, it’s replying to messages or it’s scrolling on Instagram. By the time I have finished these things, I have forgotten why I picked my phone up and the original idea is a distant memory.
This means that when I have an idea for an image, or for a blog, see something I want to shoot when I am out and about and don’t have my camera, I can quickly write it down and then get back to what I was doing, the idea safely written down and my brain not fried by more social media exposure!
I like one that’s small enough to fit in my pocket, like it with lined or squared paper as this helps me to stay more organised and a soft cover as this means I can fit in most pockets.
The American “Field Notes” books are a great size and come in some awesome designs, but they are very expensive to buy in the UK, whereas Amazon sells “Site Notes” books much more cheaply - they’re also much more plain but do look quite retro. I use a Pilot HiTech V-Point pen and have a soft leather case to keep it all in.
Find the things I use on Amazon, here:

Bonus Item
Finally, a bonus item as it doesn’t really serve any purpose in terms of my photography, but it is (used to be) a camera and it looks great.
This is my Box Brownie lamp which I got from a maker's market somewhere and it sits atop one of the speakers I have in here and it looks fab with its little Edison bulb throwing out some warm light!
There lots of these around if you take a look at site like Etsy.
So there you have it, ten things which make my life in the studio much easier and at times, a little more enjoyable, especially when I am deep into editing!
I hope you find something you like and I will see you in the next one!
If you enjoyed reading this then don’t forget to sign up to my newsletter so that are notified when I have a new blog post out, to get hints and tips straight to your inbox or to find out when I have offers running in the store.