My Photography Blog
Welcome to the Chris Kendrick Photography Blog, where I share the stories, challenges and inspirations behind shooting Lake District landscapes and working as a Cumbria-based photographer. Alongside behind-the-scenes reflections from the fells and lakes, you'll also find honest photography gear reviews, covering the cameras, lenses and accessories that genuinely perform in real Lake District conditions. Whether you’re passionate about landscape photography, exploring Cumbria’s scenery, building your kit, or simply curious about the craft, there’s something here for you.
Some posts include affiliate links; thank you if you choose to support the blog through a qualifying purchase. If there’s a topic or piece of gear you’d like me to cover, let me know. Enjoy exploring!
Enjoy!
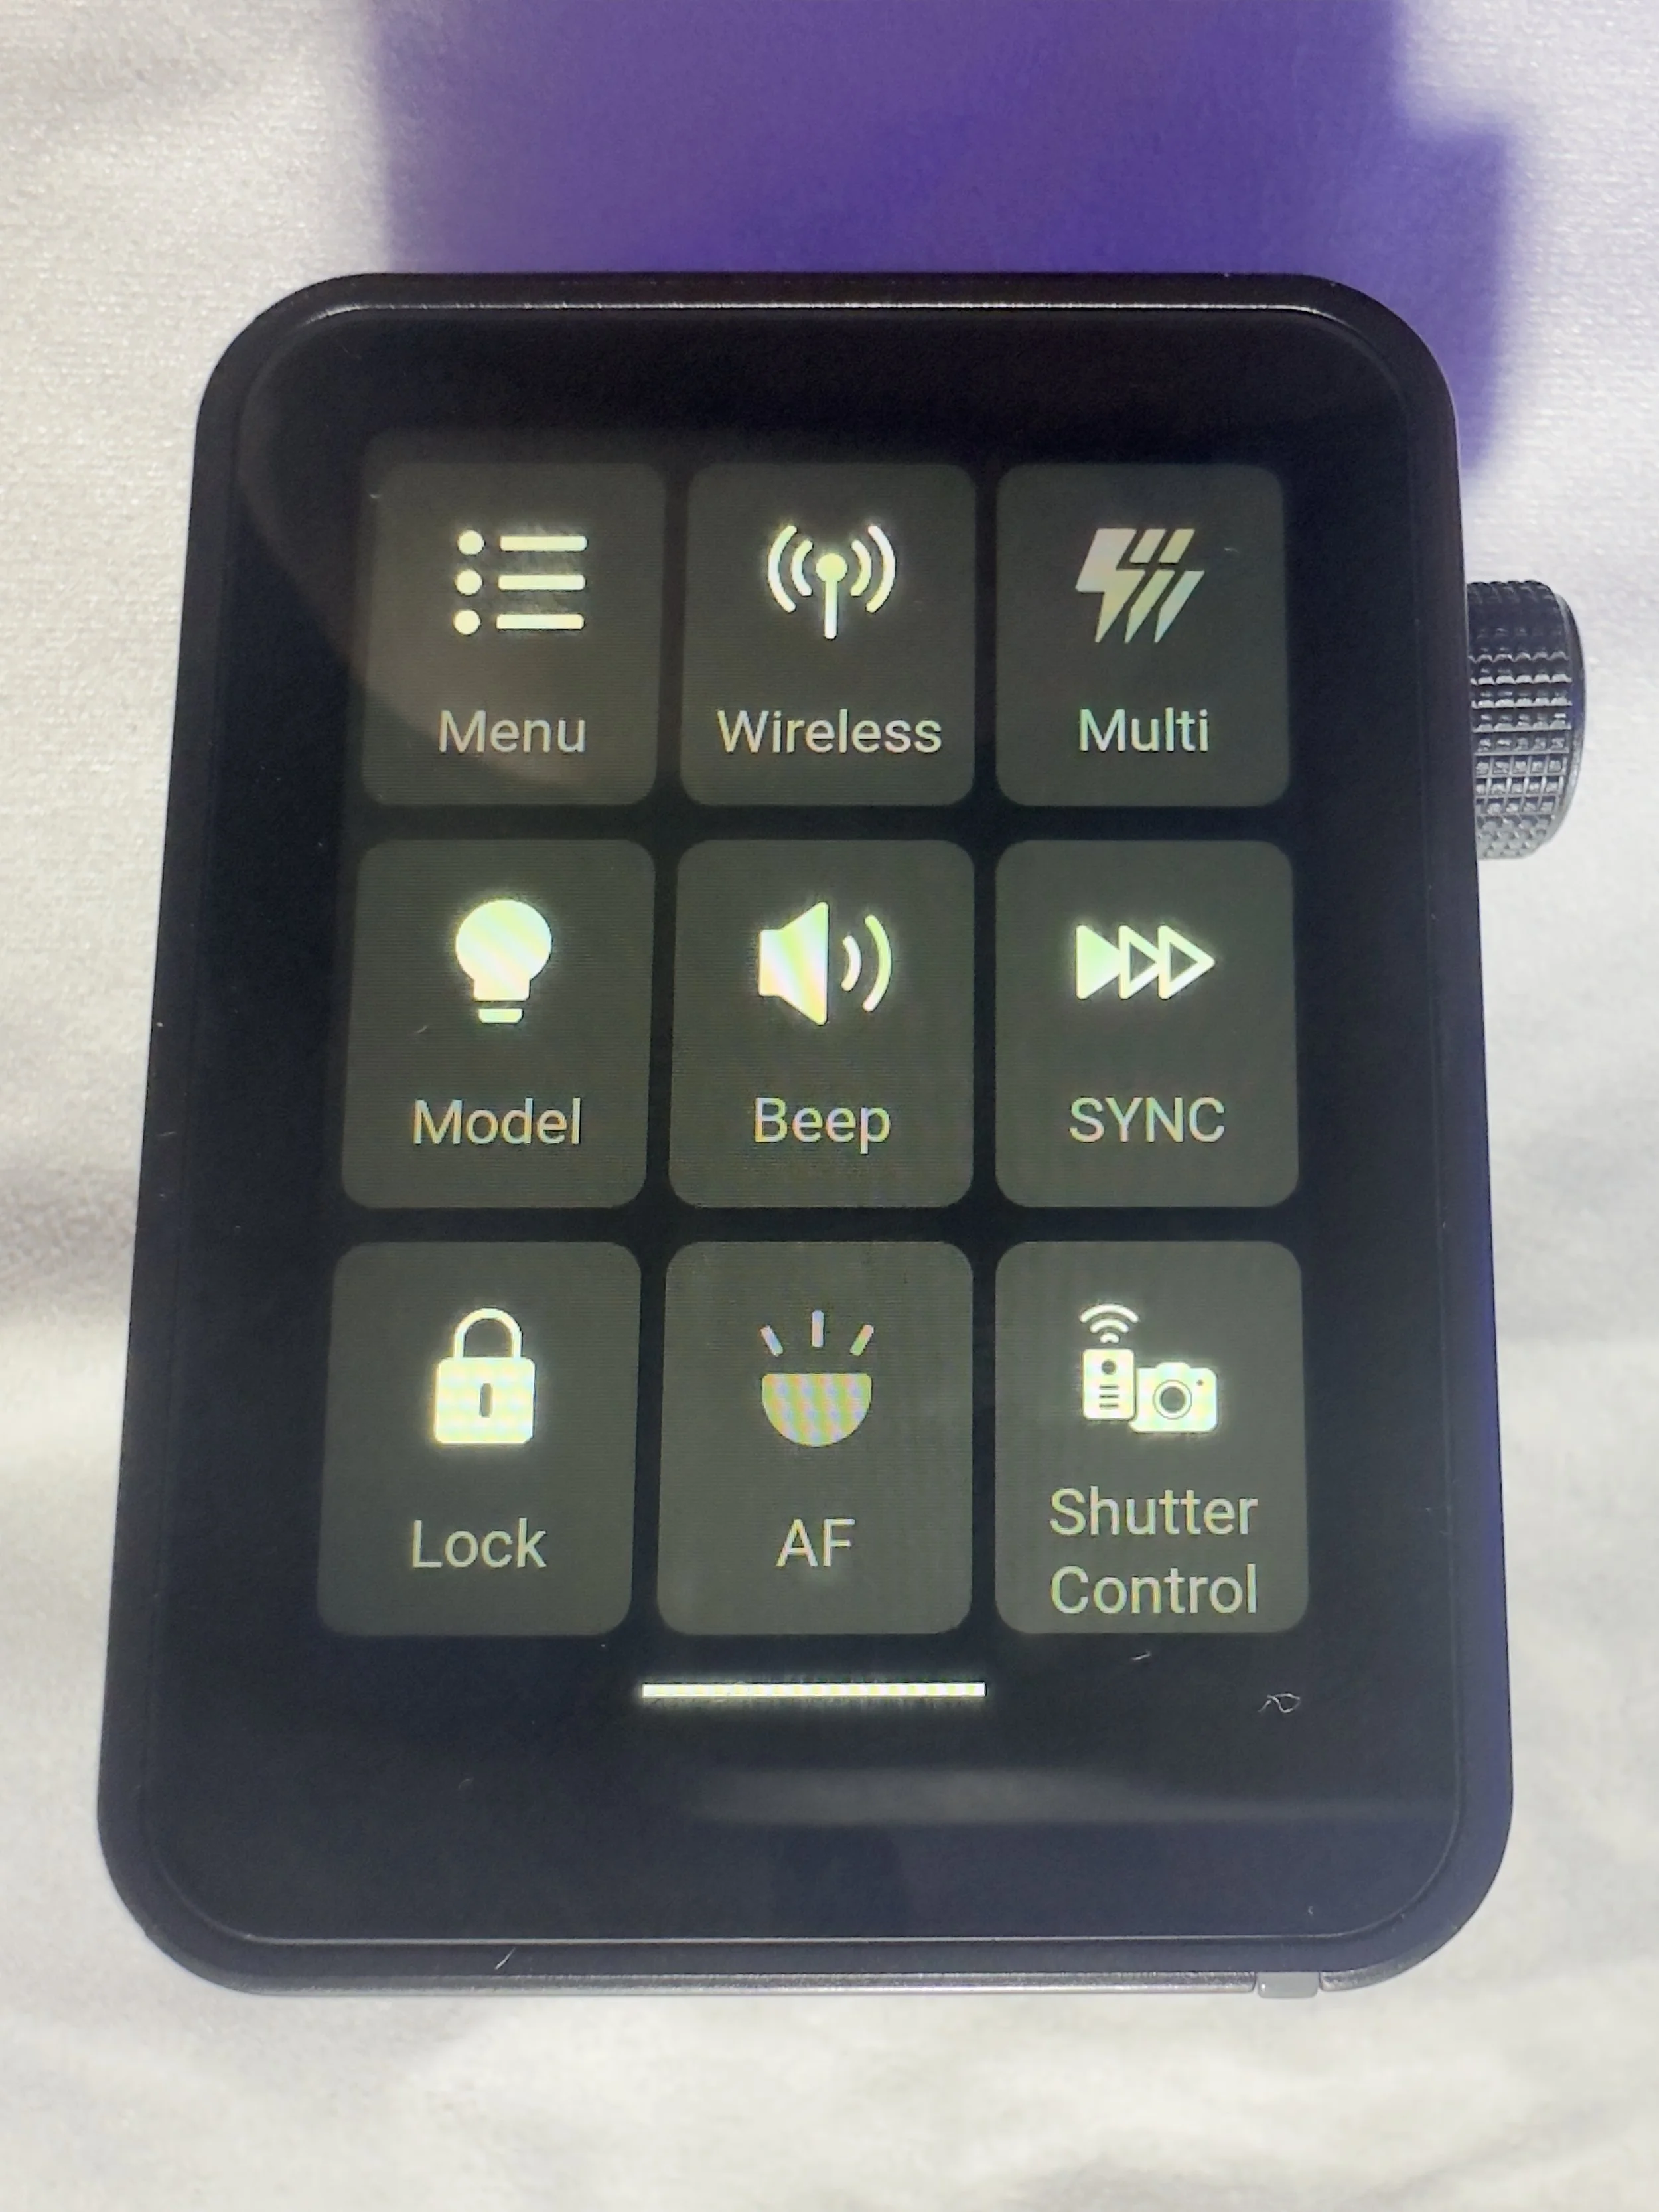
Gear Review: Godox X3 Pro Wireless Touchscreen TTL Flash Trigger.
The Godox X3 Pro is a compact, touchscreen flash trigger designed for Canon photographers who want fast, reliable control over off-camera lighting. In this review, I take a practical look at how the X3 Pro performs in real-world shooting, covering its radio triggering reliability, touchscreen workflow, TTL and High-Speed Sync support, and how it fits into a modern Godox lighting setup. If you’re considering upgrading your flash trigger or moving to a cleaner, more portable lighting workflow, this Godox X3 Pro review breaks down who it’s for, how it performs, and whether it’s worth adding to your kit.
Ahhh, flash triggers! For years (for me at least) these have been unnecessarily difficult to use bits of kit with complicated menus, too many buttons and some of the least intuitive things I have ever had in my photography set-up.
The Godox X3 Pro-C was launched in late 2025, with initial availability starting in September/October 2025 and changed that! It is something that I have been wishing someone would make for a number of years and finally something has come along that ticked a lot of the boxes I was hoping for.
I’ve had a number of different flashes and I still own some of them. One of the first sets was some Neewer off-camera flashes (the catchily titled Neewer NW-562 E-TTL Flash Speedlite), which came with their own triggers and a manual which contained some literal translations which were largely unhelpful. They were a lot of faffing, but once I got some settings dialled in for the transmitter and the receivers, I didn’t change them. I could just about work with the plethora of buttons and dials on the flash to change things like the output power and the zoom, and I did find it handy being able to reposition them. I still have them as they make useful lights that I can hide in scenes to light them more creatively.
I eventually upgraded to some more powerful strobes, this time from Godox and went for the Godox SK400III, which I paired with Godox XPRO-C TTL trigger. This was a real step-up from the previous trigger as now I could set up groups and store some different settings. Again however, I found this really complicated to use. The old style LCD screen was, I found, very confusing, difficult to use and to be quite honest, a bit of a pain. It did however give me some more flexibility and allowed me to do a little bit more. When I say ‘allowed’, what I mean is that I could control the strobes from the trigger rather than having to go and off fiddle with two set of buttons on two different flashes.
More recently, I have taken delivery of the Godox X3 Pro C Wireless Touchscreen TTL Flash Trigger. Yep, you guessed it, I got in the Black Friday sale last year, and I have had a couple of months to play with it before giving you my thoughts. One of my overriding thoughts is that they need to come up with some better names for these things!
This blog contains Amazon affiliate links and I may receive a small kick back if you make a qualifying purchase after you have clicked one of these links. This is a great way to support the blog, so a massive thank you goes to you if you choose to make a purchase, all of the money I make from this goes back into helping me to create reviews for the blog, it’t not a huge amount, but every little helps!
First Impressions:
This is much smaller than previous triggers that I have owned, yet you don’t lose any of the screen real estate that you want with a piece of gear like this. It’s light, which is a real bonus when you’re sticking it on the top of your camera via the hot shoe. One of the other things I like about it is that it has a built in rechargeable batter - HOORAY - no more faffing about with AA batteries which cost a fortune or rechargeable ones that never seem to last very long. The battery is rechargeable via a USB C cable which comes supplied.
It’s a lovely little object to hold, the plastics feel solid and the branding is fairly tame which means it looks quite subtle.
The touchscreen is bright and responsive. It’s also big enough that you’re not forever bumping icons you didn’t mean to and it’s not so sensitive that you’re accidentally changing your settings by just brushing against it.
There are 2 buttons on the right hand side, which give solid feedback when your press them (one of these will test fire the flash and the other is the power/menu button). Finally, on the same side, you have a multifunction wheel, which you can turn to navigate the menus and press to make selections, it has a reassuring click which lets you know you’ve made a selection. This might be handy if you’re working somewhere cold and are wearing gloves, or if you struggle to use your hands to make the changes via the touchscreen.
On the front of the unit there is an autofocus assist beam and at the bottom of it there is mechanical button which retracts a pin on the hot shoe to enable you to release it from the camera when you’re ready to pack down.
It came with about 60% charge already in the battery and to charge it to full took about 45 minutes. I don’t know what the full battery life is, but it’s been enough to get me through a full day’s shooting.
My Experience with The Trigger
I have really enjoyed using it so far. Once I had everything set up (which took no more than a few minutes after I had watched some YouTube videos), I was ready to go and shooting. I had someone booked in for some headshots not long after I took delivery of it and it got me through the whole session with no issues (I did have the old one on standby just incase I ran into any issues), I was able to make range of adjustments which synced to the strobes with no issue.
One thing I really like is that you can scan the 2.4ghz frequencies and the trigger will tell you which channels are the clearest ones for use in the environment you are, and then you can set this on the strobes and the trigger. I use each of my flashes in its own group and I don’t bother with the ID numbers as I am not often working in an environment which requires me to do this. I have however, messed around with creating different groups and using ID numbers for the purpose of this review, and have found that it’s a fairly straightforward process.
There is a slight lag from when you make changes on the trigger to them registering on the flash, whilst this hasn't been an issue for me, it’s something worth knowing. We're talking about delay of less than a second, but I know there are people who aren’t going to be into this.
What other features does it have?
One little ‘'bonus’ feature of this unit is that you can also use it as an intervalometer, but you will need to connect the trigger to the camera with 2.5mm TRS cable (male to male). These are less than a tenner for two if you click the link I have just posted, but a lot of you might find that you already have one of these knocking around at home somewhere, especially if you have purchased flash gear before.
One of the big plusses, for me at least, of this trigger is that it is a radio trigger so this does away with the need for line of sight to enable you to trigger the flash, which gives you some more flexibility on set/location and it saves the need for the use of optical slaves.
Switching between TTL and manual flash is straightforward, which is especially useful when working in changing light conditions.
The updatable firmware is also a huge bonus for lighting setups and products which are constantly evolving, and will reduce the need to keep spending money on buying new gear.
You can also change the trigger distance or range and you have two options here, 0-30 metres and 100m. I have found that when I am shooting in the studio, it’s much more reliable and has fewer misfires when working in the 0-30m setting. I haven’t used it outside yet, so can’t say if it works well up to 100m.
Finally, in the menus there is a function called ‘legacy’ which allows you to turn off all but one of the pins on the hotshot (the centre one), which means that it has greater functionality across a range of older camera bodies. You should be sure to check that your camera is compatible with the unit before you buy it.
Who is this for?
The Godox X3 Pro-C is ideal for photographers who want a compact, modern flash trigger without sacrificing control or reliability. It’s particularly well suited to Canon shooters who regularly work with off-camera flash and want a streamlined, clutter-free setup that travels easily. If you shoot on location, work with multiple light groups, or frequently switch between TTL and manual flash modes, the X3 Pro-C’s touchscreen interface and intuitive layout make lighting adjustments quick and efficient.
It’s also a strong choice for photographers moving away from optical triggering and into a radio-based workflow, offering dependable performance indoors and outdoors without line-of-sight limitations. Those who value portability, a clean camera setup, and fast access to lighting controls will appreciate what the X3 Pro-C offers.
However, photographers who prefer physical dials and buttons, work extensively in cold or wet conditions, or want interchangeable batteries may find a more traditional trigger a better fit.
Where Can I Buy One?
The easiest place to get one of these is on Amazon, where you will find it for around about £88. Make sure that you buy one which is compatible with your camera. There are a number of different versions, so don’t end up with something that you need to return! The ‘C’ in the name of this one stands for Canon, there is an ‘S’ for Sony and so on. They are clearly labelled with the camera brand on Amazon.
Pros and Cons
Pros
Bright touchscreen with intuitive navigation and operation.
Small profile makes it great for travelling and on location marking.
Supports Canon TTL metering and high speed sync
Uses the Godox X system which gives compatibility across a wide range of flashes/strobes
Built in USB C rechargeable battery negates the need for a high pile of AA batteries.
High speed sync speed up to 1/8000 if your camera supports it.
Cons
Touchscreen can be fiddly in cold and wet conditions
Not hot shoe pass through. Once it’s attached, there is no way to connect anything else, which could be a limiting factor in some setups.
More expensive than some other Godox triggers without much development around the core functionality.
Final Thoughts
The Godox X3 Pro-C is a strong choice for Canon photographers who want a modern, streamlined approach to off-camera flash control. It delivers reliable radio triggering, a clean and intuitive touchscreen interface, and a compact design that keeps camera setups lightweight and uncluttered. In real-world use, it offers all the core functionality most photographers need, from multi-group control and TTL support to High-Speed Sync for working in bright or fast-changing light.
While those who prefer physical buttons or interchangeable batteries may gravitate towards more traditional triggers, the X3 Pro-C excels in ease of use, portability and workflow efficiency. For photographers looking to simplify their lighting setup without compromising on control or performance, the Godox X3 Pro-C is a capable and well-designed trigger that fits comfortably into both studio and on-location workflows.
Technical Specifcations
Godox X3 Pro-C (Canon) – Specifications
Quick reference spec sheet
If you’d like to support the blog and help me keep producing Lake District photography content, honest gear reviews and regular website updates, you can do so via my Buy Me a Coffee page. Keeping everything running smoothly takes time, and your support makes a real difference. Thank you.
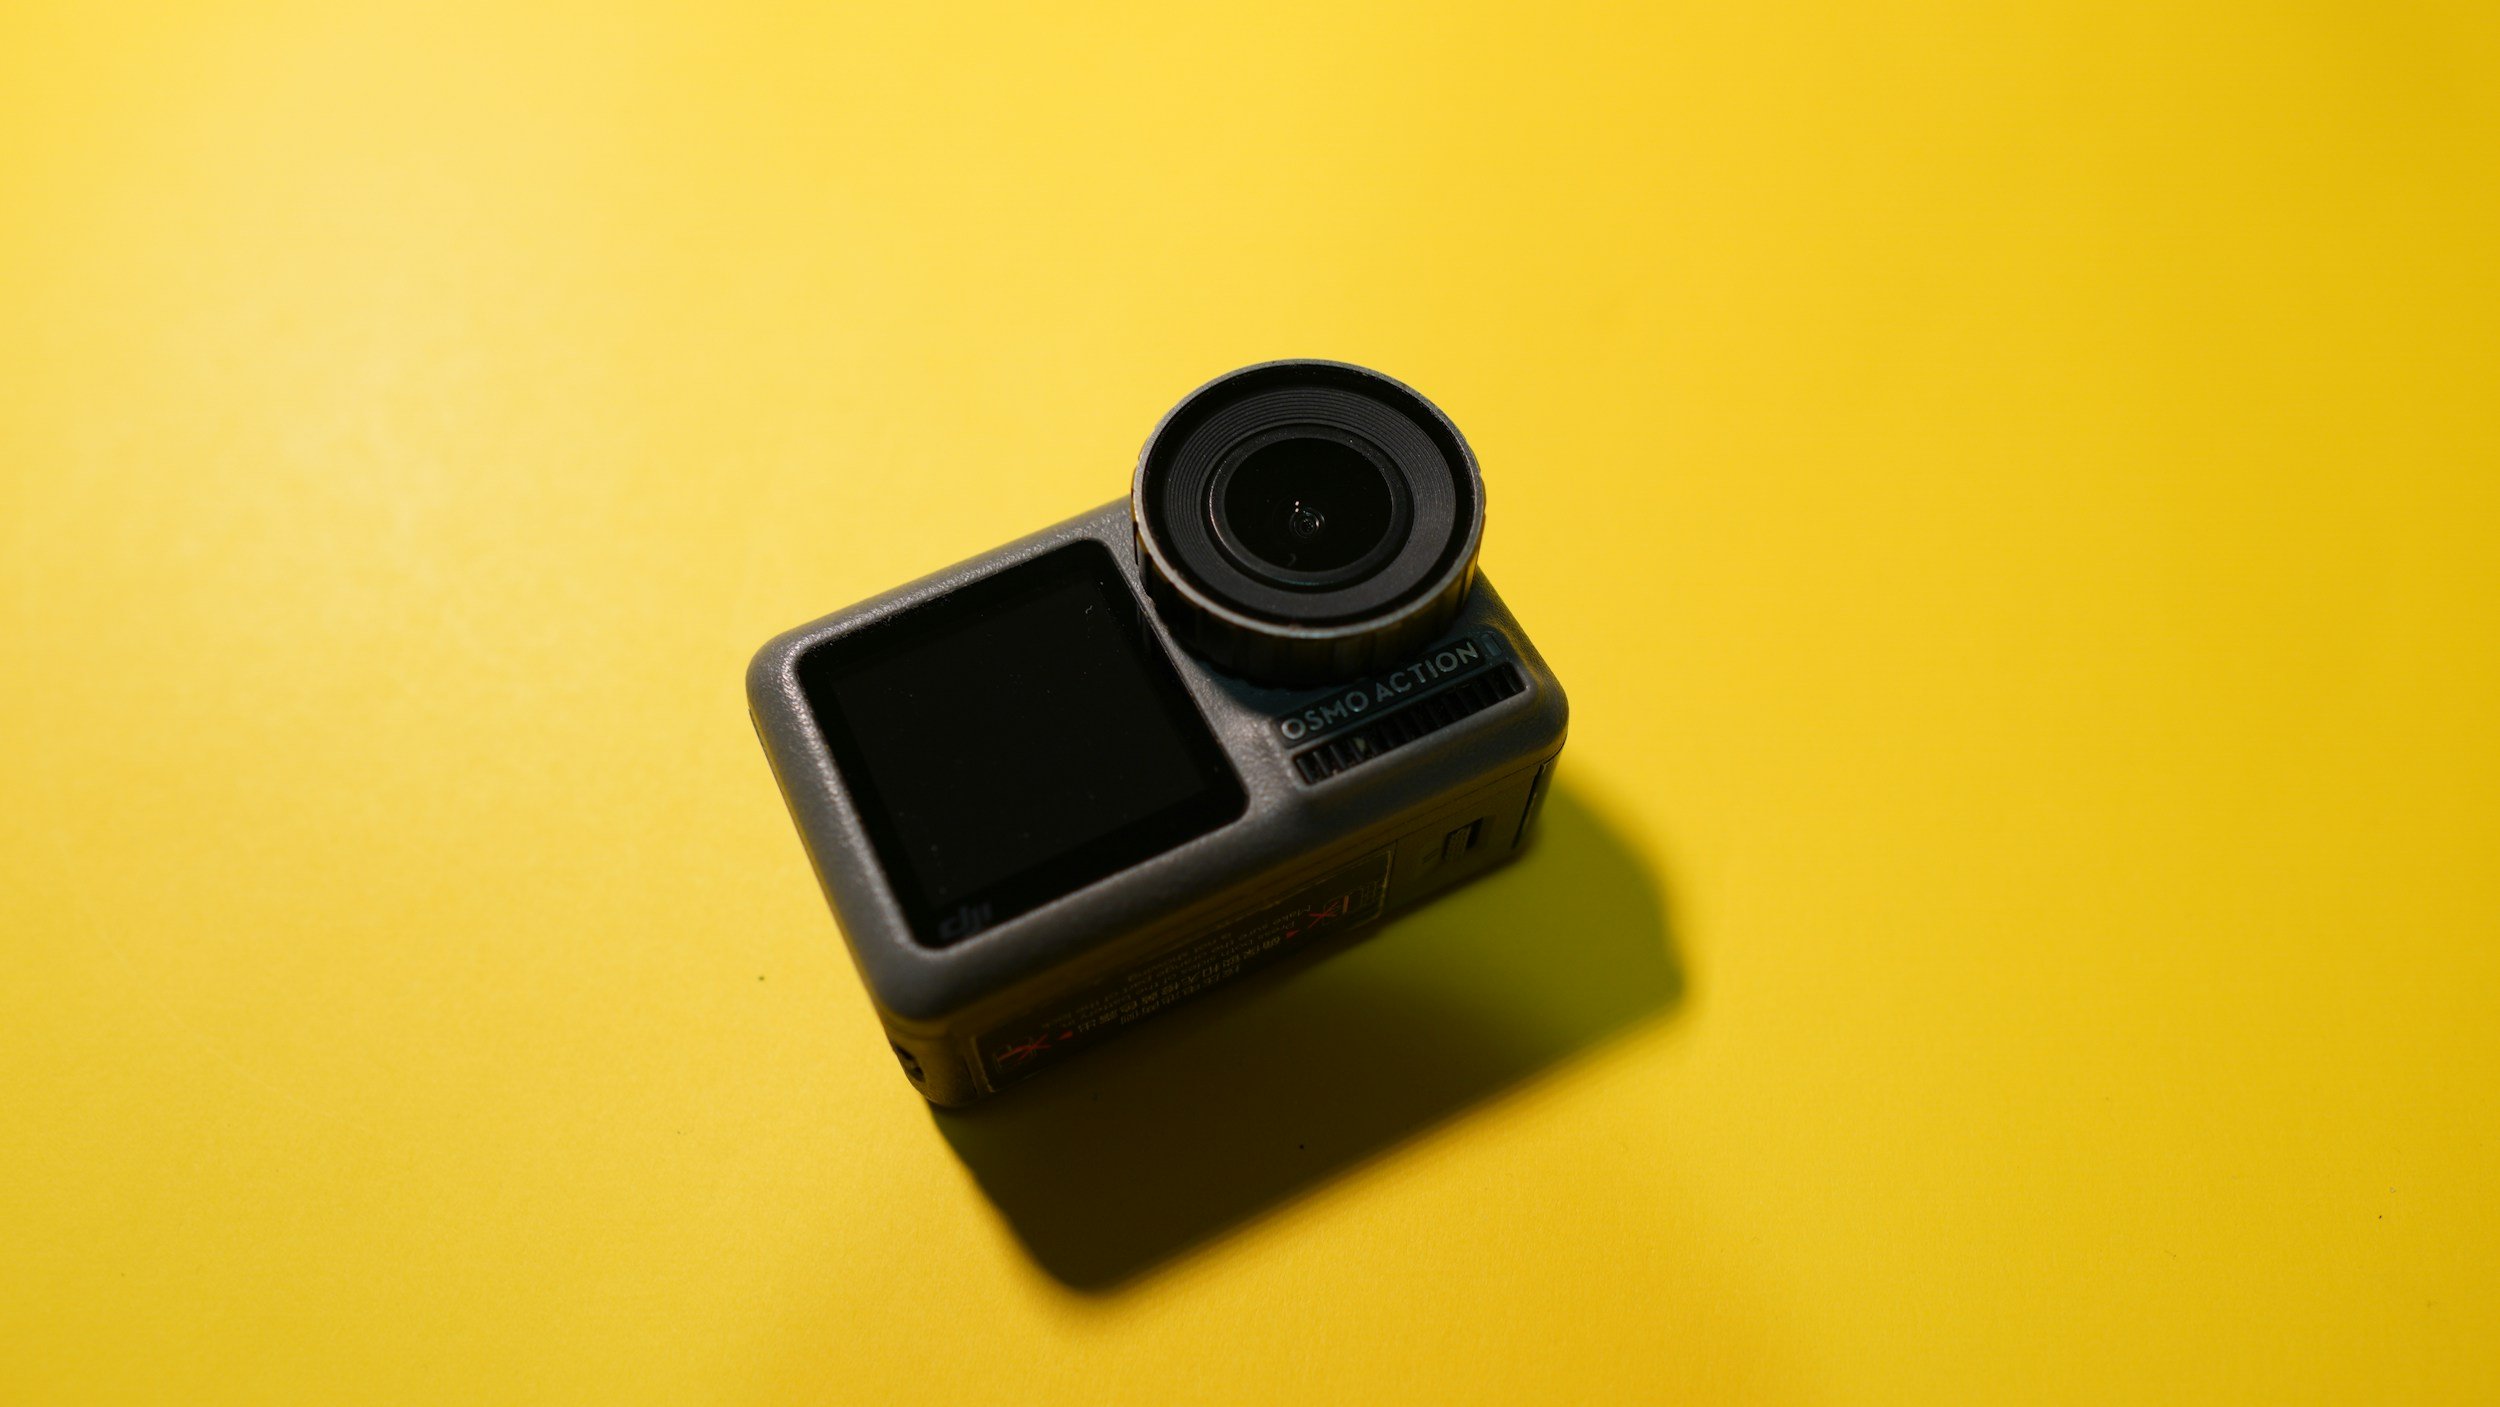
Gear Review: DJI Osmo Action 4. Worth it in 2026?
The DJI Osmo Action 4 is a compact action camera designed for photographers and filmmakers who want high-quality video and reliable performance in challenging conditions. With its larger 1/1.3-inch sensor, improved low-light performance, and robust weather sealing, it promises more than just point-and-shoot convenience.
In this review, I take a closer look at how the DJI Osmo Action 4 performs in real-world use, including image quality, stabilisation, usability, and how it fits into a photographer’s kit alongside a mirrorless or DSLR camera. I’ll also cover who this camera is best suited for, where its limitations lie, and whether it represents good value compared to other action cameras on the market.
Ok, so full disclosure here, I got this in the Amazon Black Friday sale on December 1st, last year, (that’s 2025 if you’re here really late!). It was part of a flash sale they had on some DJI products and I bagged the DJI Osmo Action 4 for £150; an absolute bargain when you consider that on the same day, it was on sale on DJI’s own website for £289. I’m pretty chuffed with the bargain I bagged on this one. I wasn’t actually looking for anything but this was too good to miss.
But why the Osmo Action 4, it’s had two successors since its launch, haven’t I just bought something that is already out of date? For me this was about value for money and adding value to what I do. No it’s not going to produce cinema worthy movies (at least not in my hands!), but it is going to give me felixibilty and add value to what I do, particularly to my social media offering in ways that my current kit doesn’t allow me to. At least not as well or as conveniently as this does.
I already own the DJI Action 2 and I like it, but it’s a touch on the fiddly side and I wanted something that gives me a bit more (the OSMO Action 4 already trumps it on being able to shoot in D-Log, something which will be a game changer for me) and that will also give me some more flexibility if I want to talk to camera but not have to break out the DSLR to do it.
This blog contains Amazon affiliate links. If you make a qualifying purchase after clicking one of these links then I may receive a small kickback.
First Impressions?
I was surprised how small the box was, but then remembered it’s only an action camera so I am not sure what I was expecting. I’ve not had a massive amount of time to play with it, but it feels good quality, the screens (front and rear) are both really clear and responsive.
One thing that was quite quickly brought to my attention when I put my SD card in is that it wasn’t fast enough. This is something I should have known/realised, but if you’re shooting memory dense 4K footage then you’re going to need a V30 memory card in the DJI Osmo Action 4 - it just means that your card will be handle the mountains of data that are being thrown at it in a way that won’t lead to constant crashes. I’ve ordered one and hopefully this will be enough. I like cards from Lexar and Sandisk. I would recommend 256gb or 512gb for this camera. (Update: It’s arrived now, I went with a Lexar 256GB. I have it formatted in the camera and it’s working a dream and at 4k 30FPS is indicating it will hold about 4 hours worth of footage, more than enough for my needs)
I went for the ‘essential’ combo, and in that you’ll get the camera, a battery, a mounting cage and a bolt to attach it to GoPro type accessories. I’ve tried some of the generic GoPro attachments I have in the studio and they all fit fine. You also get a USB cable and some stickers. The final thing you’ll find is a lens hood which is great for attaching if you break the protective lens cover, but be aware that if you don’t have the protective cover fitted, the camera isn’t waterproof!
It’s solid feeling little unit, but I think it will need to be handled with care in order to protect the lens. It’s not too heavy and will likely spend a lot of time in a Smallrig cold shoe mount attached to the top of my camera for some BTS and timelapse work.
The unit comes supplied with a plastic protective “frame”, similar to what you would get with a go-pro, but if you’re not familiar with these, then it’s a bit like a bumper case for a mobile phone. You also get the magnetic quick release mount, which I really like. The magnets are strong and the way it attached to the bottom of the camera feels really secure. It’s the same as on on DJI action cams and it works (for me) really well. You’ll also get an Osmo locking screw, which is for attaching the camera to tripod mounts, handlebar mounts or whatever other attachment you decide you want to put it on. You name it, there’s probably an attachment for it. If you’re coming from GoPro then you’ll find that most of the stuff you already have will fit onto it quite easily without the need to buy a ton of new stuff.
I have an old GoPro Hero7 Silver, and the DJI Osmo Action 4 is slightly bigger than this, but that bigger sensor has got to go to somewhere, as well as all of the tech to support the front and rear screens. The touchscreen is bigger than on the GoPro and this is a very welcome addition. The menus are easy to navigate and the settings are where you would expect them to be. If you already own a DJI action cam or any of their gimbals then the menus are going to feel very familiar to you. They’re not quite as easy (for me at least) as the Canon menus, but then maybe I am a bit biased!
Battery Life
This is advertised as being upto 160 minutes, so well over two hours, but this is obviously going to depend on a number of variables such as the camera settings you are using.
Charging this camera isn’t the fastest, I haven’t completely emptied it yet, but even from 60%, it takes well over an hour to charge. Your experience may vary, but this is one of the drawbacks for me.
Using the OSMO Action 4
Pairing with the DJI Mimo app was a breeze, and like with other things from DJI, you can use your phone as a sort of field monitor to get things framed up well. I have always found this to be beneficial with things that have a smaller screen to work with, no matter how clear the screen is.
Talking of the screen, it’s clear, it’s responsive and easy to use. Navigating the menus is easy and with up to 750nits of brightness, it’s going to be easy enough to see in bright sunlight.
This is a really intuitive piece of kit, and within minutes of getting the battery inside it, I was ready to go and play with it, but the weather and the darkness put paid to that for its first night.
The menus are really intuitive and easy to find your way around, there’s nothing complicated here. Everything is easy to find and is where you would expect it to be. Make sure to activate pro-mode if you’re wanting to take advantage of the d-log profile inside here.
One thing I don’t like, and its a gripe with a lot of action cameras is that it’s a pain in the you-know-what when you need to the card out of the camera - the whole cage has to come off so you can access the doors and their slots. I know this isn’t a massive issue, I really do, but I also hate the faff that comes with getting the card out of the camera!
The first use out and about was easy, just using the controls on the camera. Nothing fancy, just hand-holding and shooting. This is probably really picky, but the buttons on the camera itself are quite stiff and take a fairly firm press to activate. Again, not a huge issue and I’d be complaining if it started recording when I didn’t want it to because the buttons were pressed to easily. Just make sure you have got the shot and then leave a little pause before you press the button to stop recording so as not to introduce unwanted movement into your footage.
Who is it for?
There’s the obvious audiences for this; people who want to record FPV sports, people who want to record FPV anything, cyclists… the list goes on. But what about applications for photographers and content creators?
I bought this as I want to do some more BTS footage for my social media, as well as some small pieces to camera, and this was an ideal camera for me to do this with, and at the price point I got it at, it was a no brainer. It also has time-lapse functionality, something else which I value and it records slow mo in 1080p at 240fps. I’m not sure what my application for this will be yet, but I am sure I will come up with something in the future.
Video Quality
This is what you would expect from DJI. It’s pretty damn good. One of the major selling points for me with this camera was the ability to shoot in D-Log; I have been longing to be able to shoot and grade my own log footage for sometime, and this is going to allow me to do that.
This camera shoots in 4K upto 120 and in 1080p, you can double that to 240fps.
The stabilisation in this camera is first rate. I am not known for being the steadiest person at times and having this is great when I am hand holding, or if the camera is on a tripod being battered by the wind!
Have a look at the video below and take a look at the difference between the graded and the ungraded footage. I have done all of the grading in PremierPro, I’ve still not quite got my head round DaVinci enough to be willing to share it yet! I’ve also popped a download link to some ungraded log footage at the bottom of this page, so that you can have a play with it before you make a purchase, if that’s the kind of thing you like to do.
DLOG Footage transitions to a really basic, saturated colour grade using DJI Input LUT and some basic colour correction.
Pros and Cons
Pros:
Clear, easy to navigate menus make using the camera easy.
Large f/2.8 aperture and large sensor aid low light shooting.
Dual touchscreens are really useful for vloggers.
Good video specs — 4K video up to 120 fps, 10-bit colour, and 240 fps slow-motion at 1080p make it versatile for cinematic clips, action shots, or creative video.
Cons:
Charging takes a long time.
400mm minimum focus distance makes some close up shots unachievable
Photo output is 10MP which isn’t a massive amount of resolution.
No ultra-high (e.g. 5.7K) video resolution — For creators needing very high detail or future-proof 4K oversampling/creative cropping, the 4K max could feel limiting.
Where can I buy one?
I got mine from Amazon in the Black Friday sale, so you might not get the sam great price that I did, but check them out by clicking here.
In Conclusion
I really like this piece of kit, it will give me flexibility and a wide variety of options when it comes to recording video out in the field and I need my “big camera” for the business of taking photos. I will probably stick to using something more substantial in the studio when I need video, though the D-Log makes it a very appealing option for the added colour grading flexibility.
It comes with enough accessories to get you started, but if you don’t have many attachments then I would recommend getting a few adapters and such like so that you have some of your bases covered. Oh, and don’t forget to get that V30 memory card when you order it.
The 4K is a really nice thing to have and the d-log profile gives you a ton of extra flexibility when you’re editing allowing you to make the footage look how you want it to and not how the camera things it should.
It’s lightweight enough that you’re not going to break your back carrying it around with you but you’ll want to make sure it’s well protected in your bag so that your preserve the lenses.
Thanks for reading, I hope you found this useful/insightful! If you’d like to be the first hear about new blogs and reviews and to keep up to date with what I am doing and see my latest work, please consider signing up to the mailing list via the contact page.
If you’d like to support the blog and help me keep producing Lake District photography content, honest gear reviews and regular website updates, you can do so via my Buy Me a Coffee page. Keeping everything running smoothly takes time, and your support makes a real difference. Thank you.
Downloadable Log Footage
Click the button to start the download. This is raw, 4K, ungraded footage, straight out of camera but with the audio removed.
The Nerdy Techie Stuff
The spec table below should answer any questions you have about the spec of this camera.
| DJI Osmo Action 4 – Key Specifications | |
|---|---|
| Image Sensor | 1/1.3-inch CMOS |
| Effective Photo Resolution | 10 MP (≈ 3648 × 2736) |
| Lens / Field of View | f/2.8, 155° ultra-wide |
| ISO Range | ISO 100 – 12,800 (photo & video) |
| Max Video Resolution | 4K (3840 × 2160) up to 120 fps (16:9); 4K 4:3 up to 60 fps |
| Slow Motion | 1080p Full HD up to 240 fps |
| Video Colour / Codec | 10-bit colour, D-Log M; H.264 / HEVC (MP4) |
| Stabilisation | RockSteady 3.0, HorizonSteady, HorizonBalancing |
| Screens | Dual colour touchscreens (front & rear) |
| Waterproof Rating | Waterproof to 18 m (without housing) |
| Operating Temperature | Cold-resistant down to –20 °C |
| Dimensions | 70.5 × 44.2 × 32.8 mm |
| Weight | 145 g |
| Battery Life | Approx. 160 minutes (varies with settings) |
| Connectivity | USB-C, Wi-Fi (2.4/5 GHz), Bluetooth 5.0 |
| Photo Formats | JPEG, RAW |
Gear Review: Canon 85mm F/1.2 II USM Lens
My first impressions of the Canon EF 85mm F/1.2 Prime lens and includes some of the first shots I have used this for as a landscape photographer. You are going to WANT (/need!) to buy this lens.
This blog contains Amazon affiliate links. As an Amazon affiliate, I earn from qualifying purchases. This is a great way for you to support me! Thanks!
This was an unexpected purchase of this piece of kit, which I have wanted to get my hands on for a long time so when I saw one sale in amazing condition in a local second hand store for an absolute steal, I couldn’t just leave it sitting there.
So what’s in the box? I suppose everything you would normally expect if you’re paying well into 4 figures for a piece of kit, (thankfully mine was nothing like this expensive!) - you get the lens, front and rear caps, a lens hood and a fairly solid pouch to store it in. It’s a great little unboxing experience! If after reading this, you can pick up your own lens at Amazon by clicking here.
The overwhelming first impressions are that this lens is HEAVY. I mean like over a kilo in weight, so you might want to think about how far you are carrying this thing, or, what you’re going to leave at home so that you can take this with you.
Spoiler alert, this is an INSANE lens so you’re probably going to want to take this at the expense of something else. The lens is also made up of 8 elements and this really adds to the weight. Wide open, you’re down to F/1.2 and you can get down as low as f/16.
Another observation that you can’t help but make is that the front element on this lens is huge - the thing is like a bucket, but given that it opens up to F/1.2 then you've gotta have somewhere for the light to get in!
The lens has everything you would expect from Canon’s L series lens; the weather sealing is great, it feels great in the hand and the build quality is as good as it gets. It’s a solid piece of kit.
<———— The bokeh creates awesome separation at F/1.2
So how does it perform?
The first thing I did once I had it at home was slap it on the front of my camera and go and play with it around the house and in the garden. I was immediately blown away by the sharpness that I was seeing on the back of the camera, and the bokeh is butter smooth (the bokeh is round to F/2.0 and octagon from F/4.0). I think this might be the sharpest lens that I have ever owned!
It’s quick to focus and the motor is super quiet, so if you’re shooting video or in more intimate environments then you’re not creating a ton of noise to disturb your footage or whatever event that you’re shooting. It doe have quite a long minimum focussing distance 3.2ft (97cm) so don’t be getting any dreams of shooting macro with it, but I’m guessing if you’re buying this then you’re not shooting with macro at the forefront of what you’re doing!
One of the things I’m hoping to do with this lens, but haven’t had chance to try yet is some low light shots, especially out in the field and not in the studio. That said, shooting indoors with it is pretty straightforward even with fairly average natural light.
Sadly, Canon discontinued this lens in 2023 so your best bet is to find something second hand and grab a bargain, you can still find them on Amazon and on other reputable second hand gear sites such as WEX and MPB. It's no surprise that Canon have discontinued this lens on the EF mount given that everything is/has shifted focus (see what I did there) to their RF line. You can check out the RF version of this lens here, but beware, the price tag is eye watering if you’re looking to buy a brand new one, especially if its one of the faster ones!
<——— Landscape shot, heavily cropped at f/4.0
Who is this lens for? If you’re into portraits and low light street photography then this should definitely be in your bag. No questions. I know this is probably an odd choice for someone whose primary focus is landscape photography, then this choice seems slightly out of left field, so what’s the use case?
For me, this lens is going to be about diversifying the types of shots that I take. It’s also only the second prime lens I have in my bag (of course, I have a nifty fifty as well!) and one of my current aims is to work on composition and finding new ways to shoot familiar things and the sharpness of this lens is going to make for some very interesting results, and I do love a bit of bokeh! It might even make me go and do some street photography too… and maybe some Herdy portraits!