Using Luminar Neo to Edit Landscape Photography
I’ve spent years editing landscape photographs within the Adobe ecosystem, so trying Luminar Neo properly for the first time felt like stepping outside a very familiar workflow. With more photographers questioning whether they really need an Adobe subscription, I wanted to see whether Luminar Neo could offer a serious alternative, particularly for landscape photography.
I haven’t done anything like this before and talked about my experience of using something other than the Adobe creative suite to edit my landscape photos, but I have recently invested in this piece of software and I thought this might be something of interest to a lot of people, especially given that there seems to be a trend of people exploring pieces of software outside of the Adobe ecosystem to edit their images.
After a month with Luminar Neo, I do not think it replaces Lightroom for my full landscape photography workflow, especially when it comes to cataloguing and printing. However, I do think it offers excellent value for beginners, casual photographers, and anyone who wants fast, creative edits without paying for an Adobe subscription.
This blog contains Amazon affiliate links. This means that if you click one of product links on this page and then make a qualifying purchase, I may receive a small commission which is at no cost to you. This allows me to keep writing posts like this and maintain this blog so that you can benefit from reviews, like this one of Luminar Neo.
TL;DR
Luminar Neo is not a full Lightroom replacement for my landscape photography workflow, especially for cataloguing large libraries and printing. However, it is a powerful, beginner-friendly editing tool with excellent AI features, useful landscape tools, strong presets and a one-off purchase option that makes it a very tempting Adobe alternative.
Boring Tech Stuff
Just for those of you who are interested, everything I am talking about here has been done on a Mac M1 which is 5 years old this year using the Mac’s monitor and an additional BENQ monitor, which I have both been callibrated using the SpyderX Pro calibration tool.
The AI stuff can be quite heavy on your machine’s resources, so make sure that you have checked the technical specifications of the software before you take the plunge as there is nothing more frustrating than having something that either won’t run or runs slowly because you’re machine can’t hack it. I will post an update when I have used it on my M4 MacBook Pro just so that there’s something here that is a bit newer and much faster as a bit of a basis for comparison.
Price
At the time of writing, Luminar Neo was available with several discounted licence options, including a perpetual licence. These offers appear regularly, so I would be cautious about paying the headline price without checking whether a promotion is available.
The first thing I want to talk about is the price. I paid a one off payment to own a perpetual licence for Luminar. I have taken the “Cross Device Perpetual Licence”, which is currently on offer for £129, down from the usual price of £405. It should be noted though that Luminar often have these big reductions in force, so it’s worth waiting for one of them to come around before you pull the trigger. There is a cheaper tier at £99 (on offer), which just gives you access to the desktop features and there’s also a higher tier priced at £130 (full price £464) and for this price you get full access to the creative library for a year.
I should also disclose that I paid less than the listed price as I’m eligible for educator’s pricing in light of the work that I do. Having played with it though, I would say that it’s definitely worth the £99 it’s on sale for. (Teachers - you just need to submit proof of employment via their website, students, you’re also eligible for the discount, you’ll just need to submit some form of valid student I.D.) If you’re a teacher looking for multi-seat licensing then this is something that’s available, but probably best to put a ticket in for the IT technicians to iron out the fine details.
So what are my thoughts on it? Well, I’ve had it for around a month now and there are some things I like and others that I don’t. Let’s take a deeper look…

Catalogue
The AI search is one of the most impressive parts of Luminar Neo’s catalogue.
I like the catalogue in Luminar Neo, but I don’t love everything about it. I think for me, Lightroom is going to win out every time. Lightroom has been cataloguing our images since time immemorial and has developed a system that many of us are familiar with. It’s not perfect, but it's close.
The catalogue in Luminar is much simpler, but the search… well… When you upload your images to the catalogue, it “scans” all of them, and once it’s done this, you can use an AI search to find the images you are looking for.
You can search (for example), “bluebells” and it will find every photo with bluebells in, similarly if you search “red hair/ginger” it has an excellent hit rate. I have tried to catch it out, but so far, have been unsuccessful. It even recognises the names of some the peaks in the Lake District!
You can still flag images, mark as picks etc. but there isn’t (that I have found) any way to assign a colour (something I do a lot when I am editing) so this is something I would like to see in a future release.
There isn’t the option to create collections in the catalogue, but with the file tree on the left hand panel, I don’t think that this is an issue, and if we’re honest, the collections in Lightroom are a little clunky anyway.
The catalogue panel is where you can also do things like HDR blending, focus stacking, panorama stitching, upscaling and photo restoration.
All of these work well and the process is similar to what you would find in Lightroom. For example, rather than selecting images and right clicking, like you would in Lightroom, in Luminar, you drag and drop them onto the relevant panel and then execute the action. The results are pretty good and much in line with what you would expect from Photoshop or Lightroom, but I do like the convenience of not having to keep opening and switching between two different applications.
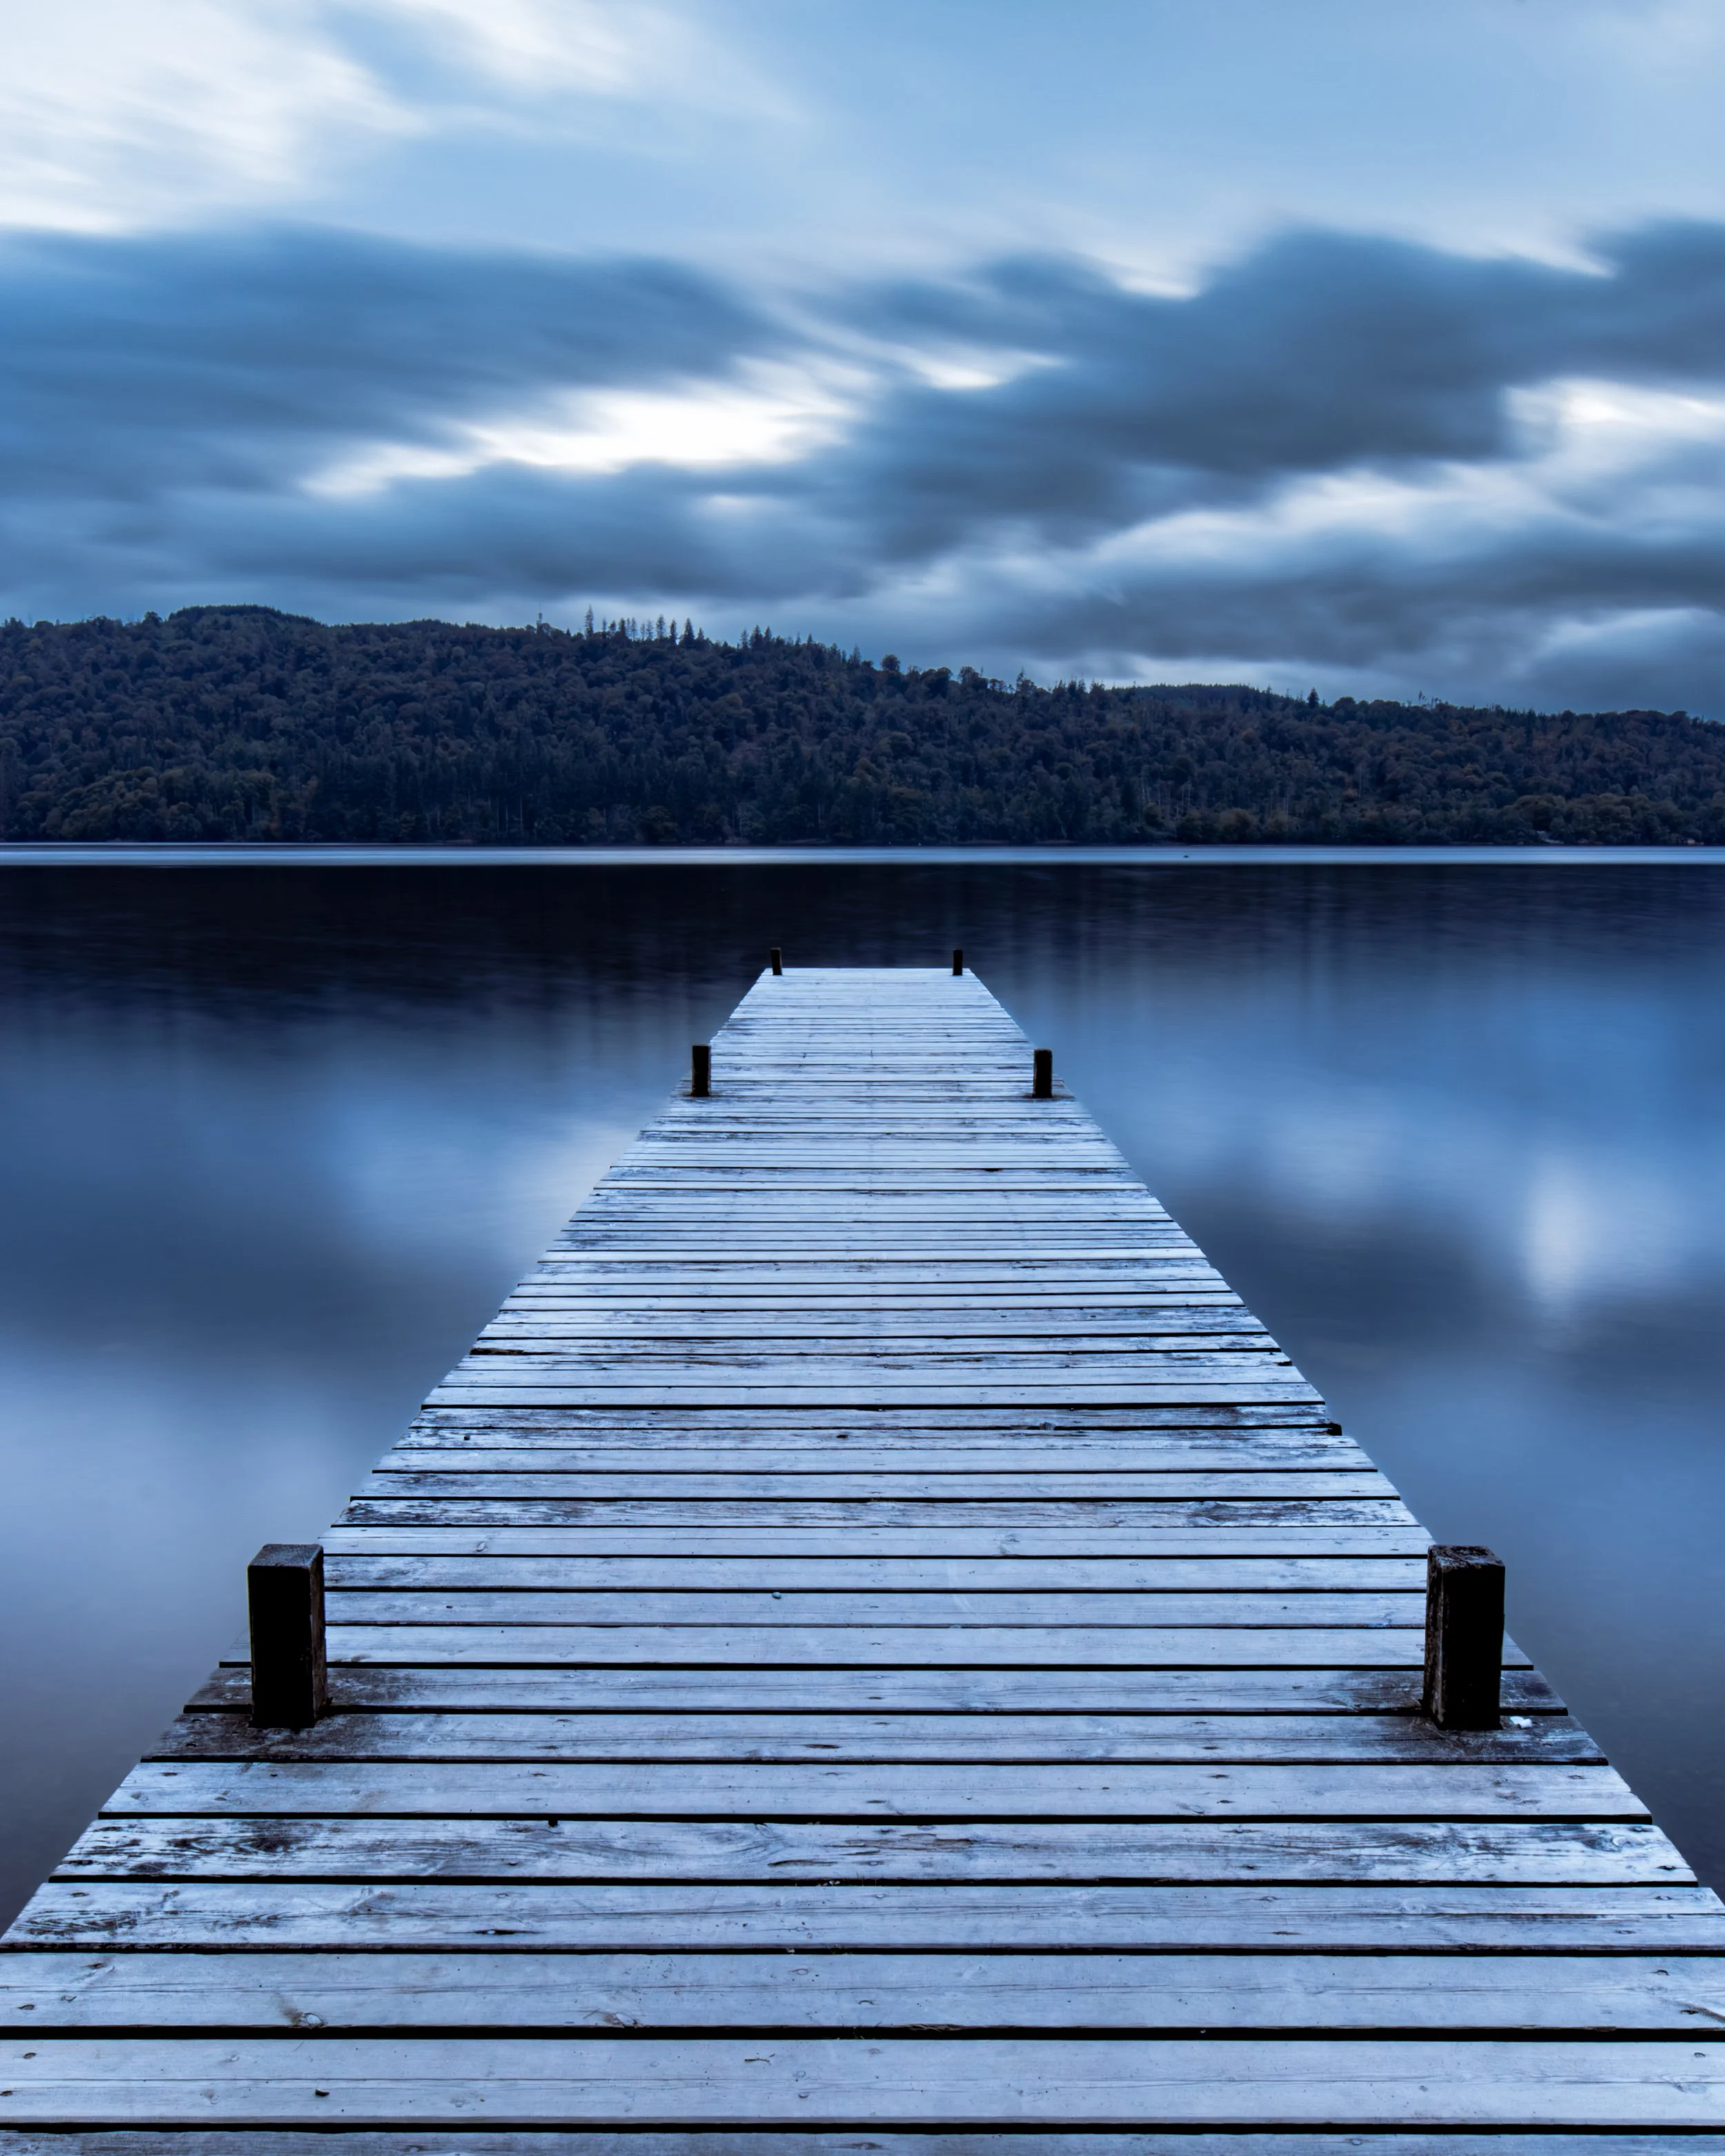
The image on the left (above if you’re on a mobile) shows a 3 image exposure blend with one of the presets applied and some quick exposure adjustments. The whole thing took me less than one minute, so it’s a pretty speedy way to edit your images.
I do think that if you have a large professional library, this is not going to be a solution as I can’t see how it is going to help you to manage your files effectively and Lightroom is going to, and should be, your go to.
Finally, theres’s the “Spaces” section. This is a great little feature where you can create groups of photos to share with family, clients, friends etc. I haven’t really explored this a whole lot so don’t want to write too much about it, but if you want to read some more, you can check out what Luminar themselves have to say about it here.
Editing
There are two sections for editing. The ‘presets’ tab and the ‘editing’ tab. Both of which do what they say on the tin - you can add a preset or edit you photo from scratch, or you could add a preset and then tweak the final product in your editing workflow.

Presets
When you buy the software, you buy some of the presets, but not all of them. There is a marketplace within the presets panel where you can buy other presets that you might want, they’re not cheap and I haven’t bought any of them so I can’t add anything of use here, you’ll have to investigate them yourself if using presets is your bag.
I am not a huge user of presets in my day to work, I like LOVE editing, I find it to be a really enjoyable part of the process, and it’s important to get it right.
I can see the argument for presets if you have a ton of images to edit - for example if you’re editing a huge wedding shoot and want to stamp your style on your images quickly, but when you’re editing at a much smaller volume then it’s not always necessary. I should also point out that I am not throwing shade at people who are using presets, they’re a necessary part of many styles of photography, but for what I am doing, the volume I am editing at, the control I want and just for the sheer pleasure, I tend not to use them.
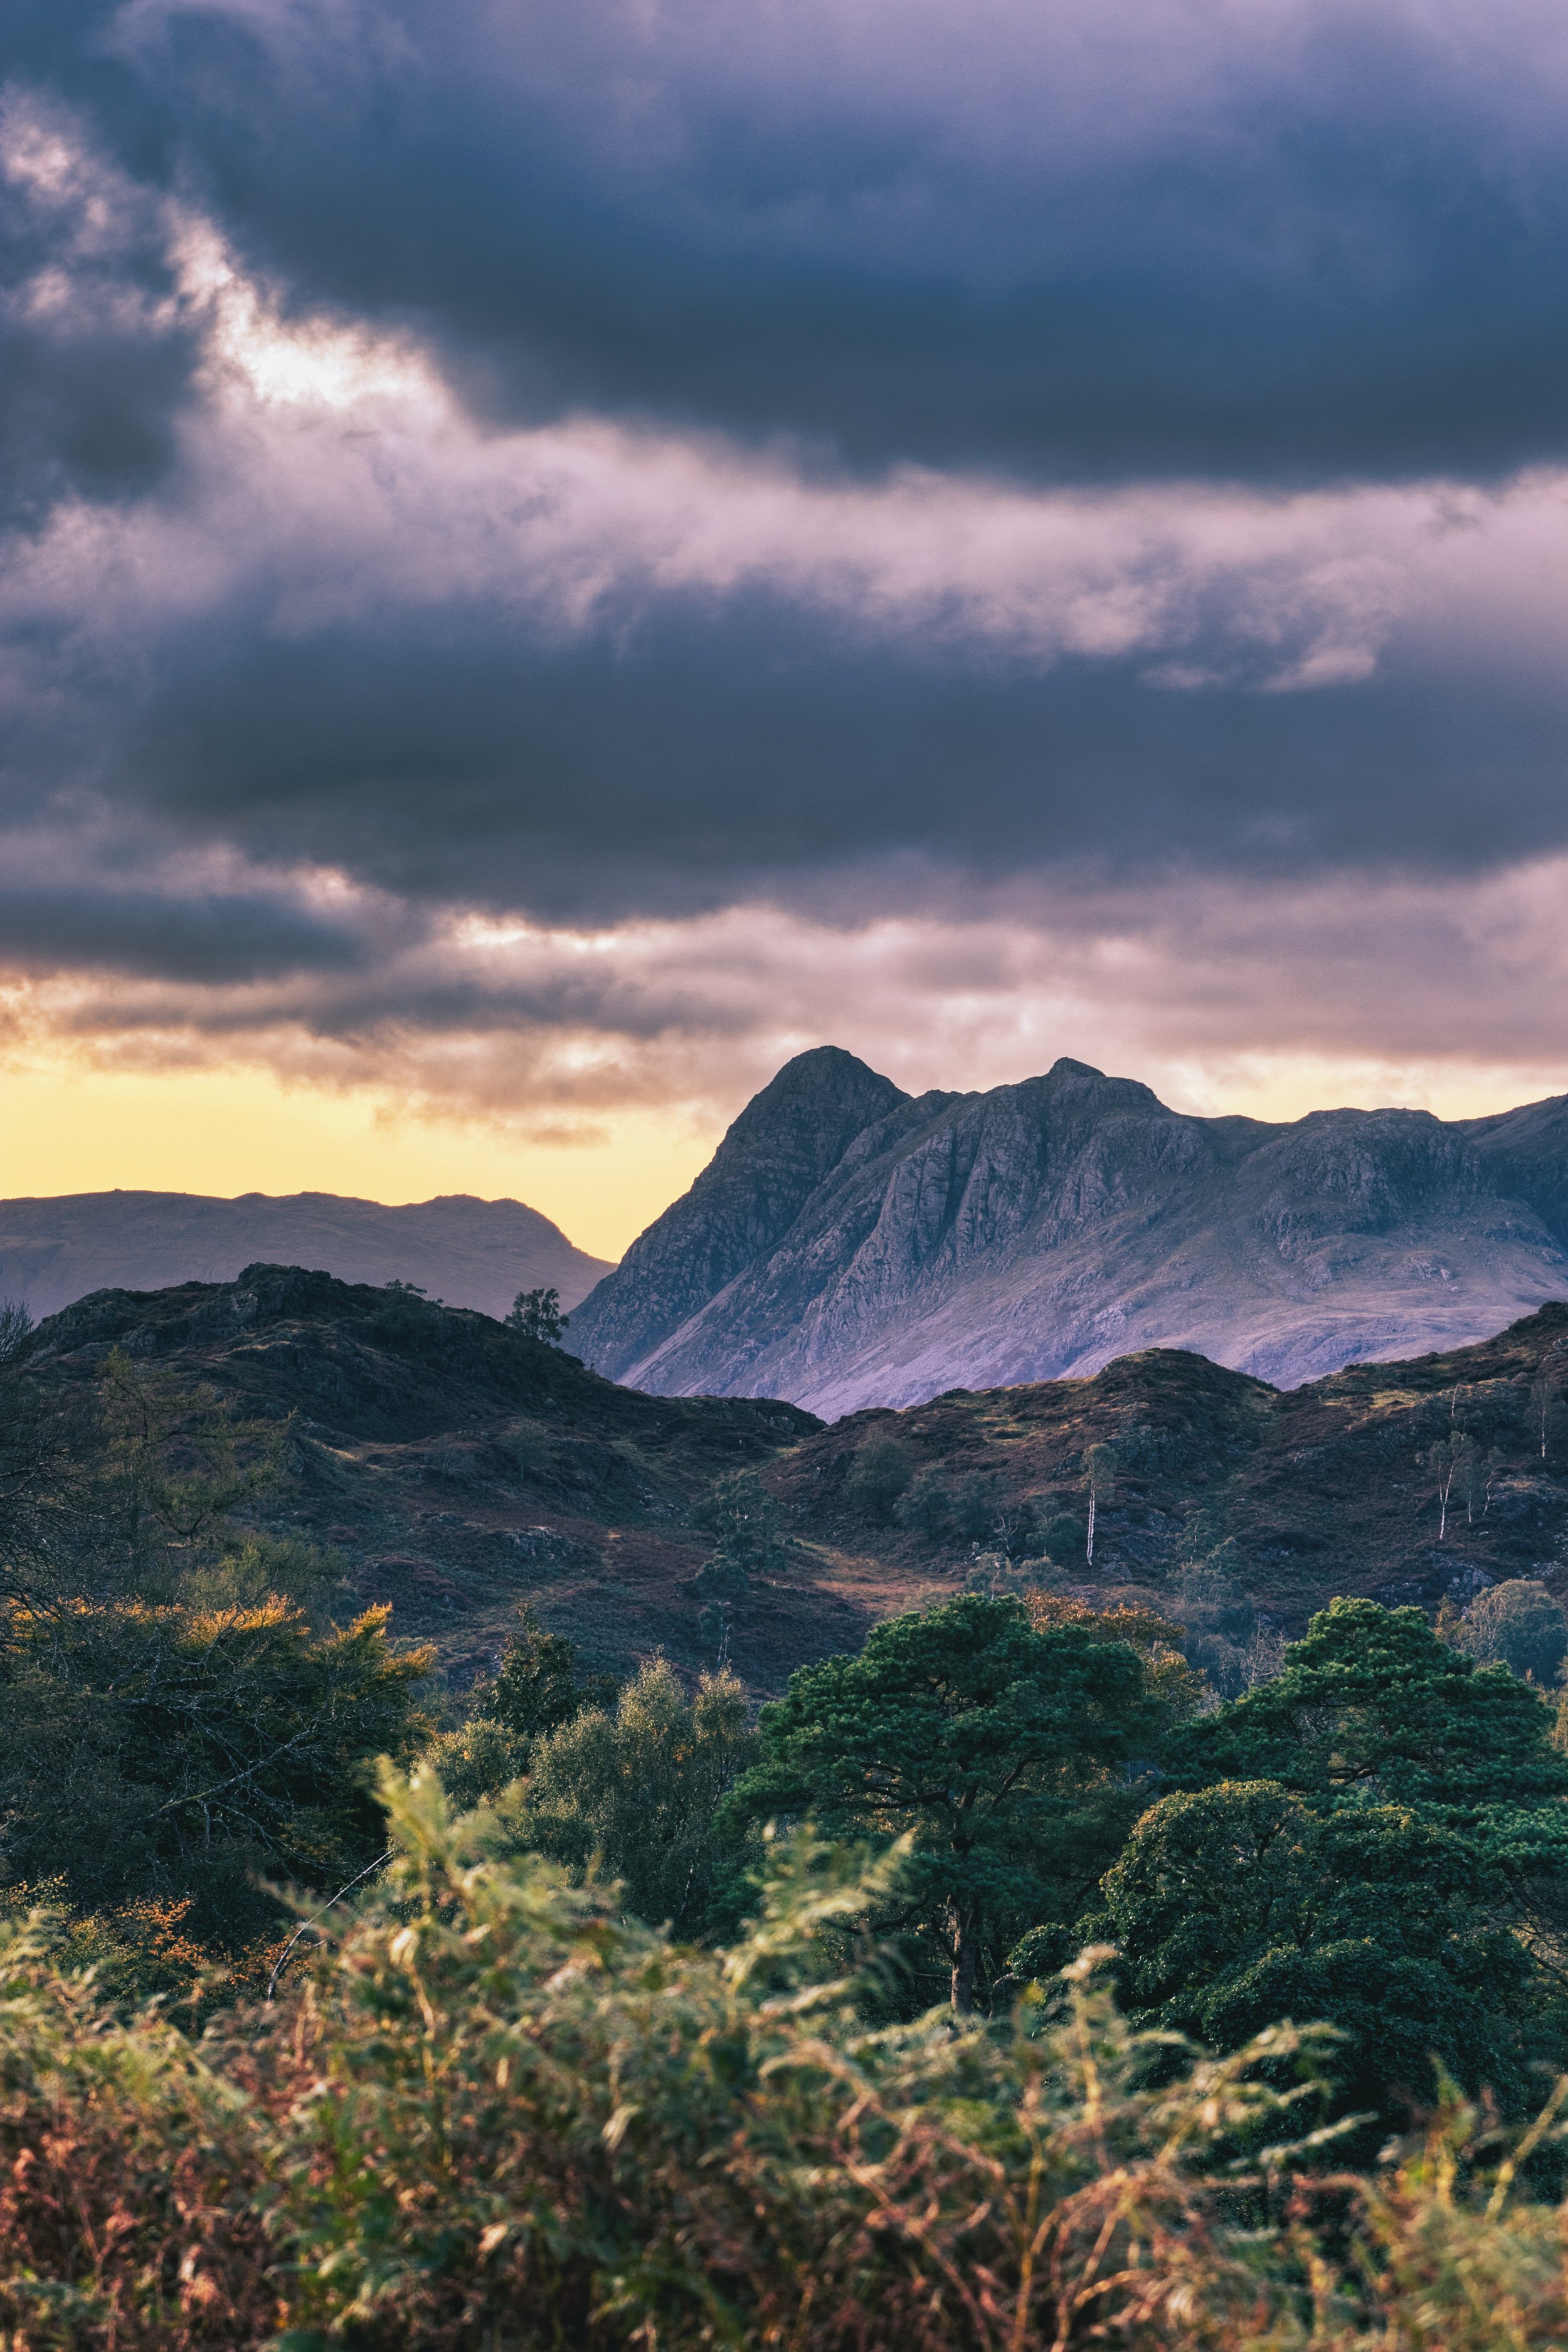
If you need to get shots ready for social media, and have them quickly then the presets tab is really going to be your friend. The included presets have been really well thought out and don’t take much tweaking to get right - take a look at the image of the Langdales above and you’ll see what I mean - like I mentioned above, this image took less than an minute to composite and edit using one of the built in presets.

Editing Panel
My biggest challenge has not been that Luminar Neo lacks editing tools. It is that I have spent years building an Adobe-based workflow, and changing that workflow takes more mental effort than I expected.
I won’t lie, I have found it a real challenge getting to use the workflow that is required to use this effectively. This isn’t a flaw in the software, it’s a flaw in the user and having my workflow so deeply engrained means that doing what I do in a different way has presented a real set of challenges I wasn’t expecting.
I will however say that having most of the shortcuts that we are used to in Adobe apps mimicked in Luminar was a welcome touch; learning where everything is located, what it does and how it responds hasn’t been further complicated by having to learn a bunch of new shortcut keys.
What you will notice when you open the edits panel is that everything isn't in the same place as it would be in Lightroom and it’s not as easily customisable on the face of things - you can’t just drag and drop the panels to suit your taste and workflow. What you can do however, is add the tools that you do like to you favourites and then you can reorder them in this panel, so there is a bit of a workaround.
The other thing you will notice is a lot of the menu items have a little AI symbol next to them, which isn’t a surprise given that so much of what this application does is AI powered and is one of the big marketing points that Luminar use.
You’ve got a number of panels - Favourites, Image Quality, Essentials, Landscape, Creative, Portrait and Professional.
Those of you who are thinking about switching from Lightroom to Luminar are going to find most of what you are looking for and used to in the esstentials tab. This is where you will find the develop menu which contains things such as exposure adjustments, highlight and shadow adjustment, curves adjustments and HSL etc.
The HSL is a bit like old Lightroom when it was just made of sliders and not the colour wheels that we are so used to seeing and using now. This makes things simpler and if you’re new to post processing this could make colour grading a bit more accessible.
Everything behaves as you would expect and I haven’t been caught out by anything yet, but that said, it did take me a while and then some Googling to find the dehaze slider. There isn’t anything revolutionary and it all feels quite familiar.
The Landscape panel is interesting. You have AI sky replacement with a group of sky images included with the package and this functions as you would expect - it uses AI to replace the skies and does a decent job on all of the images I have tried.
The Twilight Enhancer allows you to recolour the feel of twilight images, “atmosphere", which lets you add fog and haze to your image, with the usual masking tools available to allow you to target where this happens and the ‘Water Enhancer’ which allows you to enhance water (I haven’t really played with this). All of these are AI powered and work well, I particularly like what you can do with the fog tool - just don’t overcook it!
You also have an option in here to add sun rays - you choose where the centre of the sun is/will be and you can add sun rays and then adjust various parameters to get the look right, and then you have the ‘Landscape’ panel, which is where you will find the dehaze tool! Alongside all of these are enhancers for foliage, Golden Hour light and you can also adjust the hue of your foliage. It’s all pretty powerful and works well.
The tools I found most useful for landscape photography:
HDR blending for quick exposure composites
Atmosphere for adding subtle mist and haze
Landscape tools for foliage, golden hour warmth and dehaze
Panorama stitching for wider scenes
Focus stacking for sharper foreground-to-background images
The danger, especially with the AI tools, is that it becomes very easy to over-process an image. Used carefully, they are genuinely useful. Used heavily, they can quickly become obvious. Less is always more when it comes to post processing.
What else is there?
As you move down the list, you then have your ‘Creative Tools’ menu. This has got a lot of stuff in it, but the things you are going be interested in as a landscape photographer are ‘toning’ where you can do split toning adjustments, just like the older versions of Lightroom, ‘Magic Light’ which allows you to adjust the glow of streetlamps and decorative lights in your images and ‘blur’.
I was hoping that blur would include a function where the software would have something built in to provide Orton Glow quickly, but at this stage, it doesn’t look like we have that - maybe in a future version(?).
One thing that isn’t of use to me as a landscape shooter, but will be useful in some of my other work is the ‘Neon Glow’ tool, which produces some pretty realistic looking neon shapes. All of these have to be freehanded at present, but again, I hope in a future version we might get some paths and shapes.
The final two tabs are ‘portrait’ and ‘professional’. I haven’t played much with the portrait tab, but all but two of these funtions are AI powered and allow you to relight your images, add bokeh, smooth skin, facial alterations, slim faces, adjust eyes and mouths all really quickly. These are not things I have much call for as I am not in the business of heavily editing portraits other than exposure adjustments etc. If you’re doing something where you can be more creative, rather than honest, then this could be a good tool for you.
The professional tab includes ‘Supercontrast’, ‘color harmony’, ‘Dodge and Burn’ and ‘Clone’. Dodge and burn and Clone, do exactly what you would expect them to and in the way you would expect them to. Supercontrast allows you adjust tones in the highlights, midtones and shadows, independently of each other and colour harmony allows you to fine tune the colour balance of your image. All of these are really useful, effective tools. Rather than ‘professional’ I think would call these something akin to “finishing” or “finishing touches” as these are the kind of the like the last bits of polish you are going to add to your images before you export them.
Let’s Talk About Presets
I am not anti preset. I spoke about them earlier and I agree that there is place for their use, but I don’t know if this place is within landscape photography. They are great for weddings and street, maybe even some cityscape shots, but in the landscape world, it’s not really something we have much call for.
I have a saying in my day job that “nothing works everywhere, but everything works somewhere” and this is something that can be applied (in fairly broad brush terms) to presets. Not every preset will work on every image, but they will all work on at least one.
The ones that are included in Luminar Neo are pretty good, and they work on a wide range of images but you need to be careful with them as they can make your images look over processed. Used sparingly and selectively they are going to help you, but don’t get lazy - learn to edit properly so that you can understand them and what they do to your images.
Compatibility with Graphics Tablets
I have been using this with my Wacom Intuos Pro (Medium)and haven’t run into any issues so far. Everything works as it does in other image editing apps and I haven’t had any issues with compatibility. If you don’t have a graphics tablet and you’re not sure if it’s something you need, then check out my blog article “Do You Need a Graphics Tablet for Landscape Photography?” You can customise your tablet to work with Luminar Neo in your tablet’s settings.
I also have the Logitech MX Creative Console and at present there are not any setups for this currently uploaded to the Logi Options+ app. You can set this up yourself and programme in all of your shortcuts, but this is something I just haven’t had the time to do. It would be a useful thing to have, but at present, I’m not crying out for it in my Luminar Neo workflow.

What Doesn’t it Do?
Printing. This is something that is still (for my workflow at least), which will remain the preserve of Lightroom. I don’t think that there is anything better for printing your photos. There is the option to print in the ‘file’ menu of Luminar Neo, but it’s just your basic print dialogue without any way of checking your image before you print it. This isn’t a dealbreaker for me at all as I have other options, but if you’re looking to produce high quality prints then this isn’t the solution for you. Printing is about having full control over the finished product and I like what Lightroom does for me.
I have already mentioned the colour wheels in Lightroom. These have become something that help me to grade my images more effectively: I like using them and it would be great to see them added to Luminar Neo in future releases.
Effective cataloguing of large bodies of work: I won’t dwell on this as I spoke about it earlier, but if you have a large library of images then this isn’t the way to catalogue them.
Pixel level editing and complex compositing - you need photoshop for this. I don’t feel like this is intended to replace Photoshop, but you can see that Luminar are definitely going after a chunk Lightroom’s user base.
Who is it For?
This is for anyone who doesn’t want to be buy into an expensive Adobe subscription and pay for it month on month. The one off purchase price positions it will in terms of accessibility and this isn’t beyond the reach of most people, especially if you choose one of the lower tiers or take advantage of one of the many offers that Luminar often have on their website.
Teachers and students, you can click this link and it will take you to the page where everything you will find everything you need to know about obtaining your discount.
It’s also going to be great for people who are new to photography and who are starting their post production journey. It’s intuitive, it’s easy to use and it produces some good results and does so quickly.
What’s The Use Case?
I think this is a great access point for people who haven’t edited before and feel a bit overwhelmed by the idea of jumping straight into Lightroom. If you’re a casual photographer looking to up your social media game, then this is something that actually might be enough for you - you’ll be able to decide if you think you need to spend the extra money to invest in something like Lightroom or other editing software.
This is going to be a real time saver for a lot of people, particularly if you need to get something at short notice for socials; this is going to be an app which allows you to do that quickly and effectively.
If you’re after images which look particularly stylised then this is going to be a good way to get your images looking the way you do in much less time than it might take you in Lightroom or Adobe Camera Raw.
If you’re wanting to print your images, then you’re still going to need something like Lightroom’s print module to help you get them ready, that’s not something that Luminar Neo does yet, but I suspect that this could be something that is in the pipeline. If they truly want to rival Lightroom then this is something that are going to need to address alongside some of the issues around image organisation.
Pros and Cons?
Luminar Neo: Pros and Cons
Luminar Neo is an AI-powered photo editor aimed at photographers who want quick, creative results without the steeper learning curve of more traditional editing software.
| Pros | Cons |
|---|---|
| Very beginner-friendly The interface is simple, visual and much easier to approach than many professional editing suites. | Not a full Lightroom replacement Its catalogue and image management tools are more limited, making it less suited to large professional archives. |
| Powerful AI editing tools Tools such as Enhance AI, Sky AI, Relight AI, portrait tools and generative features can speed up common editing tasks. | AI tools can feel heavy Advanced AI, generative tools and large RAW files can put pressure on RAM, GPU and overall system performance. |
| Excellent for creative edits It is particularly useful for landscapes, portraits, travel images, atmospheric edits and stylised creative work. | Results can look over-processed Some presets and AI adjustments can become unrealistic if used too strongly, especially skies, structure and portrait effects. |
| RAW editing support Luminar Neo supports many RAW formats alongside JPEG, PNG and TIFF, making it suitable for serious photography workflows. | Less precise than Photoshop It is strong for quick enhancement, but less capable for complex retouching, compositing and pixel-level editing. |
| Works as a plugin It can be used alongside Lightroom Classic and Photoshop, which makes it useful as an additional creative editing tool. | Pricing can be confusing There are lifetime and subscription options, but access to upgrades, Pro tools and generative features can vary by plan. |
| Non-destructive editing Your original files remain intact, so you can return to previous edits and make changes without permanently altering the image. | Best performance needs modern hardware Older laptops or low-spec machines may struggle with large batches, layered edits or demanding AI features. |
| Good value for some users The lifetime licence option may appeal to photographers who want to avoid an ongoing subscription. | Not ideal for high-volume workflows Wedding, event and commercial photographers managing thousands of files may find Lightroom or Capture One more efficient. |
Verdict
Luminar Neo is best for photographers who want fast, polished edits with minimal technical complexity. It is especially useful for beginners, hobbyists, landscape photographers and content creators. However, photographers who need advanced catalogue management, detailed retouching or high-volume professional workflows may be better served by Lightroom, Capture One or Photoshop.
The Final Word
Luminar Neo is not going to replace Lightroom for me completely, particularly when it comes to cataloguing and printing. However, I do think it has a clear place in my workflow. For quick edits, creative landscape work, AI-assisted adjustments and fast social media-ready images, it is genuinely impressive. For beginners, casual photographers, students, teachers and photographers who do not want another subscription, it is very easy to recommend.
If you’ve found this useful, I share more like it in my newsletter, you can sign up by clicking here — honest thoughts on photographing the Lake District, reading conditions, and what I’m learning along the way. No spam, no gear hype. And if this article helped you head out with your camera a bit more confidently, you can also buy me a coffee. It’s a simple, optional way to support the site and helps me keep writing practical, experience-led content like this.
Check out my previous blog posts by clicking the links below: