My Photography Blog

Welcome to the Chris Kendrick Photography Blog, where I share the stories, challenges and inspirations behind shooting Lake District landscapes and working as a Cumbria-based photographer. Alongside behind-the-scenes reflections from the fells and lakes, you'll also find honest photography gear reviews, covering the cameras, lenses and accessories that genuinely perform in real Lake District conditions. Whether you’re passionate about landscape photography, exploring Cumbria’s scenery, building your kit, or simply curious about the craft, there’s something here for you.

Some posts include affiliate links; thank you if you choose to support the blog through a qualifying purchase. If there’s a topic or piece of gear you’d like me to cover, let me know. Enjoy exploring!

Enjoy!

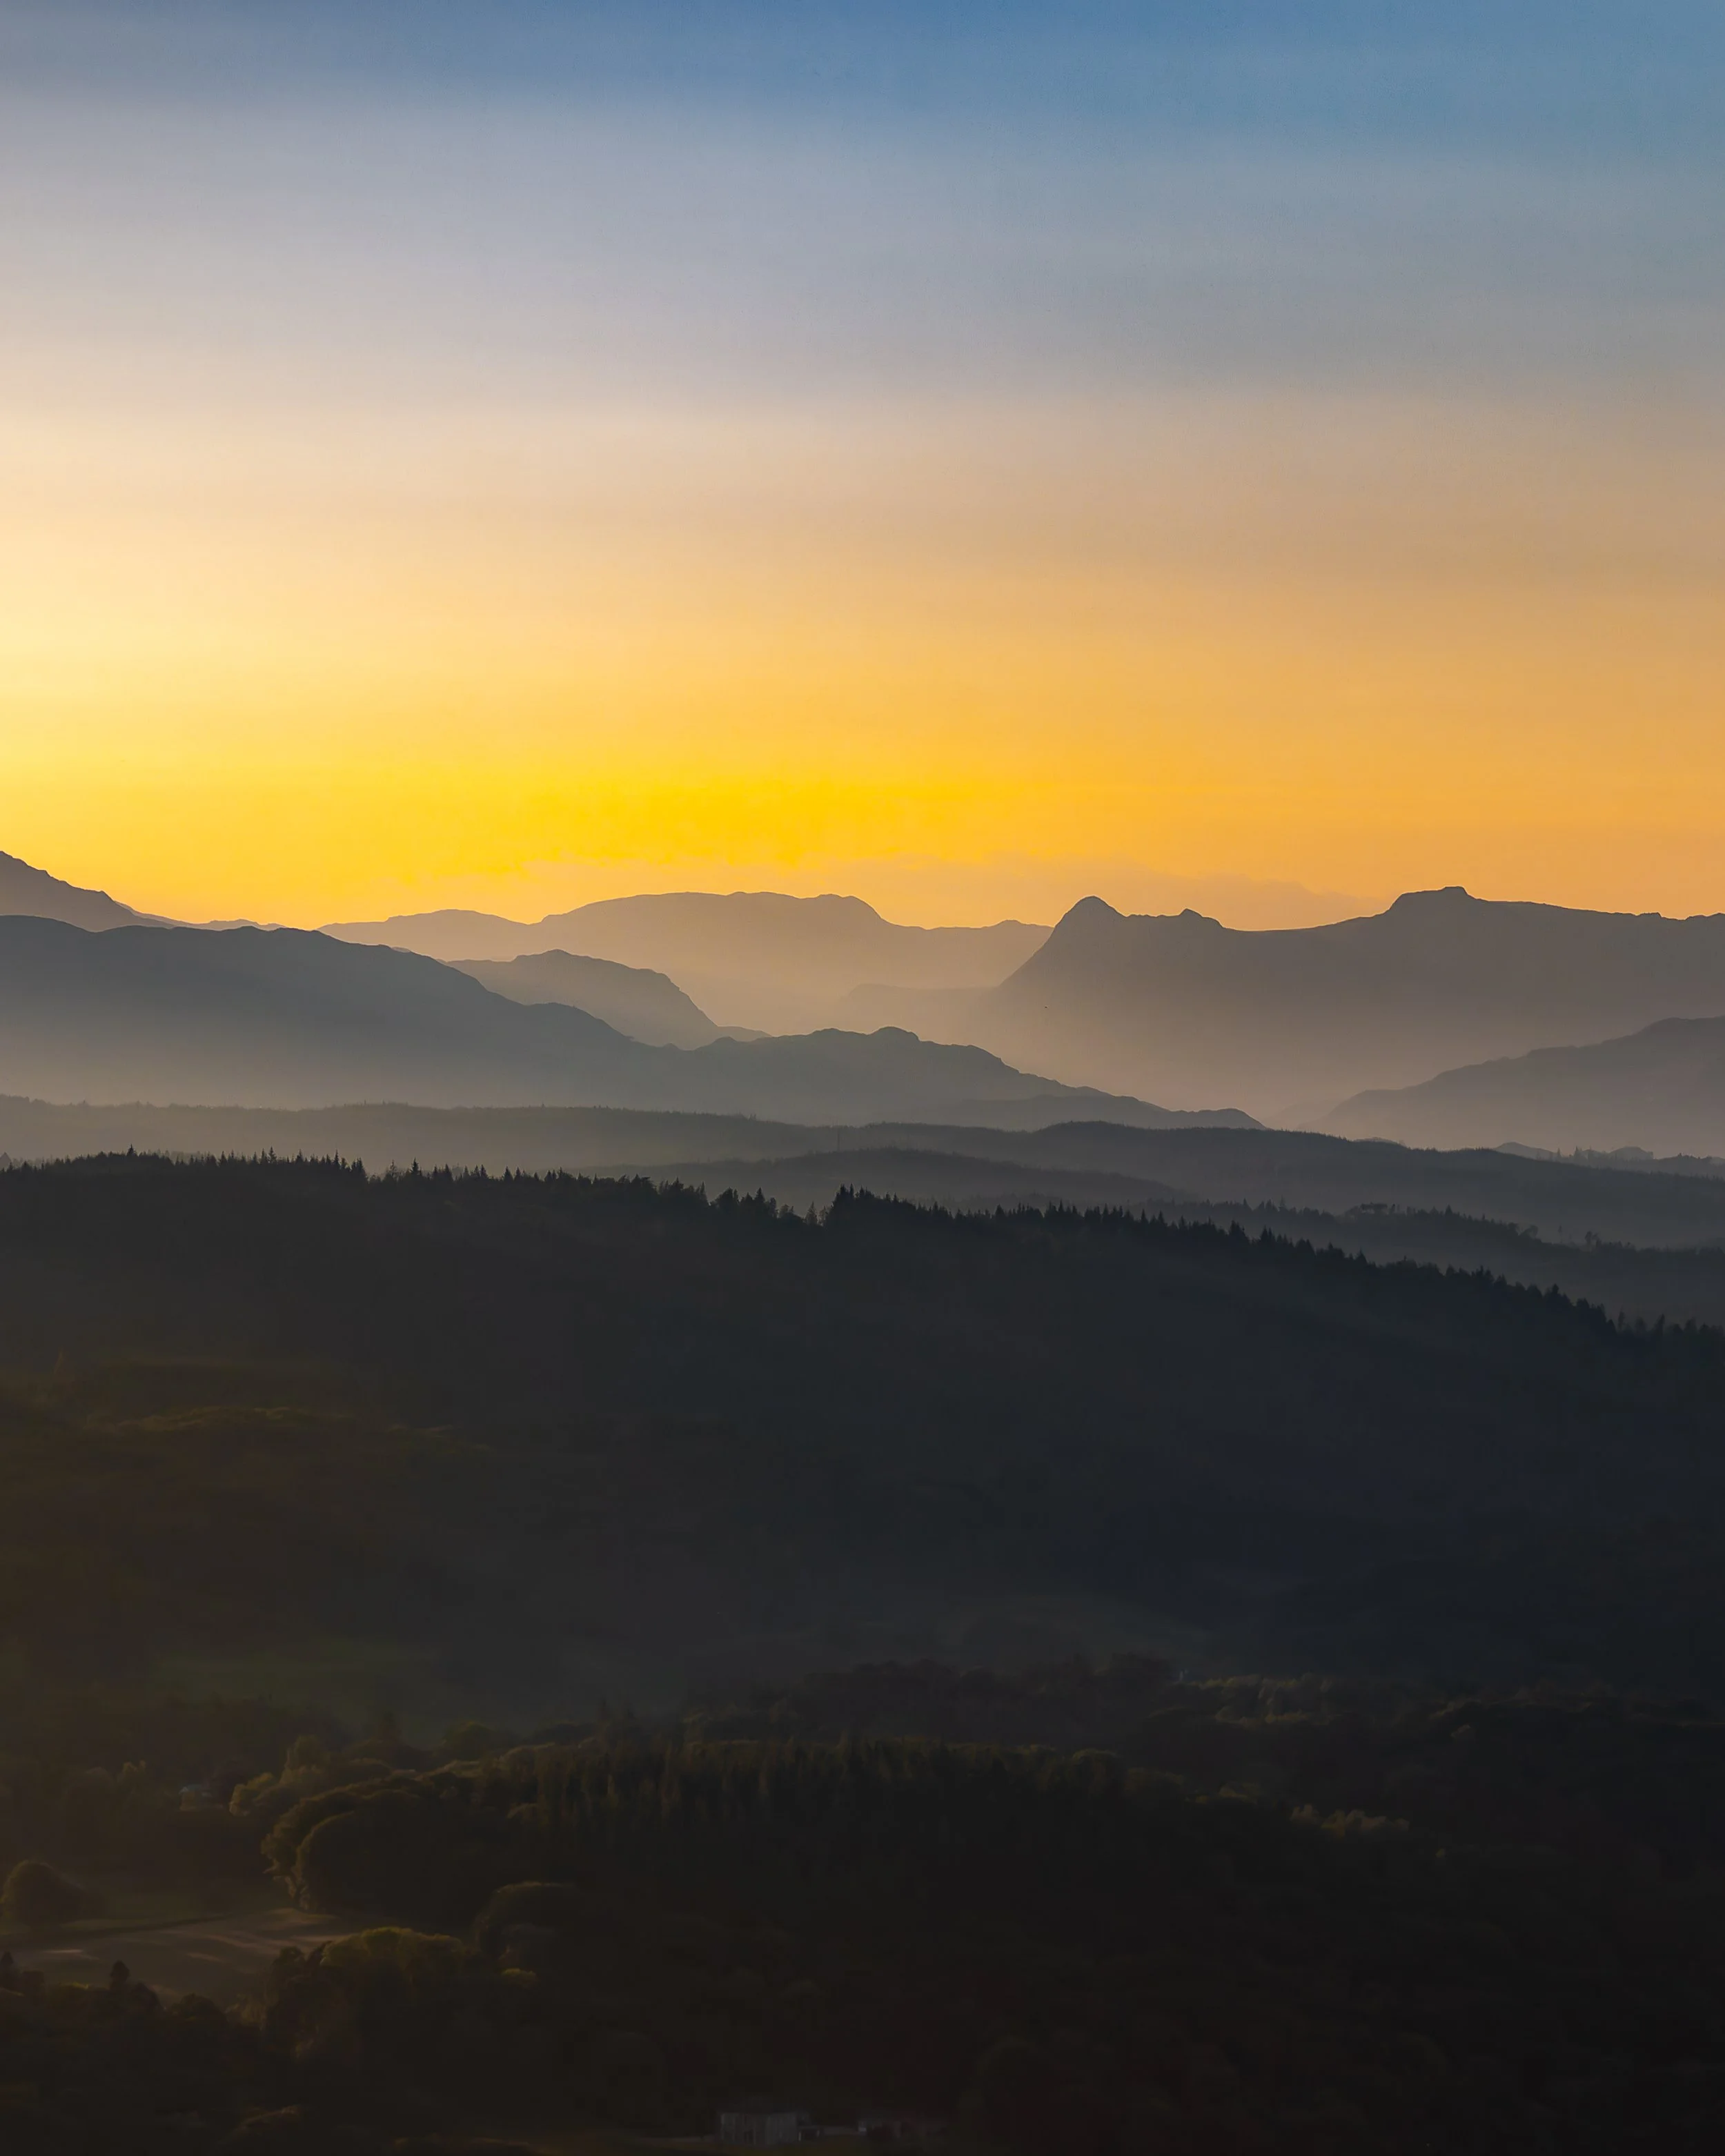
You Won’t Take Any Good Photos Today: Shifting Your Mindset in Landscape Photography.

“You won’t take any good photos today.” It’s a thought most landscape photographers have had at some point — often before the camera has even come out of the bag. This article explores how mindset, expectations, and pressure can quietly shape the way we shoot, and why chasing “good photos” can sometimes get in the way of meaningful photography.

Rather than focusing on locations, gear, or conditions, this piece looks at the mental side of landscape photography: learning to let go of outcomes, embracing imperfect days, and staying open to what the landscape offers. By shifting how you approach a shoot, you may find that creativity, enjoyment, and better images follow naturally — even on days that don’t look promising at first.

You won’t take any good photos today. Got it?

I normally try and take a positive tone in this blog, so this feels like a bit of a harsh way to start something off, but I promise I am going somewhere with this… bear with me.

If you know me, or you have been here before, you will know that my “real” job is working in a school, as Music teacher, who just happens to teach photography as well - the latter is definitely my favourite part of my role! One thing I am always talking to students about is adopting a “growth mindset”. This is about switching the way that we think, so instead of thinking “I’m not good at this”, we say “I can get better at this/I have room to grow/this is how I can better” and instead of “Other people are better than me” we might try thinking “Other people might be ahead now, and I can learn from them”.

So, to start writing this by saying “You won’t take any good photos today”, seems ostensibly negative and completely antithetical, but when we unpack it, it actually starts to take some of the pressure off of us as photographers. And it doesn’t have to be just applied to photography, you could switch this up to anything else that you do!

If we look at it again, saying that “You won’t take any good photos today” is very different to saying “You can’t take any good photos today”. We can all take good photos, we have the knowledge and the skills to do it. We just don’t always do it!

So when we say this, we’re not saying that we can’t do it, we’re saying that we won’t. This is isn’t about being negative, it’s about lowering our own expectations the amount of strong outcomes that we have when we’re getting the images out of the camera, and lets face it, we’ve all been disappointed at some point or other when we’ve been to a location we’ve been excited to get to and got home to find that the shot we wanted wasn’t quite right, the light didn’t help or whatever other reason it is that’s stopped us from being as successful as wanted. This is because, in our heads, we have built everything up so much, that we think we are coming home with a card full of bangers and then we don’t have a single one. It’s gruelling right? If this has never happened to you, please let me know what your secret is and well go into business together!

So what makes a good photo?

I refer you back to my to the opening of this blog: You won’t take any good photos today… If you know the definitive solution to this statement, let me know and we will go into business together and can retire at the start of next month.

This is one of the beautiful things about photography in that, it is so subjective that no one can give you the answer.

You could ask 100 photographers this question and I reckon that all of them would say something different, and they would all say “that’s a really tough question”.

Some people will mention sharpness, some will mention blur, some will mention expsosure and others will mention colour. Most of them will mention story in some form or other. A sharp photo isn’t always a good photo, a blurry photo isn’t always a bad photo, some photos will be way underexposed or over exposed and will still be good photos.

The answer to this isn’t a definitive one. That’s because (in my opinion) there are good photos and there are technically good photos.

By technically good, I mean that they are sharp where they need to be, they are well exposed and they have a balanced composition. Good photos don’t have to be technically good; if you think about intentional camera movement (ICM) then there isn’t much in this style of photography that is sharp: that’s the whole point of it!

If I’m taking pack shots, then there isn’t a story, they’re photos of objects which are intended to be honest. They need to be technically good so that they show the object/item off at it’s best and in a way which shows it for what it is; the client isn’t after creativity, they want the brief fulfilling and they want clear shots. These shots are technically good, but at the same time, they’re not going to win any awards. Such is the need for technical accuracy, that AI is starting to get involved with this in a big way.

So what makes a good image? For me, it’s one that makes you think, makes you stop and makes you ask questions. Not everyone will like all of your image, art is subjective and it’s divisive. One of the most expensive photos ever sold at auction (Andreas Gursky’s Rhein II) is one such photograph. It’s one of a series of photographs of the River Rhein, which flows through the centre of the frame with grass one either bank, an overcast sky and a path in the foreground. Everything runs horizontally. I think what I like about it is that you can view it top to bottom (like layers in cake), or from front to back link you are standing and looking at the scene. To some people, this will be a boring photo, but for me it’s not just a good photo, it’s a great photo… someone thought it was great to the tune of around $2.7million, but there are some people who won’t think it’s worth more than a tenner!

Your Camera

Better camera’s don’t take better photos. Read that again… Better camera’s don’t take better photos.

They might make higher resolution images in a way that makes the process easier, may be more intuitive and will make your life easier in post processing. If you’re a wildlife photographer, the better autofocus systems might give you more in focus shots. But they won’t help you to take ‘good’ images and they won’t make you a better photographer.

Think about some of the great photographers of the last 100 years. Ansell Adams, Henri Cartier-Bresson, Ernst Haas, Elliot Erwitt - the list could (and probably should) go on and one. But none of them used digital cameras. They didn’t have the autofocus systems that we have today, they probably didn’t have light meters in their cameras, they didn’t have the technology in their lenses that we have in the modern world but they still took great photographs.

When I got my first DSLR and took it out for the firs time, at night, in London I was set to come back with 100’s of photos that were going to blow people’s minds.

I did not.

I even thought that there was something wrong with the camera. There wasn’t, but there was a problem behind the camera, in someone who thought that the camera was going to do all of the heavy lifting. I had to spend time learning the theory and the technqiues and had to invest in a tripod. I even had to the read the camera manual… assisted by some demonstrations on YouTube.

But, telling myself that I might not take any good images made it even sweeter the first time came back and downloaded my card to find some images that I was pleased with and wanted to share with people.

Photography companies are great at making new cameras and they are just as good at marketing and making you think that you need the latest pieces of kit. You should only upgrade your kit when you’re need to, not just because the manufacturers told you that you should.

A few years ago, teaching photography I had a student with a Canon 5D Mark IV and a student with an entry level Canon, it was something like a 4000D. Guess who was taking the better photos… I’ll give you a clue; it wasn’t the person with the expensive camera.

Remember, the most important thing in photgraphy isn’t what taking the photos, it’s who’s taking the photos and the bit of electrified meat between their ears that is telling them how to take it.

So Why Aren’t You Going to Take Any Good Photos?

I mean, this a bit of a harsh question, you are going to take good photos, but if you can adjust your mindset and think that you’re not going to, you avoid the disappointment of having nothing you’re proud of, but you also have the joy of coming back to the edit and seeing that you have got more than you expected.

If you go out all the time thinking that you’re going to have endless good, usable photos on your memory card only to find that you don’t, you’re going to begin to fall out of love of with photography pretty quickly.

Even people who do landscape photography full time will go out and not come back with an image that they are happy with. They might have some technically excellent images, but nothing that they feel is ‘good’.

Remember

Photography is art, and as I have said, art is subjective.

Not everyone is going to like your photos, and that’s ok. Not all of your shots are going to be good, and that’s ok too. You won’t get banger after banger every time you go out to shoot, sometimes you will come back with a whole card of photos that you don’t like or you don’t think are any good, and guess what? That’s ok!

Thanks for reading, I hope you found this useful/insightful! If you’d like to be the first hear about new blogs and reviews and to keep up to date with what I am doing and see my latest work, please consider signing up to my newsletter.

If you’d like to support the blog and help me keep producing Lake District photography content, honest gear reviews and regular website updates, you can do so via my Buy Me a Coffee page. Keeping everything running smoothly takes time, and your support makes a real difference. Thank you.

Read More

What Are The Best Camera Settings for Landscape Photography?

When photographers ask “what are the best settings for landscape photography?”, they’re often looking for a simple checklist. The reality is that there’s no single set of perfect settings that works for every landscape scene. Light, weather, subject movement, time of day, and creative intent all influence the choices we make behind the camera.

In this guide, I explain why fixed “best settings” don’t really exist, and instead break down the decision-making process photographers use when choosing aperture, shutter speed, ISO, and focus. By understanding how these elements interact with the scene in front of you, you’ll be able to confidently select the right settings for any landscape, rather than relying on guesswork or presets.

This is a question I get asked a lot, and I mean A LOT. Not just about landscape photography, but about all sorts of different photography - what are the best settings for portraits/ICM/product/wildlife… the list goes on.

The bad news for some people is that there is no ‘best’ settings for any of these types of photography. The best settings for the photo that you are taking are the ones that you need to be able to take the photo you want to take.

Let me unpack this a little…

For some situations, there are preferred settings. In a landscape shot, I am going to want use the sharpest part of my lens, and for the lenses that I have, that’s usually somewhere around the f/8 mark.

This is going, to some extent, dictate the rest of my settings as I am making the aperture smaller; other things are going to need to change in order to compensate. If you’re new to photography, then reading my blog about the exposure triangle, is going to help you to really understand what I am talking about in this entry.

Once I have set my aperture, I have a number of things I want to consider… do I want to freeze motion or do I want motion blur? Do I need to inject a ton of ISO into the image to get my desired exposure length? Does the ISO value I choose mean that I am going to be adding a load of noise/grain into my image that is going to ruin it?

Even though I want to use the f/8 aperture, this might not be possible and I may need to make some compromises.

It may even mean that to get my desired level of sharpness across the whole image, I need to consider focus stacking.

There’s a lot going on in just this one scenario.

Thinking again about the original question, “what are the best settings for landscape photography?”, we then need to remember that as landscape photographers, everything we do is at the mercy of that staple of British conversation, the weather. As a landscape photographer in The Lake District, I know only too well the perils of the changeable Lake District weather and understand that at certain times in the year, it isn’t uncommon to experience all four seasons in one day! However, the most common thing you are going to come across is changing light, no matter where you are.

Sometimes the light will be bright, you’ve got your camera settings dialled in and made your image. You want to take another couple of images at the same location, or of the same subject, but the light has changed, the clouds have positioned themselves firmly in front of the sun and everything that you have just done correctly to nail the first exposure, now needs to change. This is normal and for me, it’s one of the challenges that makes this pursuit so much fun!

But I’m Not a Landscape Photographer!

To be quite frank, this doesn’t matter. What I have just said can apply to all manner of photography genres, particularly those where you have little-to-no control over what the light is doing, because you are shooting outside and are at the mercy of Mother Nature.

To give another example…

I used to live in London and was used to shooting in low light - night photography was a real staple for me, as were shots of “bus trails” and light trails. For a time, I was obsessed with taking cityscape images, with long exposure times to get either light trails or capture the motion blur of a bus that was driving through my scene.

After much experimentation, I figured out that for me, on my camera with my lenses, the optimum exposure time for a perfectly (in my opinion!) blurry bus was around 0.3 seconds. Notice that I said “around” in the last sentence? This is because it wasn’t always 0.3 seconds, there are a lot variables at play, not least the speed of the bus that was driving through your scene. If it was going too fast for my settings I wouldn’t get what I wanted. If it was going to slowly for my settings, it wouldn’t make it out of my scene and I would end up with something that I didn’t want.

What about portraits?

Surely for portraits, what you need is a fast lens and then just to shoot everything at f/1.8 also that you get good bokeh? Not in my experience.

Bokeh is great, we all love the way it looks, be that light orbs in the background of our images, or a blurry background that makes your subject ‘pop’ and creates some separation from background.

The issue is the focus plane. I try to imagine the focus plane of my image as an invisible entity that stretches from the front to the back of my scene. The higher my f number, the deeper the depth of field and the more of the image will be in focus.

But when it comes to shooting portraits, you want to be sure that all of your subject is in focus. I have found in my experience, the shallower the depth of field, the less of my subject is in focus and by the time I have looked beyond the focus of someone’s nose, I am starting to see a fall off in sharpness and by the time I have moved along that invisible plain to their ears, I am really not seeing as much sharpness as I should.

In the portrait scenario, your settings are not only going to be dictated to you by the amount of light that you have available, but also by your distance from your subject, and further more, your subject’s distance from the background. You might need to adjust your settings, your positioning and your subject’s positioning to make sure you are getting the level of focus you want and the correct exposure that you need.

If you’re doing headshots in a controlled lighting environment, against a backdrop and you can have your subjects stood on a mark, then this is going to be a little bit easier to figure out and to maintain your settings.

But if, for example, you are trying to tell a story in your images, then you are going to want completely different settings. Let’s say for example you are taking a series of portraits of people that tell us about the job they do and you are taking a portrait of a fisherman who works on a boat. You’re shooting on location at a harbour and his boat is moored up.

In this setting, you could set your aperture to f/1.2 and have a really buttery-smooth, bokeh’d background. Or… you could stop down your aperture ring to give you more of the background in focus so that you can see the harbour and the boat behind the fishermen. All of a sudden you have gone from a photograph of man who looks and dresses a bit like a fisherman, to a man who is a fisherman, with his workplace and working environment behind him to really sell the concept and to help to tell the story. Context, sometimes, is everything.

How About In The Studio?

Again, it’s a similar story here, but you do have much more control. This is because in a studio, you have full control over the lights - if you have a decent set of lights/strobes/flashes etc then you can control the brightness/intensity of the light, how soft or hard the light is (with the use of modifiers), how long it lasts for, where it is coming from and its distance from your subject, the way the light is diffused, the colour of the light… the list could go on.

What this means is that you could set your camera up and change the lighting settings or you could adjust your camera to the lighting scenario depending on what it is you are going for, but generally, if you’re changing one setting, you are going to need change something else.

In the studio, there is not a single set of perfect settings, the settings you need are going to be dependent on the look you are going for, what you are shooting (shape, size, etc) and how you need to present the final images to the client.

We are however, always looking for an image that is sharp, so our aperture is likely to be the overriding factor in our decision making here.

There are preferred settings…

… but there are no best settings!

Your preferred settings are the ones that you prefer. It doesn’t mean that they are the best ones - they might not be someone else’s. Think of it like this: If there were a set of best settings for every scenario, someone would have written the book, we’d all have a copy and we’d all be shooting the same images in the same way.

We’d also all be reading the book and thinking to ourselves “well they’re not the best settings for that situation, because what about that photo of x that I took at y”.

There’d be umpteen YouTube videos on the topic of “why I disagree with the best settings manual and what I do instead”. You see my point? These are personal, artistic choices/decisions based on an infinite number of possible scenarios with an infinite number of desired outcomes.

As you have probably gathered by now, there isn’t one single set of best settings for each of the situations you are looking to shoot. The best settings are dictated by where you are, the time of the day, the weather, the kit that you are shooting with and what your final intentions are.

Some of this is also going to be dictated by personal taste, especially when it comes to the creative aspects of your own work (if you’re doing client work then a big part of the creativity is going to be dictated to you, but remember that you’ve been hired for the way that you shoot, so your creativity still plays a role).

The best way to ensure that you can get the correct settings for your intended outcome is to practice, learn your camera and what it can do, what it is capable of and how to make it do what you want it to and how to programme the settings effectively. Spend some time learning about lighting, experiment and always have a project on the go so that you’re actively creating.

Thanks for reading, I hope you found this useful/insightful! If you’d like to be the first hear about new blogs and reviews and to keep up to date with what I am doing and see my latest work, please consider spending a few moments signing up to my newsletter.

If you’d like to support the blog and help me keep producing Lake District photography content, honest gear reviews and regular website updates, you can do so via my Buy Me a Coffee page. Keeping everything running smoothly takes time, and your support makes a real difference. Thank you.

Read More

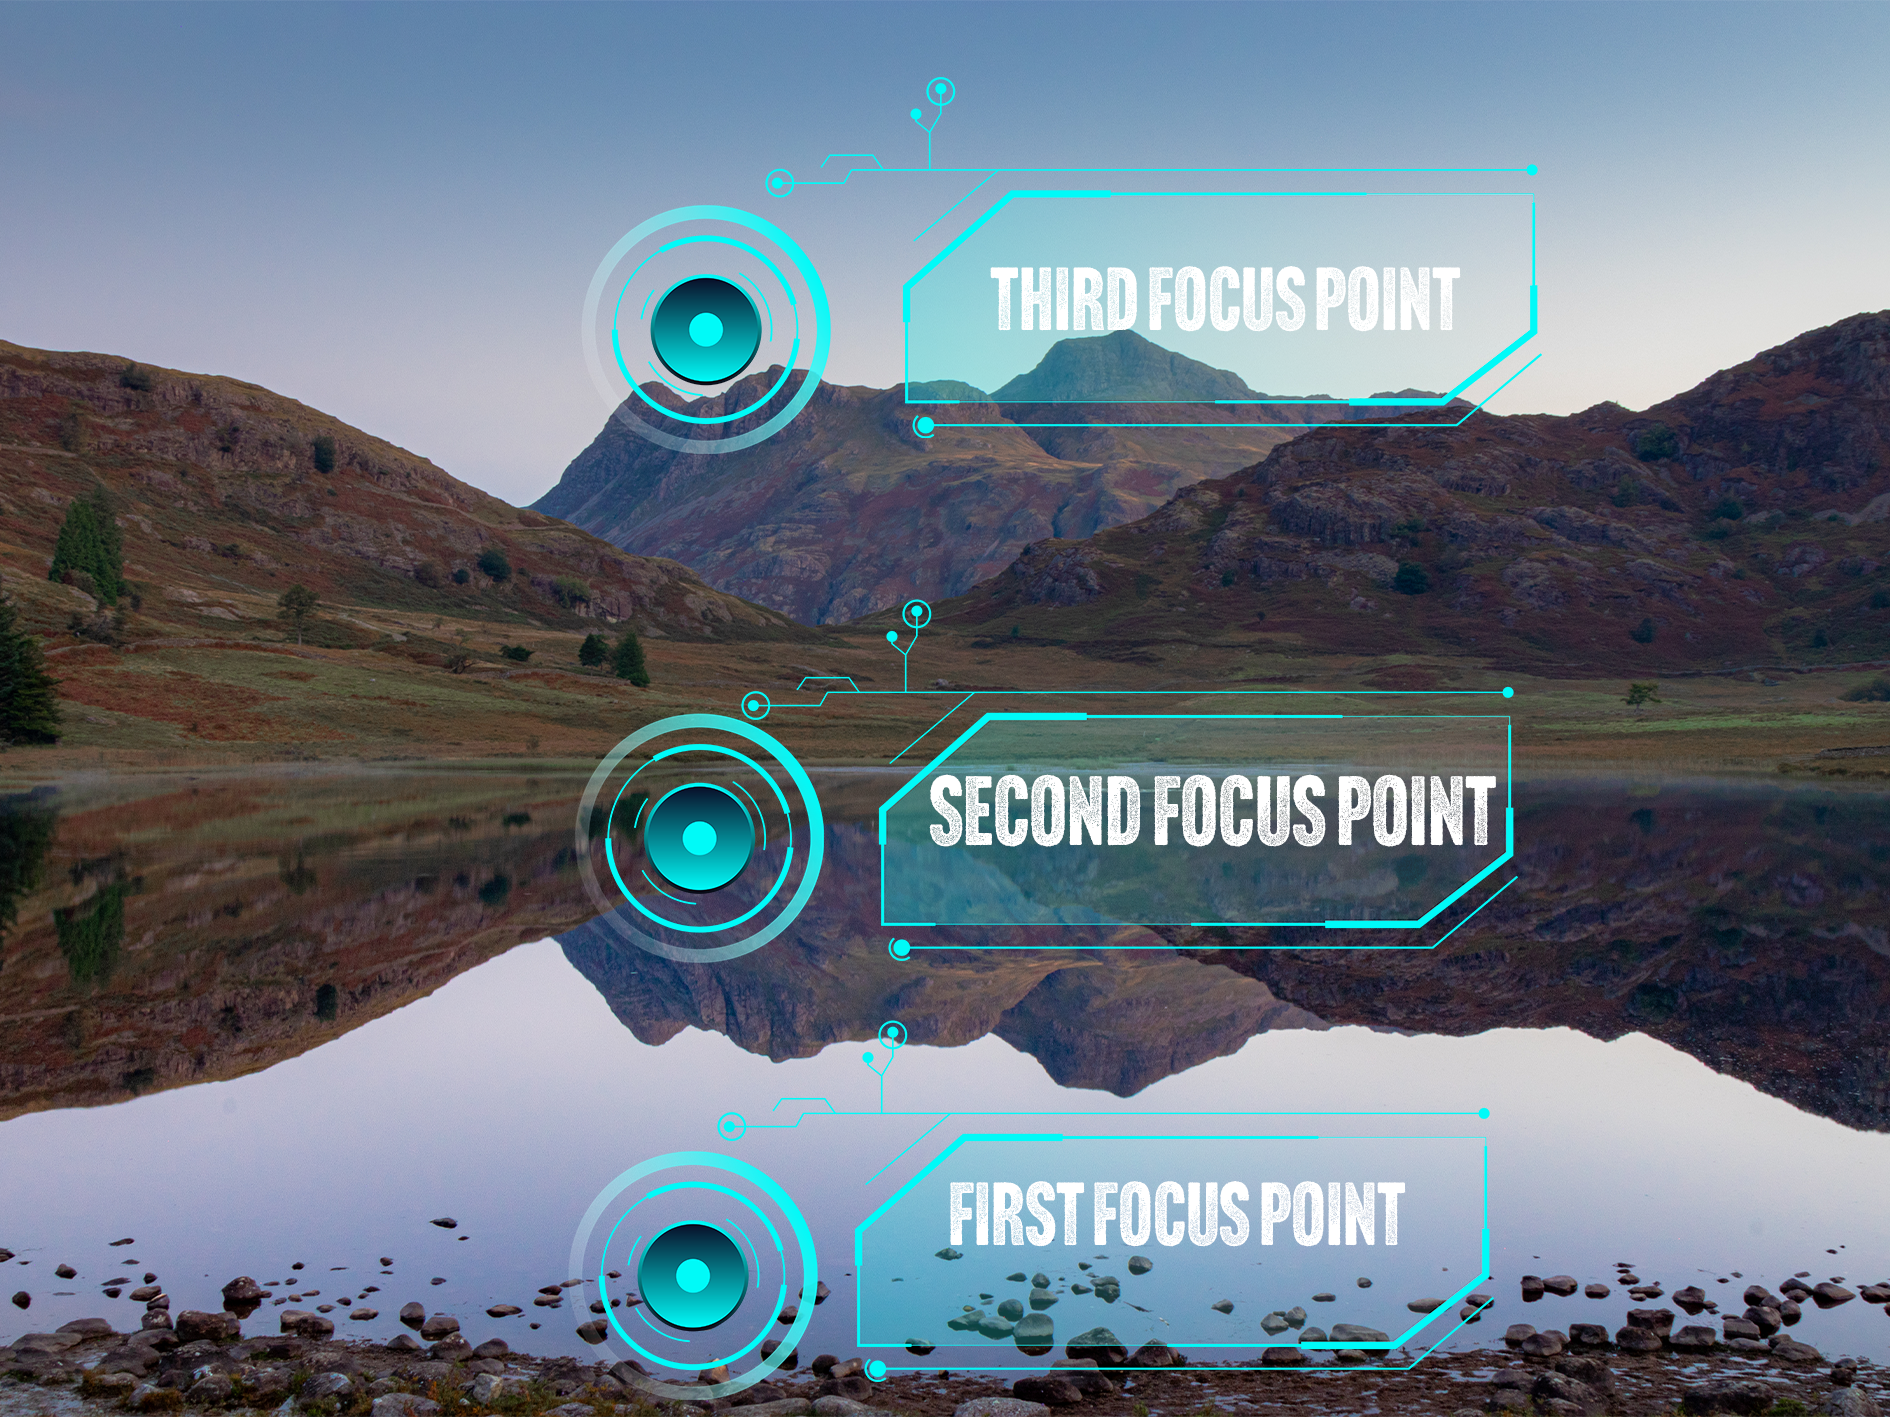
Focus Stacking: How to Get Sharp Images in Landscape Photography

Focus stacking is a powerful technique that allows photographers to achieve sharp focus throughout an entire image, from foreground to background. In this beginner-friendly tutorial, you will learn what focus stacking is, when to use it, how to shoot the required images in the field, and how to blend them together in post-processing for professional results. Ideal for landscape and macro photographers looking to improve image sharpness and detail.

Sharpness. It’s a hot topic in photography and it’s never going to of away. We all pixel peep whether we admit to it or not, and not just for our own photos.

However, there are limitations to our equipment, even the very best, most expensive lenses can only achieve so much sharpness - you can’t beat physics, you just have to adapt to it. You can come close. Coming close is expensive, and expensive will only get you most of the way. Sometimes we just have to work with what we’ve got and that usually involves using our computer and some editing software.

For this one, we’re going to be using Photoshop, as it’s the easiest and quickest way for us to get the results we want.

What is Focus Stacking?

A good starting point for this would be to look at my blog on exposure blending if you’re not sure about it and then come back and finish this off. If you’re already au-fait with exposure blending/stacking then read on!

Focus stacking helps us to ‘remove’ some of the limitations of our lenses. Even at their sharpest f/stop, there are parts of the image (often the corners), that aren’t as sharp as we would like them to be. With focus stacking, we can take several different exposures of the same subject, with different focus points, usually working from the front of the image to the back and then we can blend them together in Photoshop which creates one image which is sharp across its whole area.

How Do You Focus Stack?

The first thing you need to do is to take your images. I am going to use an example which I have taken in the studio, for the simple reason that this is the place that I have the most control over as much of the process as possible. I’m going to be shooting tethered using capture one, but the process you will go through will be exactly the same, be it in the studio or out in the field. The major difference is that when you/I are working out in the field, instead of being in the warmth of the studio and working on a nice big monitor, we’re often out in poor conditions and working on the ‘tiny’ screen on the back of the camera.

Essentially, what we’re going to do is take at least 3 different exposures. In the first image, we are going to make sure that our foreground, or the front of our object is in focus, in the second image, we are going to focus on the mid ground and then finally, we are going to focus on the back of the image; this will either be the back of your object in the studio, or on infinity if you are out in the field. I have tried to visualise this for you in the image below.

This image shows where your (minimum) 3 focus points will be when you are shooting images for an exposure stack.

How many shots you need is going to be influenced by what you are shooting and what you are shooting on, what f/stop you’re at and if there is any movement in your scene. Three exposures is a good rule of thumb for this type of photography, if you take too many images, this can start to complicate things in post processing and your image can end up looking strange, have weird artefacts in it when your exposures are blended or simply, it just won’t work!

The other thing to remember is that you need to keep your settings locked in. If you start to change the settings on your camera between each exposure, this can cause issues and slow down the process.

Finally, you need to (99.9%) of the time, do this on a tripod. You want your exposures to line up exactly between shots, if they don’t, guess what… more complications!

So you’re set up, you’ve got your shot framed and you’re ready to start shooting. The next phase of this is going to be dependent on the camera you have. A lot of newer Canon camera’s have a focus stacking setting built into them. You will need to consult your camera’s manual for instructions on how to do this, but you can tell it how many images you want in the stack and how much you want the focus to shift between each image. The other way of doing it, and the way I am going to describe in this blog (because my camera doesn’t have the focus stack function!) is manually, using either manual or autofocus.

This is fairly straightforward.

1) Frame up your shot and select your settings.

2) Focus on the foreground by either twisting your focus ring, or tapping the screen to select a focus area and half pressing the shutter button. Check the focus is sharp and capture your image.

3) Repeat step 2 for the midground.

4) Repeat step 2 for infinity/background.

I always find it useful to grab an exposure which has my hand in front of the lens after I have completed each ‘stack’.

You can take as many stacks as you like whilst you’re out and about, but keeping them organised whilst you are working and before you get into post will make your life a lot easier in the edit.

How to Create a Focus Stack in Lightroom and Photoshop.

I have shared a video below which explains this process in full, but the first thing you are going to want to do is import your images into Lightroom.

Once they are in Lightroom, edit your first image and get it looking the way you want it. Once you have done this, you want to copy the settings from you first image to the other two in you stack, so that they all have the same adjustments applied to them. I usually just make some global adjustments at this stage and do anything local on the image I get out of Photoshop. You can see this process in the video below. You can make your adjustments in Camera Raw in Photoshop, but I find the process of copy and pasting the adjustments in Lightroom much easier.

Once you’ve done this, you need to select your three images and then right click and ‘open as layers in Photoshop’. When you’ve done this, you can move on to the next stage.

Now your images are in Photoshop, the process is pretty straightforward; you’re going to shift click to select all three images, the in the edit menu, we’re going to select “auto align layers”. This will make sure that our images are neatly stacked on top of each other. Leave the ‘Auto’ option checked and click OK.

Once this has completed, make sure that the three layers are still selected, go back into the ‘edit’ menu and select “auto blend layers”. Make sure that “stack” is selected and then I always keep “seamless tones and colours” and “Content aware fill transparent areas” are checked. The latter will fill any transparent areas (usually around the edges) that have been created when your images were aligned.

Now that Photoshop has done it’s thing you will see that it has created masks on each of your layers, and if it’s worked well, you should see that the masks are broadly letting the focussed areas of each shot show through. If you need to fine tune these masks, you can do this using either a white or black brush and painting on the respective mask.

The final step is to check that you are happy with what you have, that it’s sharp where you want it to be, and that’s the process done!

All you need to do now is hit save, and if everything is working well, you should see it appear back in Lightroom as a .tiff file that you can now make some local edits on and get it looking exactly how you want it!

I have made a video of this whole process below, so you can see each step and hear some commentary that I hope you’re able to follow along with!

Step By Step Focus Stacking Video Tutorial

Check out my YouTube video on focus stacking - please head over to the channel and subscribe!

Original Images:

I set this up on the studio against a yellow backdrop and one light source (just a video light for this for the sake of speed), this is just three props I found amongst some old props in the studio - a lego mini-figure, a pocket watch and a Funko figure. I set these up in a line extending away from the camera. These images were shot at f/4, just to force the depth of field to clearly illustrate what I am trying to demonstrate. You should be able to see the three focus points by looking at which part of the image in focus, you should be able to see each subject in sharp focus as the focus point moves towards the back of the image.

Whilst I have done this in the studio to illustrate it, the process in the field is exactly the same. The only thing you might find is that when you’re not in a controlled environment, you’re much more likely to have changes in light and the position of your camera to deal with.

After following the process outlined above, all three images are combined to produce the final, stacked and fully focussed image you see below:

I hope that you have found this useful, I am trying to put some more of this type of content together and will eventually get them uploaded to my Chris Kendrick Photography YouTube Channel so you can digest them at your leisure.

If you have found this useful, I’d be grateful if you would like to support the blog and help me keep producing Lake District photography content, honest gear reviews and regular website updates, you can do so via my Buy Me a Coffee page. Keeping everything running smoothly takes time, and your support makes a real difference. Thank you.

Check out some more of my latest blog posts below…

Read More

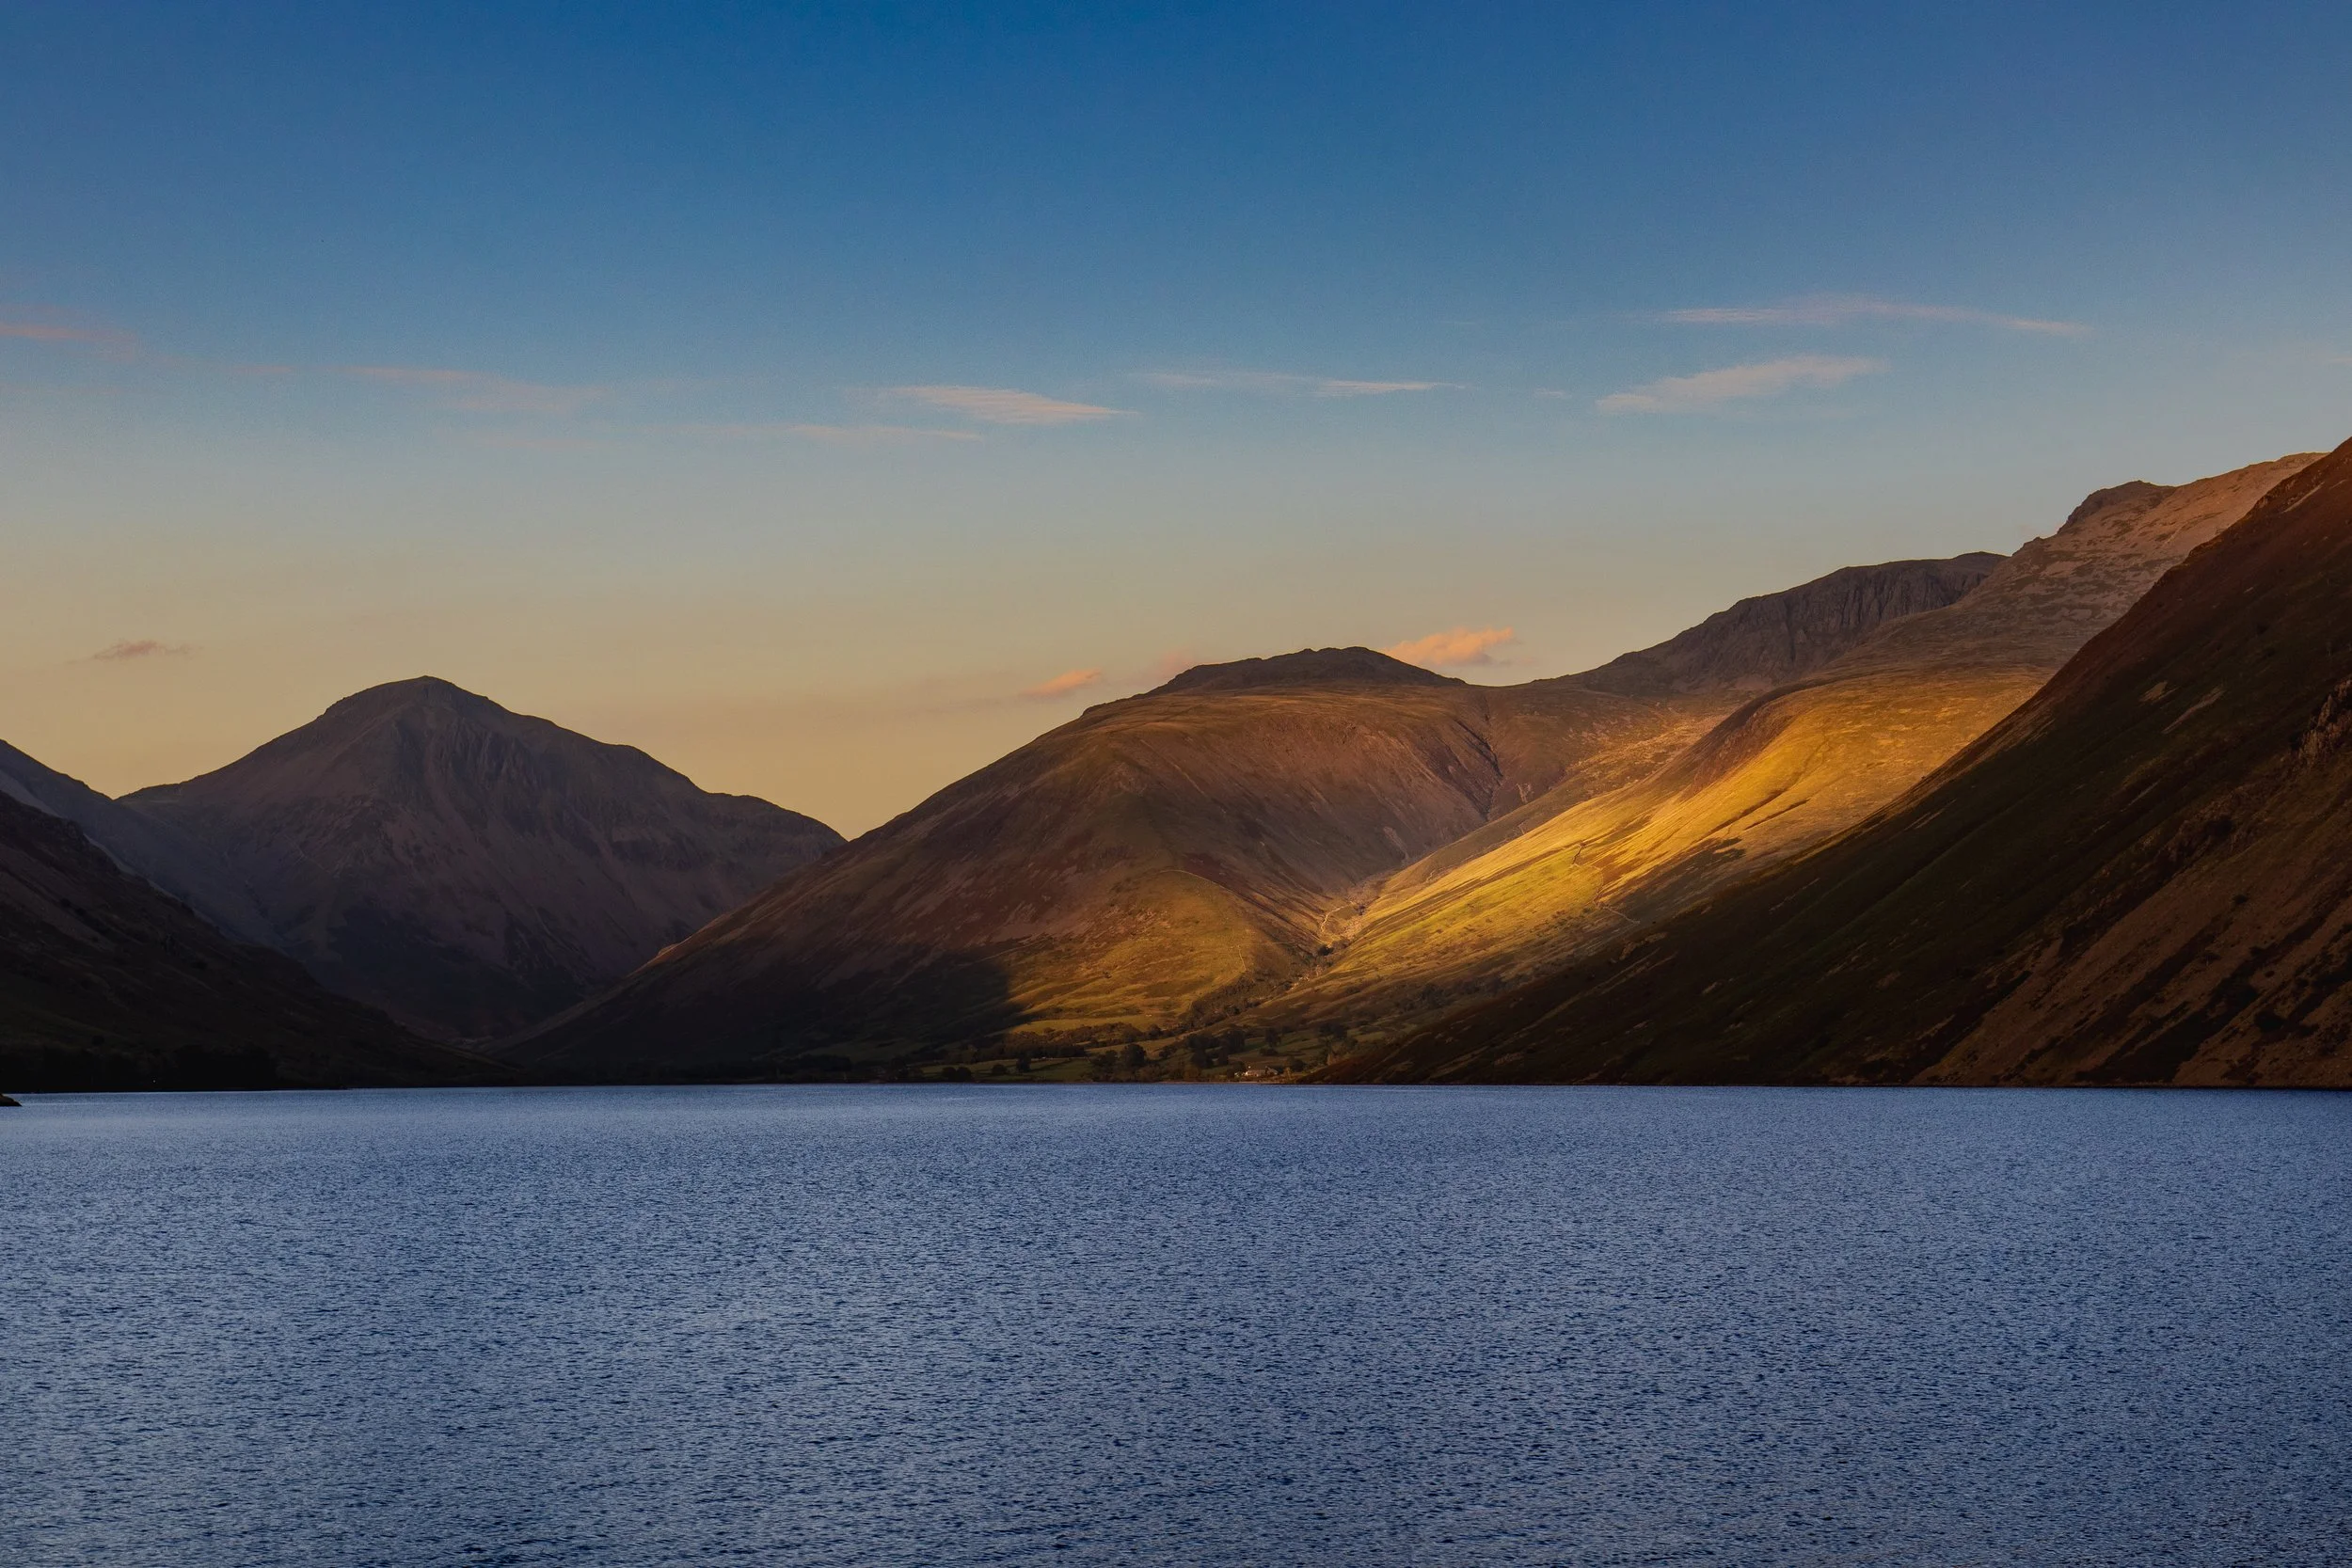
5 Beginner Lake District Landscape Photography Locations You Can Reach Without a Long Hike

Short on time or energy but still want great Lake District landscape photos? These five locations offer incredible views with minimal walking, perfect for beginners, visitors, or quick photography trips.

Welcome back! I am going to keep this one as short as possible, but at the same time try to give you enough information in a short space of time so that you can get out and shoot.

What follows is a list of 5 places you can take incredible landscape photos in The Lake District, without having a massive hike to get there. These will be great if you’re short on time, or if you’re short on energy but still want to get out. Nothing in here has more than a 20 minute to reach a great spot and get some great photos in the bag.

Gummer’s How

This one is the one with longest and most demanding walk, which is saying something as this one is an easy trek, which should take no longer than 20 minutes from the car, has a bit of climbing but is rewarded with incredible views across Windermere and many of the Lake District fells.

There’s a free car park just off Fell Foot Brow, which is run by Forestry England. You can find it at ///rated.soup.looms on What Three Words.

From here, cross the road and follow the signs which will lead you along a short trail with a slight incline, and then you’ll be met by a short, but much steeper climb up to the top of the hill.

Walk towards Windermere (you will be able to see it) and you will be rewarded with some breath taking views. This is a great place for sunset and you’ll get some incredible shots if the weather is in your favour. I prefer a long lens here as it lets you pick some of the detail in the scene.

Don’t forget your head torch for the way back if you’re planning on staying late.

If you’re planning for sunset, then check out my sunrise and sunset photography in the Lake District blog.

Queen Adelaide’s Hill

This is another one which is a short walk from the car and rewards you with great views across Windermere, without the walk up Gummer’s How. There’s even a bench at the top if you’re feeling a little out of breath. This is another good one for sunset. You can park at at Rayrigg Meadow Car Park (What Three Words: ///magpie.permanent.agent).

The path to Queen Adelaides Hill is largely paved, but there is a small section which is through a bit of woodland that can be uneven underfoot and isn’t paved so make sure you have the right footwear on.

Arrive in plenty time if you’re going for sunset, as this car park allows motorhomes overnight and it fills up quickly. It’s also not cheap and is run by the council so there’s no discount/free parking with your National Trust Card.

Head towards ///waiters.risky.loudness and you will be in position for some great views.

Surprise View

We’re heading out of the Southern Lake District and up to Borrowdale for this one. You’ll find Surpise View at What3Words ///copying.shadowed.bounding , with parking really close by. I would estimate the walk from the car to the viewpoint to be around 30 seconds… This is the shortest ‘walk’ on the list! You have incredible views of Derwent Water and down into Keswick from up here, and it’s great for sunset shoots, and also looks great at Blue Hour.


Whilst you are here, you can also bag a Lake District classic and bag yourself a shot of the packhorse bridge at Ashnesss, What3Words ///pills.index.remarried. This is a great place to go and do some long exposure work! Check out my long exposure blog by clicking here.

Wastwater

Moving out into the Western Lake District now, and we’re headed to Wast Water. I am not going to include a what3words location for this one, because there are so many great places to shoot from here. You’ll end up on the north eastern shore of the lake (the opposite shore is inaccessible unless you fancy a swim across England’s deepest lake) when you arrived and there is lots of parking at the side of the road (stay out of the passing places and park respectfully, please!). Once you’re parked, you can walk along the side of the lake and scope out some of the compositions that are spread out in front of you. Explore and have fun. This is another one that is great at sunset.

Blea Tarn

This one takes a little more central and comes with a weather warning. If the weather is poor, don’t go - check before your travel. In the winter, the roads leading up here become treacherous and are impassable in bad weather. You have been warned!

That said, in the summer, whilst you need to be careful on the roads, many of which are single track, your patience (and careful driving) will be rewarded with an easy walk up shot at Blea Tarn.

You can park at the National Trust Car Park (free for members!) which you will find at What3Words ///destroyer.marked.groomed . Leave the car park via the entrance you got in through, cross the road and follow the path. From here, the tarn is on your right and you can walk down to it. Make sure you watch where you put your feet and take good shoes - it can be very boggy. There are great shots across towards the Langdale Pikes and you will see some interesting wildlife here if that’s your bag as well.

This one is a good sunrise spot, get here early to secure the best spots.

Bonus Hidden Gem

This one is often overlooked and is little known. It is called Kelly Hall Tarn, which is in a village called Torver on the way into Consiston. There is parking at What3Words ///backdrop.shelters.quitter. Once parked, take a walk towards the back of the car park and follow the path which will lead you to the Tarn. It’s about a five minute walk, which can be boggy after rain and also boggy when it hasn’t rained for days. Be prepared. This is a great sunset spot, and is super dark at night for you astro fans!

And that concludes the blog! If you try any of these locations, let me know how you get on. I’m always interested to hear where people head first, and what conditions they find when they get there. Keep an eye on the blog for more beginner-friendly Lake District photography guides.

These guides are all written from time spent out in the Lakes with a camera in hand. If you’ve found it useful, buying me a coffee is a great way to support the site. You can also join my newsletter for future guides, photography tips, and new content as it’s published.

Check out some more of my latest blog posts below…

Read More

Street vs. Landscape Photography: A Personal Perspective

Moving from London’s bustling streets to the wild, open fells of the Lake District has transformed the way I see and capture the world through my camera. In this post, I share what I’ve learned making the shift from street photography to landscape photography — from mastering natural light and adapting composition techniques, to preparing for unpredictable weather and refining my gear choices. Whether you’re curious about photographing in the Lakes or looking to adapt your city skills to the countryside, you’ll find tips, techniques, and personal insights from my own journey.

Moving from London’s bustling streets to the peaceful landscapes of the Lake District transformed my approach to photography. In this guide, I share practical tips for making the shift from street photography to landscape photography, including composition techniques, gear recommendations, and how to work with natural light.

It’s been almost 2 years since I made the move from London to The Lake District, and in that time I’ve had to learn (and will continue to learn) a lot about landscape photography, what it is, what it means and how to capture successful images. In this blog, I am going to break down some of the things that I have learned, some of the stuff that I have changed and what has had to stay the same as I continue on this landscape photography path in The Lake District

One of the things that I have learned, is that I need(ed) to adapt what I was already doing. As with so many things, there are a lot techniques, “rules” and conventions that apply to the landscape photography I do now in Cumrbia, that were also important things to remember in street and cityscape photography.

I am aiming to break down some of these below; I hope you find it interesting and maybe learn something as you read!

This blog contains Amazon affiliate links and I may receive a small kickback if you decide to make a purchase using one of them. 

Light is Key - Lessons from The Lake District.

Yes, light is key to both styles of photography, but (in my opinion, and certainly in the way I work) you see it and use it differently. Perhaps, for me, a big part of this is that I shoot far less in low light now. There’s not a whole lot to photograph in the hills at night time unless you’re an astrophotographer (something I am yet to have a ‘proper’ go at), or you love super long exposures!

For me, the biggest difference in how I use light, is that when I am doing landscape photography in the Lake District, the light becomes the photograph, it is the subject and it is what generates a lot of the interest, especially when it’s dappled sunlight across the Fells. In my days shooting in the city, I used it in a different way, often finding interesting coloured lights and then using really wide apertures to force these out of focus to create wild bokeh style backgrounds, usually with interesting foreground texture (more on foreground later), often by the way of drain covers, or leading lines.

Golden hour, and blue hour, are important to both styles. Golden hour, the period before sunset and the period after sunrise, and blue hour, the period after sunset and before sunrise, often provide some of the ‘best’ light for both styles of imagery. In the city, I used it to photograph buildings, in the landscape, I use it to photograph entire scenes, or parts of them.

Many photographers see this as the ‘best’ light, but it does mean, especially as a landscape photographer that you are subjecting yourself to super early starts or late nights, waiting for it to arrive.

Harsh light, i.e. when the sun is high in a clear sky can make landscapes much more of challenge, whilst street photographers will likely see more opportunities with this kind of light, which creates strong, harsh shadows can make for some really interesting compositions, but because of the way that the landscape photography environment is made up, these opportunities are often fewer and further between.

Ultimately, and this feels like a bit of a cop-out, you have to be outside to experience any kind of light, you make your own opportunities, and you can’t shoot any images in good or bad light, if you’re sat in the house!

Composition in Landscape Photography vs Street Photography.

This could, and probably should be a blog all of its own, but I will ‘quickly’ touch on some of the similarities and differences that I have found whilst making the switch, this isn’t a ‘how to’ guide, but will look at some of the similarities and differences which have affected me as someone making the switch into predominantly landscape photography vs street photography.

There’s a lot of differences and a lot I have had to learn, change and adapt. I think that perhaps the biggest shift I have had to make is how to decide what to do with what’s in front of me. In the city, the environment is very much on top of you. In a city like London, where I did the majority of my photography, everything is close to you, if you walk through Canary Wharf or around parts of the City of London, then huge skyscrapers ascend above you and horizons can be non-existent. The environment limits how much you see and almost forces you into certain compositions in particular locations.

Contrast that with being out in wide open spaces, often on top of the highest point for miles around. This comes with its own set of challenges and of course, the temptation just to shoot the whole scene, or to photograph the whole of the sunset or sunrise over Derwentwater. This has been one of the hardest things for me to adapt to, especially when photographing in The Lake District, when there is a stunning vista laid out in front of me, with an amazing sunset kicking off in the background.

I have done a number of things to help me with this; I have looked at a lot of work by other photographers, (but have tried to avoid looking at other Lake District Photographers so that I don’t end up just taking everyone else’s photos), watched YouTube videos, practiced, and finally, have gone on shoots with just a longer focal length lens (usually my Canon EF 70-200mm f/4L), as this takes the wide shots out of play and makes me pick out what I think are interesting features in the landscape. It makes me look for different compositions, different subjects and more creative ways to work with the light that is in front of me.

I don't always go out with just one lens, I often take something which is a bit wider (like a 24-105mm) or sometimes, something super-wide (like my Canon EF 10-18mm F/4.5-5.6), but I do try to think more carefully about my composition when I am shooting with a wider lens, which leads me neatly onto my next point about foreground interest.

When I was shooting in the city, I would use foreground interest to force background lights out of focus to create bokeh, and this kind of foreground interest is something I am trying to include more of in my landscape photography.

I just have to look a bit harder for it, and I’m also not trying to force my images to have out of focus elements (more on focus stacking later). In the city, there are interesting textures, in convenient places, everywhere. There are tons of interesting textures in the country as well, but getting them in the right places, with the right background and a pleasing composition which leads the eye through it, is much more of a challenge, but foreground interest is often key to a successful image. It could be something as simple as a boulder or a patch of heather, but having it there makes a huge difference to your images.

Weather Conditions in Lake District Landscape Photography

No blog about UK landscape photography would be complete without a mention of the weather, but it is something that I have found impacts what I shoot, where I shoot and when I shoot it way more than it did when I lived in the city. When I lived in London, the weather was any combination of hot, dry, wet and/or humid. Occasionally it snowed. Going out to shoot in good weather was a no brainer, going out to shoot in the rain or just after it, was even more of a no brainer - cities look awesome in the rain and in low light - reflections, bright lights and extra textures. You were also never very far from the warm shelter or a shop or a tube station.

I’ve become a bit obsessed with the state of the weather since landscape photography became my biggest focus - will there be rain, how cold will it be, how bad is the wind when I get further up and into the hills? Is there any lightning forecast? What are the chances of a cloud inversion? Is there going to be mist?

The answers to all of the above will influence where I go and shoot and when I decide to go there. If you’re new to photographing in the Lake District, apps like Clear Outside, Ventusky, the BBC Weather App, and the Met Office Mountain Weather Forecast are essential for planning sunrise or sunset photography trips.

There’s some great apps to help you stay on top of this, don’t just rely on one, have a look at what they are all saying, some of my favourites are Clear Outside, Ventusky and the BBC Weather App. If you’re heading out into the hills, the you should always check the Met Office Mountain Weather Forecast. The last thing you want to be is stranded half way up or at the top of fell when the weather closes in, putting yourself and others who may have to come and fetch you down in danger.

Focus Stacking

This has been a real game changer for me, but it has taken some practice. Focus stacking is essentially a different version of exposure stacking, something which I had done in my city photographs to enhance the dynamic range. If you’re trying to achieve pin-sharp images of the fells from foreground to horizon, especially during golden hour, focus stacking is an essential technique for Lake District photography.

Focus stacking, on my camera at least, is a far more manual process. What focus stacking does is to combat some of the physical limitations of your lens and allows you to have all parts of your image either acceptably sharp or pin sharp. Essentially, you take several exposures of the same scene, with your camera mounted on a tripod (this is important, as if you move the camera, your attempts are over before the have even begun!), with each exposure focused on a different point. So, for example, you may focus on the foreground, take an image, then the mid ground and take another image, and then the horizon line and take another exposure. Three generally works well, you could do more, but this can make things more complicated in post production.

When you get back to your computer, you can do all of your light room edits etc. and then export the images to layers in Photoshop. Once in photoshop, you can ask it to automate this process for you, or you can use masks to have full control. It’s slightly more involved than that, and I will do a tutorial on this at some point in the future, but in the meantime, there are lots of tutorials on YouTube that will talk you through the process

I did far less focus stacking in the city than I do in the country, I think largely because my style has shifted and I want more of the scene in acceptable focus than I did in the city when the goal was often bokeh balls.

Slowing Down Your Process

This has been a big adjustment for me. In the city, everything moves a lot quicker, no one is taking their time. Opportunities for images can be fleeting, gone in seconds and won’t come back.

Thats’s not to say that things don’t change at all in the country, but there is more time to let a scene develop. You can stay in one spot and see various stages of light, see patterns change and wait for light to move to where you want it, especially if you’ve got some great dappled light illuminating the hills above Ullswater.

<— Not me in the image, I’ve used a stock image here!

When I was doing much more street photography, I always felt like I needed to be moving, whereas with landscape photography, you have time to slow down and take things in and wait for the opportunities to present themselves, photographing the scene in front of of you as it changes. The big difference is that sometimes, it can take a long time (and a lot of effort) to get to where you want to be. In the city, hop off the train or get out of the car, and generally you’re in amongst it. The country is often a lot more uphill and not as easy to access, but that’s all part of the fun!

You don’t limit yourself by staying in one place, you have time to explore what is in front of you and enjoy the way it changes - as the light moves, so will your eyes and you’ll notice things that you hadn’t thought about capturing only moments earlier.

Gear

This isn’t going to be a ‘does gear matter’ section, but a comment on the type of gear I’m using.

I used to rely heavily on fast lenses - I was using wide apertures for shallow depth of field and often needed the extra light for shooting in low light conditions. I have come to realise that I don’t need a plethora of fast lenses for what I am doing now. I am more concerned about image quality and sharpness, which helps with the cost of things as well - fast lenses are much more expensive. Take the Canon 16-35mm L series lens, there is a difference of almost £300 in the price of the F/4 version when compared to the latest version of the same lens with a maximum attitude of F/2.8. The F/4 versions are also a lot lighter, which is great in terms of carting it around with you all day.

I do still have a couple of fast lenses, namely an F/1.8 nifty fifty and an F/1.2L 85mm Prime. The 85 is a unit of a lens, weighs almost 2kg and is incredibly sharp. These two lenses also hardly ever come out with me unless its for a portrait session or I have a genuine use case for them in the field - 2KG is a lot to carry around all day and then not use! The 85mm was a staple of my bag in London, because of that shallow depth of field, and it was great in low light as the front element is like a bucket.

The lenses that tend to come out with me now are a 10-18mm EF, 16-35mm f/4L, 24-105mm F4/L and my 70-200mm F4/L. These save weight, cover the whole range of focal lengths and give me all the flexibility I could ever need.

Some things are a given for both styles - a sturdy tripod is a must, if it’s light weight, then even better, but expect to pay good money for the privilege. The other item that has been really useful is my Peak Design Camera Clip, which whilst a little pricey for its size, is a must have for when you are out walking, but you might want to get it back in your bag when the terrain starts to get a bit trickier. Better to break a tumble with your hands and not your camera and expensive lens!

What bag you put it all in is very much a personal choice, but for short walks, I like the LowePro Fast Pack , (you can read my review of the Lowepro Fastback here), and for longer walks I take the LowePro Protactic 450 AWII. The latter is a much bigger bag and it comes with hip straps, which make longer days much more comfortable, but it does lack space for your non-camera gear like a jacket or something to eat!

In Summary

I think it’s clear that there are a lot of similarities between the two different styles I have shot, but in short, we’re still taking photos, we’re still telling stories and we are still doing it using similar equipment. We are, to an extent very reliant on the weather but for different reasons.

For me, the biggest difference is the tempo that things move at in the landscape photography world, it’s slower and at times more methodical, with a greater need for focus stacking if you want that front to back sharpness in your images.

Which one would I choose? Well both of them. I still do some street photography and still really enjoy it; I enjoy the dynamism and the change of pace it offers from the much more pedestrian pace of landscape photography, but regardless of what I prefer, I just love being out with camera, taking images, sharing images and telling stories!


If you’ve enjoyed this, then please consider signing up to my newsletter, you can do that by clicking here or head over to my Instagram to see some of my latest work and what I am up to!

Read More

10 Things I Wish I Knew When I Started Photography.

Beginner Photography Tips from Someone Who’s Been There

This blog contains Amazon affiliate links. As an Amazon affiliate, I earn from qualifying purchases. This is a great way for you to support me! Thanks!

I have been working on a lot of things for beginner photographers in the last few weeks and a few people have had a read of my blog from last week, Essential Photography Gear for Beginners: What You Really Need to Get Started. https://chriskendrickphoto.co.uk/blog/what-gear-do-you-need-as-a-beginner-photographer

To this end, I thought I would go one further and think more about beginner photography and this led me to think about the things I wish I knew when I started taking photos. 

This turned into quite a long list (with some repetition!), which I have tried to distil into ten points below. I will try and keep it short and simple, but I do have habit of trying to share as much as possible - it’s all about helping each other. I’m not a gate keeper! 

So let’s jump into 10 Things I Wish I Knew When I Started Photography…


1. You Don’t Need an Expensive Camera to Take Great Photos

This one kind of touches on the “Does Gear Matter Question”. The answer to that, as we know, is yes. But also a resounding no. But, it does a bit and “categorically no”. 

Ultimately, what matters is that you have some gear AND you know how to use it. Some of the best time you can spend as a photographer  is time getting to know your camera (or the camera app on your phone!), what the buttons do, and more importantly, where they are. You will miss shots if you’re spending ages trying to remember what the buttons do and where they are. Its also well worth learning your menus, where to find things and what they all do.

But this doesn’t answer the question. The main point in the previous paragraph is “that you have some gear”. It doesn’t matter what that gear is, as long as it works and you know what you’re doing with it.

You can take a great photo on any camera. It doesn’t matter whether its a Hasselblad X2D or an Canon R5 MKII. Breson didn’t have either of these. Gilden doesn’t use one. What they do know how to do is to frame a shot, when to take the shot and how to edit the shot to make it exactly what they want. 

If you have camera that uses older tech, or you have a camera that is more basic, or you’re using your phone, you can take a great photo. 

Good photos mean something. Good photos say something. Good photos tell a story. You achieve a photo that does all of these things with any camera, be that the latest offering from one of the big companies, or a 20 year old DSLR. What matters is what or who you are taking photos of. 

This is one of the most important things I have learned. When I started out, I bought the best camera I could afford and paired it with a kit lens. I still have that camera now. I have added more lenses, but I still have that camera and use it most days. 

Another way to think about this. In “real life” I am a teacher and I have taught photography at A-Level. The best photography student I ever had, the one who took the best images was the student who had the cheapest camera (not just in their class, but across all 4 classes I taught) and they created some images that were genuinely first rate images. I always remind myself of this when I am looking longingly through the window of my local camera shop. 

2. Manual Mode Isn’t as Complicated as It Seems

It really isn’t. It might seem it, but it’s not. I promise. The thing you need to master is the exposure triangle. Conveniently, I have made a blog about the exposure triangle, which you can read here. https://chriskendrickphoto.co.uk/blog/a-beginner-photographers-guide-to-the-exposure-triangle

If you can master the basics of shutter speed, ISO and aperture. Get the hang of this, then you can start to think about white balance and picture profiles (if your camera supports them) and maybe go one step further and start to explore things like long exposure photography and ICM (Intentional Camera Movement). 

You should also look into aperture and shutter priority on your camera and learn to use these too.

3. Light Is the Most Important Part of Any Photo

It’s the name of what we do… The word “Photography” is taken from two Ancient Greek words “Photos” meaning light and “graphé” meaning to draw or write. Photography literally means “writing or drawing with light”. 

So yeah, light is kind of important! Without it, we can’t take images. 

But then we have low light, good light, bad light, soft light, hard light, specular light… and many more. 

A good space for us to start is Golden Hour. This is the light we have after sunrise and before sunset. The term  Golden is a bit of a misnomer, it can be about an hour, it can be 15 minutes and it’s also really dependent on the weather and atmospheric conditions where you are taking photos. If you’re covered in thick grey cloud, you aren’t going to get amazing golden light, but you will have some lovely soft light to work with.

It doesn’t have to be soft light though. Hard shadows can work really well and add drama to your photos, just look at the work of someone like Fan Ho, for example. He used harsh shadows to great effect in a lot of his work (he also shot on a dual lens reflex camera, not a mirrorless or a DSLR, because they hadn’t even been thought of at this point!) 

As you get more confident with your camera, you will find new ways to manipulate the light with long exposure and exposure stacking and this will produce you some awesome results!

Use your weather apps and maybe look at experimenting with apps like PhotoPills. They will help you to decide what the weather might be like at the location you are visiting and will tell you where the sun is going to be in the sky and this will enable you to pick the right place to make the most of the light. 

I’m going to include reflections in here as well, because they’re made of light too, right? Reflections are some of my favourite things to include in my shots; I used to live for a good reflection when I lived in the city, and the same is true now I live out in the sticks, they just tend to be a bit bigger in the countryside that in the city. But you don’t need a tarn in the Lake District with the reflection of a mountain, a puddle and tree can work just as well!

4. Composition Can Instantly Improve Your Photos

This is one of the most important things and one of the easiest ways to improve your images, quickly and cheaply. 

Composition as both a topic and a concept is HUGE. As a beginner, I didn’t know much about it, let alone the different types of composition. When I started out, I was just taking pictures of things I liked and sticking them in the middle of my frame. 

Then I learned about the rule of thirds, leading lines and the golden ratio. There’s more than this, but these are the three that you will hear the most about. You should go and find out about them and start using them - the difference you will see is huge. 

5. Editing Helps — But Subtlety Is Key

Editing is one of my favourite things to do. You need to know that it takes practice and you are constantly learning. You can never know everything about editing. 

When you first start out, one thing you are likely to do (I know I certainly did!) is to find the saturation, virbance and clarity sliders in Lightroom and drag them all or most of the way towards the right hand send. This will make your colours unnatural and it’s not a desirable look for your photos. 

Take your time, practice, look at other photorgapher’s work, watch YouTube videos to learn, but keep it subtle and let it look natural. 

When it comes to editing, less is more. Just like this section of the blog!

6. You’ll Take a Lot of Bad Photos — and That’s Fine

Time for clichés. 

We learn by making mistakes, so go out and make them. The only stupid mistakes you make are the ones that you don’t learn from (2 clichés already!).

But joking  (and clichés ) aside, embrace your mistakes, establish why it’s a mistake and then go out and try again. Rinse and repeat.  

(I’ve used stock images in this blog, but this one is mine, it was handheld and the exposure was too long for this method of taking the image, so it’s blurry and there’s camera movement!)


7. Stop Comparing Yourself to Everyone Else

“Be yourself, everyone else is already taken” Oscar Wilde. 

This was on the wall in a school I used to work in and it’s stuck with me. It works for so many things in life, but in this instance, it works really well. 

Don’t sit and compare your landscape shots to Ansell Adams’ work. Don’t compare your portraits to Annie Leibowitz and don’t compare your still like/commercial photos to Scott Choucino. These are well established professional photographers, have years of experience and have forgotten more about photography than most of us will ever know!

But aside from those I have mentioned above, don’t compare yourself to other photographers on social media. You’re not them and they are not you. Work on your own images and discover your own style!

8. Consistent Practice Beats Occasional Perfection

Use it or lose it. If you’ve ever played and instrument, you will know that you need to practise to get better. Stop practicing and it takes longer to learn the piece. If you’re a sports player and don’t train, you lose the skills you are developing and your fitness decreases and you don’t perform as well.

The same is true with photography. If I go out to shoot and haven’t done so for a couple of weeks, I really notice it and I find that it takes a while to get my eye in and I don’t always know where the camera controls are - this leads to missed shots and missed shot can’t be a good shot or a bad shot!

9. You’ll Start Noticing the World Differently

This sounds like a bit of a cop-out, but it’s true. You’ll notice leading lines, you will notice good light and you will notice that you don’t always have your camera with you when you wish you had - but we all have a camera in our pocket these days anyway, don’t we?

I have lost count of the number of times I have been driving home and have seen amazing light on the fells. The number of times I wish I had my camera with me or the the numbers of times I wished I wasn’t driving at 70mph watching the world zip by the car window is huge. 

If you look hard enough, everything can be a photo and as you practice more, you will begin to see that you can find images where you might not have thought there could be one. Even in harsh sunlight (which isn’t always the photographer’s friend), you will see that you start to see shadows that will make a great image!

10. Enjoy the Process

What is the point in doing it if you don’t enjoy it? It’s probably going to be difficult at times, but what you experience in difficulty, you will more than make up for in sense of achievement. 

Go out there and take lots of bad photos! Learn from the mistakes and use them to improve. Enjoy getting frustrated at the edits but having something beautiful at the end of it. 

I’d also recommend getting your photos printed. I print my own images but if I’m not printing them to hang on the wall or want smaller images, I use services such as Free Prints and get a stack of 6x4s delivered direct to the door for about three quid! It completes the process and brings everything full circle from scouting to shooting to editing, to having those prints in your hand - it’s nice to have a tangible reward at the end!

Photography is great fun, if at times it can be challenging and occasionally frustrating. It can be your best friend and your sanctuary, and it can also, at times, be your worst enemy and some subjects will become your nemesis, but it wouldn’t be fun if it were easy, right?


Thanks for sticking with me through this post — I hope it’s helped you feel a little more confident on your photography journey. If it has, why not stay connected? You can follow me on Instagram and Facebook for regular tips, behind-the-scenes content, and new work. And if you’d like more beginner-friendly photography advice, early access to blog posts, and exclusive updates, make sure to sign up for my newsletter here. Let’s keep learning and creating together!

Read More