My Photography Blog
Welcome to the Chris Kendrick Photography Blog, where I share the stories, challenges and inspirations behind shooting Lake District landscapes and working as a Cumbria-based photographer. Alongside behind-the-scenes reflections from the fells and lakes, you'll also find honest photography gear reviews, covering the cameras, lenses and accessories that genuinely perform in real Lake District conditions. Whether you’re passionate about landscape photography, exploring Cumbria’s scenery, building your kit, or simply curious about the craft, there’s something here for you.
Some posts include affiliate links; thank you if you choose to support the blog through a qualifying purchase. If there’s a topic or piece of gear you’d like me to cover, let me know. Enjoy exploring!
Enjoy!
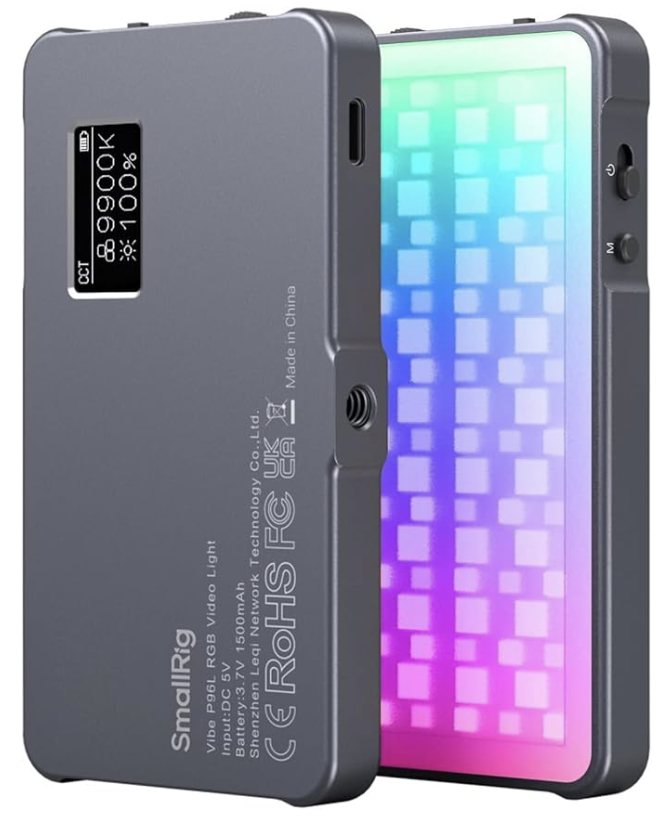
Gear Review: SmallRig Vibe P96L RGB Video Light
The SmallRig Vibe P96L RGB video light is a compact, pocket-friendly LED that’s ideal for content creators, vloggers and photographers who want reliable on-camera fill light without carrying a full lighting kit. In this review, I’ll cover real-world performance for macro photography, product photography and quick portraits, including colour accuracy, usability, and how well it works as a travel-friendly light. The P96L offers RGB plus adjustable colour temperature (2500–8000K), an OLED display for quick settings checks, and a sturdy aluminium alloy body designed for durability and heat management.
I’m sticking an extra entry in this week, as I wanted to review this light, 2 of which I received as Christmas gifts. These were things that I asked for after having done a bit of research so I had a decent idea of what I was getting and a rough idea of what it would do. This is my quick review after a couple of weeks of using them. I am going to try and keep this fairly short and concise.
This blog contains amazon affiliate links. If you click one of these links and then make a qualifying purchase, I may receive a small kickback - this is at no extra cost to you. This is a great way to support this blog and allows me to do things like creating these reviews.
So let’s jump into this quick review of the (not so) memorably named SmallRig Vibe P96L RGB Video Light.
Why Did I Get Them?
I wanted these not as video lights, which is there inteded purpose, but as small, portable, constant light sources that I could take out with me when I want to get a bit more creative, especially with macrophotography and when I want to use lower apertures, but keep the shutter speed as fast as I can. I don’t think I will use the effect feature that has been designed into these lights, but I will absolutely use the CCT and HSI functions (more on these features below), to creatively light some macro shots and to give myself some more creative flexibility. I have got some Pavotubes, but these are too big to cart around in my bag for occasional use so only really get used in the studio.
What’s in The Box?
This one is straightforward. You get the unit, an instruction leaflet and a charging cable (USB-C).They’re well packaged, and come in a well made Apple-esque box, which gives them plenty of protection on their journey.
First Impressions
The first thing I noticed when I opened the box was the build quality and look of these things. They look great and appear like they’re much expensive than the less-than £40 you have paid for them. I like the tacitly of the admittedly quite small buttons, and this will be beneficial when you’re working low light but could be problematic if you’re wearing gloves.
Interestingly, even though I got two of them, the amount of battery in each was vastly different. One was over 80% charged, whereas the other one almost completely flat. Don’t expect that you’re going to be able use it straight out of the box without having to charge it first.
Build Quality
These are really well made pieces of equipment. They are made out of an aluminium alloy which feels really premium, the front of them is covered in plastic which is textured and creates a nice bit of diffusion so you’re not just battling with bare LEDs. They measure around 108x60x11mm and weigh less than 120g, which means that they don’t take up much room in your bag and they’re not too heavy to carry around with you. It also means that they are small enough to hold in your hand but that they have a wide enough “base” to stand up on their own. They do have a 1/4” threaded tripod mount (female) if you want to attach them to anything, but if you want to mount them to your camera’s hot-shoe, you’re going to need to invest in something like the SMALLRIG Tilting Mount with Cold Shoe Adapter - I have a couple of these and they are great little bits of gear which will do the job of holding this light to your camera nicely without adding too much extra weight to your setup.
They aren’t weather sealed, so if you’re using them in poor conditions, or expect to be using them a lot in the rain, then look for a different, weather sealed option or plan ahead to make sure that you don’t get them soaked.
Ease of Use
These are really easy to use. The controls are simple, the LED display on the rear of the unit is clear, bright and easy to read. The buttons and dials on the top and side of the light are really tactile, which makes them easy to use when you’re working with limited light but might be a bit more of a challenge in cold weather or if you’re wearing gloves.
There is a mode switch on the top which cycle through the three modes, which are CCT, HSI and Effect.
CCT is Correlated Colour Temperature. The light has a range of around 2500 to 8000k and you can adjust the brightness and temperature this feature by using the wheels on the side of the unit. This will give you clean, accurate light. They are rated at CRI 96 so not too shabby in this regard, especially at this price point.
HSI is Hue, Saturation and Intensity. You can change the hue and saturation using the top wheel, which is “pressable”. Pressing the wheel in toggles between hue and saturation and you can adjust this by nudging the wheel up and down. Intensity (or brightness) is controlled using the bottom wheel. This will give you much more creative control.
Effect is exactly that. These are a group of pre-programmed settings which will create effects such the light from a TV, police, fire and ambulance lights and strobe effects. These aren’t something that I will use much as photographer, but those of you who shoot video may be able to find a use case for this. This will give you creativity and atmosphere.
These are all pretty intuitive and won’t take much learning, so ease of use gets a big thumbs up!
Battery
These come with a built-in rechargeable 1500 mAh lithium-ion battery, which charges fairly quickly and carries a decent amount of power. You can charge these with the supplied USB either hooked up to your computer or from a battery pack if you think you are going to run the battery down during a full day of shooting. I’ve been out with these for a full day and haven’t run them to empty, but this is going to be dependent on a number of variables such as the ambient temperature (they’ll not last as long in cold temperatures), how much your using them and what brightness you are using them at.
Who is This For?
The SmallRig Vibe P96L is best suited to photographers who need a compact, colour-accurate LED light for close-range work and creative lighting control. It’s a strong fit for product photography, still life, behind-the-scenes content and studio desk setups, where accurate colour rendering and quick adjustment matter more than raw power. With a CRI of 96, it’s particularly useful for photographers who want consistent, reliable colour when shooting details, textures or reflective surfaces. Its small size and built-in battery also make it a practical option for location work, travel photography and content creation, where portability and fast setup are essential. While it’s not designed to light large scenes or act as a primary key light, it works very well as a fill light, accent light or creative colour source for photographers looking to add flexibility to a lightweight setup.
Where Can I Buy Them?
I got mine from Amazon , and they cost £39.90. They are sold at wide range of photography retailers, so shop around for the best price.
Pros and Cons
Pros:
High colour accuracy (CRI 96) – produces natural, reliable colour, particularly useful for product and still life photography
Wide colour temperature range (2500K–8000K) – easy to match daylight, tungsten or mixed lighting conditions
Full RGB control – useful for creative accents, backgrounds and experimental lighting
Compact and lightweight – ideal for desk setups, travel and location work
Built-in rechargeable battery – no need for external power; convenient for portable use
Simple, intuitive controls – quick adjustments without breaking workflow
Multiple mounting options – 1/4″ thread and cold shoe compatibility increase flexibility
Good value for money – strong feature set for its size and price point
Cons:
Limited output power – not suitable as a primary key light or for lighting large scenes
Best suited to close-range use – effectiveness drops quickly with distance
Small control buttons – can be fiddly when working quickly or with gloves outdoors
RGB effects more niche for photography – some modes are more useful for video than stills
No weather sealing – care needed when using outdoors in poor conditions
Conclusion
The SmallRig Vibe P96L isn’t designed to replace a full lighting setup, but that isn’t really the point. Where it works best is as a compact, dependable and colour-accurate LED light that earns its place in a photographer’s everyday kit. The high CRI rating, wide colour temperature range and RGB control make it genuinely useful for product photography, still life work and close-range creative lighting, while its small size and built-in battery keep it practical for desk setups and location use.
If you regularly need a portable fill light, accent light or creative colour source, the P96L offers a strong balance of control, build quality and value. It’s not the light you’d reach for to illuminate a large scene, but for photographers who want flexibility without adding bulk, it’s a well-judged and versatile option that punches above its size.
If you’d like to support the blog and help me keep producing Lake District photography content, honest gear reviews and regular website updates, you can do so via my Buy Me a Coffee page. Keeping everything running smoothly takes time, and your support makes a real difference. Thank you.
The Problem with Social Media and Photography.
Social media has become deeply embedded in modern photography, but its influence is not always positive. From chasing likes and trends to comparing yourself endlessly with others, platforms can quietly shape how photographers create, edit and even value their own work. In this article, I explore the real problems social media introduces into photography, how it affects creativity and confidence, and why stepping back can sometimes help you reconnect with what matters most behind the camera.
Photography has never been more accessible — or more distracting. We’ve never shared so many images, yet spent so much time consuming other people’s.
Welcome to another blog post, can you believe it’s already Sunday evening again? Where on earth do the weekends get to?
Anyway…
I came up with this blog idea when I was writing my 10 Photobooks YOU Should Own Blog and I was typing about “On Photography” by Susan Sontag, a book in which she talks about the way in which we consume photography and how it could mean that we become desensitised to things such as the artrocities of war, how we could end up with a distorted view of the world around us. She explores the idea of control we have as photographers and also looks at how we can end up becoming people who consume life through photography instead of actually living our lives.
Strap in, I feel like this could end up becoming more of an essay than a blog entry, but we will see how we get on. I’m not even sure how long this one is going to take me to write (it’s currently 1 minute to midnight the night before the Amazon Black Friday Sale goes live and I am hoping to grab some bargain last minute Christmas gifts (EDIT: it’s now gone midnight and I was successful!), I have just finished and scheduled the photo books blog and I am trying to be productive instead of just sitting here scrolling. .
All of the things Sontag said resonated with me, especially that final point about consuming life through photographs (I’m going to include video in this as well). I think more so because I had myself just been consuming a couple of videos on YouTube about a couple of people who had brought “Brick” devices for their phones to limit the amount they are using them and to enable to break out of the cycle of doom scrolling.
This is a big bit of inspiration for this blog, alongside what I have read in Sontag’s book, coupled with some of my own experiences and those that have been shared with me by friends.
Social media is everywhere now, it has been for some time. It’s everywhere a lot of the time, because we take it with us. It’s on our phones, it’s in our pockets, it’s right in the palm of your hand, or at least within arms reach. And I’m not just talking about the obvious things such as Facebook, Instagram and X et al. I’m thinking about things like WhatsApp and Telegram, Discord and LinkedIn. I didn’t know until a few months ago when I was doing a digital marketing course that LinkedIn pre dated all of the things that I have just mentioned!
(Case in point… I finished writing the previous paragraph 15 minutes ago and that fifteen minutes has been lost because something popped up on my phone and I got stuck scrolling!)
The Internet Used to be a Place Where You Went.
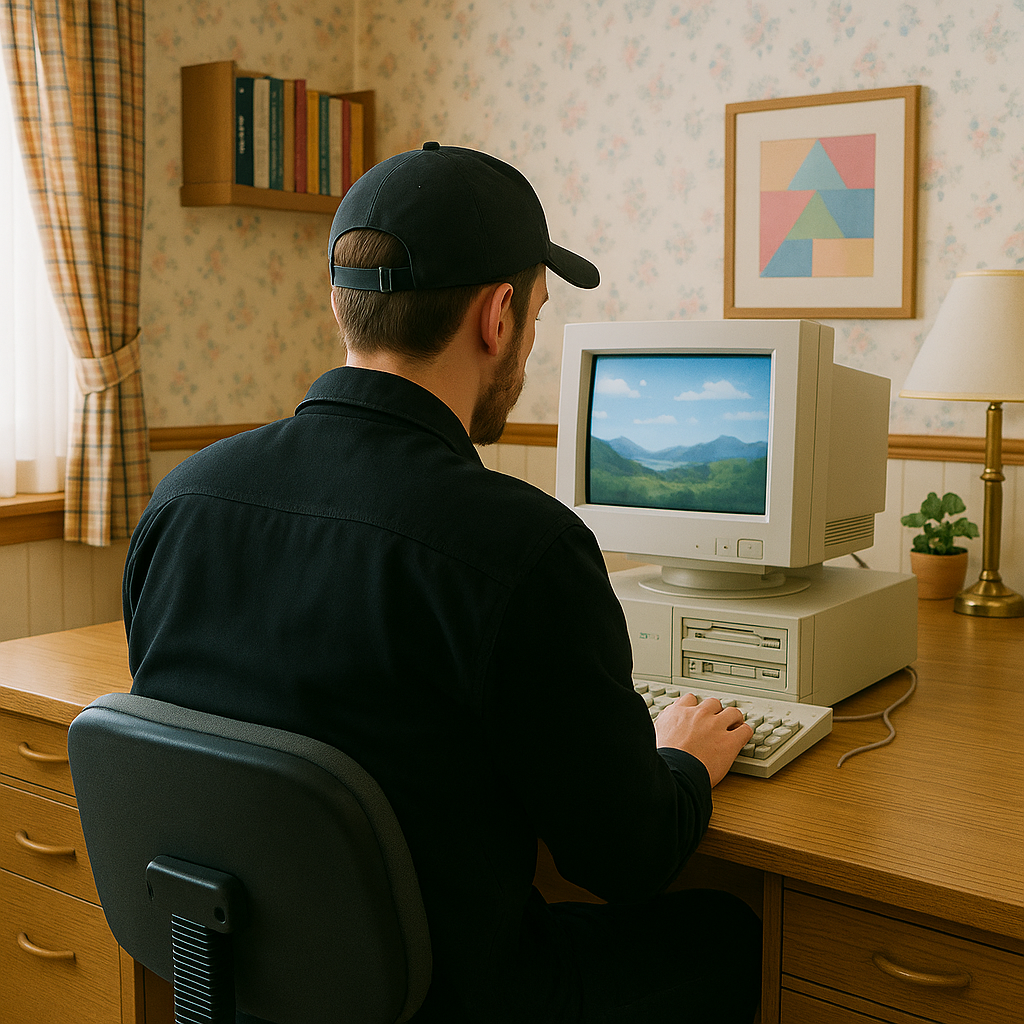
When the internet first started to take off in the 90’s, it was clear it was going to be a big thing and that it was going to be important and was going to permeate every aspect of our lives. But back then, things were very different. Computers were huge, had massive CRT monitors, sat on big console style desks and took up a lot of room in the house.
At this point in time, mobile phones were similar… they were huge and didn’t do much other than make phone calls and there certainly wasn’t any internet on them.
But back to my original point about computers.They were so big that they didn’t move easily and the chances are that it was the only internet connected device in the house. It would be parked in a corner of a room, often a lounge, sometimes an office or a dining room. This meant that you had to move yourself to go the computer to access the internet… This meant that the internet was a place that you went.
There was almost a certain kind of ceremony to it - you’d log on and then have to connect to the internet through the phone line using your dial-up modem and if it connected first time then you had the world at your fingertips and a lot of what you could access was pretty basic! As Bo Burnham put it in “Welcome to The Internet”, it was a place of “catalogs, travel blogs, a chat room or two”. And as he goes on to say in the same song, these day’s it’s “a little bit of everything, all of the time”, and that can be quite distracting, especially as photographers when we are naturally predisposed to enjoy anything that is visual.
Now We Take The Internet Everywhere With Us.
And I mean everywhere. I think most people take their phone to the bathroom with them. Long gone are the days of reading the backs of the bottles of shampoo or a discarded copy of Take-a-Break. Now, we have the entire internet at our mercy, and social media is a huge part of the internet as we know it today. Facebook alone has over 3.07 billion active users. There are 8 billion people in the world so that’ almost 40% of the population, and that means there is an absolute ton of information being uploaded to it.
Then there’s YouTube. At the time of writing, you would need approximately 18,000 uninterrupted years (yes years) to watch all of the videos that exist on YouTube (you’d better have a premium account to ensure that you’re not wasting any of your 18,000 years watching adverts! (It was originally 17,000 year when I looked 3 weeks ago: the amount of content uploaded there is huge!)
And then there’s Instagram - the app that loves us to share our photos videos in the (often) vain hope that we will get our images seen by people other than our closest family and friends.
Oh, and TikTok… this can end up being a thief of life if you let it.
And let’s not forget X (formerly Twitter).
Now depending on the way you use social media and what you are looking/watching, how you consume it and what you’re into really affects this point that I am making:
I watch a lot of photography videos on YouTube (Nigel Danson, Thomas Heaton, Henry Turner, Peter McKinnon, James Popsys etc), I also watch a lot of popular science type content and I love watching ‘Kinging It’ doing up their “Scottage”! My other vice on here is fishing videos (something else I dabble in, but am not very good at). The first and last things in this are going to help me to make this point…
I love learning, I love getting better and I love cosuming this content and hearing the stories. But whilst I am watching YouTube and looking at other people doing it, I am not out there actually doing two of the things that I love. Sure, it’s great watching others and learning from them, but you can’t learn properly yourself without making your own mistakes. I work as a music teacher in “real life”, and I know that not one of my students would get better at playing the piano just by watching me and hearing how I corrected the mistakes. They need to make their own mistakes to be able to learn how to overcome them, and the same is true for us as photographers.
I have my own strategies for managing this; I tend to watch most of my YouTube when I am working in the studio (I am watching Henry Turner as I write this), it’s usually just on in the background and I will fully engage if something piques my interest.
I am on my phone too much, I know I am, mainly on Instagram for my sins. I upload my own content and consume that of others, but it still comes down to the same point; if I’m scrolling, I’m not shooting. If I’m not shooting, I’m not learning and if I’m not learning, I am most certainly not getting any better.
Making Comparisons
We all do this, we look at other people’s work and we compare our own work to theirs. This is great if you’re doing competitor analysis, but it can be harmful to your progress and growth, especially if you’re finding that people aren’t engaging with what you think is the best photograph you have ever taken!
Then, we fall into the trap of seeing an image we like and then going out and trying to take the same image. It’s probably one we have seen elsewhere before and this serves as a bit of a memory jog for us. When we stop scrolling and go out to take our own image, we don’t think it’s as good or we didn’t enjoy the experience, or when we got there, everyone else was there trying to take the same shot that they have also seen on Instagram and now yours is just going to get lost in amongst all of the others. Now, it’s overdone and no one is bothered any more. Social media is full of a lot of noise.
If you get stuck in a scrolling-cycle, you are becoming one of those people who is consuming life through photos and not enjoying life by living it. Be the person who people want to copy, get that original shot, find the new angle on an old favourite, but you aren’t going to do that sat on your bottom, in your lounge trying to get to the bottom of Instagram/YouTube/Facebook/etc/etc/etc.
So What Can You Do About It?
This is going to feel a little bit like a PSHE lesson, so prepare yourself…
Ultimately, this will be down to you and how you think you can manage it. I’ve already mentioned that I try to limit my YouTube consumption to times when I am working on stuff like this blog or when I am editing photos. I must admit though, I do still enjoy a bit of YouTube whilst I am eating!
Scrolling is a bit more of an issue for me, especially when I am sat in front of the TV. I have made it a bit of a mission for the new year to try and scroll less and to be more present, and it’s going to take a lot of discipline and/or will-power, but if it gets too much I might try one of those Brick devices that I mentioned at the start of this blog. All of these things will, if I do them, help me to be a little more present, and it might even help my sleep as I won’t be saturated with blue light before I try and get my head down.
Remember, social media isn’t always real. In fact, I would say that it’s largely not true to life, and this is even truer with the advent of AI and the bubble that is continuing to grow. I know I have been using some AI images in this blog, but I think these ones are particularly obvious, (although they do look a little bit like me). I do it because it’s easy and I can get exactly what I need, relatively quickly. There are some very good AI images and videos that have been made by people far better at it than I am, which are really convincing (maybe not the Coca-Cola Christmas advert though!), and you need to be on it if you want to spot them.
To add to this ‘lack of reality’ (or maybe it’s a lack of truth), people only tend to share the good stuff or the exciting stuff. You don’t see the less exciting stuff, you don’t see the events that have happened that are dull or maybe to private to warrant sharing online. Don’t be sucked into thinking that someone has a perfect life - they don’t. No one does. I think people are getting better at sharing more of the less perfect things, but there’s a long way to go with this.
Instagram has moved on a great deal since the days of people uploading pictures of their dinner and it’s not just about photos anymore, in fact, it’s probably less about photos at the present moment and is very much a video-first platform, because that’s what people are more likely to engage with. The sad reality is that if you want to grow and get yourself out there on most platforms these days, you need to be creating and sharing videos.
Get out there, live your life and don’t live yours through someone else’s experiences. You’ll thank yourself for it later.
Final Thoughts
Social media isn’t the enemy. It never really has been. It’s a tool, and like any tool, it’s all about how you use it. Used well, it can inspire you, connect you with like-minded people and help you learn. Used badly, it can quietly eat away at your time, your confidence and your motivation to actually go out and make photographs.
As photographers, we’re naturally drawn to visuals. That’s what makes social media so compelling for us, but it’s also what makes it so dangerous. It’s very easy to convince yourself that scrolling counts as learning, or that watching other people do the thing is the same as doing it yourself. It isn’t. You don’t get better at photography by consuming more photography. You get better by going out, making mistakes, missing shots and occasionally getting something right.
Try to be mindful of how and why you’re using these platforms. Notice when they’re helping and when they’re just filling time. And if you catch yourself stuck in that endless scroll, remember this: every minute spent watching someone else make photographs is a minute you could have spent making your own.
Get out there. Be present. Live the moments you want to photograph, don’t just consume them through a screen. Your photography — and probably your headspace — will be better for it.
If you’d like to support the blog and help me keep producing Lake District photography content, honest gear reviews and regular website updates, you can do so via my Buy Me a Coffee page. Keeping everything running smoothly takes time, and your support makes a real difference. Thank you.
How to Overcome a Creative Rut in Photography: Tips and Strategies for Every Photographer
Every photographer hits a creative rut at some point, but it doesn’t have to stall your progress. In this blog, I share practical tips and strategies to help you break free from a photography rut, from setting yourself simple creative challenges to exploring new techniques and changing your workflow. Whether you are a beginner or a seasoned photographer, these approaches will help you reignite your inspiration, refresh your perspective, and get back to capturing images you love.
We’ve all been there. We don’t have any ideas, we don’t have the want to get up and go out to shoot and find every excuse under the sun not to go out (there’s no light, it’s raining, *insert your own here*) and sometimes, you’re just not “feeling it”. So what do you do when you’re feeling this? How could you get yourself out of it? How do you recover that lost will to go and shoot? In this blog, I’ll go through some of the things that I have done when I’ve struggled to pick up the camera.
Thankfully, this hasn’t happened to me in a long time. I’ve always loved photography since the first time I really started to do it seriously about 6 years ago, but there have been times when I just couldn’t be bothered, or simply wasn’t feeling like I wanted to. Let’s not also forget that most of us are doing this as a hobby and simply don’t always have bags and bags of disposable time to go out and shoot! Sometimes, it can be just a struggle to know what to do and where to do it.
I’ve been fortunate enough not to have ever felt like giving it up, but but under this intro, you’ll find some of the strategies I have used to get me off the couch to get out to shoot.
These tips/ideas aren’t exclusive to landscape photography, let alone landscape photography in The Lake District (which is what I talk about a lot on here), they will will work for everyone who owns a camera. You don’t need to go out and by things to help you with any of it, most photographers will have the things I talk about in this blog already. In fact in one part of this entry, I’m going to tell you not to buy gear to help with this problem!
Anyway, enough waffle. Let’s jump in…
This blog contains Amazon affiliate links and I may receive a small kickback if you make a qualifying purchase after clicking one of my links. The images in this blog are from unsplash.com and credits are at the bottom of the page.
1: Build a Shot List
I like this one because it’s free (most of us already own a pen/pencil and a piece of paper), it’s easy and it encourages you to look at other photographer’s work, or to actually go out and explore (when I am shoot planning, it tends to be a mixture of both). Doing the latter means that just in the planning stage, you are likely to go and scout the location and take the camera with you.
Come up with a list of locations and some ideas of photos that you would like to get, find some spare time in your day/week, and then head out and start to tick them off!
As with another point further down this blog, don’t plan exactly what shots you want to get - if you end up not
getting the shot(s) it makes the whole exercise feel like a bust and this could put you deeper into the rut that we are trying to escape here.
My final point about any list is that it allows you to see your progress, ticking things off as you go can help you feel a real sense of accomplishment.
2: Look at Photography Books
I have a not inconsiderable collection of photography books from a wide variety of photographers and in all manner of styles. Look at the greats and check out some newer more contemporary photographers. It’s worth looking in magazines as well. As a landscape photographer, I get Outdoor Photography Magazine every month. Other magazines are available so find which one is the one for you and try it out.
Photobooks are a bit of a double edged sword. They’re great ways to find things you want to do and maybe to find a new technique you want to try but on the other hand, they are also a great way to limit your creativity to a certain extent.
The problem is that we often see photos that other people have taken and think “I want to go and shoot that”, and you come home and you’ve got a great picture that another, unknown number of photographers have got too and can mean that in some ways, your image lacks originality. There’s nothing wrong with shooting ‘honeypot photos’, they’re great ones to have in the bag and will generally do well on social media, but they’re just not original. Look around when you’re out and find something new: be the one who’s copied, not the one who copies.
If you’re looking to improve your composition, then there are some great resources online, or take a look at The Photographer’s Eye by Michael Freeman, it’s a great resource and can give you some great ideas that you can apply to the different scenes that you plan to shoot and perhaps even some new ideas for a favourite location.
3: Challenge Yourself (a post a day/a shot a day)
There might be some days that you don’t post, and that’s ok. Just post two shots the next day, but don’t take the Mickey with missed posts - not posting for a whole month and then posting 30 photos on one day to make up for it isn’t really in the spirit of the challenge!
If you’re someone who is into social media then challenging yourself to a post a day is something you can try in order to get you out shooting. If you’re going to post every day, then you don’t need to go and shoot everyday that isn’t possible (or sustainable!) for many people, but if you like a challenge then this is something that with a little bit of effort, will ensure that you are out shooting to build up enough content to have something to post every day for a whole year.
You could try to do a shot every day, a nice (but massively expensive) way to do this could be with a Polaroid, but have you seen the price of I-type film lately? Trying to do this with colour I-type film would set you back somewhere in the order of £700!! If you don’t have money to burn then this isn’t the way to do it.
However, if you did want to shoot every day for a year, just one shot, then this can be doable, with some caveats, and gets you into the habit of taking your camera with you every day and if you need to shoot locally (see point 4 for some tips on this), then this can be a great way to start building up a fairly cohesive body of work.
4: Shoot in Your Local Area
I can already hear the cries of “but where I live is boring” or “there nothing to photograph where I live”. It isn’t and there is. You just haven’t found it yet, because you haven’t tried doing this. There is a ton of YouTube videos on this subject (usually called something like “Photographing a Boring Town”).
This can be a great way to find the interest and the beauty in the everyday. When you go out and start looking, you will start to notice the details and the compositions will start to present themselves to you.
If you have a massive camera, it can feel a bit intrusive and a bit like everyone is looking at you. Two things will help here: 1) The more you do it, the less weird it’s going to feel and 2) stick a smaller lens on the front of your camera. My 80D is a bit of a unit, but if I stick something like a 50mm, 35mm or even my pocket dispo (read my review here) on the front of it, you will reduce the size of your camera and it won’t draw as much attention to what you’re doing.
5: Come up with a Personal Project
This ties in neatly with the point above. With something like this, anything is possible, but start small. The hardest part of this can be figuring out what it is you want to do. It could be anything from documenting family life, taking photos at football matches you attend (I’m off to see the mighty Barrow AFC play in league two later and will be taking it with me), shooting around town and building your street photography skills to a still life project in the studio.
This is only going to cost you time, and it might uncover a hidden passion and could even encourage
you to step out of your comfort zone and try a style of photography that is new to you. The image for this section uses intentional camera movement (ICM), and is a fun and free way to develop a new skill and maybe find a new artistic passion in your photography.
I know it’s a bit cliché, but the possibilties for this are endlesss.
Some ideas to get you started could be:
Changing Seasons (longer term project)
Empty Streets (good for low light fans)
Everyday Objects Reimagined (Find interest and/or beauty in the everyday)
6: Take your Camera Everywhere
I mean literally everywhere. Going to the shops? Take your camera. Walking the dog? Take your camera. Driving long distance? Take your camera. Going to a museum? Take your… you get the idea.
I recently ‘found’/remebered I had a very small, very old digital camera that was given to me by a relative when she was clearing some stuff out. I am going to be taking this everywhere with me for a month to see what I can come up with and how it affects what I do. The point here though isn’t about buying new gear, it’s not about having the best gear, it’s about having your camera with you. The time when your camera isn’t with is the only time it’s useless.
It’s also likely to be the time when the best light and the best opportunities present themself to you. It will stop those “I wish I had my camera with me/if only I had my camera with me” moments and grabbing an absolute banger of a photo when you wouldn’t have normally had your camera with you can be inspiration enough in itself.
7: Plan a Trip with Photography in Mind
Pick somewhere you want to shoot. Plan a trip there. Get out and shoot. I had written this first sentence just as some placeholder text as I was planning this blog, and as reminder to me what I wanted to write when I got round to fleshing this out. Now I am looking at it, I kind of feel like it doesn’t need anything else adding to it!
Find a new location, research it, consider what shots you want to get and then go out and get them. I think with this though, and the mindset that the this blog aims to address, it’s really important not to plan your shots in too much detail. I say this because whilst it is good to have something in mind, if you don’t tick them off your list, or you don’t get the light you wanted/needed then you could well come away from a shoot like this feeling like you have failed, and that’s not what we’re trying to do here.
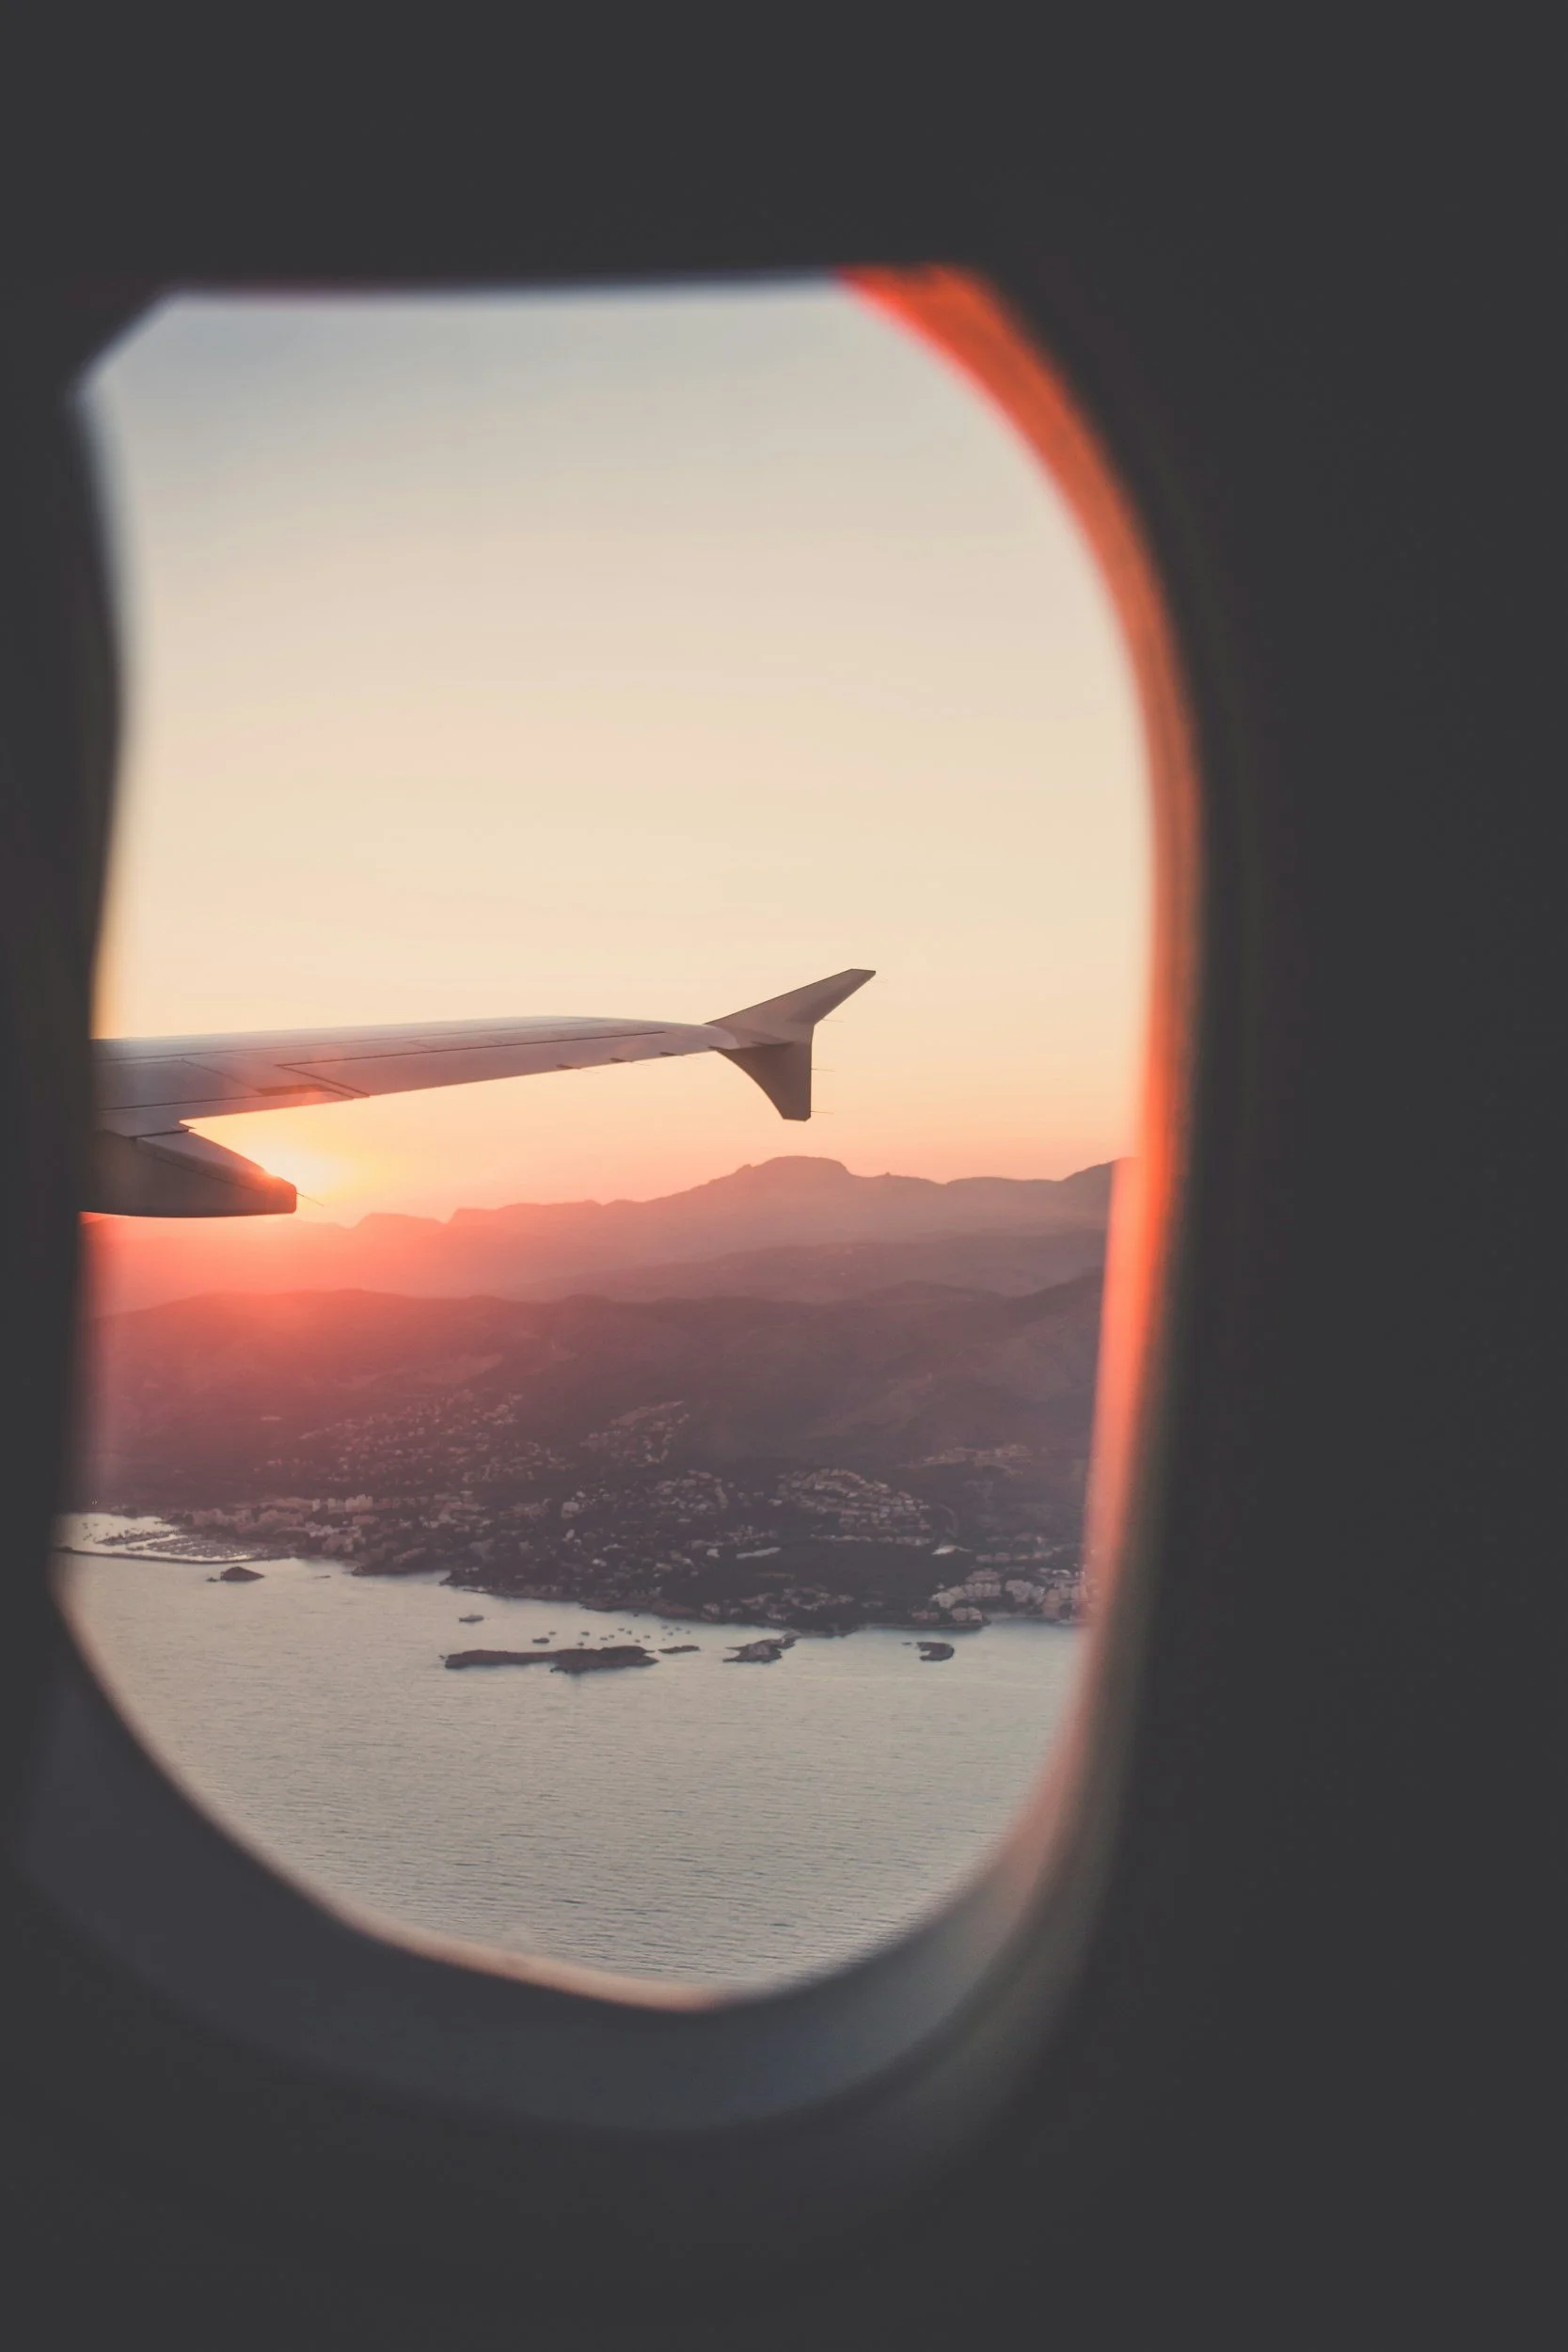
And yes, I know the image in for this entry is the view from a plane window, but this doesn’t need to be a huge trip - you could combine this with a local area project, or a longer trip that you can turn into a day out, you don’t need to get on a plane!
8: Try Something New
This one feels like it is fairly obvious.
This could be a new style of photography, a new technique or you might even decide to branch out and shoot some video if you haven’t done much of that before.
As long as it’s something new for you, it doesn't matter what you do, but have an idea and then go and try it.
Some things that you could try:
Long Exposure
Astrophotography
Intentional Camera Movement (ICM)
Taking out just one lens and sticking to that focal length. (If you only have a zoom, pick a focal length and be honest with yourself!)
9: Revisit a Favourite Spot
This is another point which I think really speaks for itself, but for the avoidance of doubt, here’s what I mean…
We all have spots that we love. These are the places that we return time, after time, after time. Sometimes we know why we go back, sometimes we don’t know what it is that draws us there, and that’s the beauty of it. I have a few places that are my go -to’s, and one of my all time favourite shots comes from one of these spots. Yet I keep going back.
I think part of it is because it looks so different at different times of the year, and the sunsets across the fells are often very colourful and seem to last forever!
It might be that your favourite spot is a real honeypot location for a particular shot and you’ve not managed to nail it yet - go back and have another go; you never know, this could be the time that you get the perfect light and everything comes together to give you the shot that you’ve been hoping for.
I think that well over 99% of the shots we take are truly once in a lifetime, so make sure you’re there to capture it.
10: Don’t Buy Gear
For me, this is one of the most important ones. You should only by gear when you need it, not because you think it will make you go out and shoot. I’ve done this before, so learn from my mistake. I didn’t learn the first time. Or the second.
It didn’t cost me a ton of money, but that’s beside the point. Every time I did this, I ended up with a shiny new desk ornament for the first few weeks as when these items arrived, they just sat unused for longer than they should do and I just ended up taking them out the next time I thought I might need them. I didn’t. These weren’t things I needed, they were things I wanted and probably because I thought they would solve my lack of motivation, and that just wasn’t the case.
Save the money and when you do need to upgrade something, you’ll already have a chunk of it there. Or save the money and use it to visit somewhere new, this is far more inspiring than having a new toy to (not) play with.
Feeling stuck happens to every photographer, but the key is to keep moving forward. If you found this guide helpful, don’t forget to save it for later and explore more of my blogs for fresh inspiration. And if you’d like regular tips, insights, and behind-the-scenes updates straight to your inbox, sign up to my mailing list. It’s the best way to stay inspired and never miss new content.
Photo Credits:
Header Image: @ryansnaadt @unsplash, List writing: @glenncarstenspeters @unsplash, Stack of books: @kimberlyfarmer @unsplash, Better Days Ahead: @carrier_lost @unsplash, Signpost: @deemoonie @ unsplash, ICM: @photoken123 @unsplash, Here the and everywhere: @jannerboy62 @ unsplash, Aeroplane window: @vorosbenisop @ unsplash, NEW Graffiti Wall: @jannerboy62 @unsplash, Instagram like: @karsten116 @ unsplash, Kid with crossed fingers: @markusspiske @unsplash
Gear Review: Canon EF 2x Teleconverter MKII
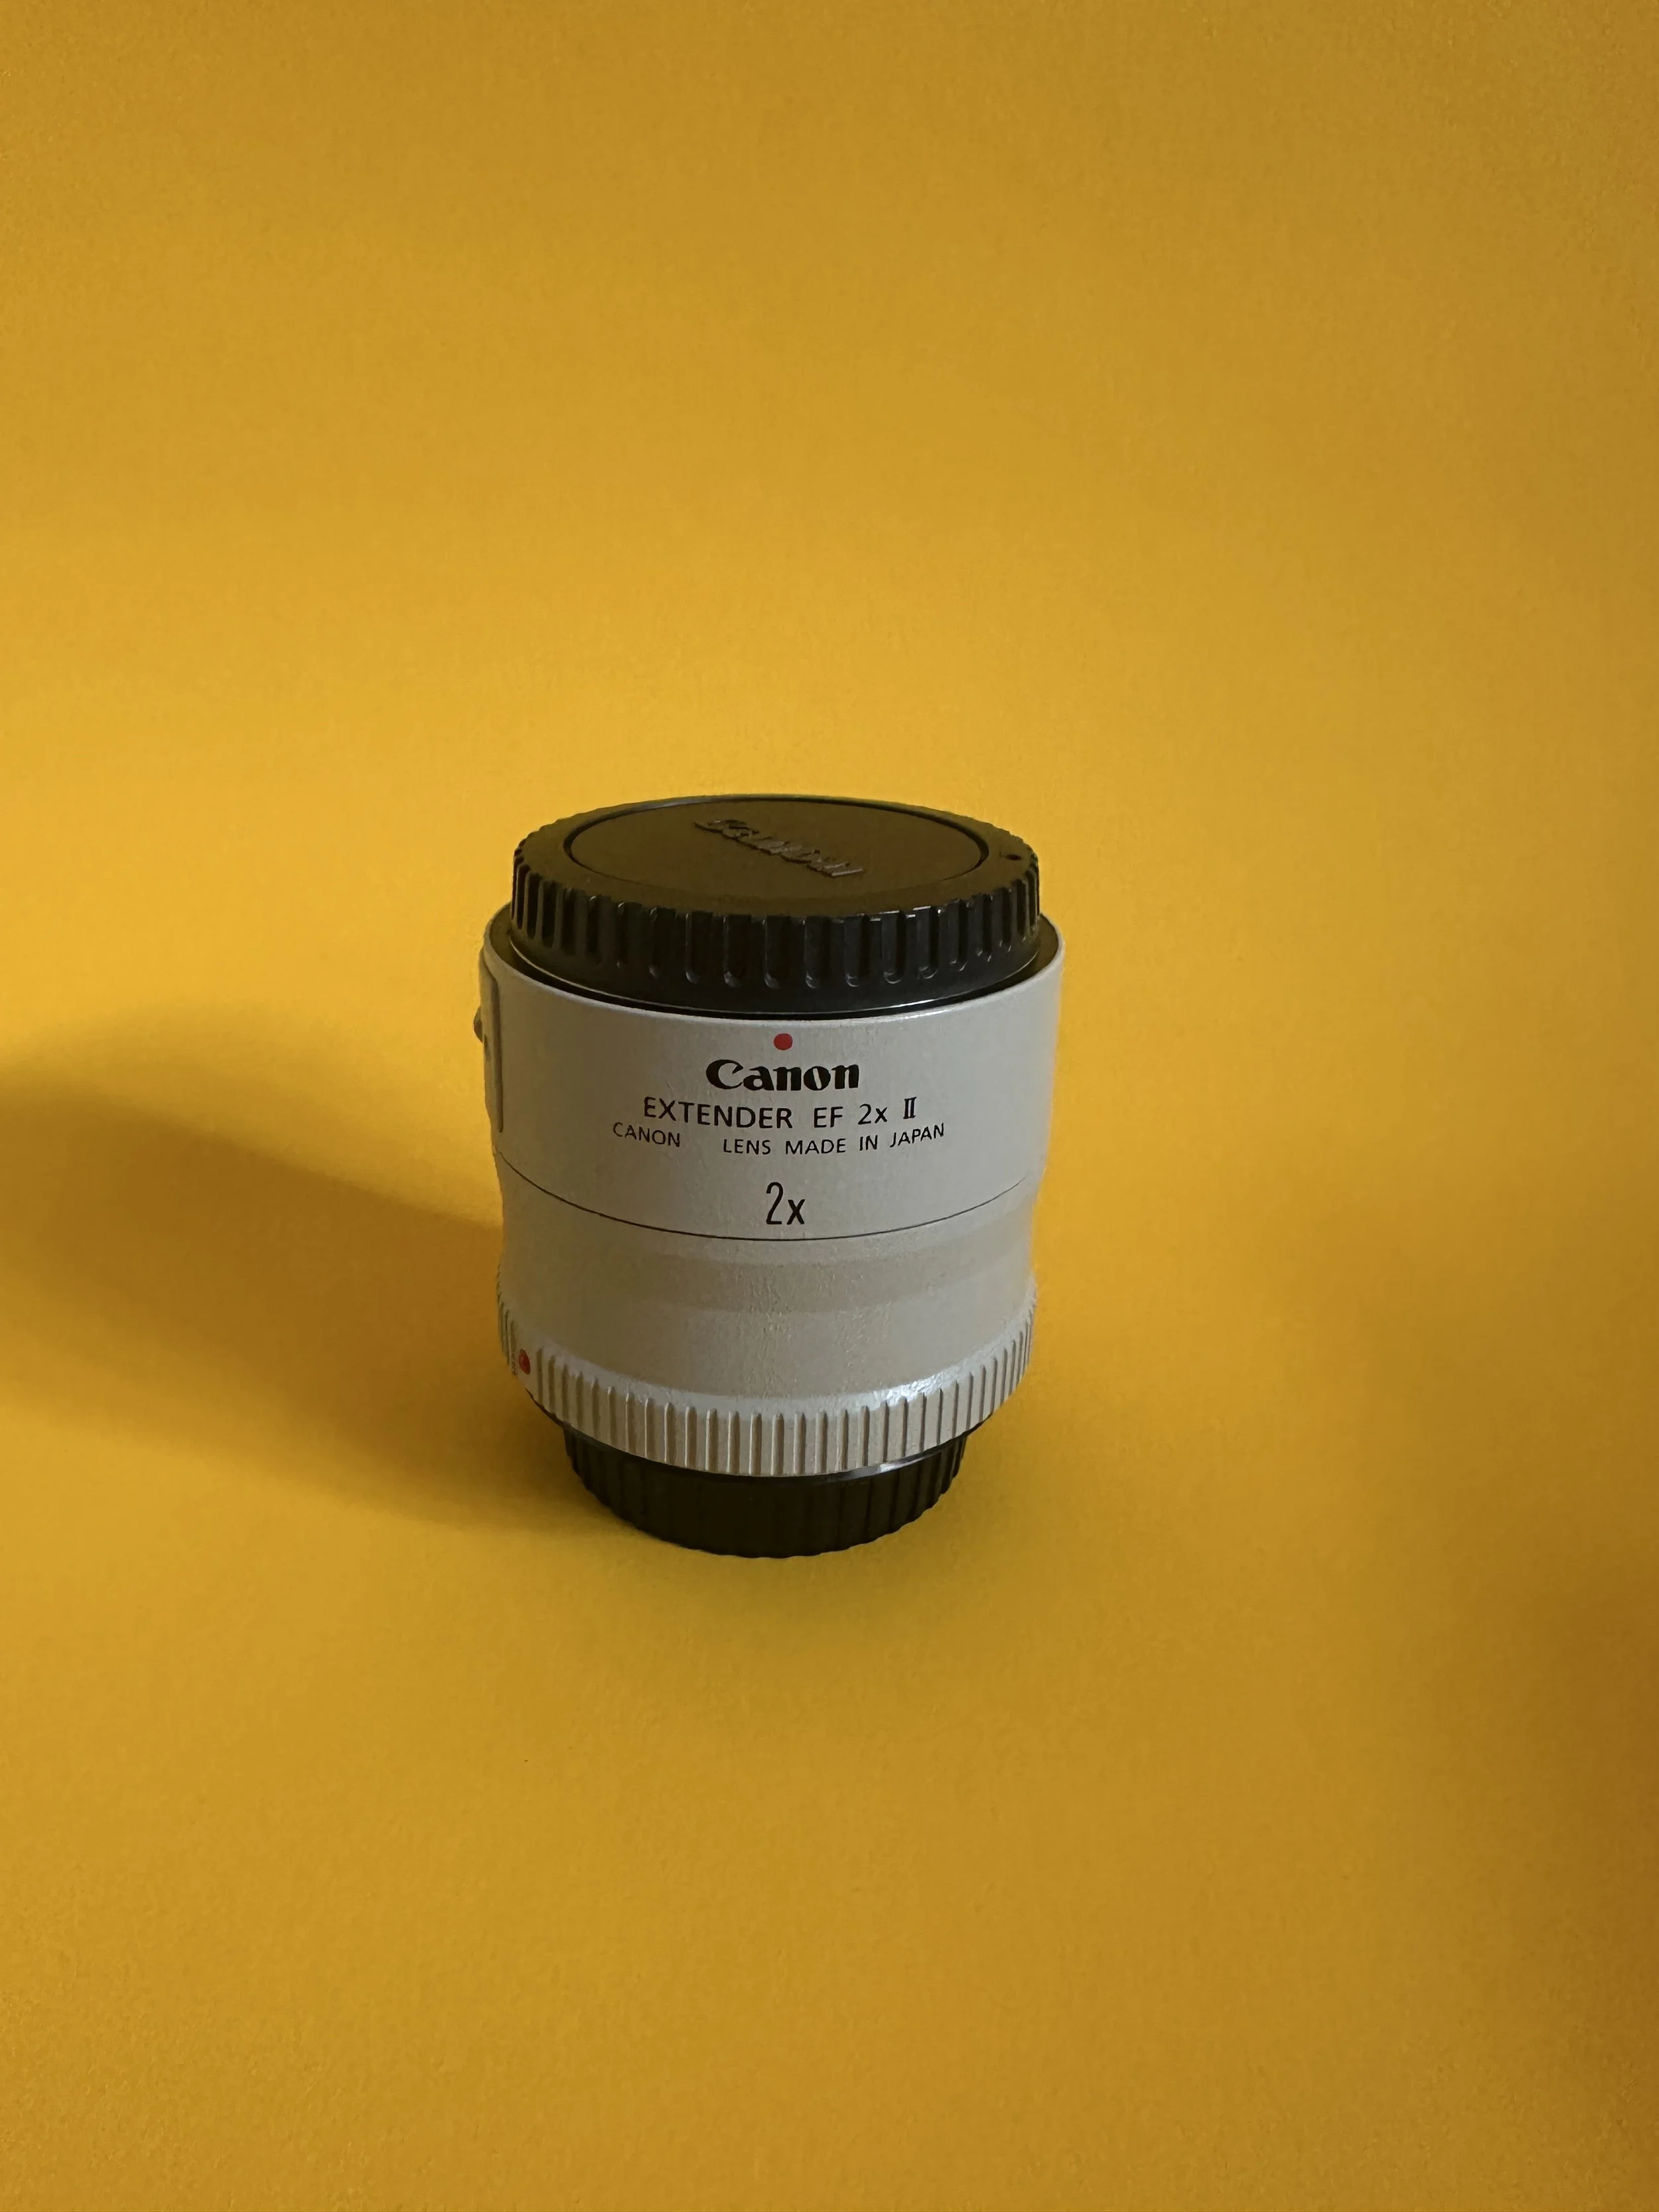
Are you looking for extra reach from your current Canon lenses without investing in a costly super-telephoto? The Canon EF 2x Extender (teleconverter) could be the answer. In this review, I explore the pros and cons of the Canon 2x Extender, how it affects image quality, aperture, and autofocus, and whether it’s worth adding to your kit for wildlife, sports, or landscape photography.
This is a review I hadn’t planned on writing as this wasn’t a piece of kit I was planning on buying! I ended up with one of these teleconverters as at the same time I was buying my 16-35mm lens, I was also looking for a telephoto zoom lens, with the Sigma 150-600mm f/5.6 being at the top of my list.
Some quick maths made me rethink this - I knew I REALLY wanted the 16-35mm f/4L, but getting the 150-600 at the same time, financially, was going to be a bit of a push and after some consideration, I decided to plump for the teleconverter and see how I got on with it. On the front of my Canon 80D which has a crop sensor, paired with my 70-200 f/4L, I can expect to have a focal length around 224-600. (Here’s the maths… (70x2)x1.6 = 224 and (2—x2)x1.6 = 600)).
We can agree this is a whole lot of reach, which is going to be great for a having a go at some wildlife which has previously been out of the range of my 70-200. I will also be able to pick out things in a landscape which have previously been a mere pipe dream and hopefully bag some great shots of the low flying jets as they pass through The Lake District Valleys.
I got mine from MPB.COM, and it’s in “Like new” condition. It set me back £198.55, which is great compared to the in excess of £800 I was going to have shell out for the Sigma. Yes, I have had to sacrifice some reach, (on a crop sensor, 800mm looks like 960mm), but I want to see how this solution works first.
This isn’t the best looking piece of kit; it’s the same off white colour we expect to see long Canon lenses come in and without the lens caps on, it’s a truly odd looking accessory.
Mine has the EF mounting system, (remember, I am still shooting with a DSLR!), and the extender comes with a solid, metal mount which firmly attaches it to the front of the camera.
There is a trade-off to all of this extra reach, namely, attaching your lens to an extender reduces your maximum aperture by 2 stops. So in my case, the max aperture my f/4 lens is going to have is f/8. I don’t mind this for two reasons - 1) I am mainly going to be using this lens in brighter conditions, so will have plenty of light to work with and 2) This lens is really sharp at f/8 so this should translate to better sharpness in the images I produce. I will share some sample images throughout this blog so you can make up your own minds!
How does it work?
Extenders, which are also referred to as teleconverters, work by increasing the magnification of your lens, and then projecting this onto your sensor. A really crude way to think of is it’s like a magnifying glass for your lens.
They come in a limited range of magnifications, usually 1.4x and 2x, though I have seen Nikon ones which have a magnification factor of 1.7x. As you’ve probably worked out, the numbers are the factors your magnification is increased by, so a 100mm lens with a 1.4x teleconverter, will have a theoretical reach of 140mm, the same lens with a 2x teleconverter will have a reach of 200mm and so on. If you have a zoom lens then the whole range is magnified by the same factor. You get the idea.
These pieces of kit however, are not selective in what the magnify. They will magnify everything in your image, which includes any grain or ISO ‘noise’ captured in your image.
What should I consider?
You need to consider what the trade-offs are. Essentially, you will be decreasing your maximum aperture and you are going to sacrifice a bit of sharpness in your final images.
Because you are effectively losing light by having the smaller aperture, you are going to have to compensate by increasing your shutter speed or ISO. You’ll need to bear this in mind when setting up your shots and consider the exposure triangle to make sure you end up with an image, which is in exposure terms, balanced. You can read about this in my blog “A Beginner’s Guide to The Exposure Triangle”.
You might lose some auto-focus functionality by attaching the extender. This so far hasn’t been an issue for me, as I have been taking pictures of landscapes in which the subject is often the light hitting the side of a mountain. Mountain’s aren’t known for being fast moving (if one does start moving quickly, then I would suggest you do the same!), but if you’re using it to shoot sport or wildlife then the amount of images you get which are ‘keepers’ will probably see a reduction compared to shots taken without the teleconverter attached.
The image on the right was taken at 400mm (640mm on a crop sensor), has had noise reduction applied alongside exposure adjustments, masking and colour adjustments. Single exposure, not focused stacked —>
Finally, you should think about what the kit is doing - it is magnifying everything your lens sees and does, so if you have a lens which suffers from, for example, chromatic aberration, this is also going to be magnified and on top this, you are going to lose some contrast as well.
First Impressions of the Canon 2x extender II.
I’ve already taken this out and stretched its legs for half an hour, the first impressions are good but I have identified a couple of drawbacks, but at this stage, nothing bad enough for me to want to return it.
I also got lucky when I was out shooting and instead of just landscapes, I was fortunate enough to see an A400 Atlas flying low level through the Leven Estuary at Greenodd, presumably on it’s way to LFA 17 at Windermere.
One of the first things I noticed was just how much more of a challenge it is to find things in the viewfinder. Especially a moving object like the A400 I just mentioned. It took me a moment to locate it and then to lock focus. I eventually succeeded and have a bagged a couple of shots I am happy with, you can see one of them on the left.
Because it was a bright evening, I didn’t need to add lots of ISO to compensate for the lack of light in now my now f/8 lens. The shot I have ended up with is sharp and because it was shot at ISO 100, it isn’t loaded with image-ruining noise.
The second shoot I went on, saw me heading over to Walney Island for sunset on a very grey evening. Ambient light was not as abundant as I might have liked it to be. Plus, it was sunset, so I was losing light by the second. This resulted in me having to bump up the ISO on my camera to 400.
When I got back to the studio, I did notice the images I had shot using the teleconverter were suffering from more noise than the same images shot on their “native” counterparts. I will point out this wasn’t a lot of noise, but was still more than I could see on the non-extender version.
Prior to the advent of effective noise reduction software/algorithms, this would have been much more of a problem than it is in today’s post processing world. I used Lightroom’s noise reduction panel to get rid of some of this and it did a pretty good job. All of the above being said, the loss of saturation, whilst not catastrophic, did (in my opinion) make the raw files harder for me to edit effectively and I felt like I had lost some of the flexibility I would normally have.
Something else I noticed was having this lens on my camera made it much heavier, so much so, the ball-head on my tripod was really struggling - I would get a shot framed up and then tighten up the ball head, all for it to “drop” when I wasn’t supporting the weight of the camera/lens/extender combination. I have to admit, this could also be a limitation of my tripod and an unfair criticism of the extender, but I had no issues when I was using my 16-35mm or my 24-105. I am going to try a different ball-head before I reach the decision about how often I might want to shoot with it on a tripod, but if you’re using a longer lens which comes supplied with a collar, then using this is a must to help you to balance the weight of the camera against the lens/extender combination. I will update this entry if I manage to solve the problem.
Who is the Canon EF 2 extender for?
I would recommend this to anyone who is wanting to try shooting at much longer focal lengths, but who isn’t ready to spend the money on a good quality super-telephoto lens just yet. There is a big saving to be made if you buy second hand and it can be a good way into trying your hand at genres such as sports and wildlife.
Another thing I would say is this lens is for someone who already owns some good quality glass to put in front of it; if you’re shooting with a lens which you know has some serious flaws then the teleconverter isn’t just going to make your lens longer, it is also going to amplify the imperfections in your lens. These are going to be painfully obvious to whoever is looking at your image. I am lucky to have a full set of Canon L Series lenses which are really high quality, but I also know the characteristics of each of them meaning I know what to look out for when using the teleconverter and this can help me to mitigate any issues before they have a chance to become a problem in the edit.
Pros and Cons
Pros:
Lightweight
Small(ish) form factor means it’s likely to fit somewhere in your bag.
A cost effective option for people who want to try shooting at longer lengths but who don’t want to shell out hundreds of pounds on a huge lens.
On crop sensors, you end up with “extra” reach owing to your sensor’s crop factor.
Cons:
Loss of stops of light owing to the max aperture of the lens caused by adding the extender.
Amplifies everything, including grain and chromatic aberration.
Some loss of contrast and sharpness in final images.
Summary
If you’re considering making your first foray into genres which require more reach, but don’t have the money to buy the long lens then this could potentially be a safe middle ground. If you’re really into low light photography then you might find the reduction in aperture to (in my case) f/8 to be too constraining. If you’re considering the purchase, then it’s helpful to start by having good lenses which you really understand as any imperfections created by the lens are going to be amplified by the converter.
I think this has been a good purchase for me, it’s opened a world of new compositions, particularly when I want to shoot things I can’t get close enough to in order to create my desired composition. It has given me some more flexibility, perhaps enough to get 2 or 3 extra compositions per location I visit, but I do think this means sacrificing some sharpness and saturation, but not so much to make the ‘project’ a write off.
Will I use this forever instead of buying a dedicated super-telephoto zoom lens (or if I’m feeling flush, a prime - £10,000 for the Canon EF 400mm f/2.8 prime anyone?), probably not. But I am happy enough with the results for the time being which means I am going to have a lot of fun creating something different to my normal shots for many months to come!
Lake District Photography Itinerary: The Best 3-Day Trip for Stunning Shots
Planning a short break in the Lake District? This 3-day Lake District itinerary is perfect for travellers who want to experience the very best of Cumbria’s landscapes, lakes, and fells in just a long weekend. From hiking iconic Wainwrights to exploring charming villages like Keswick and Ambleside, and photographing world-famous beauty spots such as Ullswater, Buttermere, and Derwentwater, this guide is packed with must-see locations and practical travel tips. Whether you’re a keen landscape photographer, a casual walker, or simply here to soak in the views, this Lake District travel plan helps you make the most of 72 hours in one of England’s most breathtaking national parks.
Visits to The Lake District are often far more fleeting than you might want them to be, especially given that a lot of us are working full time and stays often last just a few days. I’ve been living here and photographing the eternal beauty of this place for over two years now and have used some of this time and the benefit of my experience to create a 3 day photography itinerary for this incredible part of the world, so that you can grab some social media worthy shots whilst exploring the dramatic landscape this place lays out right in front of us at every single turn.
I’ve worked this into a three day itinerary, but it doesn’t need to be done over the course of three consecutive days. You might want to cram all of these into one trip, but could just as easily spread these out over the course of a week, or over several visits, the choice is yours!
What I have tried to do here is to combine some easy what I like to call “walk up shots” where you can park up and walk the shortest of distances to the car, with some longer walks and more interesting terrain.
As with many of these blogs, it’s essential I give you some of the key safety information, especially if you’re travelling alone. Always make sure someone knows where you are, where you are going what time you expect to be back. Mobile phone and battery pack should be charged before you set off, your head torch should be charged and packed even if you think you might not need it - especially if you’re cutting it fine to get back before nightfall and if you’re out in the hills, you must have your map and compass with you. Appropriate footwear, clothing and enough water are also a must. If you’re trying to plan and you’re not sure where to start, my blog about Must Have Apps for Photographers will come in handy!
So what about the photos? What about the locations and what about the subjects? I’ve laid this out in 3 days below, do them in any order you like, do them in one weekend or one week or spread them out over the course of a few weeks or even across the year, the choice is yours.
Day One - Angles and Structure
Sunsrise: Derwentwater.
One of the smaller major lakes in the The Laker District, it’s in the northern part of the National Park and is really close to Keswick. Derwentwater is over looked by Catbnells and Skiddaw, and at just over 3 miles long, it provides homes to kingfishers and otters as well ospreys over the summer before they head south to overwinter.If you head into the surrounding woodlands, there’s a good chance of seeing a red squirrel or two. Sci-fi fans may recognise parts of the landscape from Start Wars - the scenes on Takodana were filmed at Derwentwater.
<— LEFT: The view from Surprise View, Keswick.
There are plenty of photo opportunities dotted around the lake, but head to The Theatre by The Lake for sunrise. From here you can shoot back towards Catbells. This is a popular spot amongst photographers shooting the sunrise, so get here early to secure a good spot! Head to Crow Park for this one, what3words //////driveways.trails.teachers will get you in the rough area, you’ll just need to fine tune a little bit when you arrive.
When you’ve captured your sunrise shot, there will be a bit of time to explore Kewsick, plenty of good places to eat and relax here, as well some great outdoor shops if that’s your thing. If you are looking for a spot for lunch, then The Round is fantastic - amazing burgers and cocktails (if you like them!), but you can’t book and just have to turn up - good luck!
During the Day: Around Keswick and Derwentwater.
Suitably refreshed, the next stop on your itinerary is Ashness Bridge (what3words ///nation.custard.reinvest), a short drive from where you were for sunrise. This is an iconic Lake District Location and is one of the most photographed packhorse bridges in the entire national park. These were built for horses carrying heavy loads to enable them to cross the water.
You might want your ND filters for this location, it looks great with some motion captured in the water, especially if the water levels are good following the rain (we get a lot of that up here)!
Once you’ve visited here, you should head up the road to Surprise View (what3words ///heartened.coconut.cork. - this will get you to the National Trust Car Park, the viewpoint is a 30 second walk from here) This is an incredible location over looking Derwentwater, with Bassenthwaite lake in the distance. The views over the Borrowdale are amazing, and were popular with the Victorians and the Romantic Poets. Take care, there isn’t a safety rail, but there is a huge steep drop.
Sunset: Friar’s Crag.
Once you’re done at Surprise View, you can start to think abuout sunset and I am recommending Friar’s Crag for this. You can find the location at ///itself.surcharge.truck. We’re headed back to The Theatre by The Lake for the start of this one, walk past with the theatre on your left, keep the lake on you right and head towards the end of the tarmacced road, when the tarmac runs out, follow the track until you reach the bench at the end and hopefully you’ll be rewarded with some amazing golden hour light as the sunsets and you look across the lake towards Catbells.
Top tips for day one:
Pack your ND filters to help manipulate your exposure times, especially at Ashness Bridge and make sure you have your polarisers to deal with the reflections coming off the water. You’re probably going to want a tripod and I’d recommend both a wide angle and a zoom lens so that you can experiment with as many compositions as you want.
Day 2 - Mountains and Panoramas.
Sunrise - Buttermere.
We’re heading southwest from day ones adventures and to the Beautiful Buttermere. There’s a bit more walking involved today, as the parking isn’t quite as handy, but the views are well and truly worth it. You’ll also need to cross your fingers for a calm morning. Buttermere on a still morning is renowned for its mirror-like reflections, which are a photographers dream.
Park at the National Trust Car Park (///promises.parsnips.smoker), and then it’s a bit of a walk down to the lakeshore. This should take you about fifteen minutes, some of which is on the road with limited footpaths so dress accordingly and make sure you can be seen.
Once you’re by the lake shore, the walk is very easy and nice and flat, if a little boggy underfoot at times. Head for the lone pine tree for a classic Lake District Composition with Fleetwith Pike in the Background. If you’re there in Spring/Summer then head for the bluebells for an extra pop of colour.
You’re surrounded by mountains at this location, with Haystacks, Fleetwith Pike, and High Stile all beautifully reflected in the water.
Once you’re by the lake shore, the walk is very easy and nice and flat, if a little boggy underfoot at times. Head for the lone pine tree for a classic Lake District Composition with Fleetwith Pike in the Background. If you’re there in Spring/Summer then head for the bluebells for an extra pop of colour.
Buttermere in the depths of Winter —>
You’re surrounded by mountains at this location, with Haystacks, Fleetwith Pike, and High Stile all beautifully reflected in the water.
Once you’re done with your sunrise shoot, circular walk around the lake is a lovely one to get under your belt before heading into the village for a cup of tea, or something stronger if that’s your thing (and you’re not driving!) and something to eat before you move on.
Daytime - Honister Pass.
A word of warning, that if you’re not a confident driver then this might not be for you. Some of the roads are very steep, very narrow and very windy. Pay attention to the weather forecast, if it’s snowy or particularly consider whether or not you actually need to drive along it - opportunities to take photos will be there tomorrow, make sure you are too! Take your time, drive within your limits and make sure you’re looking well ahead of you.
Now that the serious stuff is out of the way, this is a great road to take photos on - there are sweeping views across the Lake District Fells and valleys, and you can also spend some time at the Honister Slate Mine, learning about the rich history of slate mining in the area.
Having your long lens in this area is going to help you get some great compression and layers into your shots. There are places to stop and get out to shoot/walk to find compositions, but be considerate of other road users, your own safety and especially considerate of the farmers who work their sheep in these hills - don’t block their gates or the entrances.
You’ll see plenty of small, picturesque waterfalls as you drive along this picturesque mountain pass, if you’re stopping to take pictures then the above rules still apply.
Herdwick sheep roam freely in this area and they make great subjects, but they aren’t renowned for their knowledge of the green cross code, so make sure you’ve got your wits about you!
Sunset - Wastwater
England’s deepest lake, with an average depth of around 80 metres. It’s bordered by Scafell Pike, England’s highest mountain )at its northeastern end), but parts of the lake are below sea level - it’s got both extremes all in one beautiful location. The view is so beautiful that it won a public vote in 2007 to be named as Britain’s Best View.
You’re going to want to follow the road along the western shore of the lake, where you can scout for compositions. Favourites look towards the north with Scafell Pike looming large in the background, Great Gable being frame across the lake and the screes on the steep slopes, which have been formed by millions of years of geological activity.
You’ll usually find Wast Water much quieter than spots like Windermere and Derwentwater owing to its much more remote location.
Top tips for day two:
Check the weather to see if you’re in luck with a calm day at Buttermere, if not, pack your ND filters to try and smooth out some of that water and to get some movement in any clouds. Pack some variation in your lenses - wide angles to capture some stunning pano’s and dramatic shots and then something longer to get some compression in layers in the shots along Honister Pass.
I’d rely recommend doing the circular walk around Buttermere. The views are incredible and that walk is a great way to find more compositions and work up and appetite for some cake in the village!
Day Three
Morning - Rydal Water and Rydal Cave
Park in the village and follow the signs! The path to Rydal Cave is well way marked and provides great views over Grasmere, Rydal Water and Grasmere village.
This is not natural cave, but was made by quarrying in during the 19 Century and were part of the Loughrigg Fell Slate Quarry, which provided stone for building.
Inside the cave you’ll find a cathedral like structure which provides a home for bats, the water in the pool makes an idea home for frogs and newts if that’s your kind of thing.
The water inside the cave can be crossed by stepping stones, which create a great leading line, but if you want to shoot this, go off season or when you can see it isn’t busy. This cave is not a hidden gem, and as such it does get very busy, especially during peak tourist season.
Looking out of the cave, lots of the surrounding vistas can be framed in an almost window-like composition, using the cave entrance as a natural frame.
Once you’re done here, I would recommend heading down into Grasmere village and getting in the queue for gingerbread - I can almost guarantee it’s the best gingerbread you have ever tasted, all served by people in traditional costume!
Daytime - Tarn Hows
Once you’ve filled up on Gingerbread, hop in the car for a drive of around 20 minutes to Tarn Hows. The closest car park is at National Trust Tarn Hows. Free parking here if you’re a national trust member. There’s a lovely circular walk here and it looks amazing during the autumn. It’s about 1.5 hour walk around the water with compositions aplenty and some great reflections if you catch it in the right weather.
Once you’re done here, you can head back into Grasmere or can choose something different and head to Ullswater.
Sunset - Choose from Grasmere or Ullswater
Time to catch that final golden hour! Your choice here is between a 30 minute drive back to Grasmere or you can opt for a longer drive (around an hour) up to Ullswater at Pooley Bridge. My preference here is for Pooley Bridge, especially if you’re leaving the area to go home as it’s much close to the M6 and to the Rheghed Centre, where there is a place which sells the most incredible ice cream (the rhubarb and custard is my favourite, or if you’re feeling adventurous, how about brown bread and lemon curd?!).
The sunsets at Ullswater are incredible if the conditions are favourable, and stopping in Pooley Bridge puts you in amongst a lot of amenities, including pubs and restaurants as well as small number of other shops.
The famous composition here is The Duke of Portland’s Boathouse, it looks great in the golden hour light, but the views across the Far Eastern Fells (including Arthur’s Pike, Bonscale Pike, Loadpot Hill, Hallin Fell, and Place Fell) are fantastic and the people using the lake for paddle-boarding, swimming, boating etc. can provide a real sense of scale and drama in your images.
Once you’re finished shooting, I would say that after today, you have definitely earned a spot in one of the local hostelries (you’ll need this if it’s winter as it gets really cold!) and a bite to eat before you head home for the day.
<— Paddle-boarding at last light, Ullswater; this image is available to buy as a print in my shop
Final Words:
So there you have it, a 3 day photography itinerary for the Lake District, which you can complete all in one go, or split across several days or visit to The Lake District. I have listed some of my favourites in here, so I hope you have found this useful and that you enjoy making images in this incredible landscape just as much as I do.
Street vs. Landscape Photography: A Personal Perspective
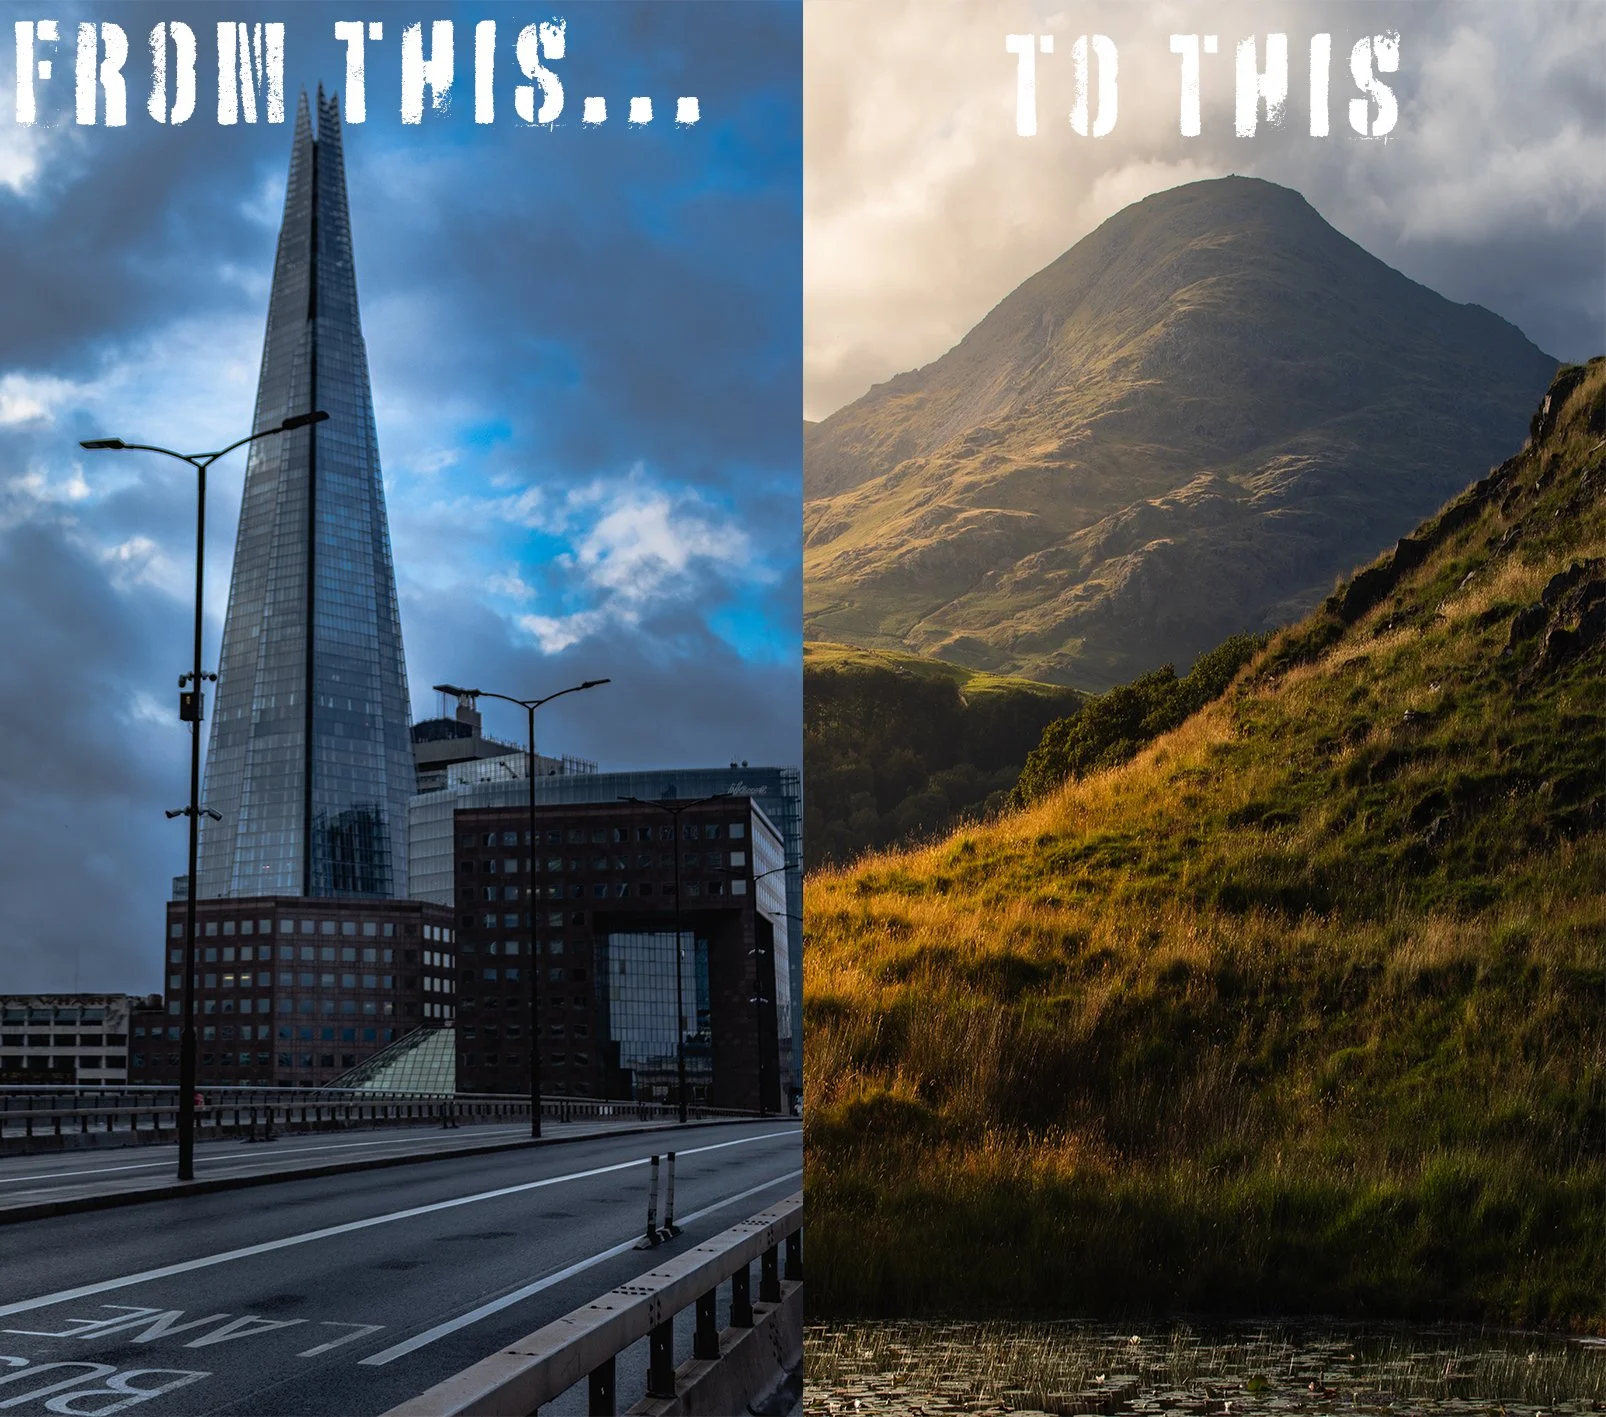
Moving from London’s bustling streets to the wild, open fells of the Lake District has transformed the way I see and capture the world through my camera. In this post, I share what I’ve learned making the shift from street photography to landscape photography — from mastering natural light and adapting composition techniques, to preparing for unpredictable weather and refining my gear choices. Whether you’re curious about photographing in the Lakes or looking to adapt your city skills to the countryside, you’ll find tips, techniques, and personal insights from my own journey.
Moving from London’s bustling streets to the peaceful landscapes of the Lake District transformed my approach to photography. In this guide, I share practical tips for making the shift from street photography to landscape photography, including composition techniques, gear recommendations, and how to work with natural light.
It’s been almost 2 years since I made the move from London to The Lake District, and in that time I’ve had to learn (and will continue to learn) a lot about landscape photography, what it is, what it means and how to capture successful images. In this blog, I am going to break down some of the things that I have learned, some of the stuff that I have changed and what has had to stay the same as I continue on this landscape photography path in The Lake District
One of the things that I have learned, is that I need(ed) to adapt what I was already doing. As with so many things, there are a lot techniques, “rules” and conventions that apply to the landscape photography I do now in Cumrbia, that were also important things to remember in street and cityscape photography.
I am aiming to break down some of these below; I hope you find it interesting and maybe learn something as you read!
This blog contains Amazon affiliate links and I may receive a small kickback if you decide to make a purchase using one of them.
Light is Key - Lessons from The Lake District.
Yes, light is key to both styles of photography, but (in my opinion, and certainly in the way I work) you see it and use it differently. Perhaps, for me, a big part of this is that I shoot far less in low light now. There’s not a whole lot to photograph in the hills at night time unless you’re an astrophotographer (something I am yet to have a ‘proper’ go at), or you love super long exposures!
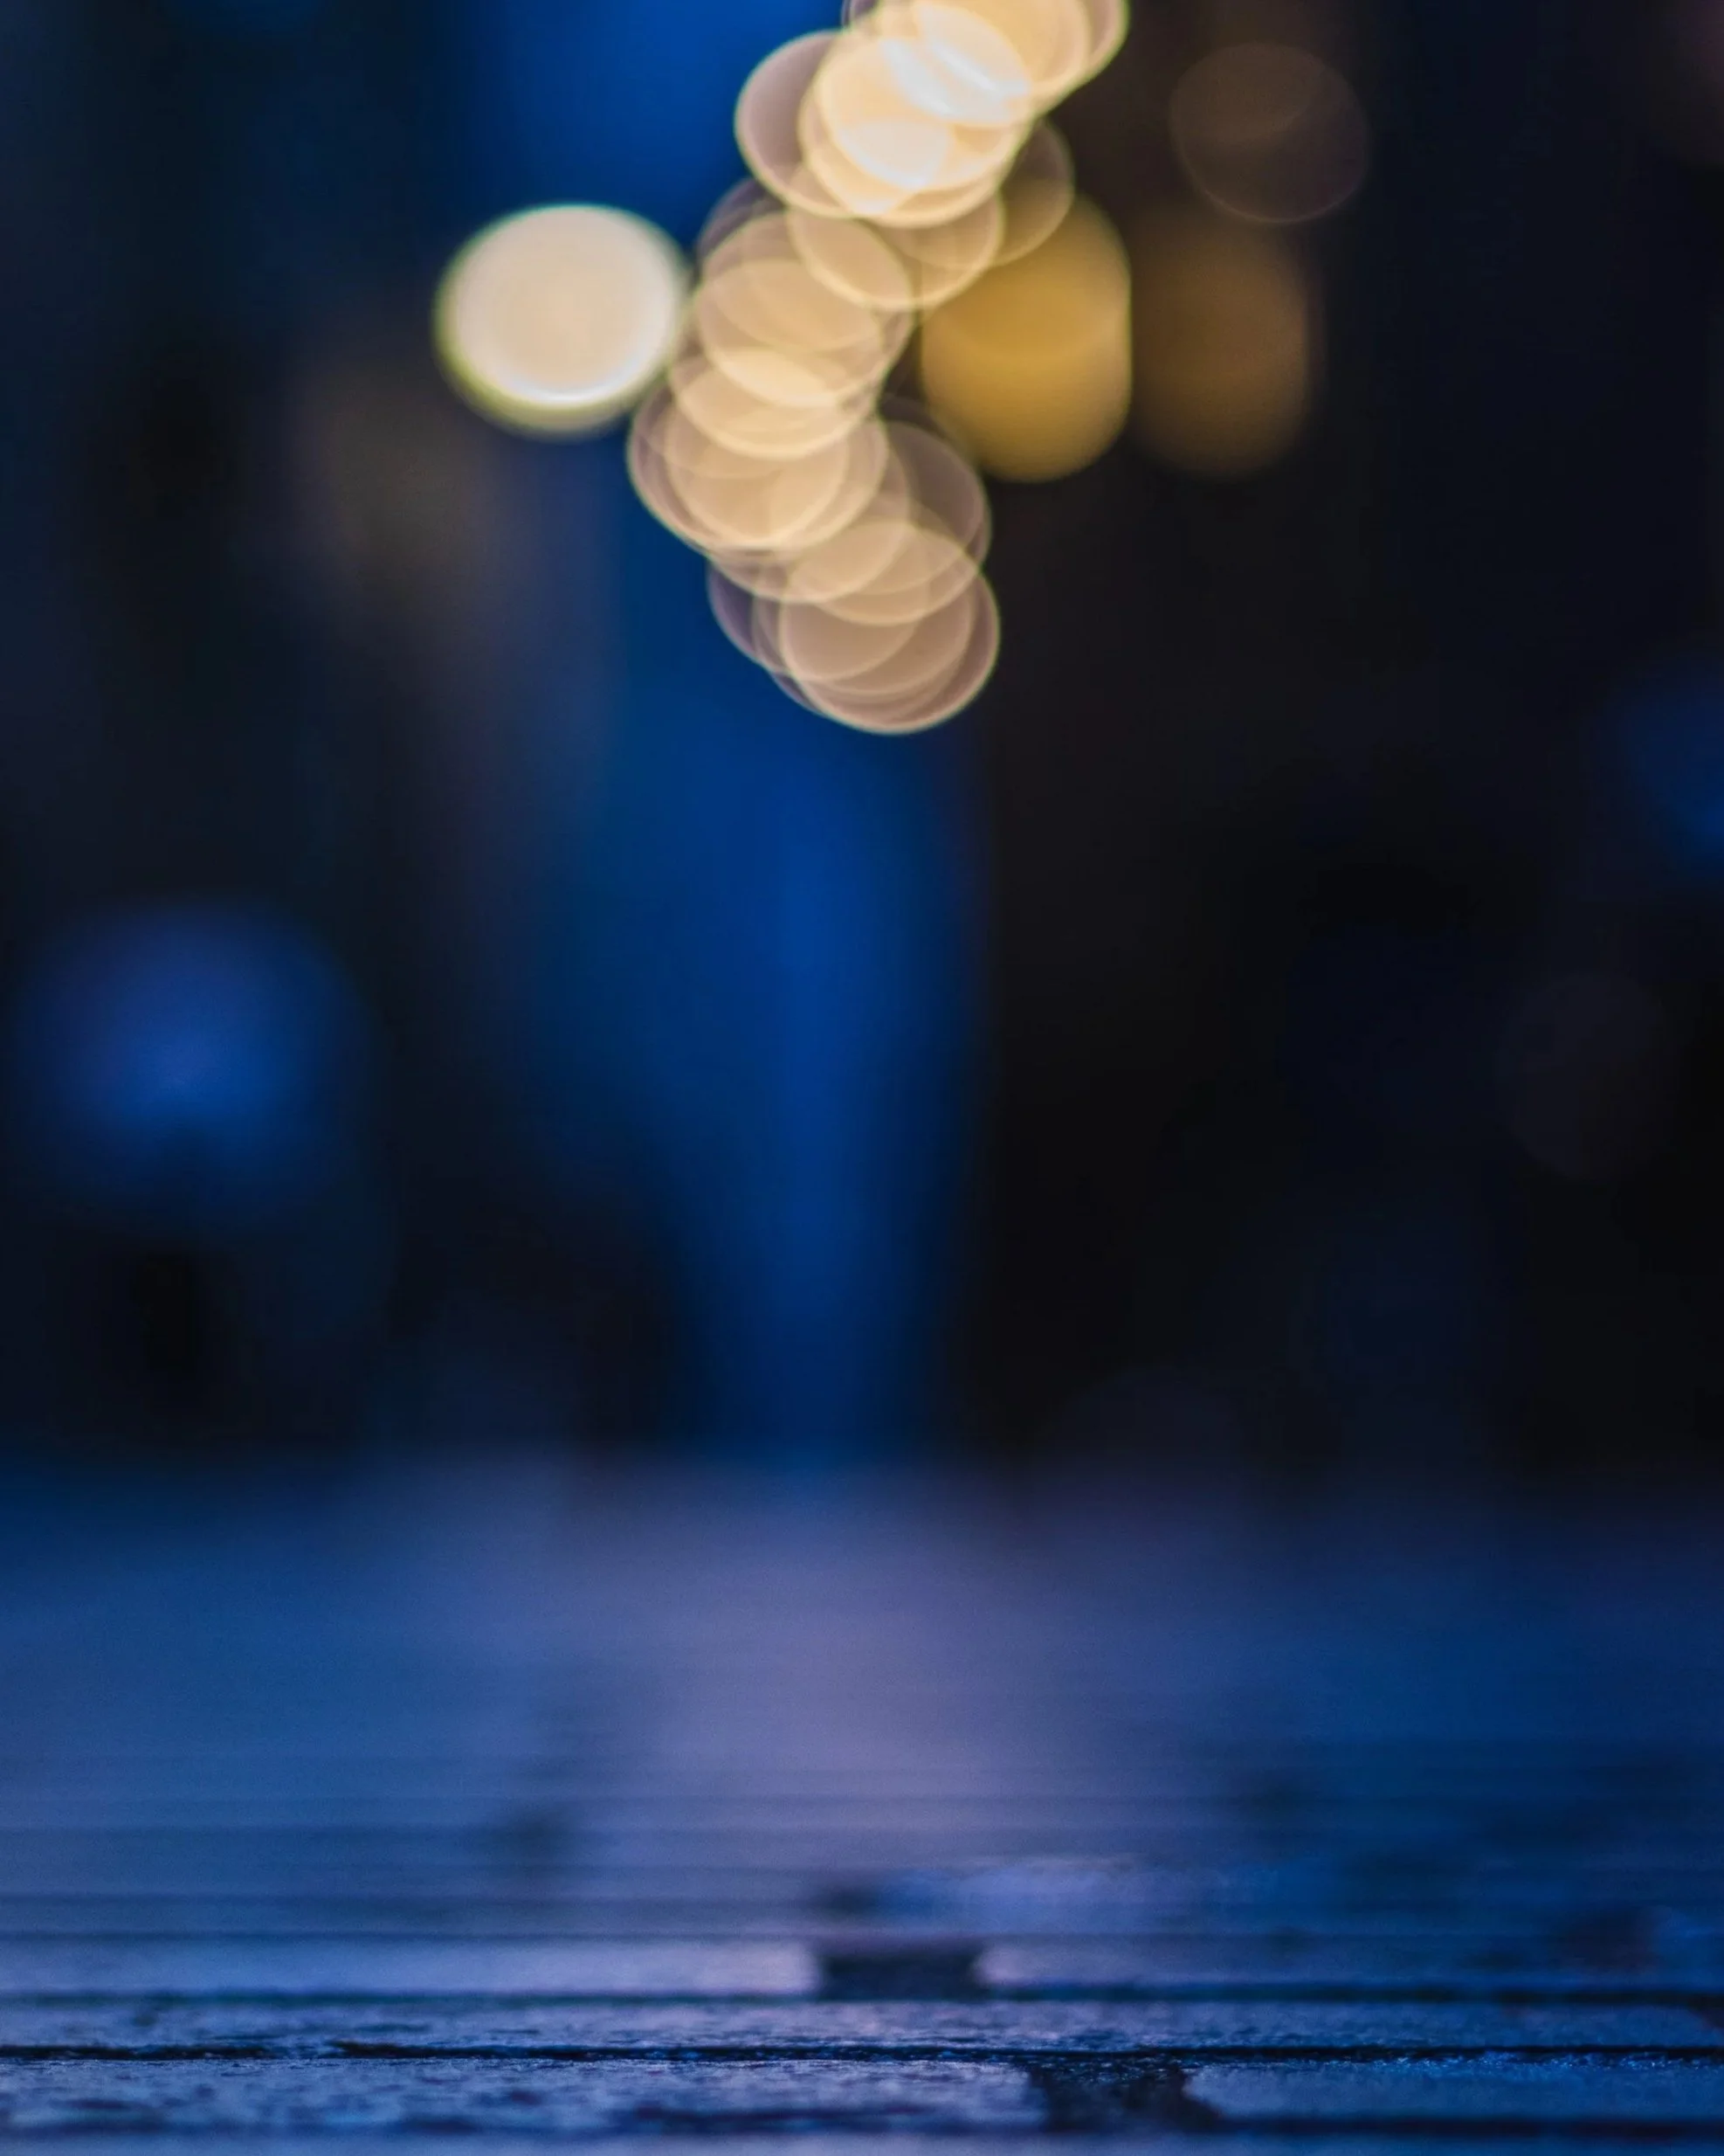
For me, the biggest difference in how I use light, is that when I am doing landscape photography in the Lake District, the light becomes the photograph, it is the subject and it is what generates a lot of the interest, especially when it’s dappled sunlight across the Fells. In my days shooting in the city, I used it in a different way, often finding interesting coloured lights and then using really wide apertures to force these out of focus to create wild bokeh style backgrounds, usually with interesting foreground texture (more on foreground later), often by the way of drain covers, or leading lines.
Golden hour, and blue hour, are important to both styles. Golden hour, the period before sunset and the period after sunrise, and blue hour, the period after sunset and before sunrise, often provide some of the ‘best’ light for both styles of imagery. In the city, I used it to photograph buildings, in the landscape, I use it to photograph entire scenes, or parts of them.
Many photographers see this as the ‘best’ light, but it does mean, especially as a landscape photographer that you are subjecting yourself to super early starts or late nights, waiting for it to arrive.
Harsh light, i.e. when the sun is high in a clear sky can make landscapes much more of challenge, whilst street photographers will likely see more opportunities with this kind of light, which creates strong, harsh shadows can make for some really interesting compositions, but because of the way that the landscape photography environment is made up, these opportunities are often fewer and further between.
Ultimately, and this feels like a bit of a cop-out, you have to be outside to experience any kind of light, you make your own opportunities, and you can’t shoot any images in good or bad light, if you’re sat in the house!
Composition in Landscape Photography vs Street Photography.
This could, and probably should be a blog all of its own, but I will ‘quickly’ touch on some of the similarities and differences that I have found whilst making the switch, this isn’t a ‘how to’ guide, but will look at some of the similarities and differences which have affected me as someone making the switch into predominantly landscape photography vs street photography.
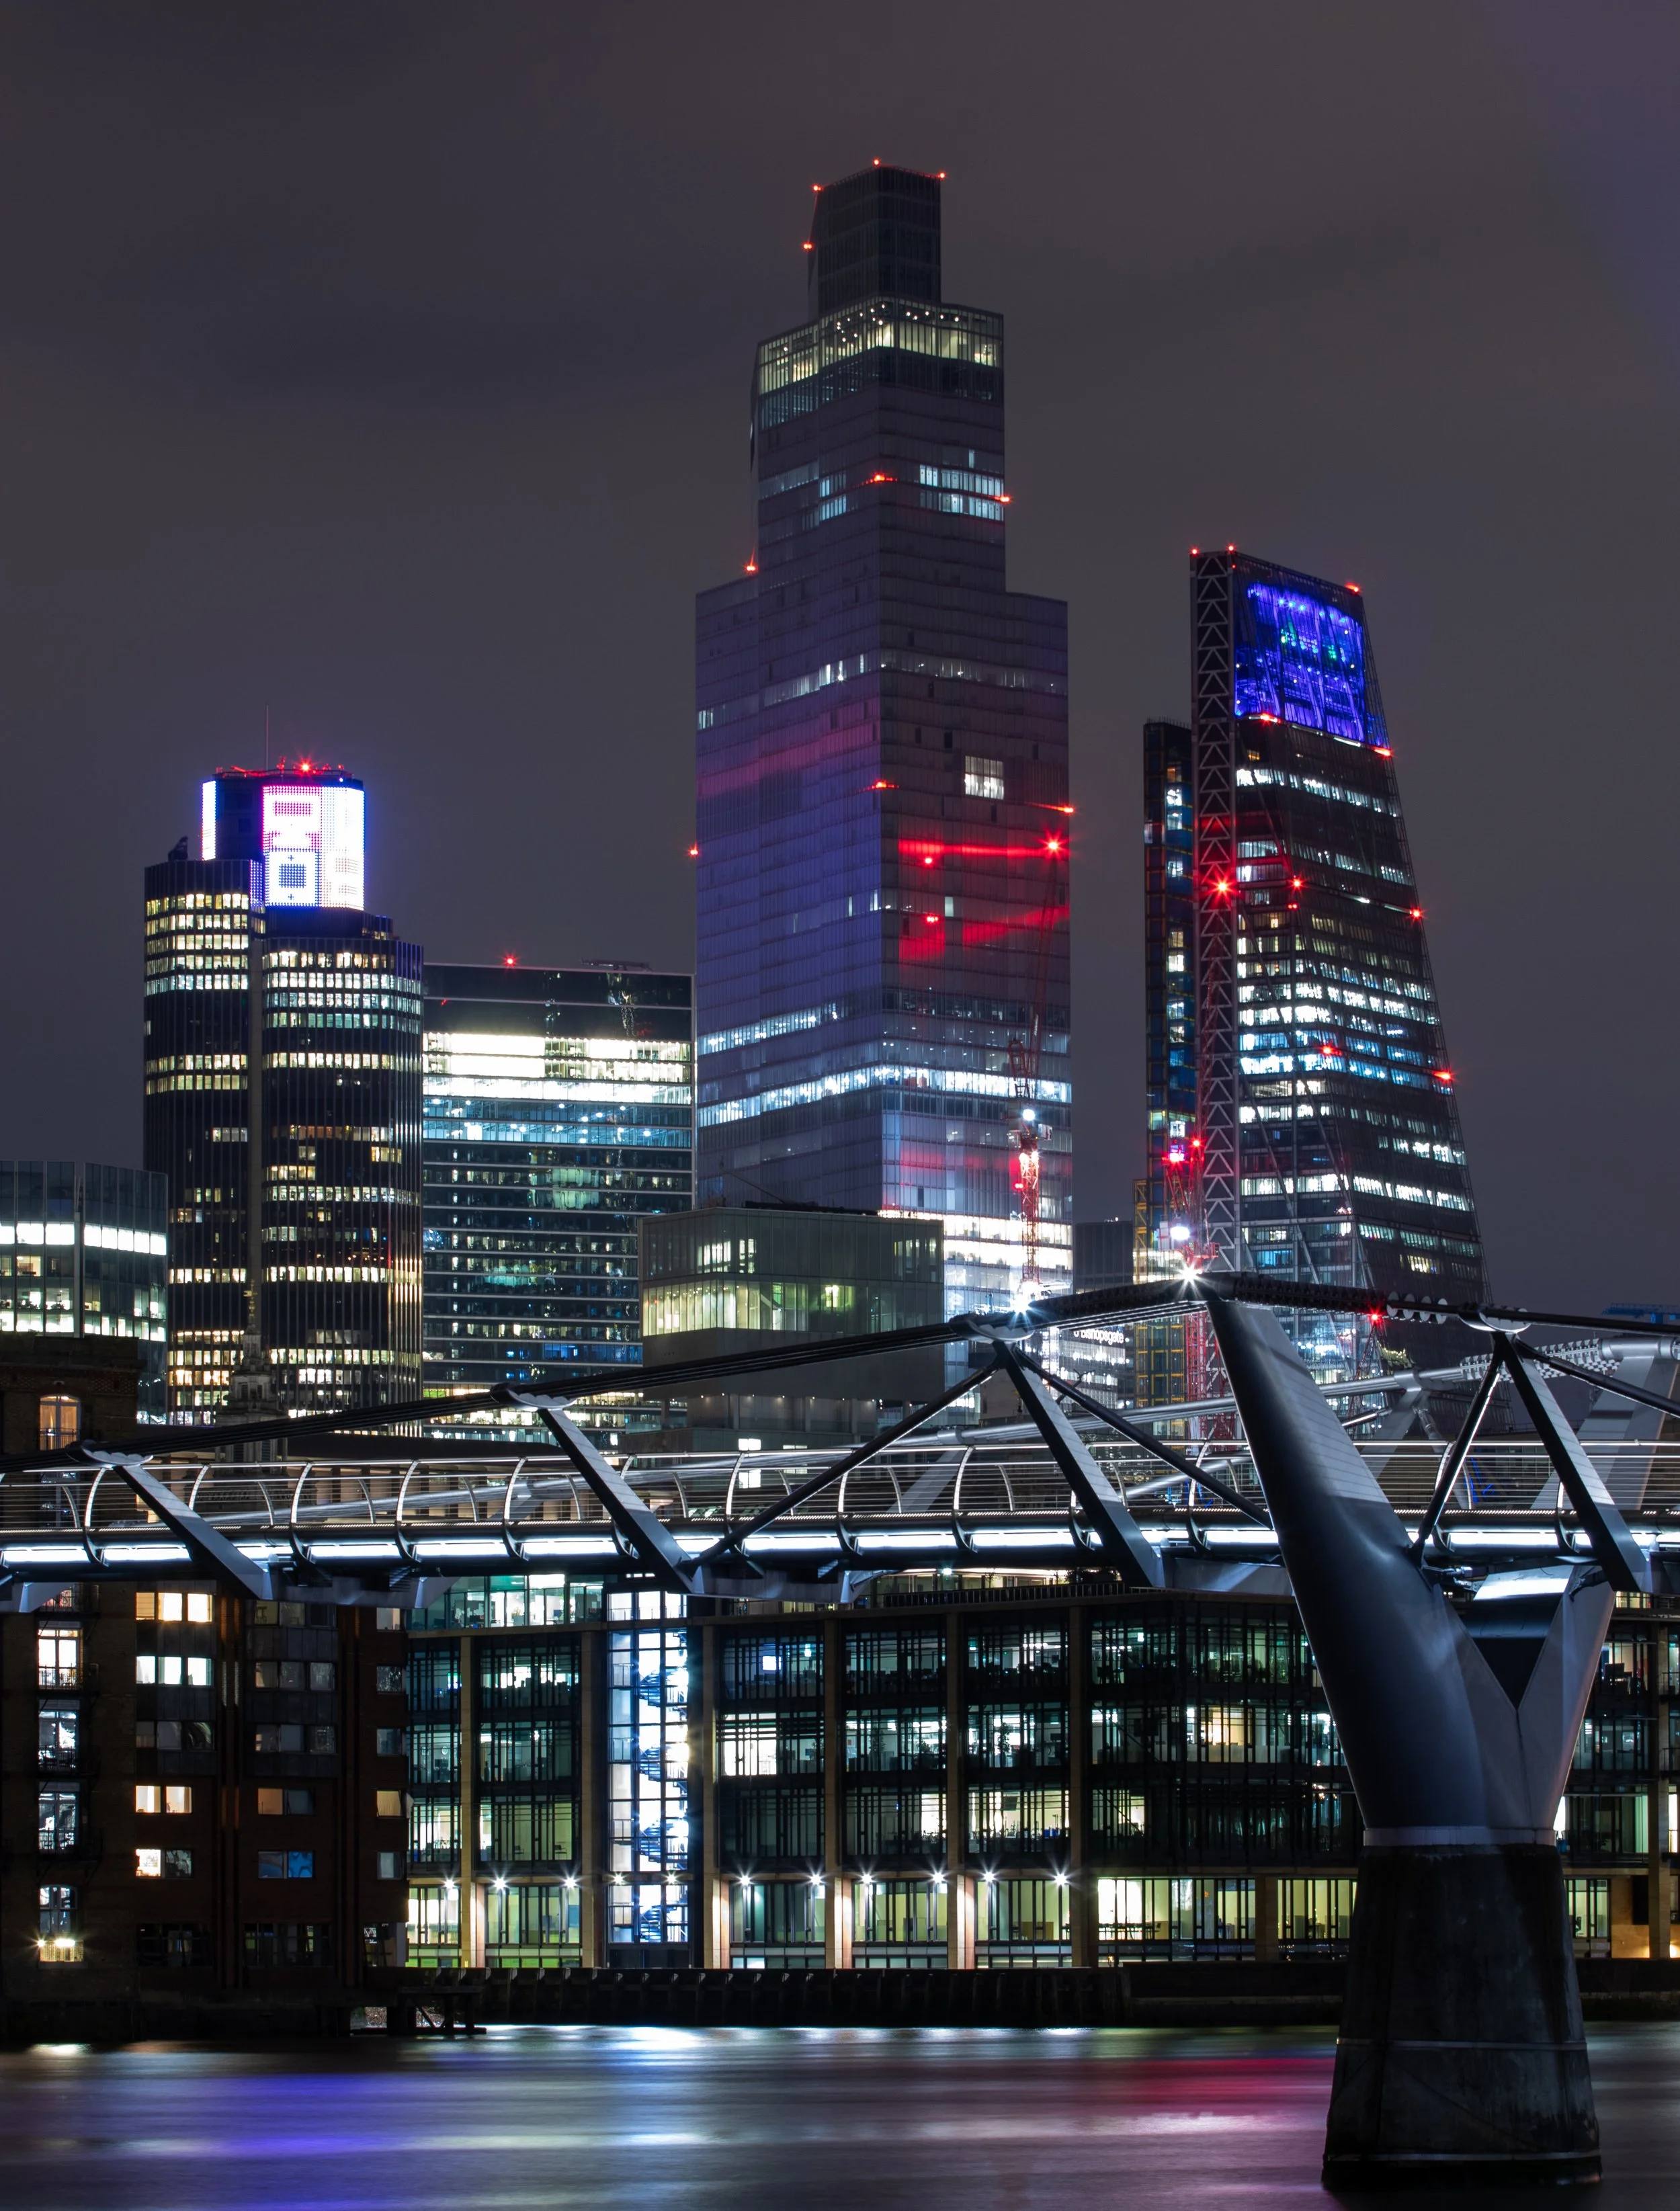
There’s a lot of differences and a lot I have had to learn, change and adapt. I think that perhaps the biggest shift I have had to make is how to decide what to do with what’s in front of me. In the city, the environment is very much on top of you. In a city like London, where I did the majority of my photography, everything is close to you, if you walk through Canary Wharf or around parts of the City of London, then huge skyscrapers ascend above you and horizons can be non-existent. The environment limits how much you see and almost forces you into certain compositions in particular locations.
Contrast that with being out in wide open spaces, often on top of the highest point for miles around. This comes with its own set of challenges and of course, the temptation just to shoot the whole scene, or to photograph the whole of the sunset or sunrise over Derwentwater. This has been one of the hardest things for me to adapt to, especially when photographing in The Lake District, when there is a stunning vista laid out in front of me, with an amazing sunset kicking off in the background.
I have done a number of things to help me with this; I have looked at a lot of work by other photographers, (but have tried to avoid looking at other Lake District Photographers so that I don’t end up just taking everyone else’s photos), watched YouTube videos, practiced, and finally, have gone on shoots with just a longer focal length lens (usually my Canon EF 70-200mm f/4L), as this takes the wide shots out of play and makes me pick out what I think are interesting features in the landscape. It makes me look for different compositions, different subjects and more creative ways to work with the light that is in front of me.
I don't always go out with just one lens, I often take something which is a bit wider (like a 24-105mm) or sometimes, something super-wide (like my Canon EF 10-18mm F/4.5-5.6), but I do try to think more carefully about my composition when I am shooting with a wider lens, which leads me neatly onto my next point about foreground interest.
When I was shooting in the city, I would use foreground interest to force background lights out of focus to create bokeh, and this kind of foreground interest is something I am trying to include more of in my landscape photography.
I just have to look a bit harder for it, and I’m also not trying to force my images to have out of focus elements (more on focus stacking later). In the city, there are interesting textures, in convenient places, everywhere. There are tons of interesting textures in the country as well, but getting them in the right places, with the right background and a pleasing composition which leads the eye through it, is much more of a challenge, but foreground interest is often key to a successful image. It could be something as simple as a boulder or a patch of heather, but having it there makes a huge difference to your images.
Weather Conditions in Lake District Landscape Photography
No blog about UK landscape photography would be complete without a mention of the weather, but it is something that I have found impacts what I shoot, where I shoot and when I shoot it way more than it did when I lived in the city. When I lived in London, the weather was any combination of hot, dry, wet and/or humid. Occasionally it snowed. Going out to shoot in good weather was a no brainer, going out to shoot in the rain or just after it, was even more of a no brainer - cities look awesome in the rain and in low light - reflections, bright lights and extra textures. You were also never very far from the warm shelter or a shop or a tube station.
I’ve become a bit obsessed with the state of the weather since landscape photography became my biggest focus - will there be rain, how cold will it be, how bad is the wind when I get further up and into the hills? Is there any lightning forecast? What are the chances of a cloud inversion? Is there going to be mist?
The answers to all of the above will influence where I go and shoot and when I decide to go there. If you’re new to photographing in the Lake District, apps like Clear Outside, Ventusky, the BBC Weather App, and the Met Office Mountain Weather Forecast are essential for planning sunrise or sunset photography trips.
There’s some great apps to help you stay on top of this, don’t just rely on one, have a look at what they are all saying, some of my favourites are Clear Outside, Ventusky and the BBC Weather App. If you’re heading out into the hills, the you should always check the Met Office Mountain Weather Forecast. The last thing you want to be is stranded half way up or at the top of fell when the weather closes in, putting yourself and others who may have to come and fetch you down in danger.
Focus Stacking
This has been a real game changer for me, but it has taken some practice. Focus stacking is essentially a different version of exposure stacking, something which I had done in my city photographs to enhance the dynamic range. If you’re trying to achieve pin-sharp images of the fells from foreground to horizon, especially during golden hour, focus stacking is an essential technique for Lake District photography.
Focus stacking, on my camera at least, is a far more manual process. What focus stacking does is to combat some of the physical limitations of your lens and allows you to have all parts of your image either acceptably sharp or pin sharp. Essentially, you take several exposures of the same scene, with your camera mounted on a tripod (this is important, as if you move the camera, your attempts are over before the have even begun!), with each exposure focused on a different point. So, for example, you may focus on the foreground, take an image, then the mid ground and take another image, and then the horizon line and take another exposure. Three generally works well, you could do more, but this can make things more complicated in post production.
When you get back to your computer, you can do all of your light room edits etc. and then export the images to layers in Photoshop. Once in photoshop, you can ask it to automate this process for you, or you can use masks to have full control. It’s slightly more involved than that, and I will do a tutorial on this at some point in the future, but in the meantime, there are lots of tutorials on YouTube that will talk you through the process
I did far less focus stacking in the city than I do in the country, I think largely because my style has shifted and I want more of the scene in acceptable focus than I did in the city when the goal was often bokeh balls.
Slowing Down Your Process
This has been a big adjustment for me. In the city, everything moves a lot quicker, no one is taking their time. Opportunities for images can be fleeting, gone in seconds and won’t come back.
Thats’s not to say that things don’t change at all in the country, but there is more time to let a scene develop. You can stay in one spot and see various stages of light, see patterns change and wait for light to move to where you want it, especially if you’ve got some great dappled light illuminating the hills above Ullswater.
<— Not me in the image, I’ve used a stock image here!
When I was doing much more street photography, I always felt like I needed to be moving, whereas with landscape photography, you have time to slow down and take things in and wait for the opportunities to present themselves, photographing the scene in front of of you as it changes. The big difference is that sometimes, it can take a long time (and a lot of effort) to get to where you want to be. In the city, hop off the train or get out of the car, and generally you’re in amongst it. The country is often a lot more uphill and not as easy to access, but that’s all part of the fun!
You don’t limit yourself by staying in one place, you have time to explore what is in front of you and enjoy the way it changes - as the light moves, so will your eyes and you’ll notice things that you hadn’t thought about capturing only moments earlier.
Gear
This isn’t going to be a ‘does gear matter’ section, but a comment on the type of gear I’m using.
I used to rely heavily on fast lenses - I was using wide apertures for shallow depth of field and often needed the extra light for shooting in low light conditions. I have come to realise that I don’t need a plethora of fast lenses for what I am doing now. I am more concerned about image quality and sharpness, which helps with the cost of things as well - fast lenses are much more expensive. Take the Canon 16-35mm L series lens, there is a difference of almost £300 in the price of the F/4 version when compared to the latest version of the same lens with a maximum attitude of F/2.8. The F/4 versions are also a lot lighter, which is great in terms of carting it around with you all day.
I do still have a couple of fast lenses, namely an F/1.8 nifty fifty and an F/1.2L 85mm Prime. The 85 is a unit of a lens, weighs almost 2kg and is incredibly sharp. These two lenses also hardly ever come out with me unless its for a portrait session or I have a genuine use case for them in the field - 2KG is a lot to carry around all day and then not use! The 85mm was a staple of my bag in London, because of that shallow depth of field, and it was great in low light as the front element is like a bucket.
The lenses that tend to come out with me now are a 10-18mm EF, 16-35mm f/4L, 24-105mm F4/L and my 70-200mm F4/L. These save weight, cover the whole range of focal lengths and give me all the flexibility I could ever need.
Some things are a given for both styles - a sturdy tripod is a must, if it’s light weight, then even better, but expect to pay good money for the privilege. The other item that has been really useful is my Peak Design Camera Clip, which whilst a little pricey for its size, is a must have for when you are out walking, but you might want to get it back in your bag when the terrain starts to get a bit trickier. Better to break a tumble with your hands and not your camera and expensive lens!
What bag you put it all in is very much a personal choice, but for short walks, I like the LowePro Fast Pack , (you can read my review of the Lowepro Fastback here), and for longer walks I take the LowePro Protactic 450 AWII. The latter is a much bigger bag and it comes with hip straps, which make longer days much more comfortable, but it does lack space for your non-camera gear like a jacket or something to eat!
In Summary
I think it’s clear that there are a lot of similarities between the two different styles I have shot, but in short, we’re still taking photos, we’re still telling stories and we are still doing it using similar equipment. We are, to an extent very reliant on the weather but for different reasons.
For me, the biggest difference is the tempo that things move at in the landscape photography world, it’s slower and at times more methodical, with a greater need for focus stacking if you want that front to back sharpness in your images.
Which one would I choose? Well both of them. I still do some street photography and still really enjoy it; I enjoy the dynamism and the change of pace it offers from the much more pedestrian pace of landscape photography, but regardless of what I prefer, I just love being out with camera, taking images, sharing images and telling stories!
If you’ve enjoyed this, then please consider signing up to my newsletter, you can do that by clicking here or head over to my Instagram to see some of my latest work and what I am up to!
What’s wrong with my photo?
Struggling with blurry shots, strange colours, or photos that just don’t quite pop the way you hoped? You’re not alone. In this post, we’ll explore some of the most common issues photographers face—whether you’re just starting out or looking to sharpen your skills—and break down exactly how to fix them. From exposure mishaps to focusing troubles, you’ll learn practical tips to take your images from frustrating to fantastic.
A beginner's guide to reviewing your images after your shoot and diagnosing what’s not quite right in the bad ones!
So you’ve got your camera and you’ve chosen a lens, you’ve read my blog about the exposure triangle and you have taken some of the information from 10 Things I Wish I Knew as a Beginner Photographer, you’ve been out on your first shoot and now you’ve had a look at the images in your editing suite of choice.
You’ve managed to secure a few shots that you’re really happy with and you’ve got a few others that have got issues, they might be blurry or noisy or out of focus. You know there’s something that you should have done differently, but you’re not sure what changes you need to make.
We’re looking at some technical stuff in this one, some of which will be specific to your camera so you might want your camera and its instruction manual to hand when you’re reading this. An open YouTube tab might be handy as well.
This blog is going to aim to show you some common mistakes, what they look like and what you can do to stop it from happening again!
Blurry Images.
This image was taken at night, outside my old flat in London and it’s blurry. Really blurry.
There are different kinds of blur in photography, but the two we see most of in camera are motion blur (where the subject is moving) and camera movement (where the camera has moved as you take the shot).
This image hits the jackpot as it has both! The tree is blowing in the breeze and the camera has moved as I have taken the shot.
So what’s caused this?
There’s a couple of issues here, both related to the amount of light available. It’s a night shot, so lots of light needs to hit the sensor to properly expose the shot. To let enough light into the camera means the shutter needed to be open longer. In the case of this image, the exposure length was 0.5seconds which isn’t massively long, but certainly long enough to cause the issues that we can see.
This image was also taken hand held, i.e. not on a tripod and without a shutter release cable. When I pressed the shutter, the camera moved and in the 0.5 seconds the shutter was open, I also moved and as a result the camera moved even more. It was also a windy night, so in the same 0.5 seconds, the wind has blown the tree and this has been recorded as blur by the camera’s sensor.
As a general rule of thumb, if your shutter speed is longer than the focal length you are using, your camera should be on a tripod. So for example, if you are shooting at 50mm and to correctly expose the shot you need a shutter speed of (for example) 1/10 then you should be on a tripod.
There’s other things you could do as well that could be useful if you don’t have a tripod. You could try increasing the ISO - this would make your sensor more sensitive to the light, so you could reduce the shutter speed, but remember his could introduce noise to the image.
You could also try increasing the size of your aperture but remember, this could impact the sharpness of the image (lenses are usually sharpest towards the middle of their aperture size) and will have an impact on the depth of field of your image. This shot was taken at 50mm with a shutter speed of 1/50th of a second and an ISO of 100 - I could have increased the the ISO but it would have introduced too much noise into the image so the tripod would have been the best way to go here.
By contrast, the skyline shot above was a 30 second exposure, 15 times longer than the night image of the tree and the house, and the whole thing is pin sharp. It was shot at f/8 with an ISO of 100 at 70mm so the above rule regarding focal length and shutter speed comes into play here; this would have been impossible without a tripod!
Underexposed and Over Exposed Images.
The image on the left is one that we would use the phrase “blown out” to describe the sky. The shutter has been open for too long.
This means that when this image was taken, the shutter was open for so long that enough light hit the sensor to “overload” the photosites that it’s made from.
This means that effectively, no data has been stored in them, there is no detail there and the image shows a patch of complete white. No amount of editing is going to sort this out unless you replace the sky in Photoshop.
By contrast, the image on the right is under exposed, so the opposite is true. The shutter wasn’t open for long enough to let sufficient light into the camera to hit the sensor and so the photosites on this image are black, but this presents the same problem - there is no data present in those parts of the image.
Fortunately, the solution to under and over exposed images is simple and doesn’t require any extra kit to solve it (unless of course you are needing such a long exposure that you need to crack out the tripod). It pays to get this right in camera!
An over exposed image needs a shorter exposure time and an underexposed image needs a longer exposure time.
You should always check your exposure using the light meter which is built into your camera making sure it’s as close to the centre as possible.
You can also turn on the zebra stripes/similar in your camera. Check the manual to see how to do this, but the premise is simple, if you have over/underexposed areas of your image, the LCD screen will flash to show where the problem areas are. This a great way to see these areas at a glance and its really helpful when you’re starting out if you don’t know how to read your histogram or aren’t confident with the light meter.
But what about images that high dynamic range, and what is high dynamic range?
Images that have high dynamic range have really bright elements and really dark elements in them. You can often find these sorts of scenes at sunrise and sunset whilst the sun is rising/setting and parts of the scene are falling into darkness or haven’t been lit up in the morning light yet.
There is a way around this, and it’s called exposure bracketing. To do this, you need to take a correctly exposed image, an under exposed image and an over exposed image (you’re going to be exposing for the highlights, shadows and “midtones” in the respective images). Most cameras have this function built into them, and it will be called Automatic Exposure Bracketing (AEB) and you should consult your manual to see how to do this with the model of camera that you have. Once you’ve got this set up, you can capture the images and then blend them in either photoshop or Lightroom to get yourself an image that is perfectly exposed! In most models, if you change the shooting mode to “burst” it will take all three images without you having to touch the camera and risk introducing any movement into the image.
Spots
More precisely, sensor spots! I have highlighted some of the ones in the image to the left although they’re already quite small and the size of this image isn’t helping, but they’re there! If you look closely, you will find even more.
These aren’t uncommon, especially if you’re changing lenses a lot and if you’re not changing them in a way that can help to prevent it.
The good thing is that they are easy to deal with using the clone stamp and/or spot removal tool in photoshop and/or the clone tool in Lightroom, depending on what you prefer. Both programmes will provide good results.
Whilst these are easy to get rid of, if there is a lot of them in your image then they can be time consuming and you always find more when you start to look for them. You might also find that they appear in some images and not in others, even though they were taken seconds apart. This is because the focal length you are using and the aperture size you are using can impact how many, if any at all, appear in your image.
These tiny, yet terribly irritating blemishes are caused by tiny dust particles settling on your camera’s image sensor and are easy to prevent and minimise if you do a couple of things . Firstly, never leave your camera without either a lens or or a body cap over the mount. This prevents the sensor being exposed to the open air and dust.
Secondly, whenever you are changing the lens on your camera try to have it pointed with the lens mount facing the floor. Dust tends to fall down and not up, so by doing this, you minimise the risk that you are exposing your sensor to. The more you change lenses, the easier this task will become as you build up some muscle memory.
You should also make sure that you keep your sensor clean. You can do this, or your can pay someone to do it for you. It’s not a difficult process, but it is a very delicate one and you’ll need a steady hand. If you’re not confident in your own ability to do this then most good, local camera shops will have a sensor cleaning service. You can buy packs of sensor cleaning swabs on Amazon and they are fairly cheap. I have linked the ones that I like to use here. You’ll pick a whole pack of these up for less than half the price of a sensor cleaning service in a shop but be warned that if you cause any damage to the sensor, you have set yourself up for a pricey repair and in extreme cases, you could completely write off your camera.
Always consult the manual for your camera and the manufacturers instructions for cleaning your sensor prior to having a go at doing it for your self.
Soft Images
Or, in the case of the image to the right, soft subjects.
When we talk about soft images, what we are talking about is an image which is out of focus. Or at least the subject of the image is out of focus or “soft”.
In the image of Chaffinch on the right is out of focus, or at least the subject is. What we have is an image where the camera has focussed on the wrong part of the image, you will see that the grass and debris in the back ground is much sharper!
The grass in the foreground is also out of focus, but in a shot like this (were the subject in focus!), could actually be desirable and help to draw the eye to the subject, but as we don't have the focus in the correct place, this is a moot point.
This image is unusable and unrecoverable. Were this the only shot of this bird I had, it may have been disappointing but fortunately, I managed to get one that was in focus!
Thankfully, again, this isn’t a difficult one to sort out, but the way in which you go about it is something which is going to be partially dependent on your camera brand and you’ll need to consult the manual, or YouTube to get the right settings.
You will need to familiarise yourself with the different autofocus modes in your camera, and make sure that you have the focussing indicators turned on so that you can see, through your viewfinder, or LCD screen exactly where the camera is focussing. This will help you in most cases to ensure that you are nailing the focus on the subject.
The autofocus in many newer cameras is powerful enough to detect the subject, recognise what type of subject it is and focus on it, if you have an older camera, you won’t have this luxury so you’re going to need to practice.
The image above was also shot at an aperture of f/4, which means that the depth of field is quite shallow, stopping down to f/8 might have help to save this image and given a deeper depth of field with more of it in focus, but this would have also mean slowing down the shutter to a speed which isn’t practical for shooting faster moving subjects.
If you’re shooting fast moving subjects like birds or sports, then you also might want to explore back button focus as this can make your life a bit easier - again, the way in which your camera is able to do this is going to depend on the make and model so consult the manual and consider watching some model specific videos on YouTube which will show you how to do this.
It can be slightly different in landscape photography and still life photography, or indeed any other genre where your subject is moving very slowly, or not moving at all, as you are likely to be using manual focus. The rubber duck above was shot in a studio using manual focus and a smaller aperture to give a greater depth of field.
Manual focus gives you complete control over where you focus and how you focus, within the limitations of your equipment and settings. When you have focussed your image, use the functions on your lCD to zoom in and check that you are completely pin sharp! You could also turn on focus peaking if your camera supports it as this will give you a further visual signal as to if/when your subject is in focus.
With any discussion about focus, we should remember that lenses have limitations. They have a minimum focus distance (how far away a subject should be before the lens is physically able to focus on it) so you’ll need to be in the right place to get the subject to be “focusable”. You’ll find this information printed on the lens you are using. You can also use the tools in PhotoPills to help you calculate hyper-focal distances. This can be quite complicated, so work on the basics first and then about going down this rabbit hole!
Grainy/Noisy Images
Sometimes, when you get your photos into Lightroom, you will be able to see that they have a kind of texture to them, almost like they have been printed on sandpaper.
What we’re dealing with here is digital noise, which is introduced into images when the ISO setting is cranked up, this amplifies something called “photon shot noise”in your image which leads to the grainy feel that you can see in the grass in the image on the right hand side.
This is one of the easiest things in this list to sort out, you just need to know your camera and be familiar with how well it deals with high iso. For example, on my Canon 80D, I know that I can get the ISO up to around 6400 before the grain starts to become an issue, but this varies from camera to camera, there is no hard and fast rule. You will need to do some experimenting to find out where the red line for you is and how much grain you are willing to accept in your images.
Remember that if you reduce your ISO, you will need to adjust shutter speed and/or aperture to compensate for this. If you are working at higher ISO’s then you really need to nail the exposure in the camera, as if you try increasing the exposure too much in Lightroom you’re really going to exacerbate any noise in your image and could end up with something that is unusable.
The other way that you can deal with some noise is in post production. The latest version of Lightroom has a noise reduction function built into it and this is pretty good at removing noise, but the trade off is that you can end up with images that look a but un-natural if you use it too much or if there was a tremendous amount of noise in the image to begin with. Other tools which can do this are available, but you need to be aware of the same issue and you should check the cost of these bits of software too!
To wrap up, understanding and avoiding common photography pitfalls is all part of the journey to improving your craft. With a bit of practice and attention to detail, these issues become easier to spot—and even easier to fix. As with most things, it comes with practice, and sometimes a lot of patience.
If you’ve found this guide helpful or have any questions about your own photography challenges, I’d love to hear from you! Feel free to drop me an email, or connect with me on Instagram and Facebook for more tips, inspiration, and behind-the-scenes content. Happy shooting!

