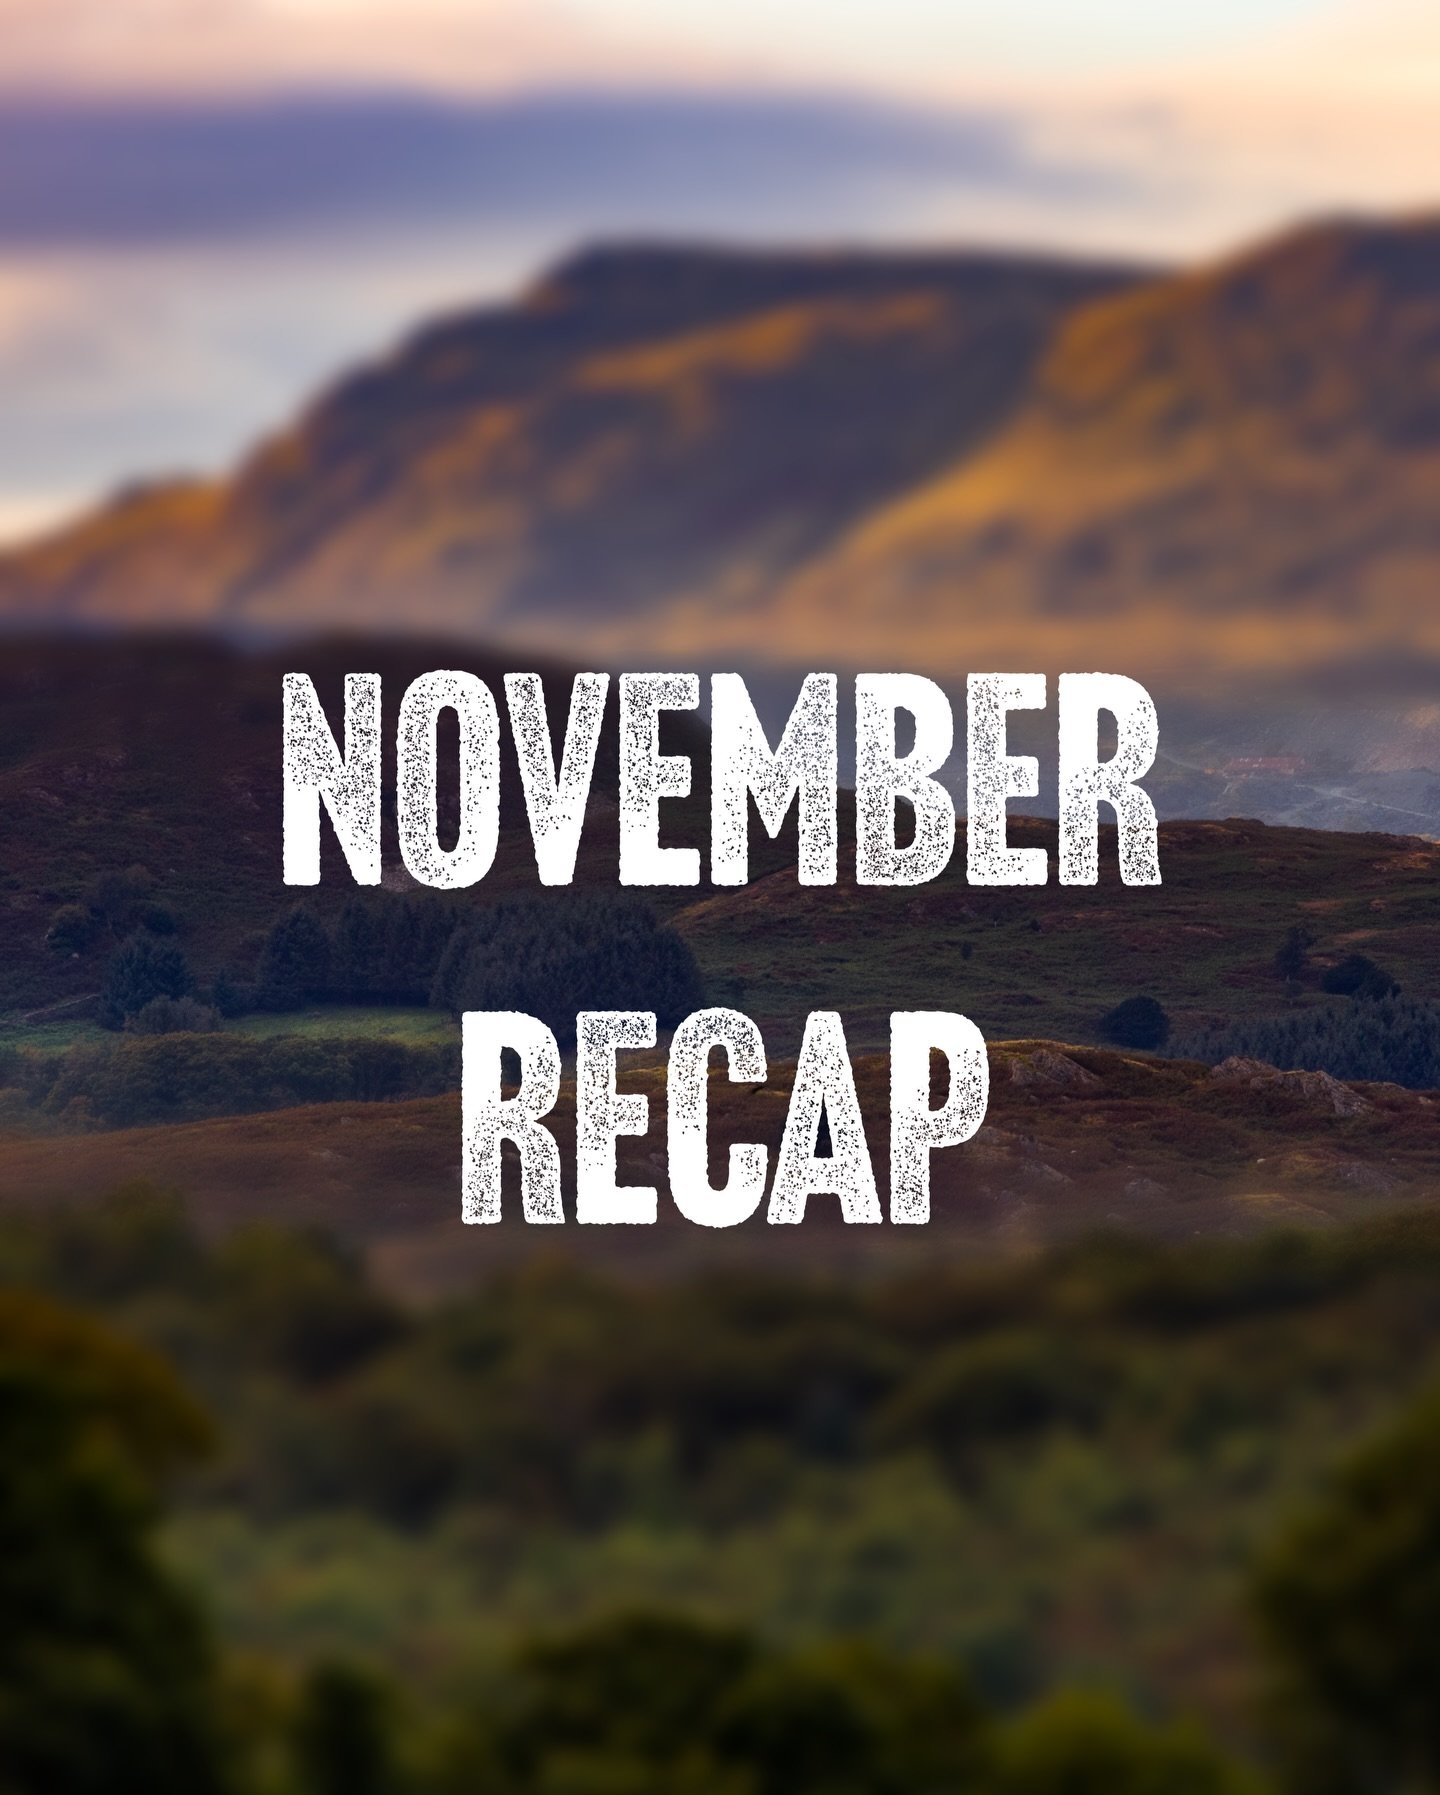
My Photography Blog
Welcome to the Chris Kendrick Photography Blog, where I share the stories, challenges and inspirations behind shooting Lake District landscapes and working as a Cumbria-based photographer. Alongside behind-the-scenes reflections from the fells and lakes, you'll also find honest photography gear reviews, covering the cameras, lenses and accessories that genuinely perform in real Lake District conditions. Whether you’re passionate about landscape photography, exploring Cumbria’s scenery, building your kit, or simply curious about the craft, there’s something here for you.
Some posts include affiliate links; thank you if you choose to support the blog through a qualifying purchase. If there’s a topic or piece of gear you’d like me to cover, let me know. Enjoy exploring!
Enjoy!
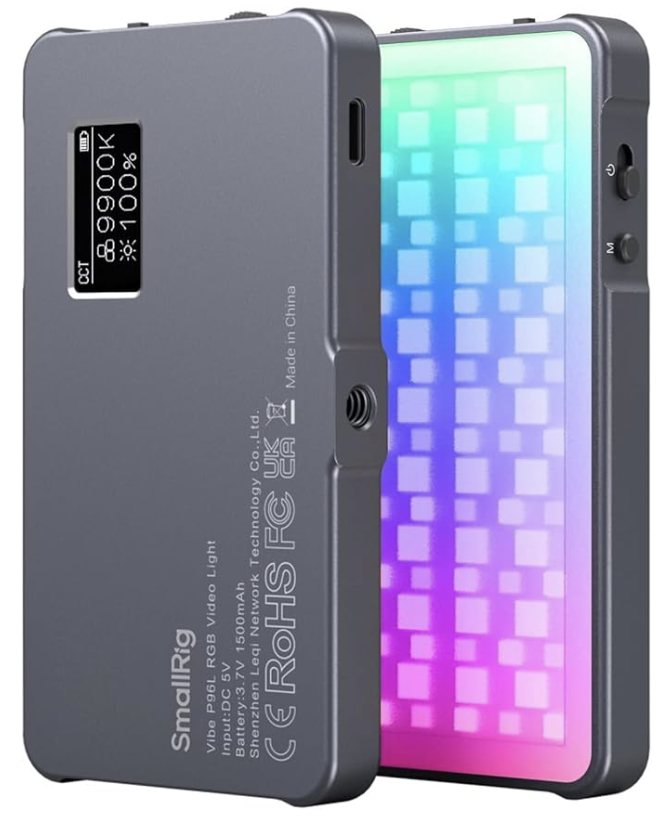
Gear Review: SmallRig Vibe P96L RGB Video Light
The SmallRig Vibe P96L RGB video light is a compact, pocket-friendly LED that’s ideal for content creators, vloggers and photographers who want reliable on-camera fill light without carrying a full lighting kit. In this review, I’ll cover real-world performance for macro photography, product photography and quick portraits, including colour accuracy, usability, and how well it works as a travel-friendly light. The P96L offers RGB plus adjustable colour temperature (2500–8000K), an OLED display for quick settings checks, and a sturdy aluminium alloy body designed for durability and heat management.
I’m sticking an extra entry in this week, as I wanted to review this light, 2 of which I received as Christmas gifts. These were things that I asked for after having done a bit of research so I had a decent idea of what I was getting and a rough idea of what it would do. This is my quick review after a couple of weeks of using them. I am going to try and keep this fairly short and concise.
This blog contains amazon affiliate links. If you click one of these links and then make a qualifying purchase, I may receive a small kickback - this is at no extra cost to you. This is a great way to support this blog and allows me to do things like creating these reviews.
So let’s jump into this quick review of the (not so) memorably named SmallRig Vibe P96L RGB Video Light.
Why Did I Get Them?
I wanted these not as video lights, which is there inteded purpose, but as small, portable, constant light sources that I could take out with me when I want to get a bit more creative, especially with macrophotography and when I want to use lower apertures, but keep the shutter speed as fast as I can. I don’t think I will use the effect feature that has been designed into these lights, but I will absolutely use the CCT and HSI functions (more on these features below), to creatively light some macro shots and to give myself some more creative flexibility. I have got some Pavotubes, but these are too big to cart around in my bag for occasional use so only really get used in the studio.
What’s in The Box?
This one is straightforward. You get the unit, an instruction leaflet and a charging cable (USB-C).They’re well packaged, and come in a well made Apple-esque box, which gives them plenty of protection on their journey.
First Impressions
The first thing I noticed when I opened the box was the build quality and look of these things. They look great and appear like they’re much expensive than the less-than £40 you have paid for them. I like the tacitly of the admittedly quite small buttons, and this will be beneficial when you’re working low light but could be problematic if you’re wearing gloves.
Interestingly, even though I got two of them, the amount of battery in each was vastly different. One was over 80% charged, whereas the other one almost completely flat. Don’t expect that you’re going to be able use it straight out of the box without having to charge it first.
Build Quality
These are really well made pieces of equipment. They are made out of an aluminium alloy which feels really premium, the front of them is covered in plastic which is textured and creates a nice bit of diffusion so you’re not just battling with bare LEDs. They measure around 108x60x11mm and weigh less than 120g, which means that they don’t take up much room in your bag and they’re not too heavy to carry around with you. It also means that they are small enough to hold in your hand but that they have a wide enough “base” to stand up on their own. They do have a 1/4” threaded tripod mount (female) if you want to attach them to anything, but if you want to mount them to your camera’s hot-shoe, you’re going to need to invest in something like the SMALLRIG Tilting Mount with Cold Shoe Adapter - I have a couple of these and they are great little bits of gear which will do the job of holding this light to your camera nicely without adding too much extra weight to your setup.
They aren’t weather sealed, so if you’re using them in poor conditions, or expect to be using them a lot in the rain, then look for a different, weather sealed option or plan ahead to make sure that you don’t get them soaked.
Ease of Use
These are really easy to use. The controls are simple, the LED display on the rear of the unit is clear, bright and easy to read. The buttons and dials on the top and side of the light are really tactile, which makes them easy to use when you’re working with limited light but might be a bit more of a challenge in cold weather or if you’re wearing gloves.
There is a mode switch on the top which cycle through the three modes, which are CCT, HSI and Effect.
CCT is Correlated Colour Temperature. The light has a range of around 2500 to 8000k and you can adjust the brightness and temperature this feature by using the wheels on the side of the unit. This will give you clean, accurate light. They are rated at CRI 96 so not too shabby in this regard, especially at this price point.
HSI is Hue, Saturation and Intensity. You can change the hue and saturation using the top wheel, which is “pressable”. Pressing the wheel in toggles between hue and saturation and you can adjust this by nudging the wheel up and down. Intensity (or brightness) is controlled using the bottom wheel. This will give you much more creative control.
Effect is exactly that. These are a group of pre-programmed settings which will create effects such the light from a TV, police, fire and ambulance lights and strobe effects. These aren’t something that I will use much as photographer, but those of you who shoot video may be able to find a use case for this. This will give you creativity and atmosphere.
These are all pretty intuitive and won’t take much learning, so ease of use gets a big thumbs up!
Battery
These come with a built-in rechargeable 1500 mAh lithium-ion battery, which charges fairly quickly and carries a decent amount of power. You can charge these with the supplied USB either hooked up to your computer or from a battery pack if you think you are going to run the battery down during a full day of shooting. I’ve been out with these for a full day and haven’t run them to empty, but this is going to be dependent on a number of variables such as the ambient temperature (they’ll not last as long in cold temperatures), how much your using them and what brightness you are using them at.
Who is This For?
The SmallRig Vibe P96L is best suited to photographers who need a compact, colour-accurate LED light for close-range work and creative lighting control. It’s a strong fit for product photography, still life, behind-the-scenes content and studio desk setups, where accurate colour rendering and quick adjustment matter more than raw power. With a CRI of 96, it’s particularly useful for photographers who want consistent, reliable colour when shooting details, textures or reflective surfaces. Its small size and built-in battery also make it a practical option for location work, travel photography and content creation, where portability and fast setup are essential. While it’s not designed to light large scenes or act as a primary key light, it works very well as a fill light, accent light or creative colour source for photographers looking to add flexibility to a lightweight setup.
Where Can I Buy Them?
I got mine from Amazon , and they cost £39.90. They are sold at wide range of photography retailers, so shop around for the best price.

Pros and Cons
Pros:
High colour accuracy (CRI 96) – produces natural, reliable colour, particularly useful for product and still life photography
Wide colour temperature range (2500K–8000K) – easy to match daylight, tungsten or mixed lighting conditions
Full RGB control – useful for creative accents, backgrounds and experimental lighting
Compact and lightweight – ideal for desk setups, travel and location work
Built-in rechargeable battery – no need for external power; convenient for portable use
Simple, intuitive controls – quick adjustments without breaking workflow
Multiple mounting options – 1/4″ thread and cold shoe compatibility increase flexibility
Good value for money – strong feature set for its size and price point
Cons:
Limited output power – not suitable as a primary key light or for lighting large scenes
Best suited to close-range use – effectiveness drops quickly with distance
Small control buttons – can be fiddly when working quickly or with gloves outdoors
RGB effects more niche for photography – some modes are more useful for video than stills
No weather sealing – care needed when using outdoors in poor conditions
Conclusion
The SmallRig Vibe P96L isn’t designed to replace a full lighting setup, but that isn’t really the point. Where it works best is as a compact, dependable and colour-accurate LED light that earns its place in a photographer’s everyday kit. The high CRI rating, wide colour temperature range and RGB control make it genuinely useful for product photography, still life work and close-range creative lighting, while its small size and built-in battery keep it practical for desk setups and location use.
If you regularly need a portable fill light, accent light or creative colour source, the P96L offers a strong balance of control, build quality and value. It’s not the light you’d reach for to illuminate a large scene, but for photographers who want flexibility without adding bulk, it’s a well-judged and versatile option that punches above its size.
If you’d like to support the blog and help me keep producing Lake District photography content, honest gear reviews and regular website updates, you can do so via my Buy Me a Coffee page. Keeping everything running smoothly takes time, and your support makes a real difference. Thank you.

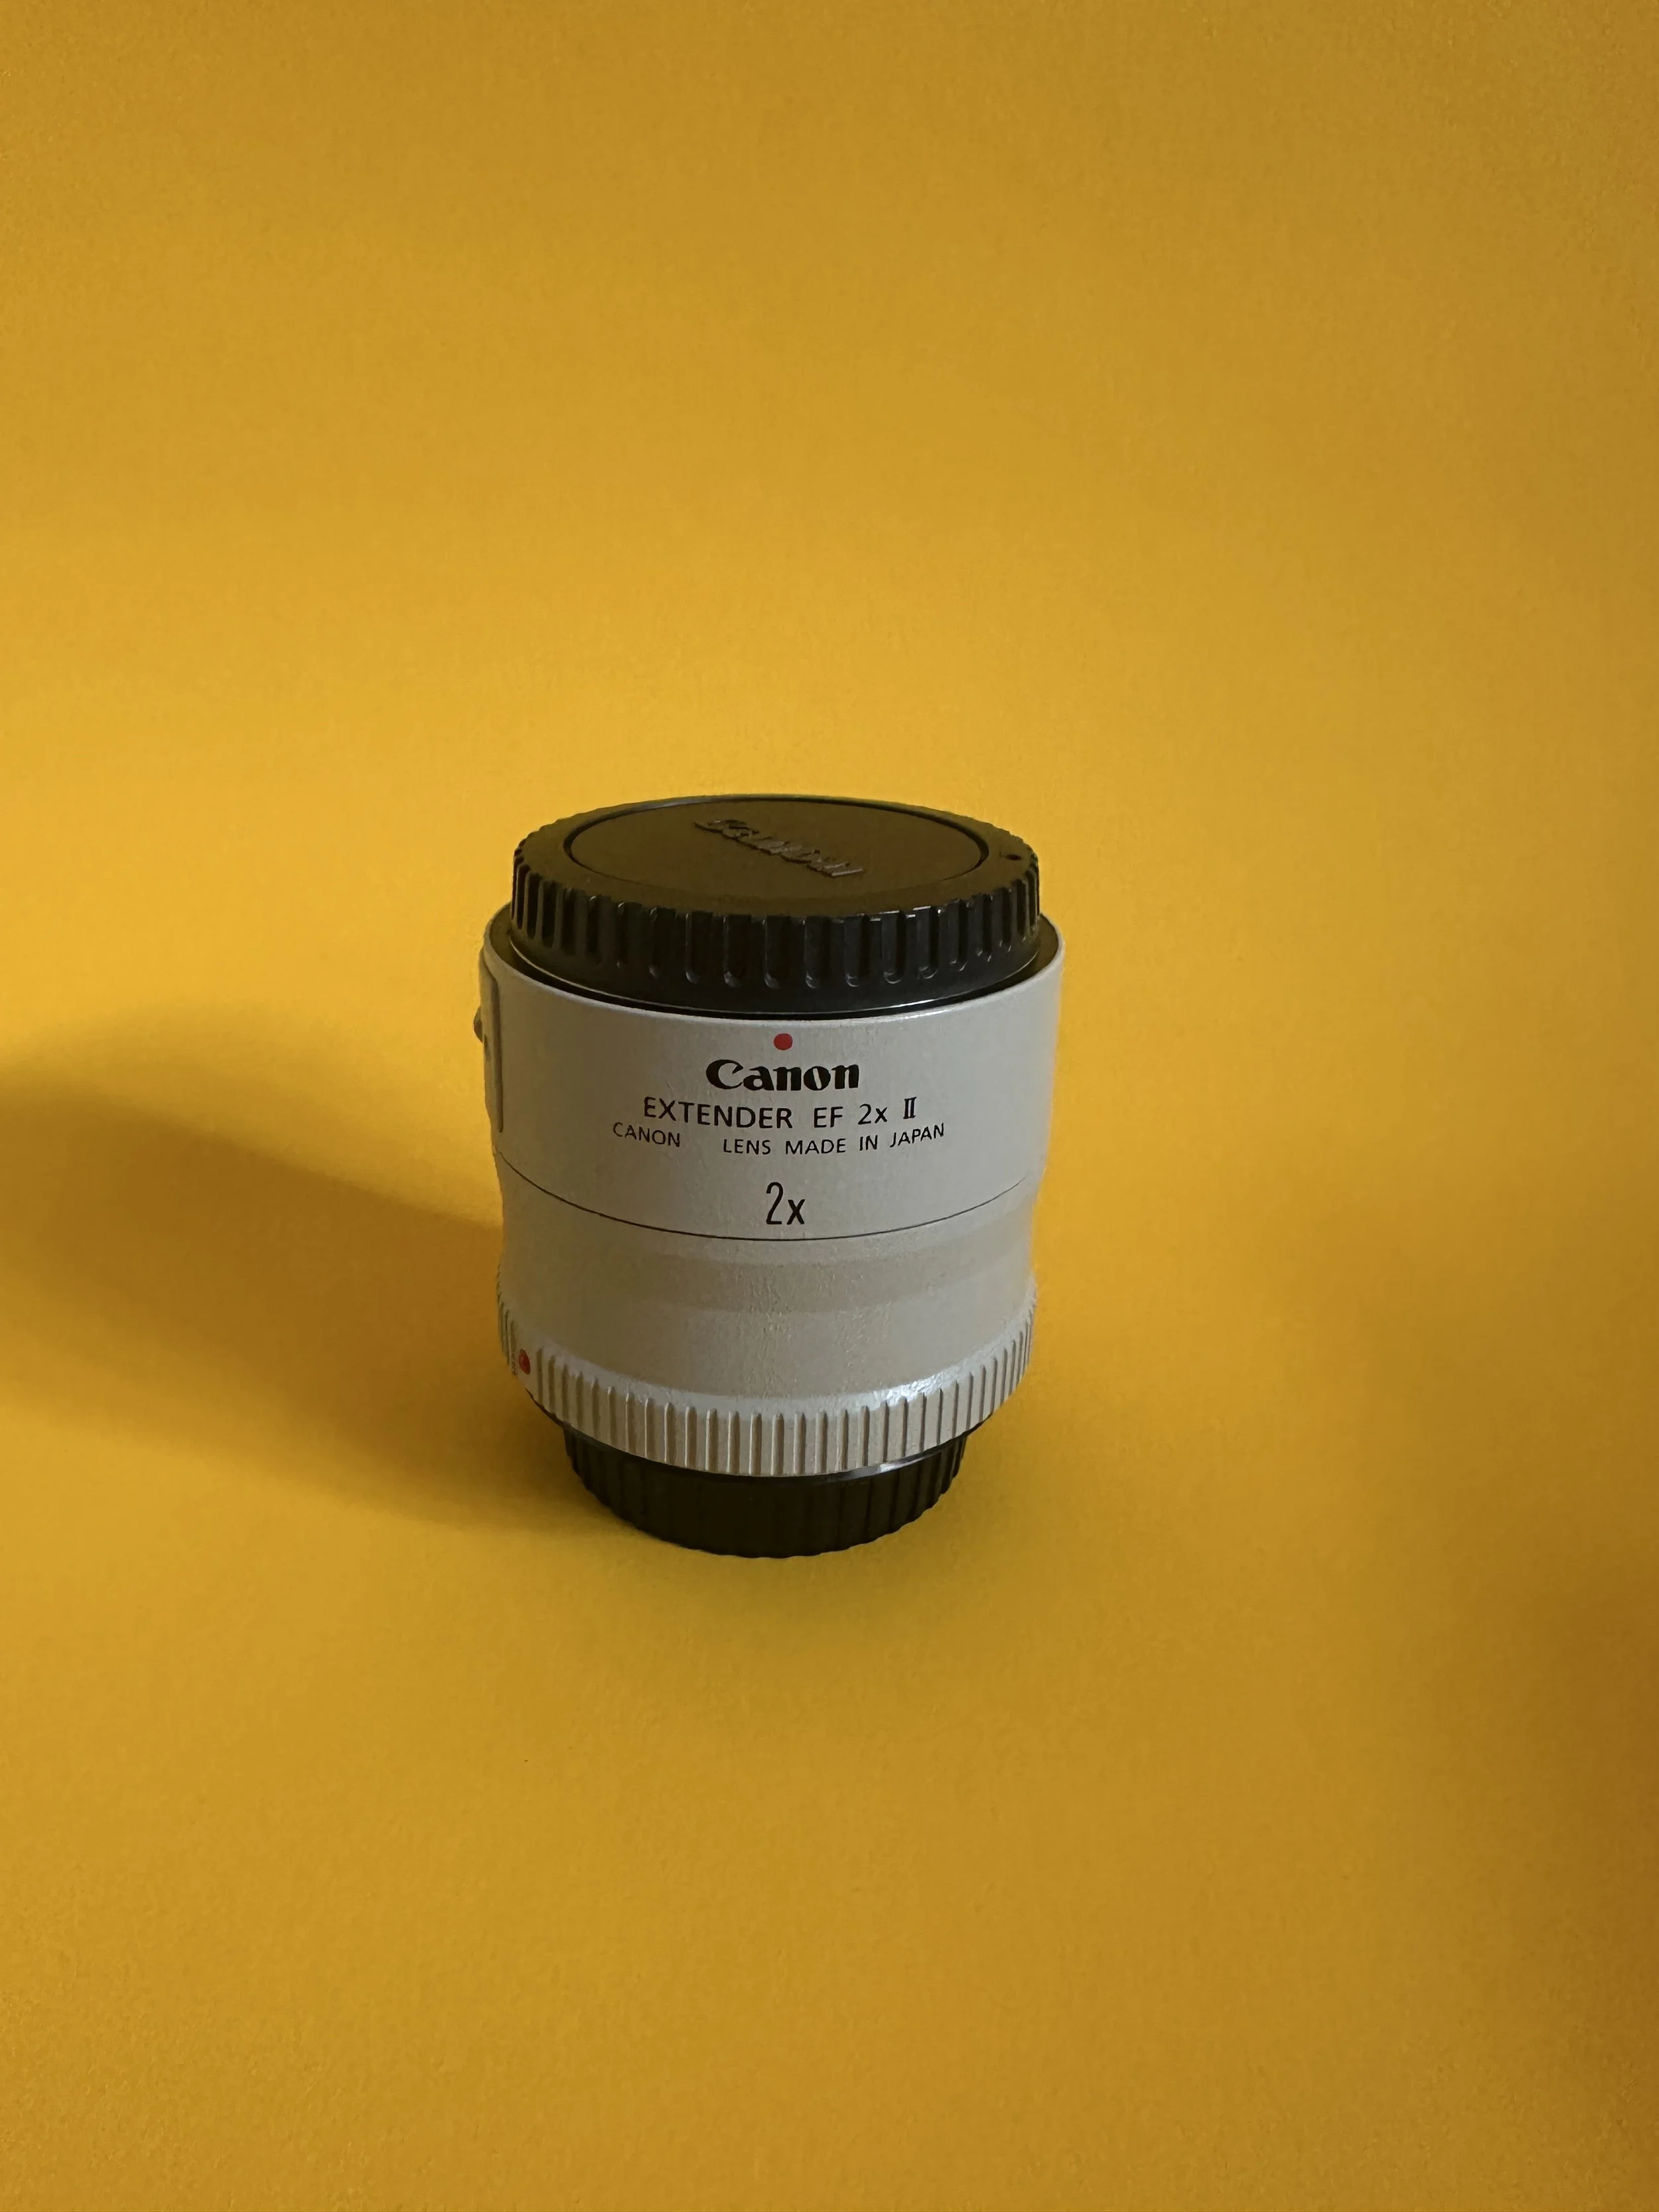
Gear Review: Canon EF 2x Teleconverter MKII
Are you looking for extra reach from your current Canon lenses without investing in a costly super-telephoto? The Canon EF 2x Extender (teleconverter) could be the answer. In this review, I explore the pros and cons of the Canon 2x Extender, how it affects image quality, aperture, and autofocus, and whether it’s worth adding to your kit for wildlife, sports, or landscape photography.
This is a review I hadn’t planned on writing as this wasn’t a piece of kit I was planning on buying! I ended up with one of these teleconverters as at the same time I was buying my 16-35mm lens, I was also looking for a telephoto zoom lens, with the Sigma 150-600mm f/5.6 being at the top of my list.
Some quick maths made me rethink this - I knew I REALLY wanted the 16-35mm f/4L, but getting the 150-600 at the same time, financially, was going to be a bit of a push and after some consideration, I decided to plump for the teleconverter and see how I got on with it. On the front of my Canon 80D which has a crop sensor, paired with my 70-200 f/4L, I can expect to have a focal length around 224-600. (Here’s the maths… (70x2)x1.6 = 224 and (2—x2)x1.6 = 600)).

We can agree this is a whole lot of reach, which is going to be great for a having a go at some wildlife which has previously been out of the range of my 70-200. I will also be able to pick out things in a landscape which have previously been a mere pipe dream and hopefully bag some great shots of the low flying jets as they pass through The Lake District Valleys.
I got mine from MPB.COM, and it’s in “Like new” condition. It set me back £198.55, which is great compared to the in excess of £800 I was going to have shell out for the Sigma. Yes, I have had to sacrifice some reach, (on a crop sensor, 800mm looks like 960mm), but I want to see how this solution works first.
This isn’t the best looking piece of kit; it’s the same off white colour we expect to see long Canon lenses come in and without the lens caps on, it’s a truly odd looking accessory.
Mine has the EF mounting system, (remember, I am still shooting with a DSLR!), and the extender comes with a solid, metal mount which firmly attaches it to the front of the camera.
There is a trade-off to all of this extra reach, namely, attaching your lens to an extender reduces your maximum aperture by 2 stops. So in my case, the max aperture my f/4 lens is going to have is f/8. I don’t mind this for two reasons - 1) I am mainly going to be using this lens in brighter conditions, so will have plenty of light to work with and 2) This lens is really sharp at f/8 so this should translate to better sharpness in the images I produce. I will share some sample images throughout this blog so you can make up your own minds!
How does it work?
Extenders, which are also referred to as teleconverters, work by increasing the magnification of your lens, and then projecting this onto your sensor. A really crude way to think of is it’s like a magnifying glass for your lens.
They come in a limited range of magnifications, usually 1.4x and 2x, though I have seen Nikon ones which have a magnification factor of 1.7x. As you’ve probably worked out, the numbers are the factors your magnification is increased by, so a 100mm lens with a 1.4x teleconverter, will have a theoretical reach of 140mm, the same lens with a 2x teleconverter will have a reach of 200mm and so on. If you have a zoom lens then the whole range is magnified by the same factor. You get the idea.
These pieces of kit however, are not selective in what the magnify. They will magnify everything in your image, which includes any grain or ISO ‘noise’ captured in your image.
What should I consider?
You need to consider what the trade-offs are. Essentially, you will be decreasing your maximum aperture and you are going to sacrifice a bit of sharpness in your final images.
Because you are effectively losing light by having the smaller aperture, you are going to have to compensate by increasing your shutter speed or ISO. You’ll need to bear this in mind when setting up your shots and consider the exposure triangle to make sure you end up with an image, which is in exposure terms, balanced. You can read about this in my blog “A Beginner’s Guide to The Exposure Triangle”.
You might lose some auto-focus functionality by attaching the extender. This so far hasn’t been an issue for me, as I have been taking pictures of landscapes in which the subject is often the light hitting the side of a mountain. Mountain’s aren’t known for being fast moving (if one does start moving quickly, then I would suggest you do the same!), but if you’re using it to shoot sport or wildlife then the amount of images you get which are ‘keepers’ will probably see a reduction compared to shots taken without the teleconverter attached.
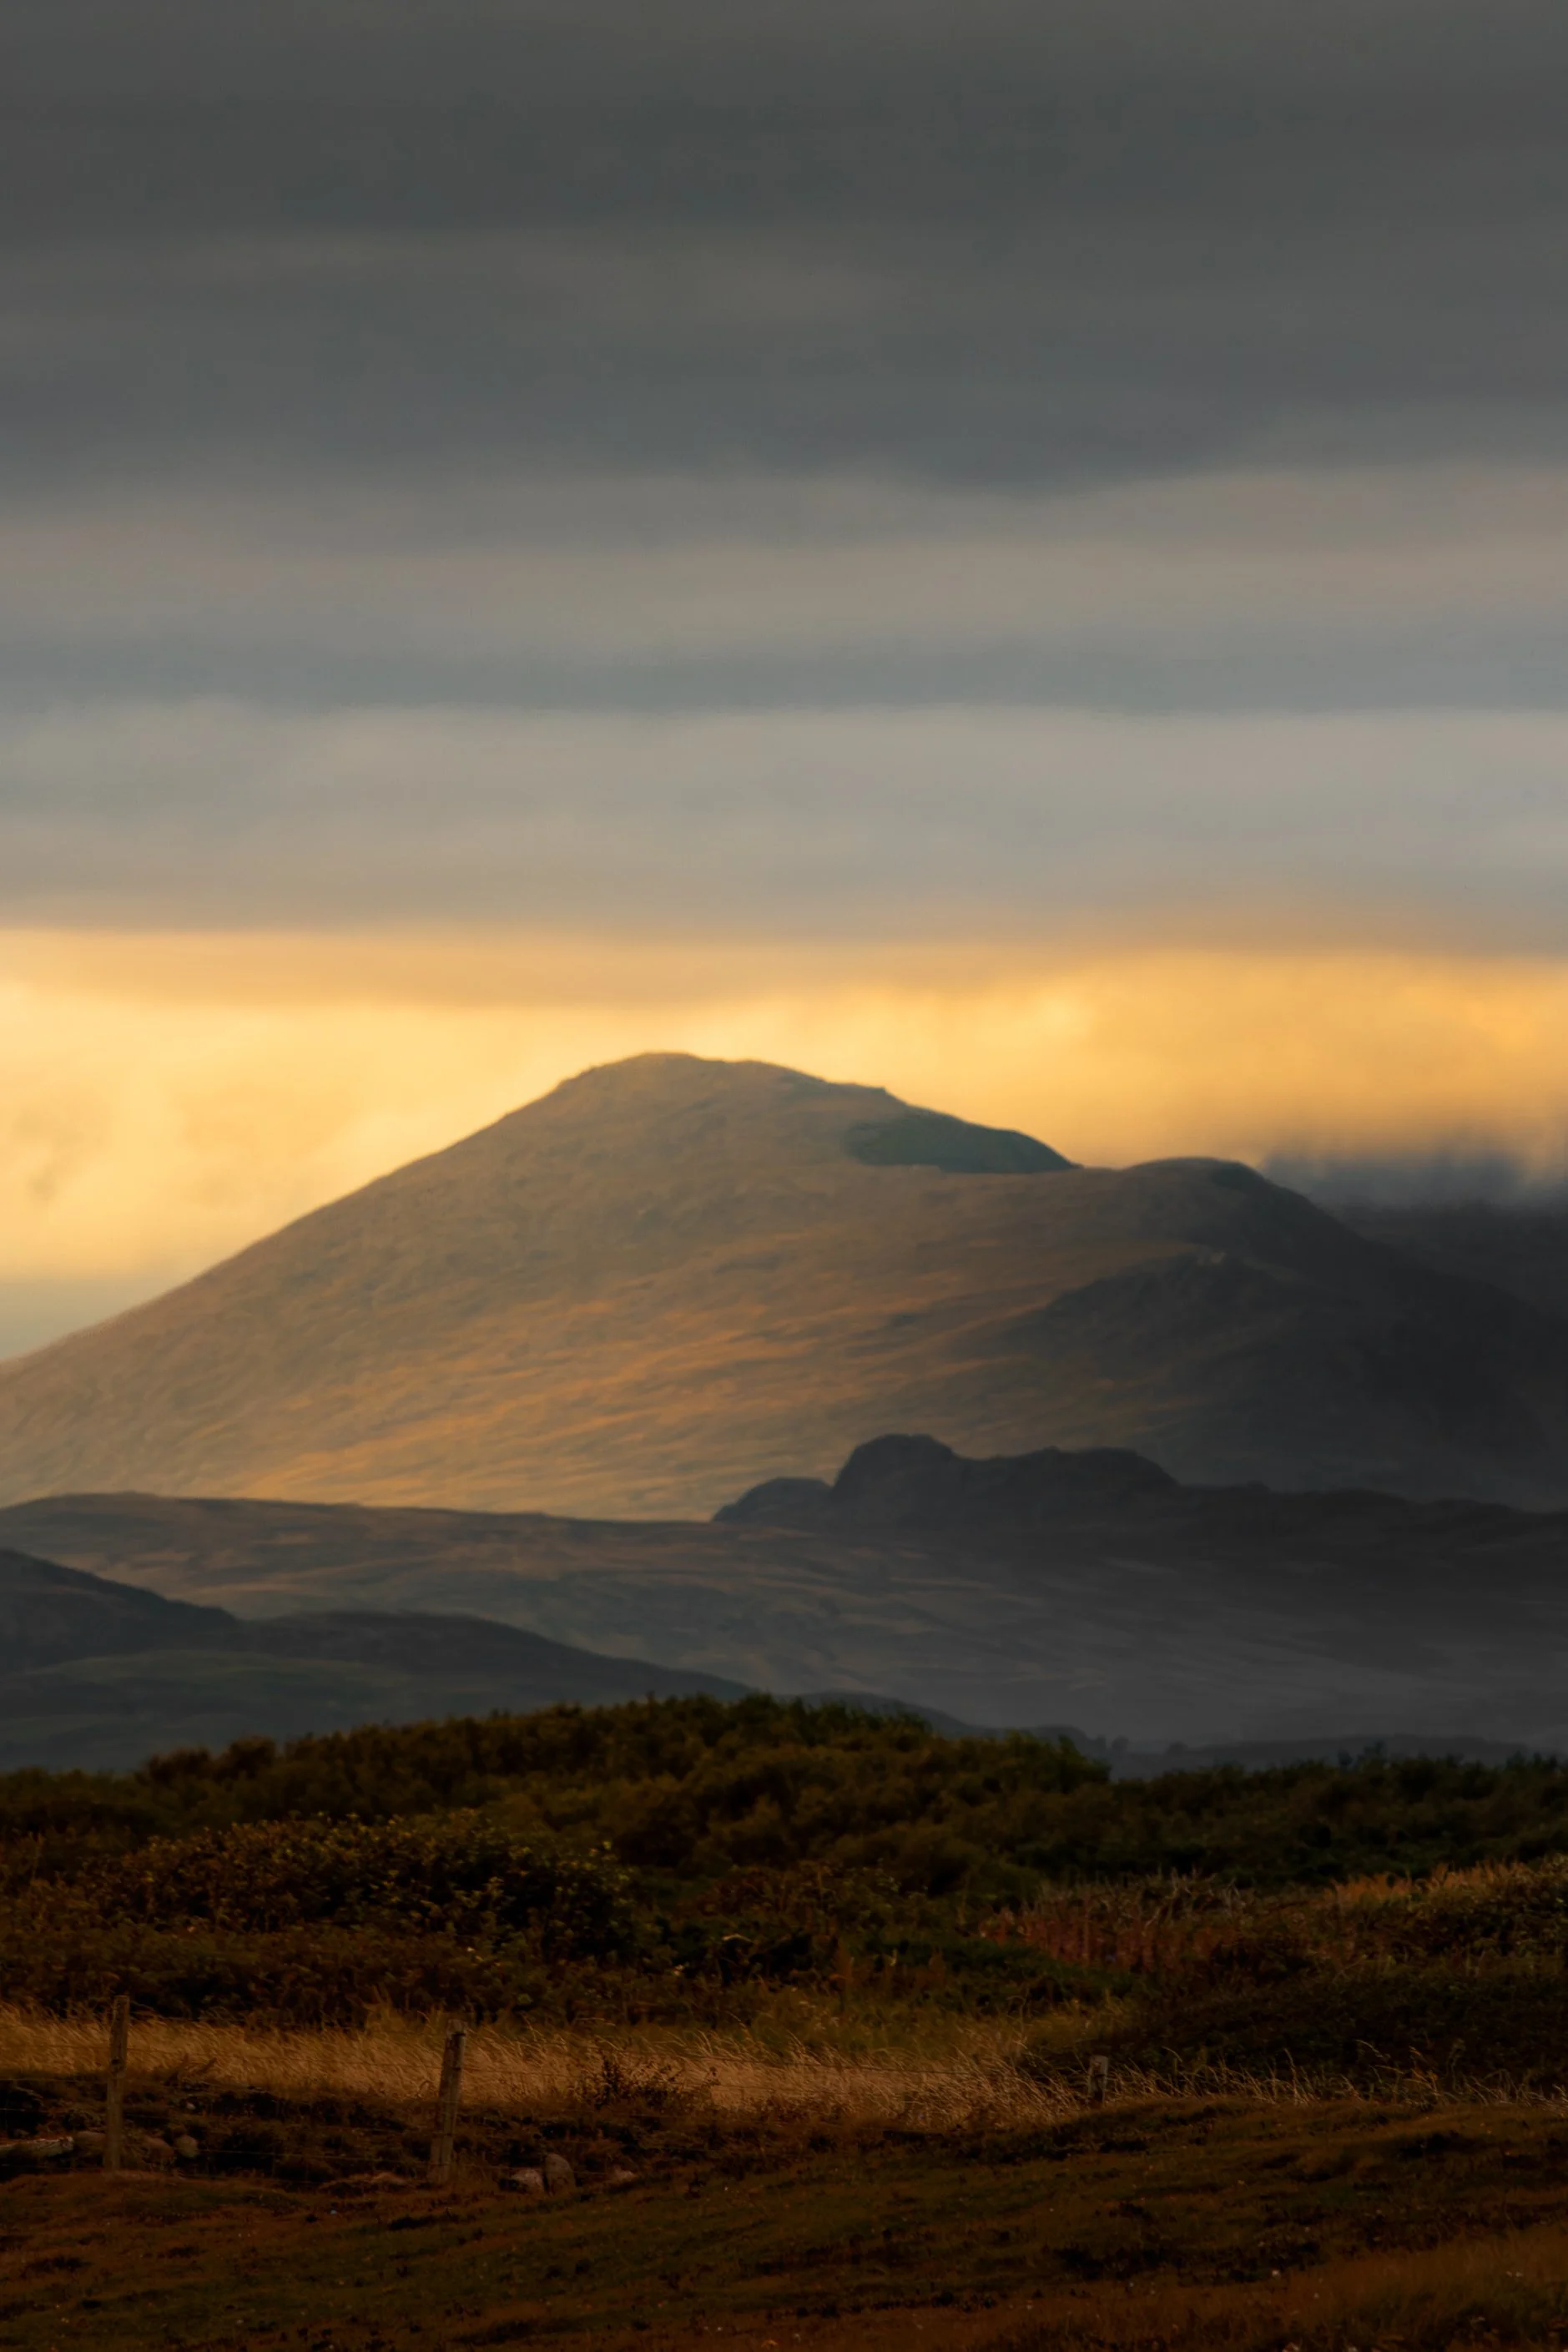
The image on the right was taken at 400mm (640mm on a crop sensor), has had noise reduction applied alongside exposure adjustments, masking and colour adjustments. Single exposure, not focused stacked —>
Finally, you should think about what the kit is doing - it is magnifying everything your lens sees and does, so if you have a lens which suffers from, for example, chromatic aberration, this is also going to be magnified and on top this, you are going to lose some contrast as well.
First Impressions of the Canon 2x extender II.
I’ve already taken this out and stretched its legs for half an hour, the first impressions are good but I have identified a couple of drawbacks, but at this stage, nothing bad enough for me to want to return it.

I also got lucky when I was out shooting and instead of just landscapes, I was fortunate enough to see an A400 Atlas flying low level through the Leven Estuary at Greenodd, presumably on it’s way to LFA 17 at Windermere.
One of the first things I noticed was just how much more of a challenge it is to find things in the viewfinder. Especially a moving object like the A400 I just mentioned. It took me a moment to locate it and then to lock focus. I eventually succeeded and have a bagged a couple of shots I am happy with, you can see one of them on the left.
Because it was a bright evening, I didn’t need to add lots of ISO to compensate for the lack of light in now my now f/8 lens. The shot I have ended up with is sharp and because it was shot at ISO 100, it isn’t loaded with image-ruining noise.
The second shoot I went on, saw me heading over to Walney Island for sunset on a very grey evening. Ambient light was not as abundant as I might have liked it to be. Plus, it was sunset, so I was losing light by the second. This resulted in me having to bump up the ISO on my camera to 400.
When I got back to the studio, I did notice the images I had shot using the teleconverter were suffering from more noise than the same images shot on their “native” counterparts. I will point out this wasn’t a lot of noise, but was still more than I could see on the non-extender version.
Prior to the advent of effective noise reduction software/algorithms, this would have been much more of a problem than it is in today’s post processing world. I used Lightroom’s noise reduction panel to get rid of some of this and it did a pretty good job. All of the above being said, the loss of saturation, whilst not catastrophic, did (in my opinion) make the raw files harder for me to edit effectively and I felt like I had lost some of the flexibility I would normally have.
Something else I noticed was having this lens on my camera made it much heavier, so much so, the ball-head on my tripod was really struggling - I would get a shot framed up and then tighten up the ball head, all for it to “drop” when I wasn’t supporting the weight of the camera/lens/extender combination. I have to admit, this could also be a limitation of my tripod and an unfair criticism of the extender, but I had no issues when I was using my 16-35mm or my 24-105. I am going to try a different ball-head before I reach the decision about how often I might want to shoot with it on a tripod, but if you’re using a longer lens which comes supplied with a collar, then using this is a must to help you to balance the weight of the camera against the lens/extender combination. I will update this entry if I manage to solve the problem.
Who is the Canon EF 2 extender for?
I would recommend this to anyone who is wanting to try shooting at much longer focal lengths, but who isn’t ready to spend the money on a good quality super-telephoto lens just yet. There is a big saving to be made if you buy second hand and it can be a good way into trying your hand at genres such as sports and wildlife.
Another thing I would say is this lens is for someone who already owns some good quality glass to put in front of it; if you’re shooting with a lens which you know has some serious flaws then the teleconverter isn’t just going to make your lens longer, it is also going to amplify the imperfections in your lens. These are going to be painfully obvious to whoever is looking at your image. I am lucky to have a full set of Canon L Series lenses which are really high quality, but I also know the characteristics of each of them meaning I know what to look out for when using the teleconverter and this can help me to mitigate any issues before they have a chance to become a problem in the edit.
Pros and Cons
Pros:
Lightweight
Small(ish) form factor means it’s likely to fit somewhere in your bag.
A cost effective option for people who want to try shooting at longer lengths but who don’t want to shell out hundreds of pounds on a huge lens.
On crop sensors, you end up with “extra” reach owing to your sensor’s crop factor.
Cons:
Loss of stops of light owing to the max aperture of the lens caused by adding the extender.
Amplifies everything, including grain and chromatic aberration.
Some loss of contrast and sharpness in final images.
Summary
If you’re considering making your first foray into genres which require more reach, but don’t have the money to buy the long lens then this could potentially be a safe middle ground. If you’re really into low light photography then you might find the reduction in aperture to (in my case) f/8 to be too constraining. If you’re considering the purchase, then it’s helpful to start by having good lenses which you really understand as any imperfections created by the lens are going to be amplified by the converter.
I think this has been a good purchase for me, it’s opened a world of new compositions, particularly when I want to shoot things I can’t get close enough to in order to create my desired composition. It has given me some more flexibility, perhaps enough to get 2 or 3 extra compositions per location I visit, but I do think this means sacrificing some sharpness and saturation, but not so much to make the ‘project’ a write off.
Will I use this forever instead of buying a dedicated super-telephoto zoom lens (or if I’m feeling flush, a prime - £10,000 for the Canon EF 400mm f/2.8 prime anyone?), probably not. But I am happy enough with the results for the time being which means I am going to have a lot of fun creating something different to my normal shots for many months to come!