
Making a zine is something I have wanted to do for a while, but hadn’t the time to be able to sit down and plan it out, send it to the printers and do something with it. In this blog I am going to talk to you about the process as per my experience, how I built it and tell you what resources and equipment you will need to make your very own zine!
This blog contains Amazon affiliate links. If you click one of these links and make a qualifying purchase, I may receive a small commission. This doesn’t cost you any extra, but is a great way to support what I am doing with this blog and allows me to purchase things to review and to make content like this blog you are reading now.
What is a Zine?
A zine is a small, self-published booklet or magazine, usually produced in limited quantities and focused on a particular subject, idea or creative theme.
You have probably heard them talked about online, especially in the photography community and the ever growing self-help/ journalling community (if this is your bag then you should definitely check out Struthless on YouTube), and can be a great way to share your images and get into the whole printing workflow that this requires as well.
Why Should You Make a Zine?
Making a zine will make you deliberately consider image choices, sequence, colour and theme, amongst other things. It’s a far more creative process than it sounds, and you can make it as ‘involved’ as you want to be.
They’re a great way to share and sell your work in a more analogue way, rather than just relying on posting and advertising images online.
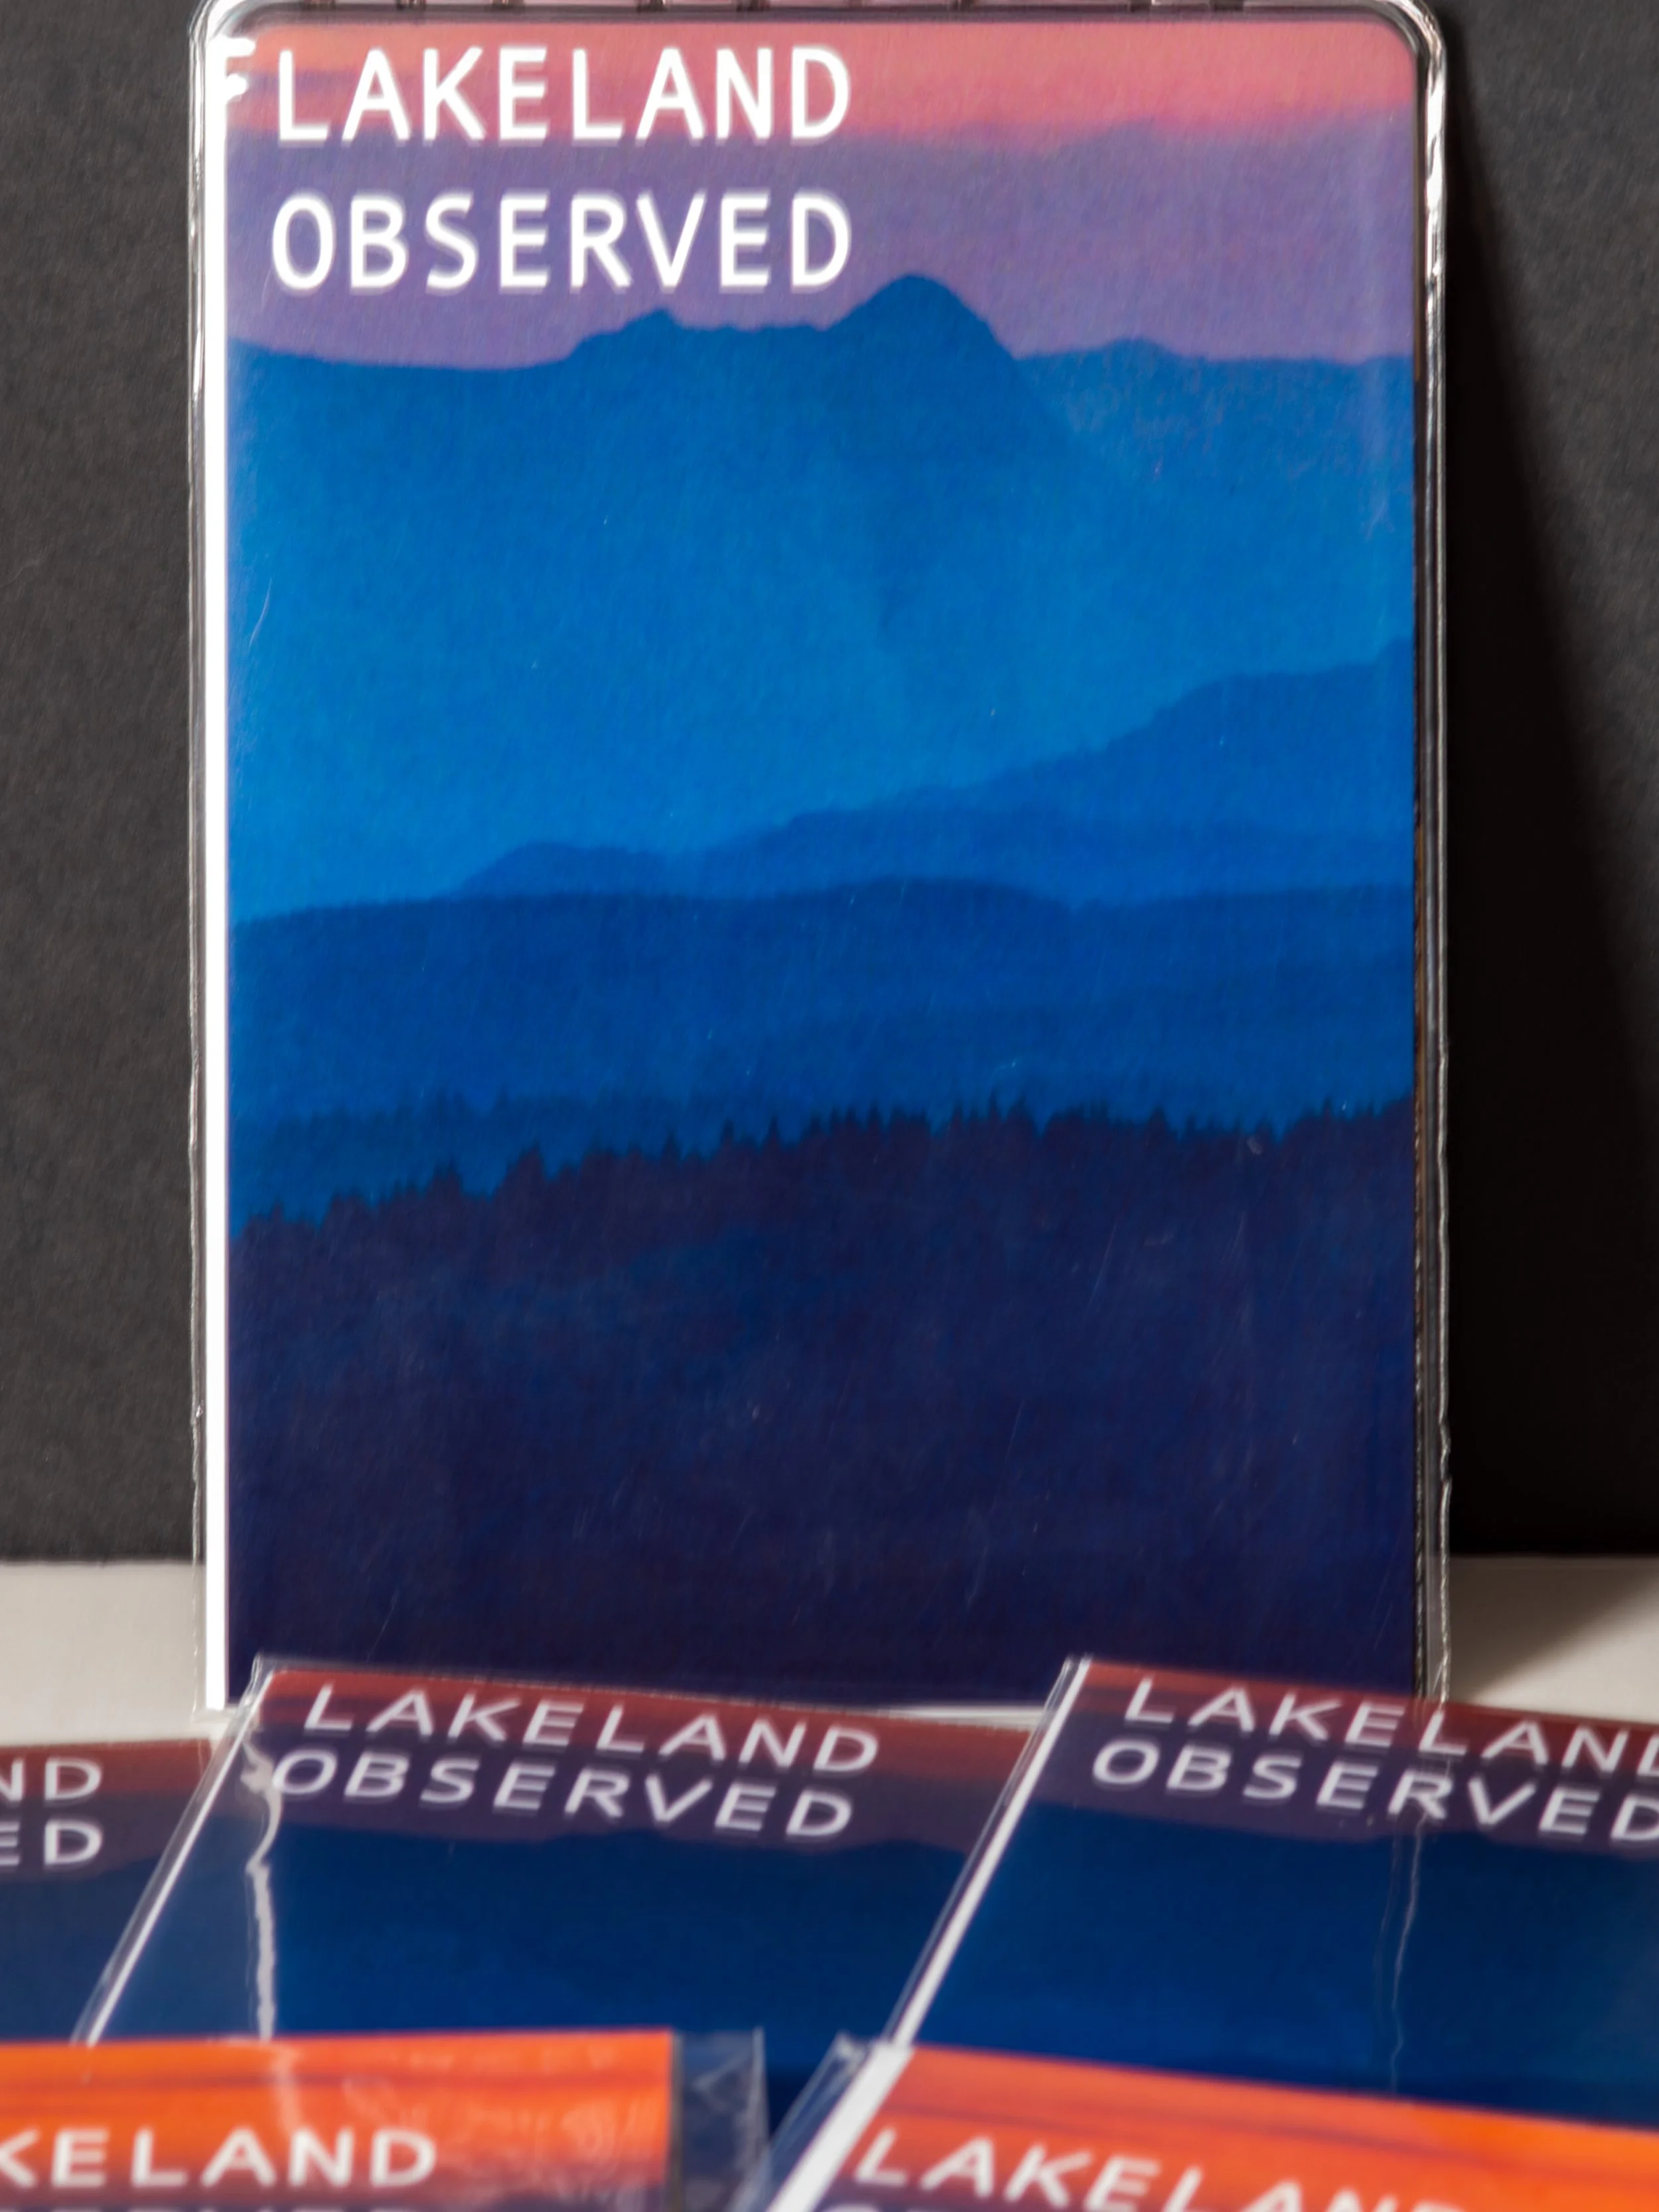
My completed, packaged zine.
You can find the links to all of the things I used at the bottom of the page and links for InDesign templates part way down.
I have used the back page of mine to hold all of my business contact details, so this functions almost like a business card - it looks pretty cool when you hand them over too! As well as this, I am not only giving people my contact details, I am handing them physical copies of my work that they can see it quickly, without having to follow a link and click through to find what they are looking for.
I found the whole process to be fun and engaging, relatively cheap (you could do it much cheaper than I have done) and pretty relaxing.
There was a great sense of reward at the end when I had created my first zine; to have something physical that I could share rather than just posting a link gave me a real sense of achievement.
I think, for me at least, the most valuable thing it did was make me stop thinking about images as individual photographs and make me consider them as more of a body of work - this is something that applies both when making the zine itself and is now in my thoughts even more when I am out on location.
Making Your Zine
This doesn’t have to be complicated. The one I have made consists of one sheet of A4 or A3 paper, folded in a way that creates me 8 spaces into which I can place my images. This is often called a mini-zine. You can see instructions on how to fold your paper here, but this is the last step you need to do, get everything printed first!
The first thing you need to do is to identify a theme. This can be as broad or as specific as you would like; for my first one, I chose the theme of the Lake District. When I make another, I might niche this down a bit to something like ‘seasons’ or ‘water’. You could even go one stage further and get as specific as ‘trees’, a specific colour or a particular mountain/woodland etc. It really is up to you: It’s your zine, you make the rules!
Once you have selected your theme, you need to choose your photos. This was the difficult part for me, I knew that I only needed 7 images as the back page was always going to be the general business card boiler plate.
Now that you have your images, you need to sequence them. This was also quite time consuming for me, I wanted to avoid having facing pages with too much similar colour, but at the same time, make sure that they didn’t clash. Your layout is going to depend on your personal preference and what you are trying to communicate through your zine.
Once you are happy with your design, you can export them to the correct file type and send them to print. I used PrintPond to do my printing and was really happy with both the results and the turnaround time - I didn’t expedite them, but they were still here in less than 72 hours, very impressive! I use the PrintSpace in Shoreditch for all of my art printing, but for what I needed on this project, I didn’t want to spend a ton of money and PrintPond gave me the quality and the price that I needed to get the results I was aiming for.
I had 15 A3 colour prints and 10 A4 colour prints made on 130gsm white matte paper. This weight of paper allows me to do things;
It creates a premium look and feel to the zine and
It’s still thin enough to fold cleanly.
Including delivery they cost me £22.82. Can’t argue with that; it’s about 91p each, including delivery.
Once I had them, I just had to fold and package them.
Download my Free InDesign Mini-Zine Template
Making the layout and getting everything right was something I did in Adobe InDesign. I didn’t get it right the first time, but have made some adjustments and have finally got it dialled in. I have made a template that you can download and use in InDesign. This will help you to resize and frame your images and make sure the images are oriented in the right direction - some of them need to be upside down. You can click the buttons below to download them to your device.
I would recommend folding a blank zine and then numbering the pages so you can see where in the zine each page will fall, but essentially, the top line is upside down and the first two boxes are your front and back cover, the other two are pages five and 6, the bottom row contains inside pages 1-4 and the images should be inserted the correct way up.
Clicking the download buttons will download my free InDesign template for a single page zine.
Folding Your Mini Zine
This is really simple, much simpler than I thought it would be - once you have done a couple, the muscle memory really kicks in. You just need to be patient with the process, because to have something finished and tangible is well worth it! There are some instructions on how to fold your zine here. I found that by using a craft knife/x-acto knife rather than scissors to make the cut, I got much better, sharper results. I used a metal ruler to help me keep everything straight.
Once I had folded it, I was pleased with the result, but I felt that it needed something else. This turned out to be gluing the pages so that there weren’t bits of paper flapping all over the place. I used book binding glue to do this with; you could use a pritt stick, but it won’t be as strong and you will end up with lumps and bit of glue where you don't want them.
I also used a bone folder to make the creases sharp. Previously, I would have just used a finger nail or the edge of a ruler, but the results I got with this simple (and cheap) tool, were much better and made everything look and feel much more professional. I will link all of the things I have used at the bottom of this blog so that you can browse for yourself and make your own decisions.
Packaging Your Zine
This stage is completely optional and will be down to your own preferences, what you’re using them for and how you are going to distribute them. I ordered cello packs for mine, as I intend to carry them in my camera bag to give to people as business cards or if they ask me what I am doing - it’s surprising how many people will approach you and ask what you’re doing and where they can look at your work; being able to give them something like this is so much better than handing them a business card that they are probably going to forget about. At least this way, it looks professional, has a premium feel and encourages them to looks at your work, and maybe even share it with family and friends.
I know adding packaging can seem like an unnecessary use of plastic, so I went for biodegradable cello bags instead. They cost a little more, but I was happier paying the difference for something I’m going to be handing out regularly, knowing that I am doing it in as green-a-way as possible to achieve my ends.
I also invested in some stickers. These have an outdoor theme and I just pop one in with each zine, just as a little extra and it’s quite a fun thing to do - who doesn’t love a sticker!?
If you’re going to use cello bags, then for an A4 folded zine, you will need A7 sized bags (or 80 ×110mm) and for an A3 sized folded zine, you will need A6 (110 × 155mm). The numbers in brackets are the recommended bag size, not the size of the final folded zine.
Things to Make Your Zine
Obviously, you’re going to need your photographs, and if you can crop them in the correct aspect ratio first, that’s going to help you when it comes to making your layout.
The essential things you are going to need are: photos/printed sheet, craft knife or scissors and a metal ruler.
The optional things are those like a cutting mat, bone folder, bookbinding/PVA glue, cello bags and stickers.
This is all pretty cheap if you buy it individually (in total you’re probably looking at about £25), and you can spend as much or as little as you link on making and packaging your zine. All you really need is your photos and some way of printing them onto the paper you are going to use, the rest is absolutely optional!
If you’re going to use a craft/x-acto knife, then you should probably invest in a cutting mat so that you’re not ruining good surfaces in your workspace.


My Final Thoughts on the Process.
This has been one of the most useful things I have done to benefit my photography in quite a while. I haven’t printed anything for some time, and having something tangible was a really pleasant experience and something I haven’t had in a while. It reminded me photos can be physical and not just displayed on a screen. It also got me thinking about photographs as a body of work again; having a theme really helped with this, and even you don’t intend on making a zine, this is a really useful practice to have.
Thanks for reading! If you enjoyed this one and want more photography tips, thoughts, guides and the occasional ramble like this, you can sign up to my newsletter. I send out new posts, useful resources and other bits that I think photographers might actually find helpful — no spam, no nonsense.
If you'd like to help keep the blog going, you can also buy me a coffee. It helps cover the cost of running the site, testing gear, getting out to make new work and generally gives me an excuse to keep disappearing down photography-related rabbit holes. Completely optional, but always hugely appreciated.
Click the links below to read some of my previous blog posts.

Image credits: Cover image - Hans @hansphoto on Unsplash