
My Photography Blog
Welcome to the Chris Kendrick Photography Blog, where I share the stories, challenges and inspirations behind shooting Lake District landscapes and working as a Cumbria-based photographer. Alongside behind-the-scenes reflections from the fells and lakes, you'll also find honest photography gear reviews, covering the cameras, lenses and accessories that genuinely perform in real Lake District conditions. Whether you’re passionate about landscape photography, exploring Cumbria’s scenery, building your kit, or simply curious about the craft, there’s something here for you.
Some posts include affiliate links; thank you if you choose to support the blog through a qualifying purchase. If there’s a topic or piece of gear you’d like me to cover, let me know. Enjoy exploring!
Enjoy!
Landscape Photography for Complete Beginners
A friendly, step-by-step guide to landscape photography for complete beginners. Learn the core camera settings, composition basics, focusing, and how to work with light so you can capture sharper, more compelling images from your very first outings.
I suspect that those of you who are reading this, are, probably going to fall into one of three categories: People who have got a new camera and are taking their first steps in landscape photography, people who have some experience in photography and are looking to to move their skills on to their next level and more advanced photographers who are looking to develop their skills in a new genre/style of photography.
This isn’t intended to be a fully comprehensive guide to landscape photgraphy, but more of a boarder overview into some techniques and practices that will hope you to develop a basic set of skills that will get you out in the field and making some images that you bring home to evaluate, edit and share.
If you’re completely new here or you’re brand new to photography, I’d recommend you go and read my beginner’s guide to the exposure triangle and make sure that you’re familiar with this before you head read further into this blog and before you head out into the field to start using your new toy.
Another one of my blog that would be worth some time of yours, at some point is my blog about must have apps for landscape photographers. These are going to be a great help to your during your shoot planning and will help you to check the weather, calculate exposure times and, perhaps most importantly figure out where to shoot and how to get there.
I am going to say this at the start: STAY SAFE! I’m not responsible if you go out and hurt yourself! The mountains and the scenery will be there tomorrow, make you are too. If you’re going alone, let someone know where you are going and when you expect to be returning. If you’re heading into the fells, take a map, the batteries won’t run out in and it’s always going to have signal. Oh and if it might get dark or start to get dark whilst you are out, take your head torch. Finally, (albeit not exhaustively), make sure you are wearing terrain appropriate footwear and weather appropriate clothing.
There are going to be some assumptions made throughout this blog: I am going to assume that you have your camera and that you have a kit lens to go with it (this is going to have a focal range of around 18-55mm and a variable aperture of around f/3.5-5.6), a tripod to mount it on (and a way to attach your camera to your tripod) and that you’ve got a bag to carry it all around in. If not, then if you have a read of my blog “What gear do you really need as a beginner landscape photographer?”. This should give you some ideas about where to start, and not too epxensively.
So now that we have looked at some basics and managed to minimise any gear talk, what should you be thinking about as a beginner photographer?
RAW vs JPEG
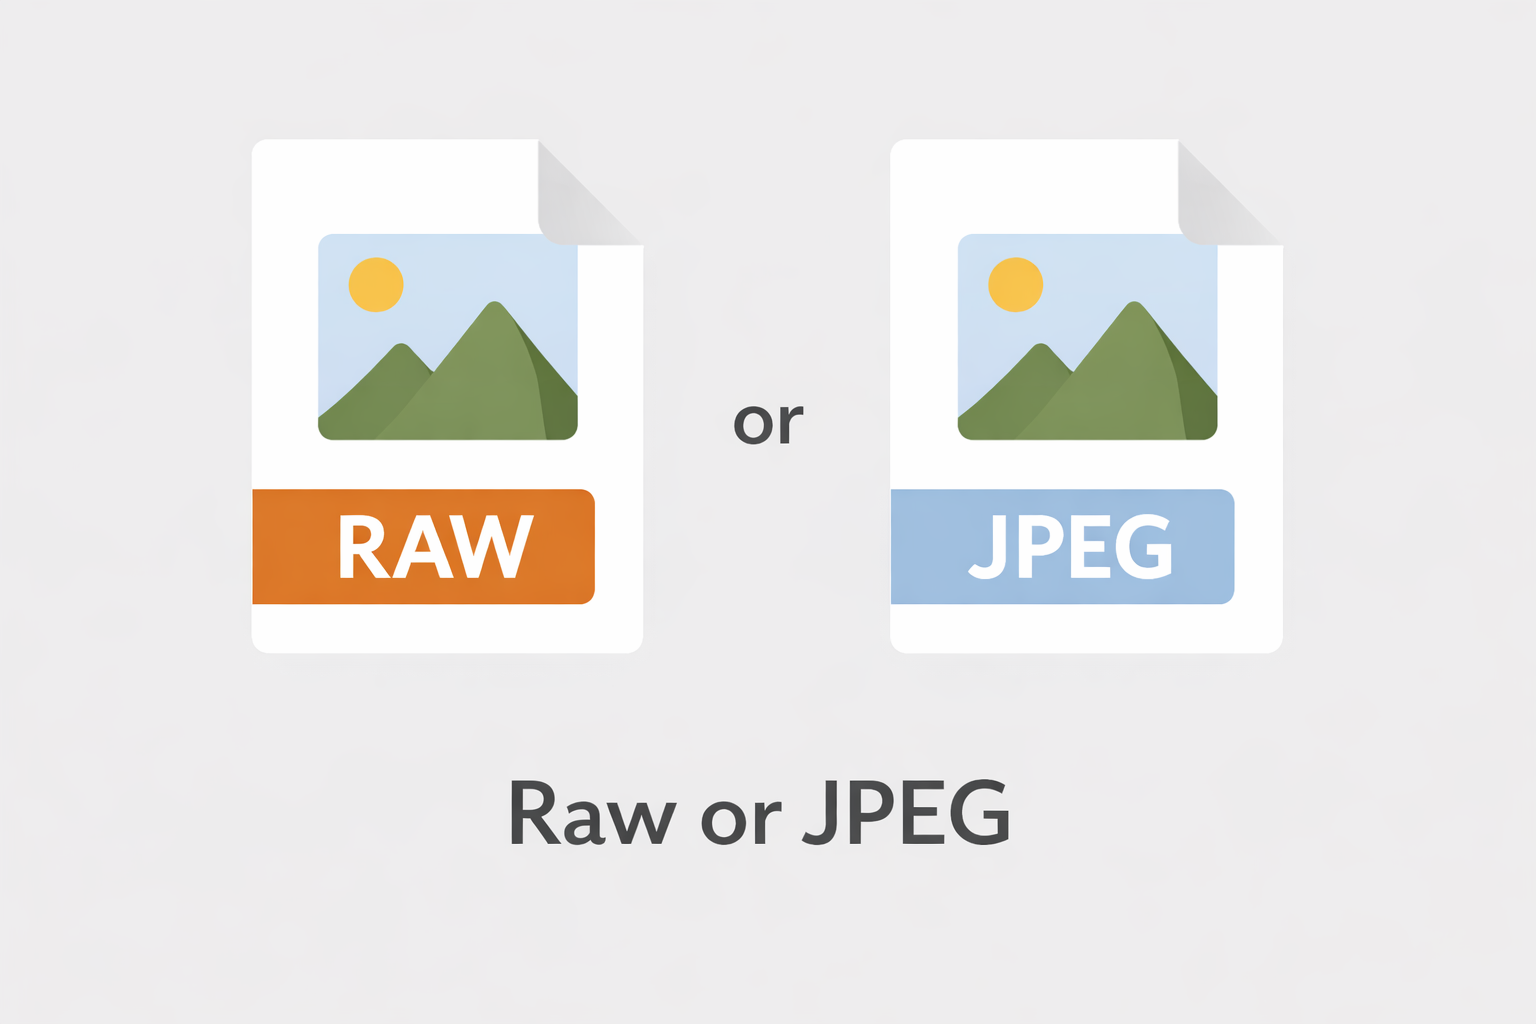
These are the two types of file that your camera is able to write to your card when you press the shutter button. You’ll need to tell the camera what type of file you want. Both have their advantages, but if you want flexibility when you are editing in Lightroom, you want RAW files. If you want faster results and photos that you don’t need to much colour correcting and exposure adjustment on, you want jpegs.
So what’s the difference? RAW files contain a lot of data about the colour and light in the photo that you have taken.
The advantage of them is that when you import them into your editing suite (lightroom/affinity/other), you can get more creative with the image and this gives you more scope to be creative with your edits. These files in their original state will not be suitable for sharing/printing. They will often look dark and flat - pretty unappealing. Once you have spent time editing them, you will have something to be proud of, but be prepared to put the work in to edit them images. These are big files and take up quite a bit space on your card and your hard drive so storing them can get expensive if you’re shooting a lot.
JPEGS on the other are much smaller in terms of file size, and this is because they are compressed files. When you take the image on your camera, it applies a colour profile to the image and makes it look “ready”. It's essentially a little a bit like taking a photo on your phone. Because of the way the file is compressed, it means that they’re not great for editing. If you try and adjust colours in a jpeg, or you try to increase exposure or contrast (for examople), you’ll find that they quite quickly start to look a bit strange and they don’t look natural. There is a limit to what you can do with them before they’re unusable.
Most camera will allow you to shoot just a RAW file, just a JPEG and RAW + JPEG. The last option is great as it gives you the best of both worlds.
Ultimately, if you plan on editing your photos, shoot in RAW. If you don’t want to do that and you want to take photos that are “ready to use” then shoot JPEG. You’ll need to consult your camera’s manual to see how to alter this setting for your individual camera.
Shooting Modes.
Some people will tell you that to be a “proper” photographer, you should be shooting in manual mode. This isn’t the case. Lot’s of pro’s shoot in aperture priority or shutter priority (called aperture mode/value and time mode/value on some brands of camera) and there is nothing wrong with this. When you’re learning, there’s nothing wrong with shooting in auto, but if you want more complete control of the final image you capture, you’ll want to learn to shoot in one of the other modes I have mentioned.
What mode you choose is largely going to come down to what you are shooting, but because landscape photography tends to be much slower, it often makes sense to shoot in full manual mode. Street photographers often prefer to shoot in aperture priority as it makes things a bit quicker for them.
But what’s the difference? In manual mode, your are in full control of all three aspect of the exposure triangle (aperture, ISO and shutter speed). In aperture priority, you choose the aperture and the camera will select your ISO and shutter speed, if you shoot in shutter priority you choose the shutter speed and the camera adjusts the other settings to help you to get the desired exposure.
If you are letting the camera choose some of the settings for you, you might want to investigate your manual and find out how to set the maximum aperture, maximum ISO and maximum shutter speeds you want it to use. ISO in particular, if set to auto could add things to your image that you don’t want like (like ISO noise) which can be hard to deal with and can affect the look of a photo.
I like to shoot in manual mode for the most part. It’s not because I think it makes a better photographer, but because I know that it gives me the most control and forces me to make deliberate decisions about what I am doing with my camera and therefore the resulting image. I don’t shoot exclusively in manual mode, but it is the one that I use more than any other.
Focus Modes
On the surface this is a bit more straightforward as you’ve only got two modes to shoot in; manual focus and autofocus. If you choose autofocus then it gets a bit more complicated as there will be lots of different autofocus modes on your camera. Talking about all of these is a complicated issue as they vary from brand to brand and camera to camera. You should read the user manual and search YouTube videos to discover more about the specific autofocus modes on your camera.
If I am shooting landscapes then I am using manual focus. I’m usually shooting on a tripod so that I have a steady based to work from and I am choosing where in the image I want to focus myself. You adjust the focus by twisting the focus ring on your lens and look in your viewfinder or on your LCD screen to see when you have got the image sharp. Once you’re happy, you can click the shutter and review what you’ve got.
It’s always worth checking the focus after you have taken the image, and using the zoom buttons on your camera to zoom into the focus areas to check that it is ‘properly sharp’.
This an area where you can get really creative, especially with depth of field (controller by your aperture and the distance between your lens and the subject) and this can create depth and layers in your image. The key is to experiment and discover what you find pleasing.
There are of course, some caveats to focusing and these are largely down to the limitations of your chosen lens. All lenses, no matter how expensive, have limitations and we can’t always get everything that we want to get in focus, in focus; we can’t break the laws of physics! As you get better and your confidence builds, you may want to explore focus stacking, but this is a much more advanced technique that we can explore at a later date.
Composition
This is a never ending topic, but composition is important. Like really important. Alongside lighting, it is one of the trump cards in photography.
There are rules in composition, but remember that rules can be broken. The common ones you will hear about are the rules of thirds, leading lines and framing.
The rule of thirds: The frame is divided into a 3×3 grid. Placing key subjects (a tree, a person, a horizon) along these lines—or at their intersections—creates a more dynamic composition than centring everything.Put the horizon on the top or bottom third, not the middle. Place the main subject on a left or right third line.
Leading Lines: Leading lines are natural or man-made lines that guide the viewer’s eye into the image—from roads and rivers to fences, shadows or architectural lines. Lines draw attention and create depth, helping the viewer understand where to look first.
Position yourself so a path or shoreline leads toward your subject or use curves to add elegance and movement to the composition.
Framing
"Framing" means using elements in the scene—like archways, branches, windows or rocks—to surround or partially enclose the subject. It adds depth, focuses attention and creates context within the wider environment. Shoot through a doorway or gap in trees or use overhanging branches or rocks to frame a landscape.
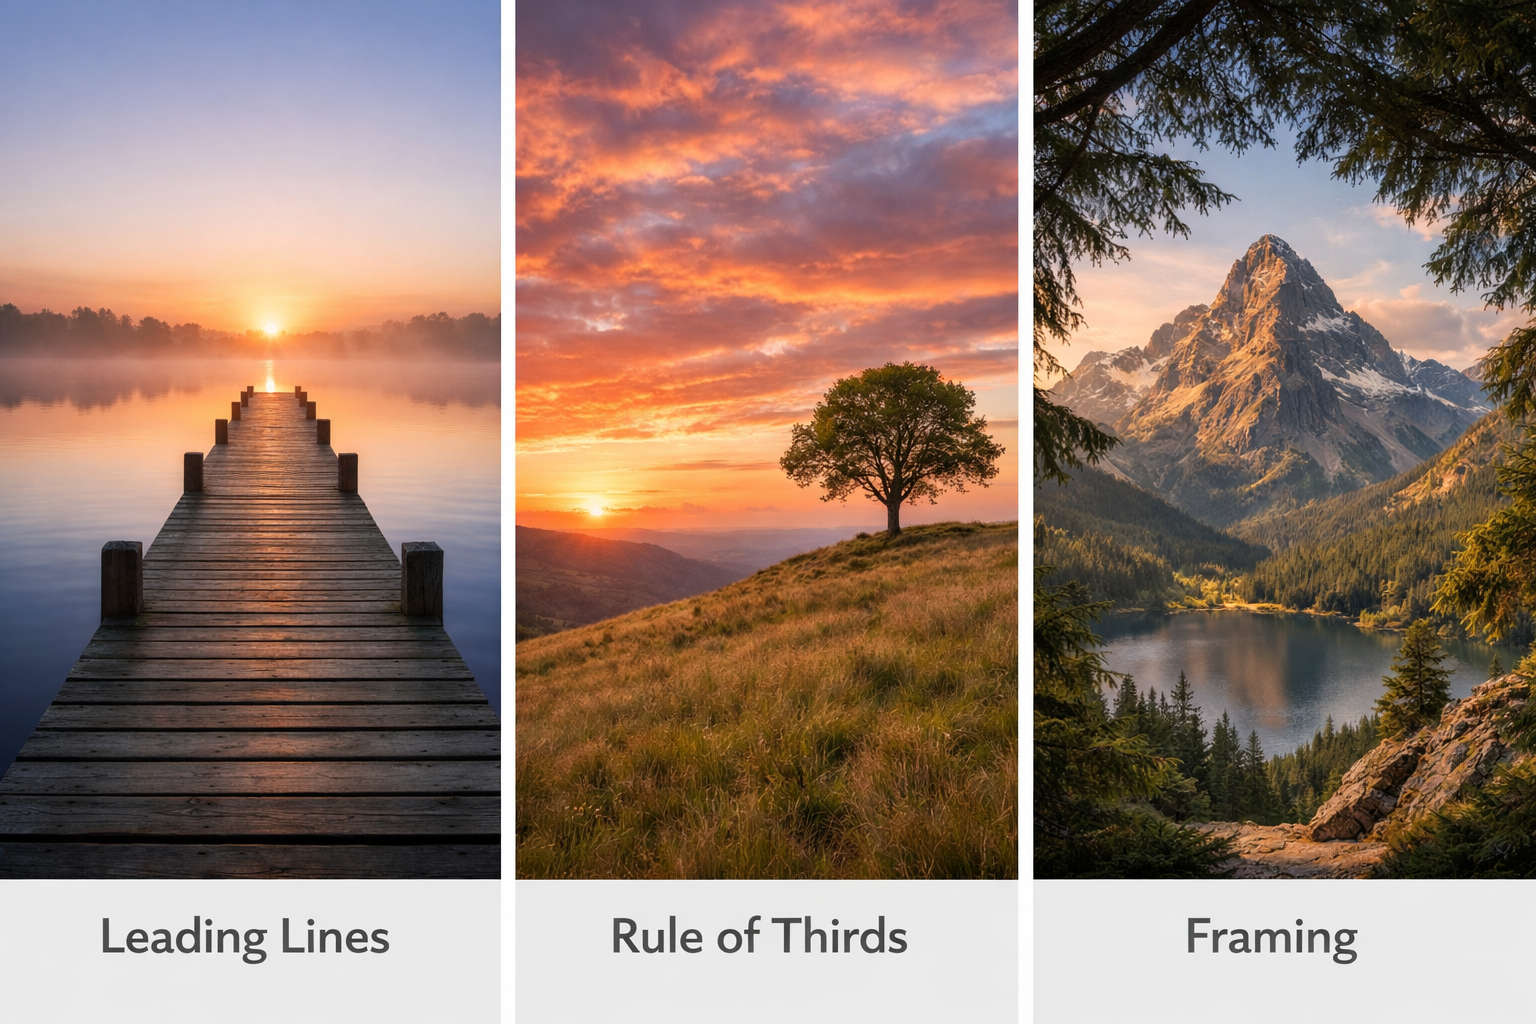
Examples showing different compositional techniques or ‘rules’

Planning
Fail to prepare = prepare to fail. Know where you want to be, when you want to be there, how you’re going to get there, and equally as importantly, how you’re going to get back. Have a look at some locations you want to visit and check them out online and see what books you can find to help you to get the most from them. There are some great photography guide books out there, such as this one which talks about photography in Scotland - there’s a whole bunch of them in this series, but don’t be too influenced by what you read and what you see online. You’ll just end up taking the same photo as everyone else.
You also need to think about the weather - what clothing do you need and what impact the weather is going to have on where you can go.
When I was photographing London, this wasn't as much of an issue as it’s the weather doesn’t make it any more dangerous, but in the Lake District (or anywhere else where you can end up isolated or at the top of a mountain) it can make the landscape deadly. As always, the moutains will be there tomorrow, make sure you are too!
Kit… what are you are taking with you? If you are a beginner, then you’re probably going to be taking your camera and your kit lens, hopefully in some kind of camera bag and you will have tripod. You don’t need to spend a fortune on a tripod, but the more you spend, generally, the better and lighter they become. That’s all you need to get started!
I think my biggest advice for your first shoot would be to go somewhere that you know and somewhere that you love. It’s even better if you have multiple different shots that you aim to grab whilst you’re out and about. Unfortunately these places are likely to be busy which means that if you don’t want people in your images (and sometimes you won’t), it’s going to make this harder. It also means that are likely to be other photographers and if it’s your first time out doing landscape photography, that can be a bit daunting. Don’t let it put you off. For the most part, we’re a friendly bunch and we love to chat about photography and some of us love to help!
Don’t Worry What Other People Think
You are probably going to feel really self conscious the first time you go out. You might be carrying a tripod, you might be using your camera on your tripod, and that makes you stand out. No one cares. People might be interested, which is great.. talk to them and be kind! People are used to seeing landscape photographers in places that are nice to look at. They’re used to seeing street photographers in towns and cities. We’re everywhere!
I remember the first time I went out to shoot when I lived in London. I felt like everyone was looking at me, especially when I was set up on a tripod. Truth is that there were far weirder things than a bloke taking photos in the city… life just passes by in London and everyone seems to have somewhere that they want to be and they wanted to be there yesterday.
Now I know that it’s very different up in the hills, there are fewer people and the people that are there are spread out but generally walking on the same paths, looking at the same locations. People will notice you but as long as you’re not being selfish or behaving like a k**b then no one minds that you’re there and no one cares that you are. Do you thing and move on when you’ve got what you need and have taken some time to enjoy the view.
You won’t always have the place to yourself. I remember going to Elterwater very early on a winter’s morning, like really early and being amazed that were at least 10 other photographers at the location with me. It’s just one of those things… beautiful places attract landscape photographers. That’s a fact that you need to deal with.
Talk to People.
For the most part, landscape photographers are a friendly bunch who like to talk and who like to help. There is a real community in photography and you should embrace it. Talking to people is one of the best ways to learn - listen to what people have to say, take not and then do your research to see how it will work for you (or if it will work at all) and then try to use it.
I have made some wonderful friends whilst out doing photography. I am part of a WhatsApp group of photographers that I know and have met from my time in London (it’s not some weird social media engagement group), but it’s a great place to learn, share images and get feedback on them, ask questions and to get support and advice.
Community in photgraphy is really important. Be a part of it. I’m going to explore the idea of community in photography in another blog post later in the year (it’s saved in the drafts at the moment whilst I figure it out), look out for it… if you want to get notified about it then sign up to my newsletter via the contact page.

Social Media
You probably want to share your images with people, and when you start out, social media is a great way to share them. Don’t expect to amass a huge following overnight. The way that social media works these days means that this is much, much harder than it used to be. Some people get lucky and have such good content that they can still do this, but those instances are much fewer and farther between.
Do it for the love of what you do and to put you images out there.
If you’re serious about it, have a strategy stick to it and adapt it. There’s a ton of stuff on social media that will help you with this, but choose wisely and don’t spend money on social media advice!
Use your social media platforms to network with other photographers. Don’t worry about the likes, don’t worry about the engagement (at least not when you’re starting out), just do it because you can and because you enjoy doing it, and don’t ever feel like you are under pressure to post.
This isn’t Everything…
I could go on for hours about all of the stuff I think you should know and you’d spend more time reading this that you do shooting, and that would be counterproductive. Different photographers are going to give you different advice, and that’s good, just choose the advice you take carefully.
Get out There and Enjoy It!
No matter where you are and where you live, the best thing you can do to get better at photography is to get out there and practice. Take the images. Make the mistakes, learn why the mistake happened, learn to correct it and have another go. You’re not going to get better sat on your behind not taking photos.
Thanks for reading - I hope you have found it useful. If you want more stuff like this as well all of the updates, please head to the contact page and sign up to my newsletter and get updates direct to your inbox!
If you’d like to support the blog and help me keep producing Lake District photography content, honest gear reviews and regular website updates, you can do so via my Buy Me a Coffee page. Keeping everything running smoothly takes time, and your support makes a real difference. Thank you.


Landscape Photography Workshops in The Lake District
Discover how landscape photography workshops in the Lake District can transform your skills. Learn to master light, composition and editing with expert field guidance.
There is something different about learning landscape photography in the place that inspires it the most. For me, that’s the Lake District and I’m lucky enough to live in amongst the stunning surroundings that it offers.
But the Lake District isn’t just a beautiful backdrop and a gorgeous place to live, but it’s living, shifting environment. Light moves quickly and it is often fleeting - it’s gone just as soon as it has arrived. The cloud and contrast change by the minute and knowing how to respond is what separates a snapshot from a portfolio image.
That’s exactly what a well-run landscape photography workshop will help you to develop.
Why Choose a Landscape Photography Workshop?
You can learn settings from YouTube and you can read about composition in a book, but actually being in the landscape with someone guiding you and talking about the decisions available to you in real time… that’s something very different.
A workshop allows you to:
Understand light direction and timing in real conditions
Refine composition beyond the obvious viewpoint
Learn how to work with weather rather than fight it
Improve confidence using filters, tripods, and exposure techniques
Develop a more consistent editing workflow
Most importantly, you learn how to see — not just how to shoot.
This variety makes it an exceptional classroom. You can practise:
Long exposure techniques on moving water
Foreground interest and depth
Working in high-contrast mountain light
Minimalist compositions in mist
Seasonal colour control in autumn and winter
Every session is different because the landscape is never the same twice.
What You Should Expect From a Professional Workshop
A good landscape photography workshop is not a “follow me and copy this shot” experience.
It should include:
Location Planning
Understanding why a location works at a particular time of day. Learning how to plan using light direction, season, and weather forecasts.
In-Field Technical Coaching
Aperture, shutter speed, and ISO in context
Histogram use
Exposure bracketing
Focus stacking
Filter selection (ND and polariser)
Composition Development
Going beyond central framing and obvious angles. You’ll explore layering, leading lines, negative space, and visual balance.
Post-Processing Guidance
Capturing strong files is only part of the process. Editing is where you refine mood, contrast, and colour.
Whether you use Lightroom, Photoshop, or both, understanding why you edit — not just which sliders to move — is crucial.
Who Are Landscape Photography Workshops For?
They’re often assumed to be for beginners, but that’s not really the case.
Workshops can benefit:
Complete beginners who want structure and clarity
Enthusiasts stuck in a creative plateau
Photographers transitioning to manual mode
Professionals looking to refine their landscape portfolio
Travellers wanting meaningful photography experiences
The key isn’t your level — it’s your willingness to learn and experiment.
Small Group vs One-to-One Workshops
Both formats have strengths.
Small Group Workshops
Shared learning
Broader discussion
Social experience
Cost-effective
One-to-One Workshops
Tailored tuition
Flexible locations
Personalised feedback
Faster technical progression
Choosing the right format depends on how you learn best.
What You’ll Really Take Away
Beyond sharper images and better compositions, most photographers leave with:
Greater confidence in difficult lighting
A clearer creative direction
Improved understanding of workflow
The ability to plan shoots independently
You move from reacting to conditions to anticipating them.
And that changes everything.

Why I Run Landscape Photography Workshops
I moved to Cumbria because landscape photography became more than just a hobby. It became how I see the world.
Spending hours exploring fells before sunrise or waiting for light to break through cloud teaches patience, observation, and decision-making.
Workshops allow me to share not just camera settings, but process:
How I plan shoots
How I adapt when conditions change
How I build a consistent editing style
How I approach landscape photography commercially
If you’re serious about improving your photography in the Lake District, a structured workshop accelerates your growth far more effectively than trial and error alone.
Final Thoughts
Landscape photography isn’t about chasing iconic viewpoints.
It’s about understanding light, timing, and intention.
A workshop won’t just give you better images from a single day — it will give you the skills to create stronger photographs long after the session ends.
If you’d like to explore the Lake District with guidance, structure, and practical field experience then get in touch. You can learn more about my Lake District Landscape Photography workshops here.
Thanks for reading - this has been a quick one today, but I hope you have found it useful. If you want more stuff like this as well all of the updates then sign up to my newsletter by clicking here.
If you’d like to support the blog and help me keep producing Lake District photography content, honest gear reviews and regular website updates, you can do so via my Buy Me a Coffee page. Keeping everything running smoothly takes time, and your support makes a real difference. Thank you.
Focus Stacking: How to Get Sharp Images in Landscape Photography
Focus stacking is a powerful technique that allows photographers to achieve sharp focus throughout an entire image, from foreground to background. In this beginner-friendly tutorial, you will learn what focus stacking is, when to use it, how to shoot the required images in the field, and how to blend them together in post-processing for professional results. Ideal for landscape and macro photographers looking to improve image sharpness and detail.
Sharpness. It’s a hot topic in photography and it’s never going to of away. We all pixel peep whether we admit to it or not, and not just for our own photos.
However, there are limitations to our equipment, even the very best, most expensive lenses can only achieve so much sharpness - you can’t beat physics, you just have to adapt to it. You can come close. Coming close is expensive, and expensive will only get you most of the way. Sometimes we just have to work with what we’ve got and that usually involves using our computer and some editing software.
For this one, we’re going to be using Photoshop, as it’s the easiest and quickest way for us to get the results we want.
What is Focus Stacking?
A good starting point for this would be to look at my blog on exposure blending if you’re not sure about it and then come back and finish this off. If you’re already au-fait with exposure blending/stacking then read on!
Focus stacking helps us to ‘remove’ some of the limitations of our lenses. Even at their sharpest f/stop, there are parts of the image (often the corners), that aren’t as sharp as we would like them to be. With focus stacking, we can take several different exposures of the same subject, with different focus points, usually working from the front of the image to the back and then we can blend them together in Photoshop which creates one image which is sharp across its whole area.
How Do You Focus Stack?
The first thing you need to do is to take your images. I am going to use an example which I have taken in the studio, for the simple reason that this is the place that I have the most control over as much of the process as possible. I’m going to be shooting tethered using capture one, but the process you will go through will be exactly the same, be it in the studio or out in the field. The major difference is that when you/I are working out in the field, instead of being in the warmth of the studio and working on a nice big monitor, we’re often out in poor conditions and working on the ‘tiny’ screen on the back of the camera.
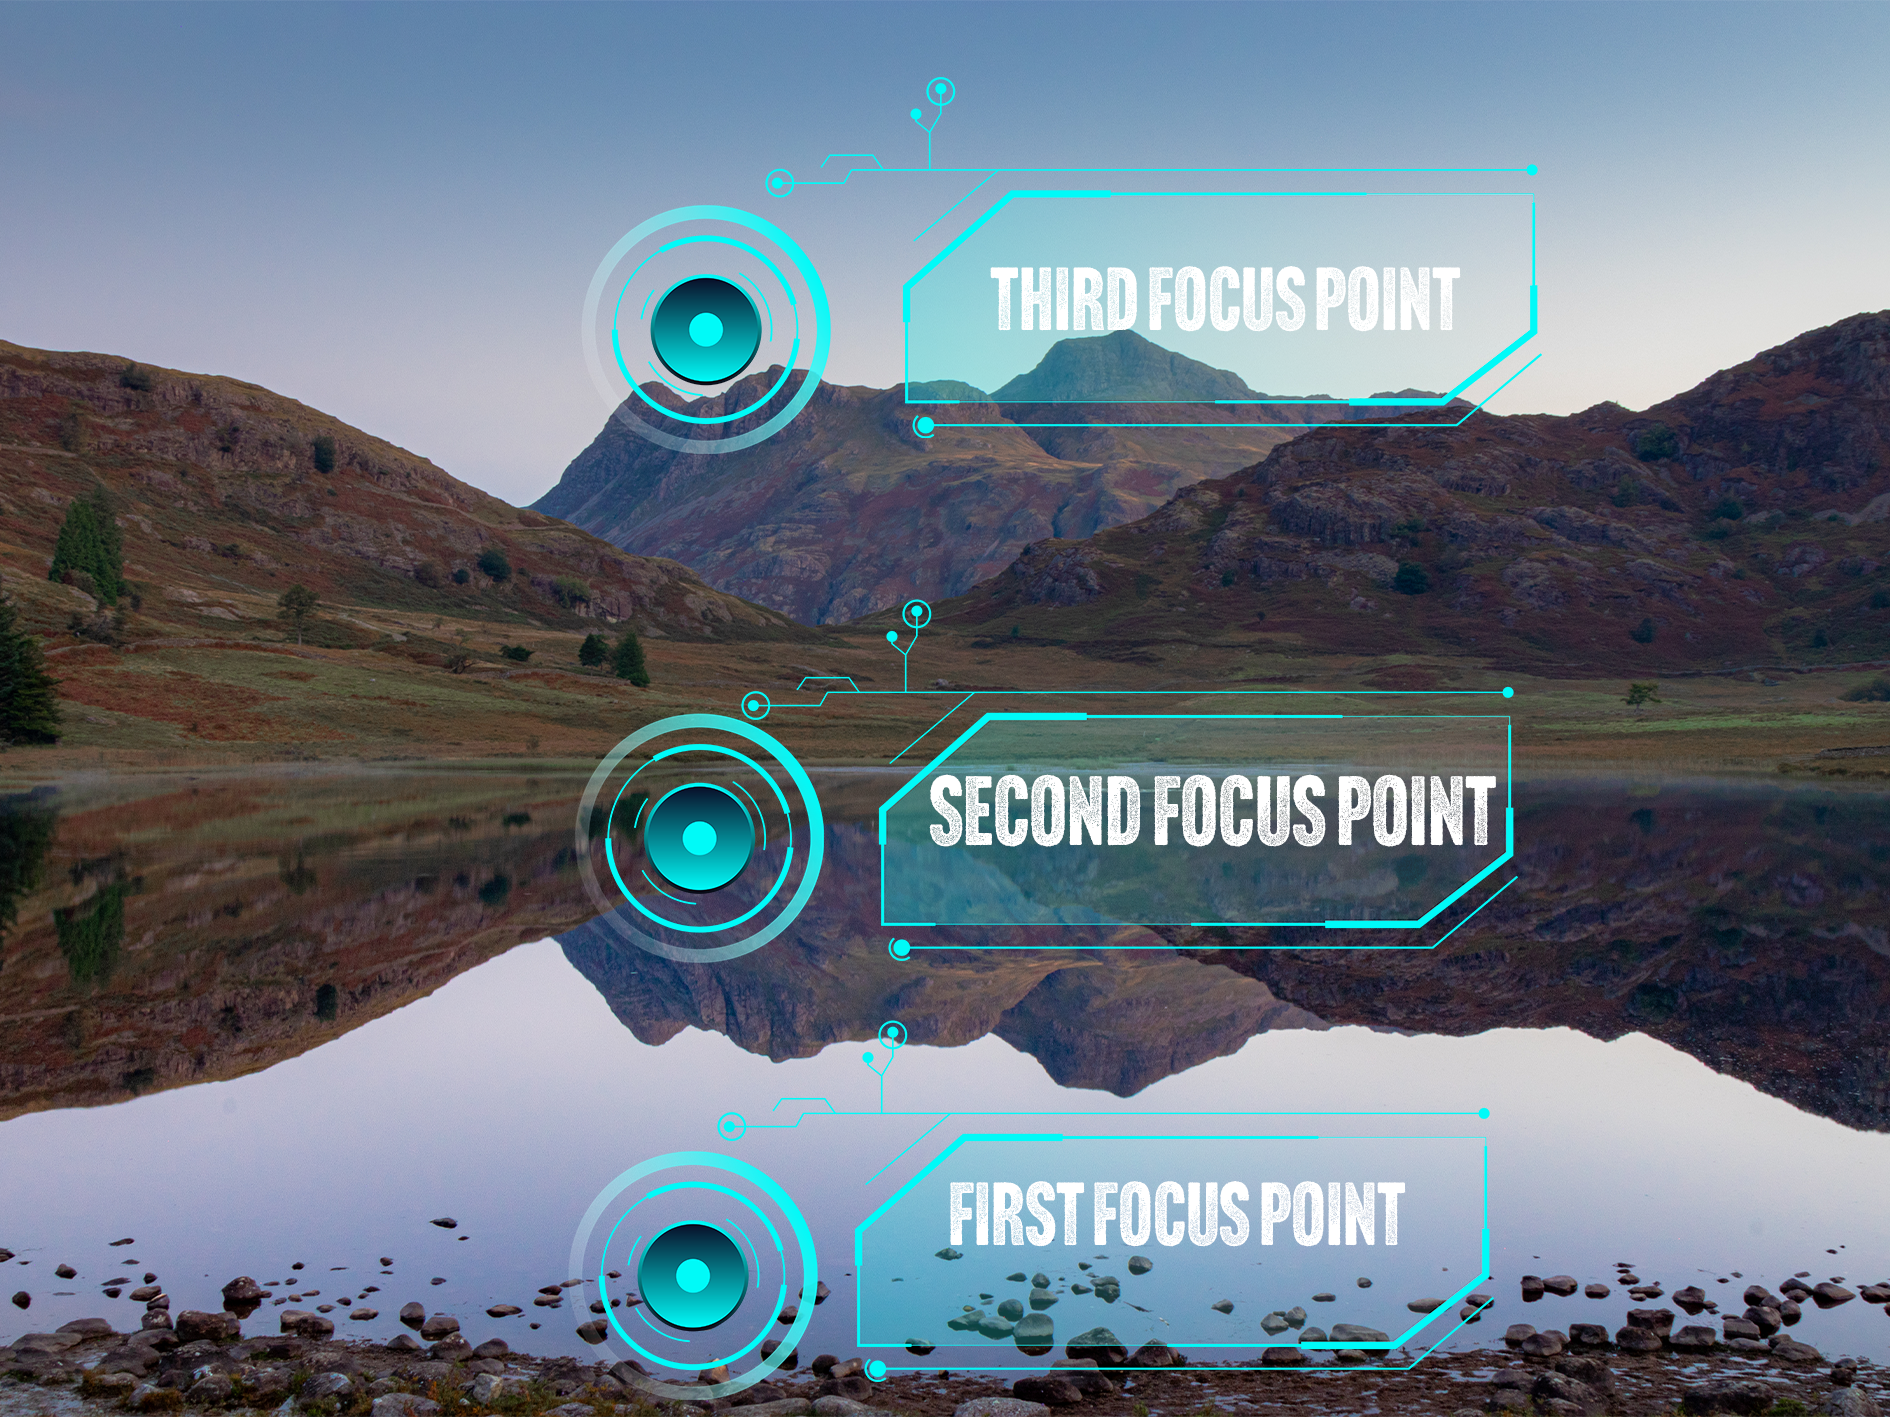
Essentially, what we’re going to do is take at least 3 different exposures. In the first image, we are going to make sure that our foreground, or the front of our object is in focus, in the second image, we are going to focus on the mid ground and then finally, we are going to focus on the back of the image; this will either be the back of your object in the studio, or on infinity if you are out in the field. I have tried to visualise this for you in the image below.
This image shows where your (minimum) 3 focus points will be when you are shooting images for an exposure stack.
How many shots you need is going to be influenced by what you are shooting and what you are shooting on, what f/stop you’re at and if there is any movement in your scene. Three exposures is a good rule of thumb for this type of photography, if you take too many images, this can start to complicate things in post processing and your image can end up looking strange, have weird artefacts in it when your exposures are blended or simply, it just won’t work!
The other thing to remember is that you need to keep your settings locked in. If you start to change the settings on your camera between each exposure, this can cause issues and slow down the process.
Finally, you need to (99.9%) of the time, do this on a tripod. You want your exposures to line up exactly between shots, if they don’t, guess what… more complications!
So you’re set up, you’ve got your shot framed and you’re ready to start shooting. The next phase of this is going to be dependent on the camera you have. A lot of newer Canon camera’s have a focus stacking setting built into them. You will need to consult your camera’s manual for instructions on how to do this, but you can tell it how many images you want in the stack and how much you want the focus to shift between each image. The other way of doing it, and the way I am going to describe in this blog (because my camera doesn’t have the focus stack function!) is manually, using either manual or autofocus.
This is fairly straightforward.
1) Frame up your shot and select your settings.
2) Focus on the foreground by either twisting your focus ring, or tapping the screen to select a focus area and half pressing the shutter button. Check the focus is sharp and capture your image.
3) Repeat step 2 for the midground.
4) Repeat step 2 for infinity/background.
I always find it useful to grab an exposure which has my hand in front of the lens after I have completed each ‘stack’.
You can take as many stacks as you like whilst you’re out and about, but keeping them organised whilst you are working and before you get into post will make your life a lot easier in the edit.
How to Create a Focus Stack in Lightroom and Photoshop.
I have shared a video below which explains this process in full, but the first thing you are going to want to do is import your images into Lightroom.
Once they are in Lightroom, edit your first image and get it looking the way you want it. Once you have done this, you want to copy the settings from you first image to the other two in you stack, so that they all have the same adjustments applied to them. I usually just make some global adjustments at this stage and do anything local on the image I get out of Photoshop. You can see this process in the video below. You can make your adjustments in Camera Raw in Photoshop, but I find the process of copy and pasting the adjustments in Lightroom much easier.
Once you’ve done this, you need to select your three images and then right click and ‘open as layers in Photoshop’. When you’ve done this, you can move on to the next stage.
Now your images are in Photoshop, the process is pretty straightforward; you’re going to shift click to select all three images, the in the edit menu, we’re going to select “auto align layers”. This will make sure that our images are neatly stacked on top of each other. Leave the ‘Auto’ option checked and click OK.
Once this has completed, make sure that the three layers are still selected, go back into the ‘edit’ menu and select “auto blend layers”. Make sure that “stack” is selected and then I always keep “seamless tones and colours” and “Content aware fill transparent areas” are checked. The latter will fill any transparent areas (usually around the edges) that have been created when your images were aligned.
Now that Photoshop has done it’s thing you will see that it has created masks on each of your layers, and if it’s worked well, you should see that the masks are broadly letting the focussed areas of each shot show through. If you need to fine tune these masks, you can do this using either a white or black brush and painting on the respective mask.
The final step is to check that you are happy with what you have, that it’s sharp where you want it to be, and that’s the process done!
All you need to do now is hit save, and if everything is working well, you should see it appear back in Lightroom as a .tiff file that you can now make some local edits on and get it looking exactly how you want it!
I have made a video of this whole process below, so you can see each step and hear some commentary that I hope you’re able to follow along with!
Step By Step Focus Stacking Video Tutorial
Check out my YouTube video on focus stacking - please head over to the channel and subscribe!
Original Images:


I set this up on the studio against a yellow backdrop and one light source (just a video light for this for the sake of speed), this is just three props I found amongst some old props in the studio - a lego mini-figure, a pocket watch and a Funko figure. I set these up in a line extending away from the camera. These images were shot at f/4, just to force the depth of field to clearly illustrate what I am trying to demonstrate. You should be able to see the three focus points by looking at which part of the image in focus, you should be able to see each subject in sharp focus as the focus point moves towards the back of the image.
Whilst I have done this in the studio to illustrate it, the process in the field is exactly the same. The only thing you might find is that when you’re not in a controlled environment, you’re much more likely to have changes in light and the position of your camera to deal with.
After following the process outlined above, all three images are combined to produce the final, stacked and fully focussed image you see below:

I hope that you have found this useful, I am trying to put some more of this type of content together and will eventually get them uploaded to my Chris Kendrick Photography YouTube Channel so you can digest them at your leisure.
If you have found this useful, I’d be grateful if you would like to support the blog and help me keep producing Lake District photography content, honest gear reviews and regular website updates, you can do so via my Buy Me a Coffee page. Keeping everything running smoothly takes time, and your support makes a real difference. Thank you.
Check out some more of my latest blog posts below…

5 Landscape Photography Techniques You Should Know to Improve Your Images.
Mastering landscape photography starts with a solid set of core techniques. In this short guide I break down five essential landscape photography techniques every photographer should know—ranging from exposure control and composition tips to methods that maximise sharpness and dynamic range. Whether you're improving your outdoor photography skills or looking for practical ways to elevate your images, these fundamentals will help you create cleaner, sharper and more compelling landscape photos in any conditions.
Just a quick one this week. I wanted to share five techniques that I use on most shoots which help me to be a better photographer. Some of these are things that I have spoken about before, but I wanted to put all these in one place to create a more cohesive resource with everything in one place. If I have spoken about something before then I will include a link to the more in-depth blog about that topic so that if you want to dive a bit deeper then you can do that at your leisure!
This blog contains Amazon affiliate links, if you make a qualifying purchase after you have clicked one of these links then I may receive a small kickback; these really help me to keep running this blog and I really appreciate every click!
Focus Stacking
Focus stacking is a valuable technique in landscape photography for achieving front-to-back sharpness when a single exposure can’t hold everything in focus. By taking several images at different focus distances—usually starting from the foreground and working towards the horizon—and blending them in post-production, you create a final image where every element appears crisp and detailed.
This approach is especially useful when working with wide-angle lenses at close range, where even small foreground subjects can fall outside the depth of field. Focus stacking ensures the entire scene remains sharp without resorting to diffraction-inducing apertures. Although it takes a little more time in the field and requires software to merge the frames, the resulting clarity makes it a powerful technique for producing high-resolution, publication-ready landscape images with exceptional depth.
Exposure Stacking
Exposure stacking is a versatile technique in landscape photography used to manage extreme dynamic range by blending multiple exposures of the same scene. Instead of relying on a single frame to capture both bright highlights and deep shadows, exposure stacking involves taking several images at different exposure levels and merging them in post-processing to retain detail across the entire tonal range.
This creates a final image that looks natural while preserving information in both the sky and the foreground, avoiding blown highlights or noisy shadows. It’s especially effective at sunrise or sunset when contrast is highest. Although it requires a tripod and careful alignment, exposure stacking offers far greater flexibility than a single exposure and produces cleaner, more balanced landscape images with rich detail throughout.
Shutter Release Delay
Probably the easiest one on the whole list, but also one of the most important if you want to make sure that your images are sharp and free from any camera movement. It’s really as simple as setting the self timer on your camera before you release the shutter. This is something you would normally do if your camera is on a tripod.
But why is this so important? What we want to do by doing this is to reduce the amount of movement we introduce into the camera. No matter how steady handed or ‘gentle’ you are with your shutter press, the camera is always going to offer up some resistance meaning you’ll need to use some pressure to press the shutter. This is going to cause your camera to move and result in an image that has motion in it, and often in landscape photography, this is something that we are really keen to avoid.
Why does it work? Having the two second timer gives the camera time to settle once you’ve pressed the button, so by the time the shutter releases, the camera is still and you aren’t getting the motion blur in you final image. This is especially important at longer focal lengths as any movement you may is going to be amplified at the business end of the lens, but it’s a good habit to get into at any focal length to ensure that you’re giving yourself the best chance of getting that super sharp image.
You could use the ten second timer function as well, but I have tried this and haven’t noticed that it makes any huge difference not the quality of the image that I’m getting.
You could go one stage further and use a trigger or a shutter release cable alongside your two second timer and this will help to guarantee that you’re giving yourself the best chance at keeping the camera still. These aren’t super expensive pieces of kit and they are always useful to have in your bag. They are usually camera specific so do your research before you buy one, but I like this Aodelan Intervalometer which you can pick up on Amazon, and I have written a review of it which you can read here.
Expose to The Right (ETTR)
One of the most effective ways to improve image quality in landscape photography is to use ETTR—Expose to the Right. This technique involves setting your exposure so the histogram sits as far to the right as possible without clipping important highlights. Because digital sensors record the most tonal information in the brighter areas of an image, capturing more light gives you cleaner data, smoother tonal transitions and more accurate colours.
The result is a file with far less noise in the shadows, which means you can darken the image during editing while retaining detail and texture throughout the scene. ETTR is particularly helpful when working with high-contrast landscapes, dramatic skies or deep foreground shadows, where maximising dynamic range becomes essential. Although it requires care to avoid blown highlights, especially with reflective surfaces or intense sunlight, ETTR offers landscape photographers a simple but powerful way to achieve sharper, cleaner and more flexible RAW files for post-processing.
Using ND Filters to Increase Exposure Times
ND filters are a great bit of kit to have in your bag. They can give you a lot of flexibility, especially with your exposure times and can help you to get really creative to create a sense of movement and drama in your landscape photographs.
ND filters are easiest described as being like a pair of sunglasses for your lens, they reduce the amount of light that is coming into camera which makes your exposure darker. This means that you will need to use a longer exposure time to get your image properly exposed and can get some movement in the sky, smooth out water in your scene or capture the movement in the waves if you’re shooting at the coast.
You can get fixed ND filters and variable ones. I prefer the variable ones as I can get more variance in one piece of kit and this means that there is less for me to carry. At the moment, I am using the ones from K&F concept as they do a good job and they’re at sensible price point. You will need to by the right size for you lens (another reason why the variable ones are great!), and it always handy to have a filter pouch to keep them in. The pouch I have linked here is a hardshell one which holds ten filters. It’s quite bulky but it keeps them safe when I’m out in the field.
Thanks for reading - this has been a quick one today, but I hope you have found it useful. If you want more stuff like this as well all of the updates, please head to the contact page and sign up to my newsletter.
If you’d like to support the blog and help me keep producing Lake District photography content, honest gear reviews and regular website updates, you can do so via my Buy Me a Coffee page. Keeping everything running smoothly takes time, and your support makes a real difference. Thank you.
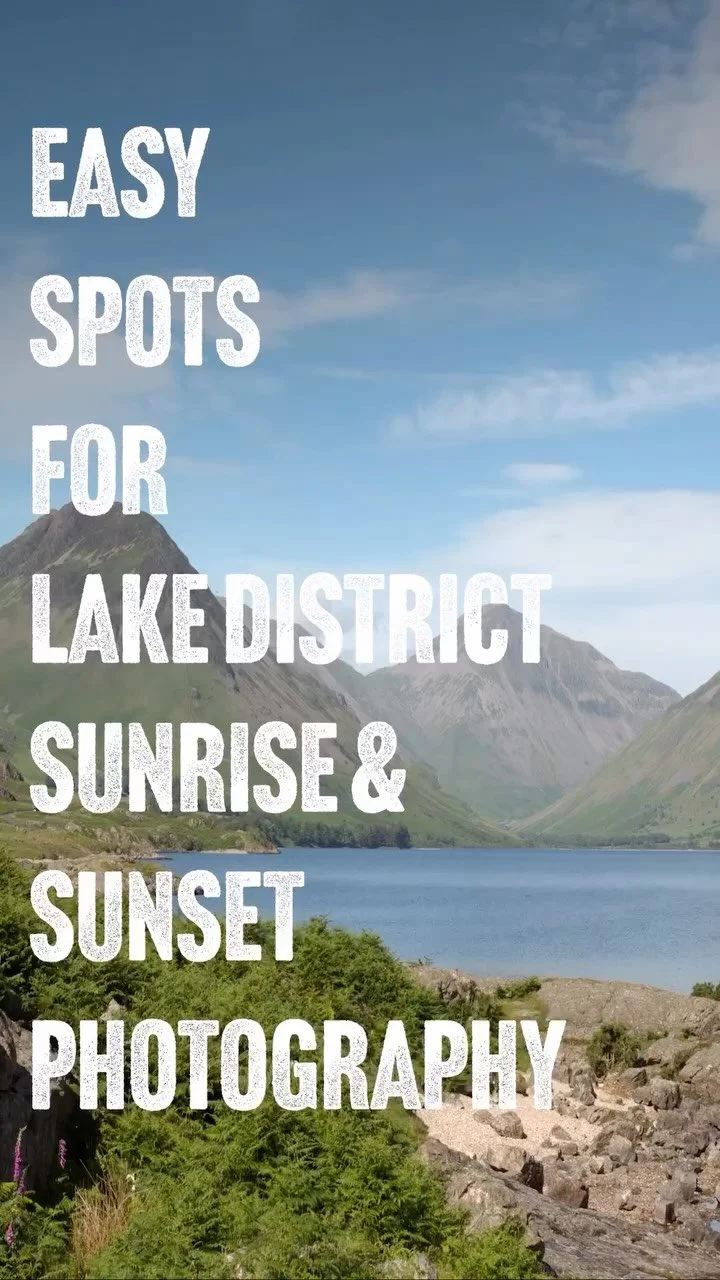
5 Beginner Lake District Landscape Photography Locations You Can Reach Without a Long Hike
Short on time or energy but still want great Lake District landscape photos? These five locations offer incredible views with minimal walking, perfect for beginners, visitors, or quick photography trips.
Welcome back! I am going to keep this one as short as possible, but at the same time try to give you enough information in a short space of time so that you can get out and shoot.
What follows is a list of 5 places you can take incredible landscape photos in The Lake District, without having a massive hike to get there. These will be great if you’re short on time, or if you’re short on energy but still want to get out. Nothing in here has more than a 20 minute to reach a great spot and get some great photos in the bag.
Gummer’s How
This one is the one with longest and most demanding walk, which is saying something as this one is an easy trek, which should take no longer than 20 minutes from the car, has a bit of climbing but is rewarded with incredible views across Windermere and many of the Lake District fells.
There’s a free car park just off Fell Foot Brow, which is run by Forestry England. You can find it at ///rated.soup.looms on What Three Words.
From here, cross the road and follow the signs which will lead you along a short trail with a slight incline, and then you’ll be met by a short, but much steeper climb up to the top of the hill.
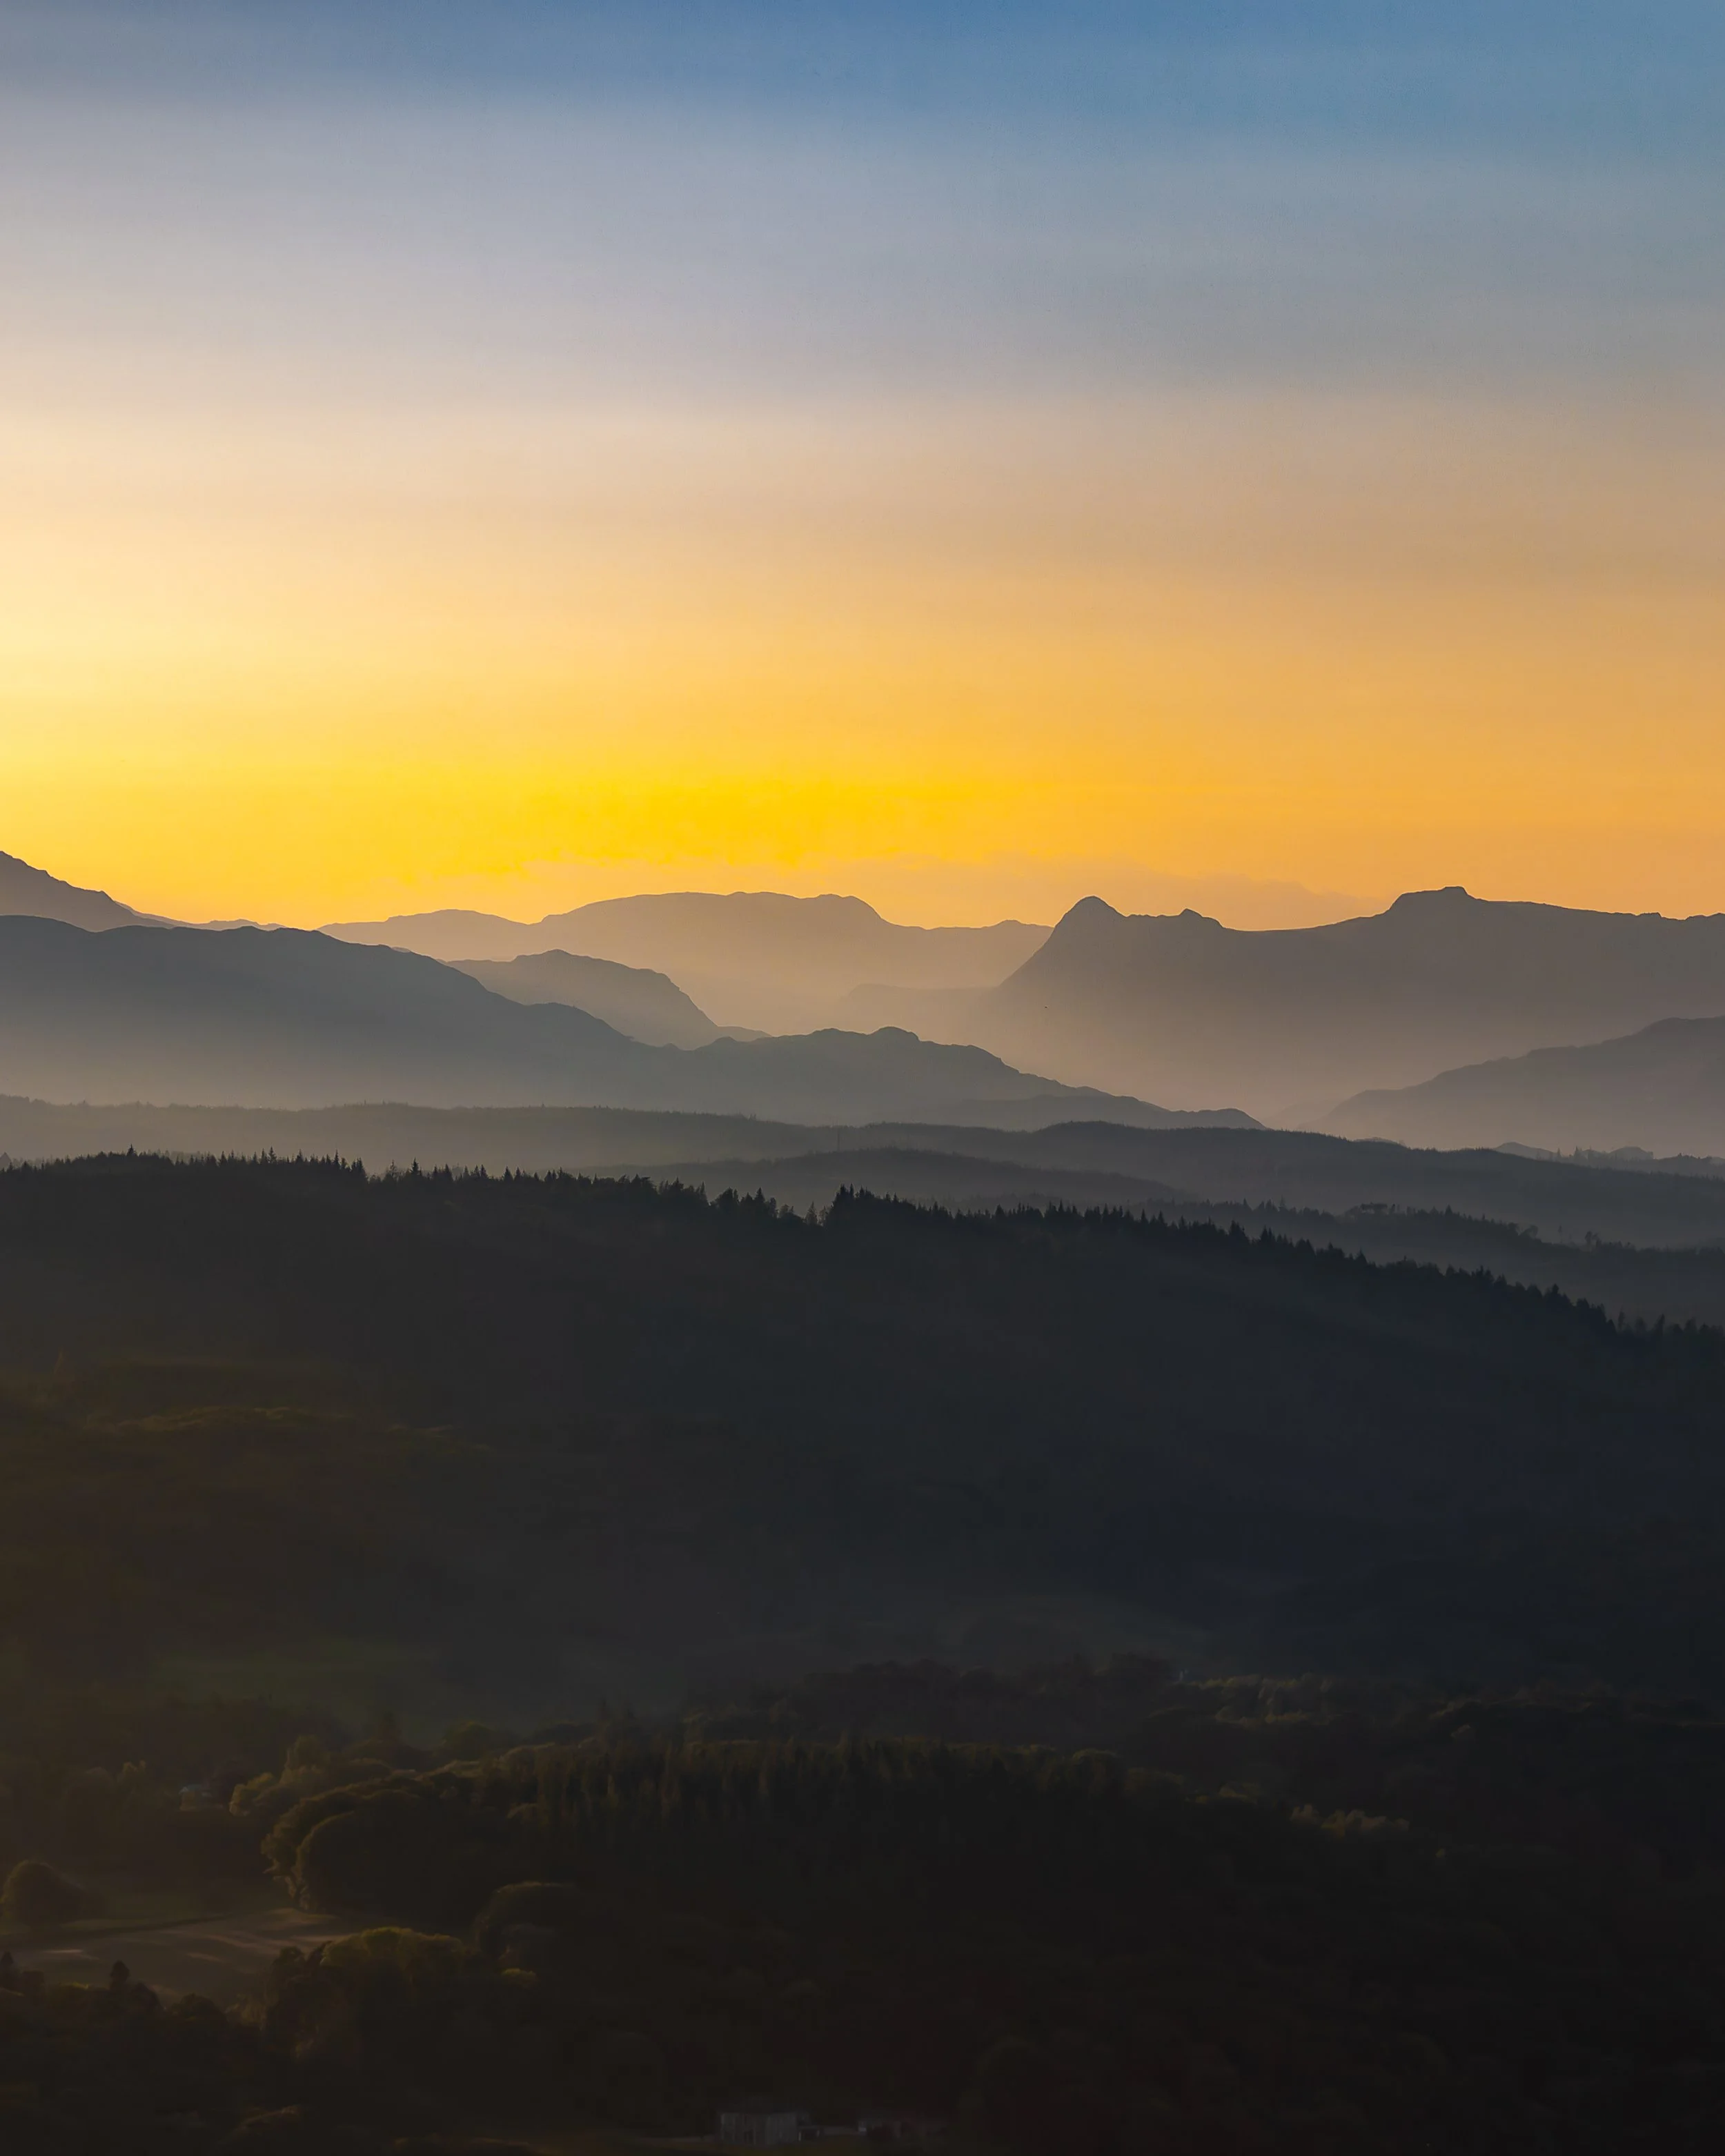
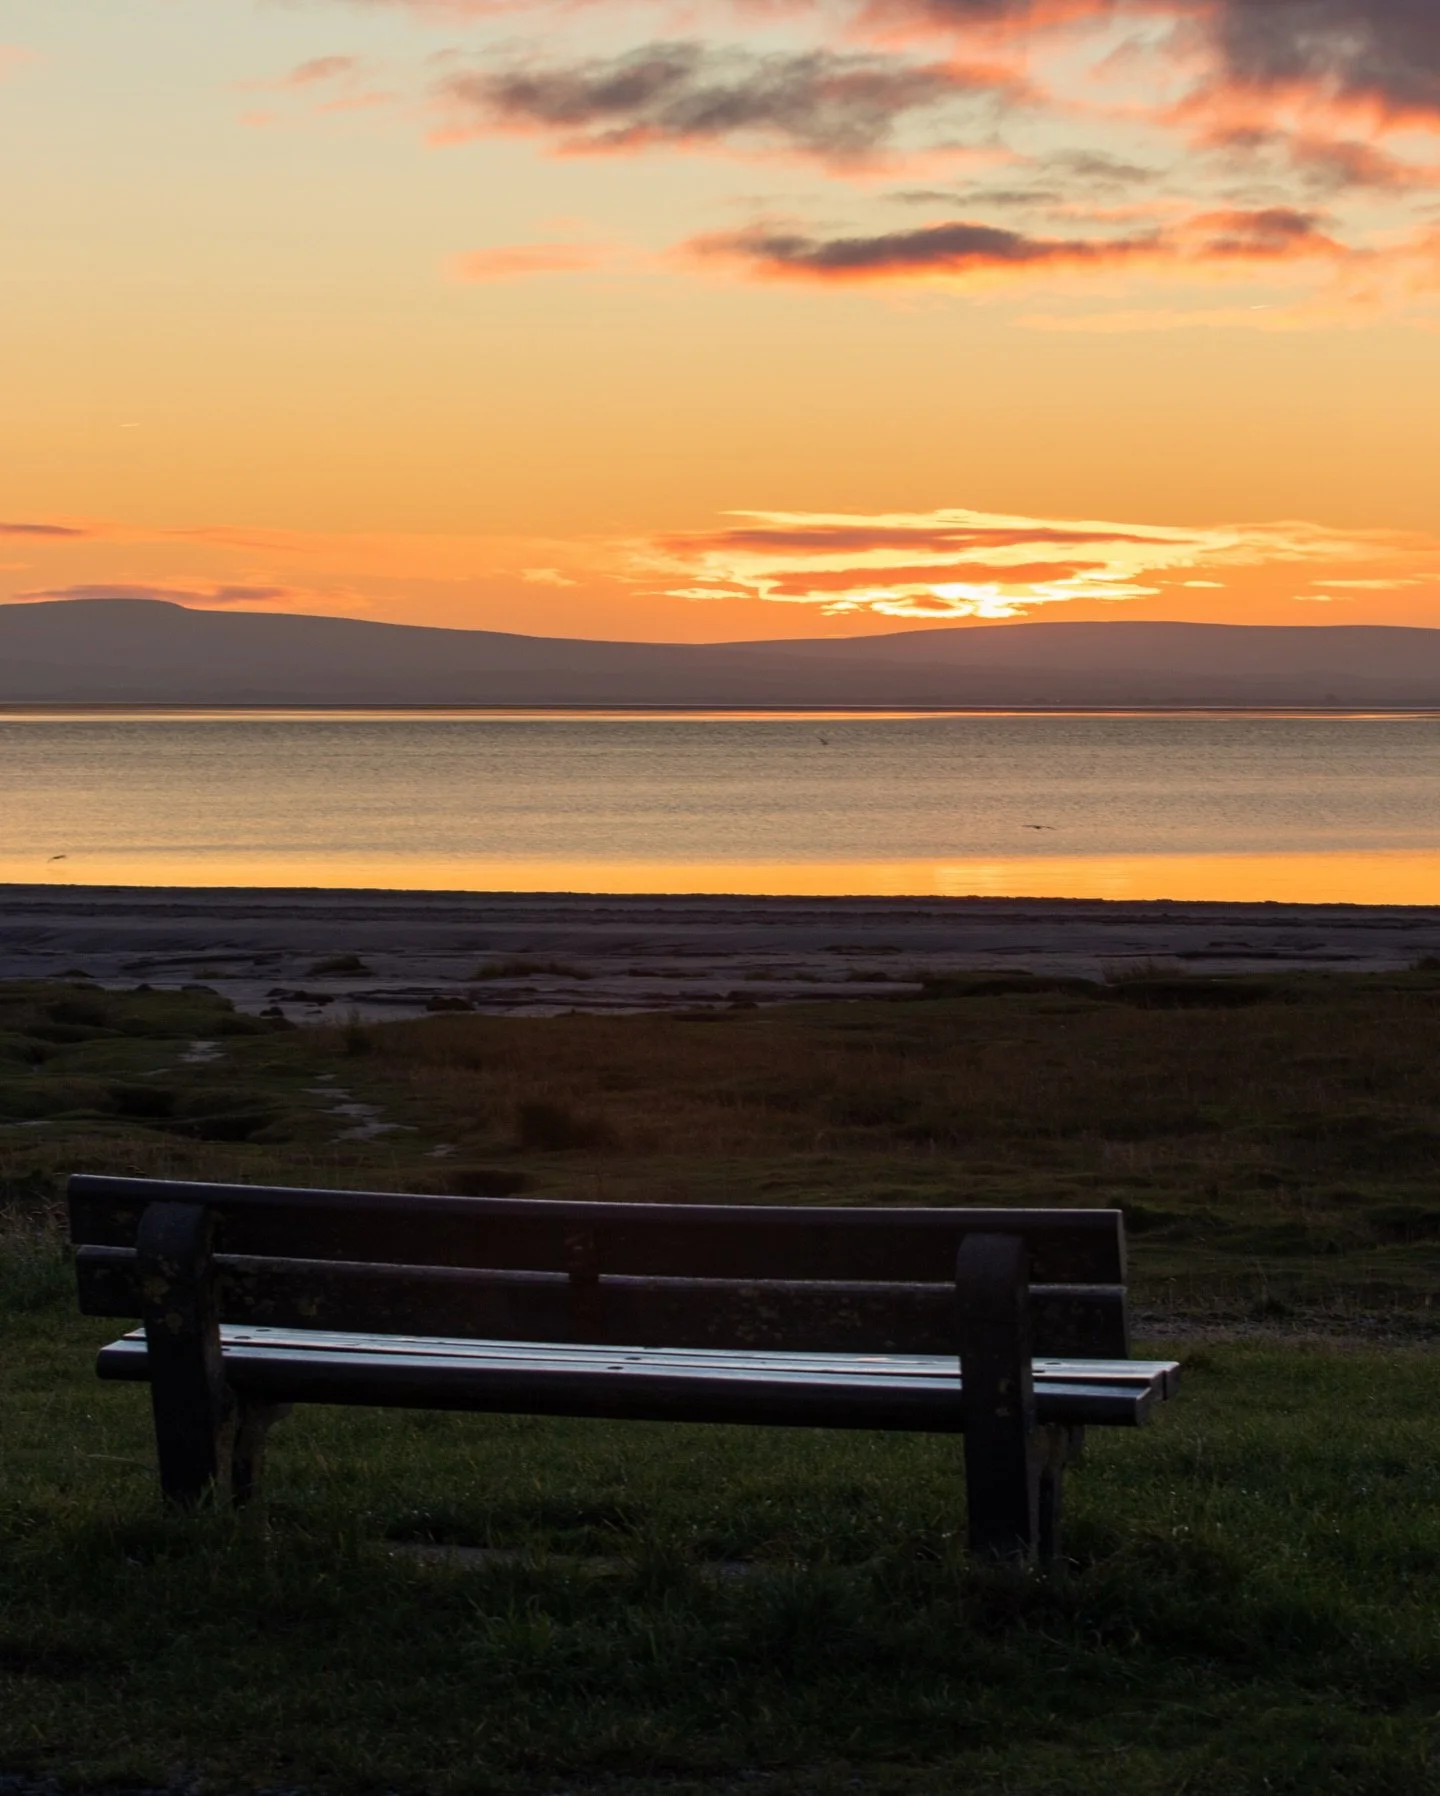
Walk towards Windermere (you will be able to see it) and you will be rewarded with some breath taking views. This is a great place for sunset and you’ll get some incredible shots if the weather is in your favour. I prefer a long lens here as it lets you pick some of the detail in the scene.
Don’t forget your head torch for the way back if you’re planning on staying late.
If you’re planning for sunset, then check out my sunrise and sunset photography in the Lake District blog.
Queen Adelaide’s Hill
This is another one which is a short walk from the car and rewards you with great views across Windermere, without the walk up Gummer’s How. There’s even a bench at the top if you’re feeling a little out of breath. This is another good one for sunset. You can park at at Rayrigg Meadow Car Park (What Three Words: ///magpie.permanent.agent).
The path to Queen Adelaides Hill is largely paved, but there is a small section which is through a bit of woodland that can be uneven underfoot and isn’t paved so make sure you have the right footwear on.
Arrive in plenty time if you’re going for sunset, as this car park allows motorhomes overnight and it fills up quickly. It’s also not cheap and is run by the council so there’s no discount/free parking with your National Trust Card.
Head towards ///waiters.risky.loudness and you will be in position for some great views.
Surprise View
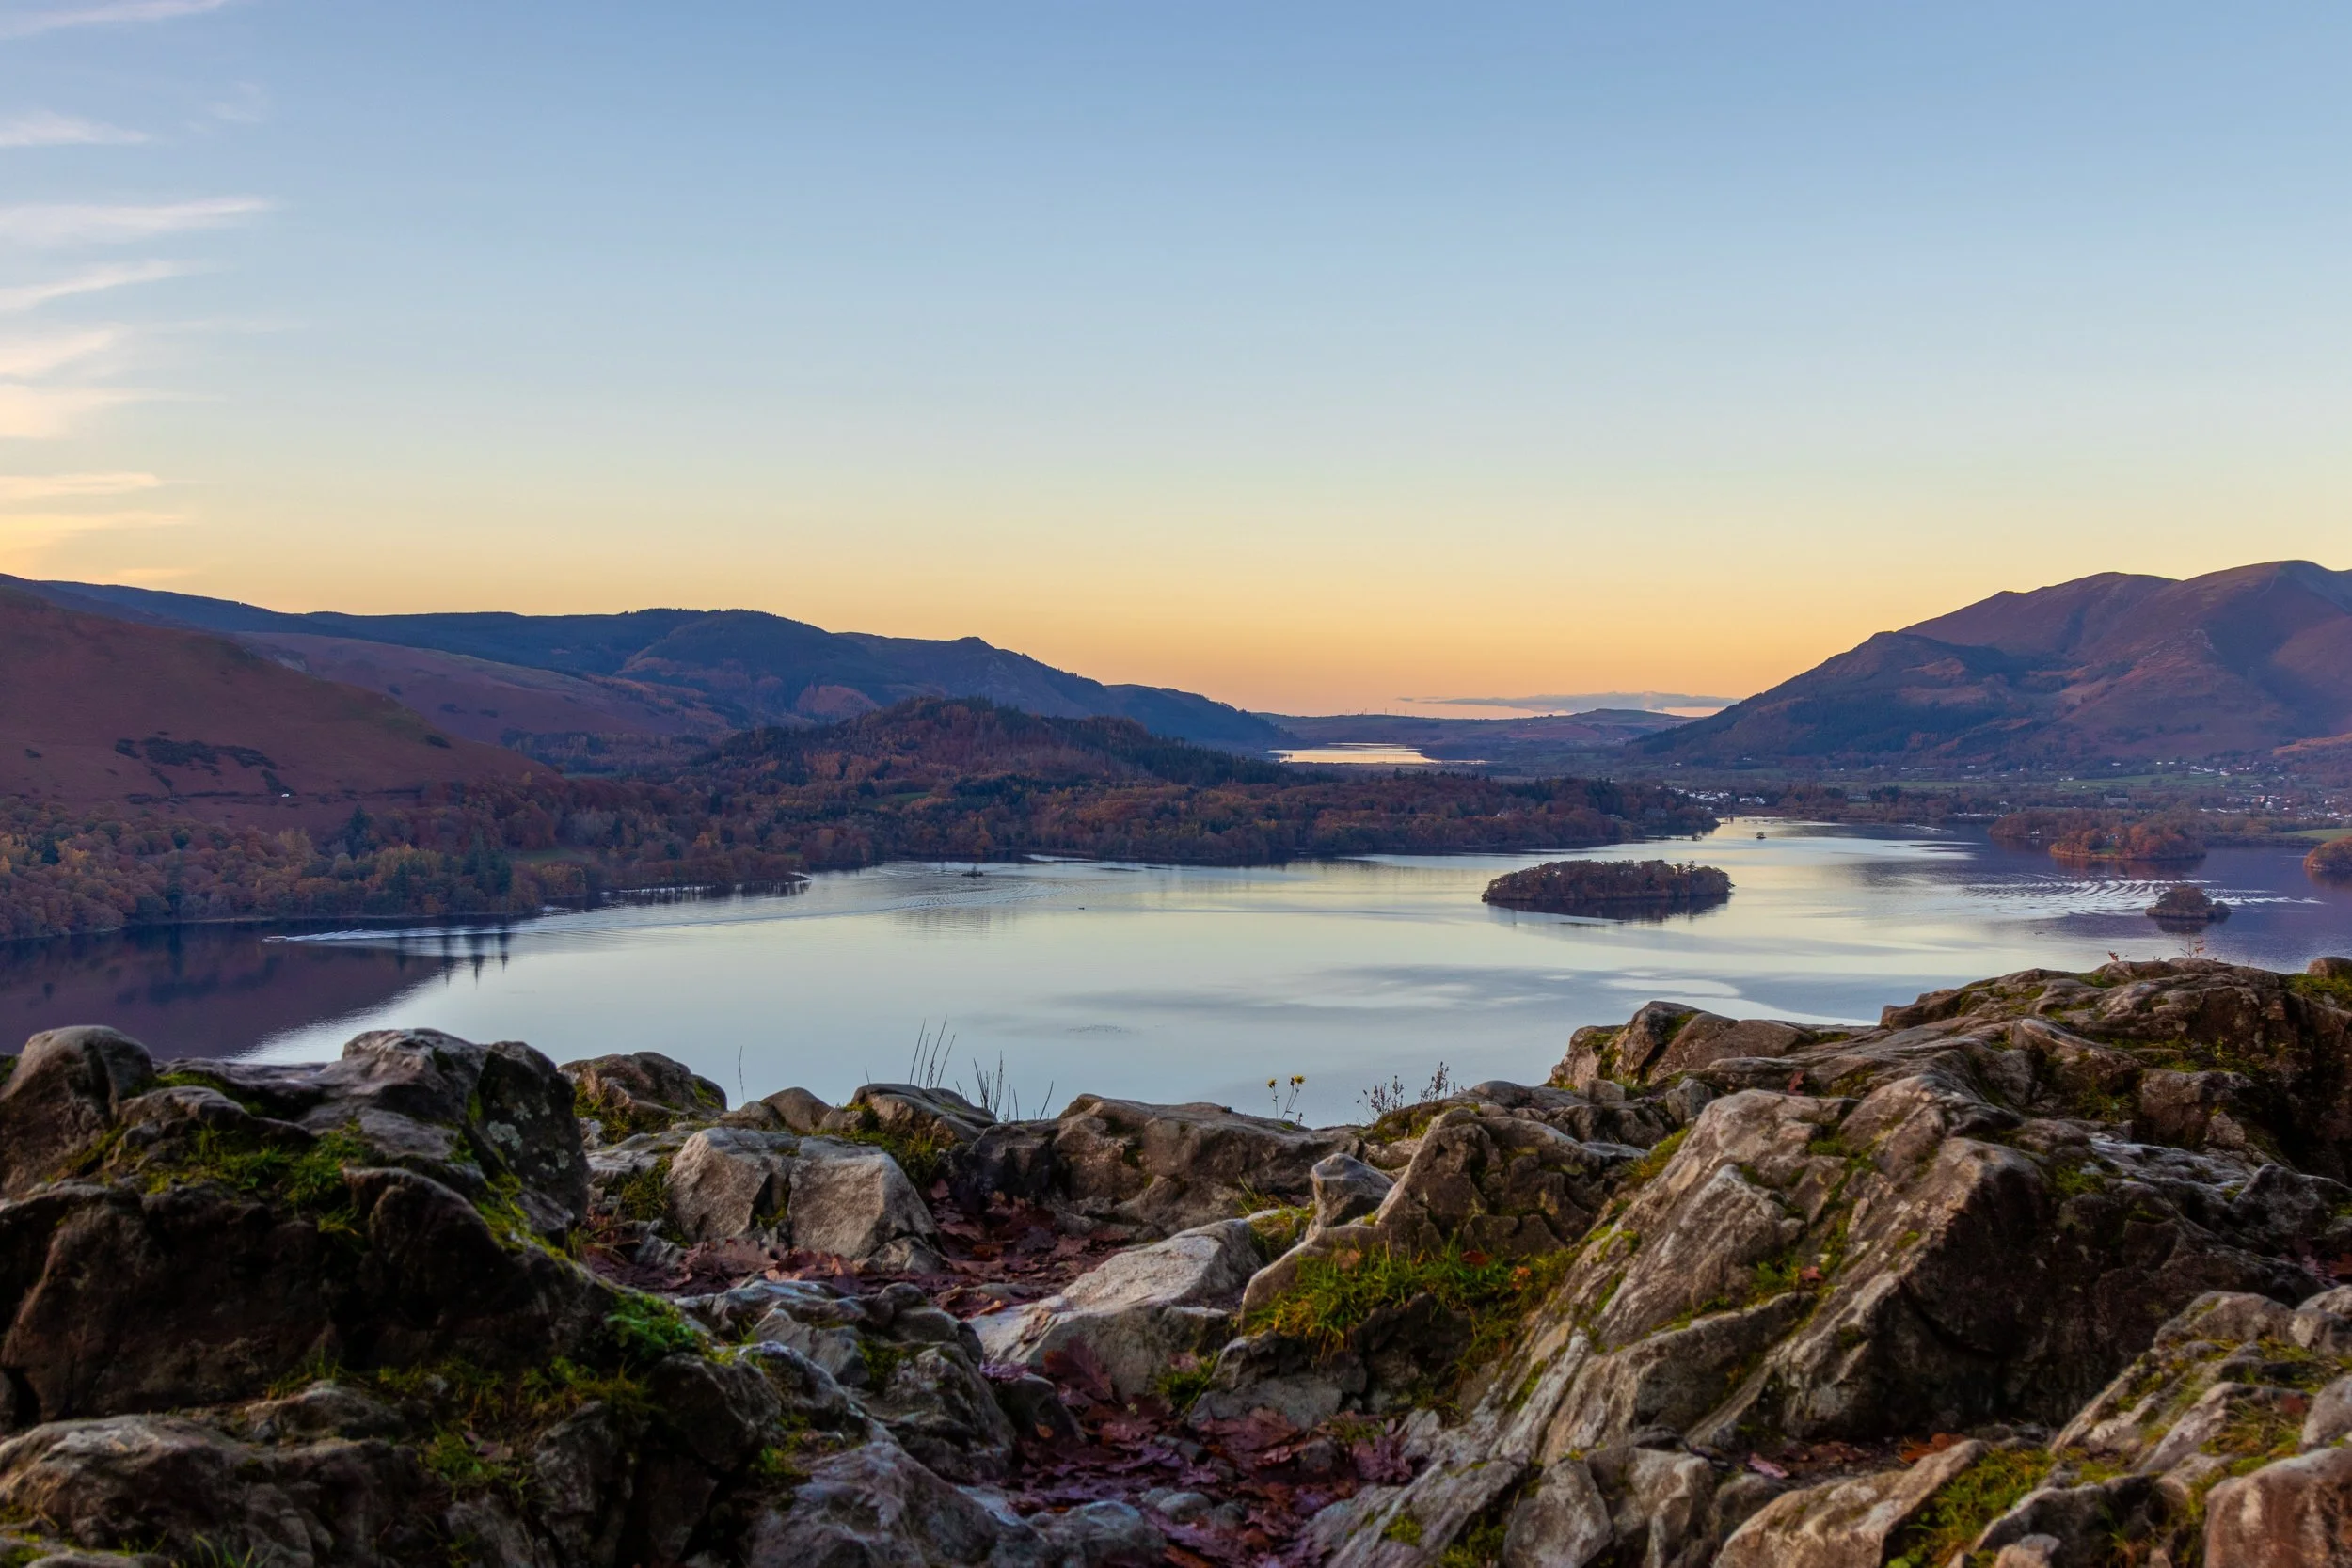
We’re heading out of the Southern Lake District and up to Borrowdale for this one. You’ll find Surpise View at What3Words ///copying.shadowed.bounding , with parking really close by. I would estimate the walk from the car to the viewpoint to be around 30 seconds… This is the shortest ‘walk’ on the list! You have incredible views of Derwent Water and down into Keswick from up here, and it’s great for sunset shoots, and also looks great at Blue Hour.
Whilst you are here, you can also bag a Lake District classic and bag yourself a shot of the packhorse bridge at Ashnesss, What3Words ///pills.index.remarried. This is a great place to go and do some long exposure work! Check out my long exposure blog by clicking here.
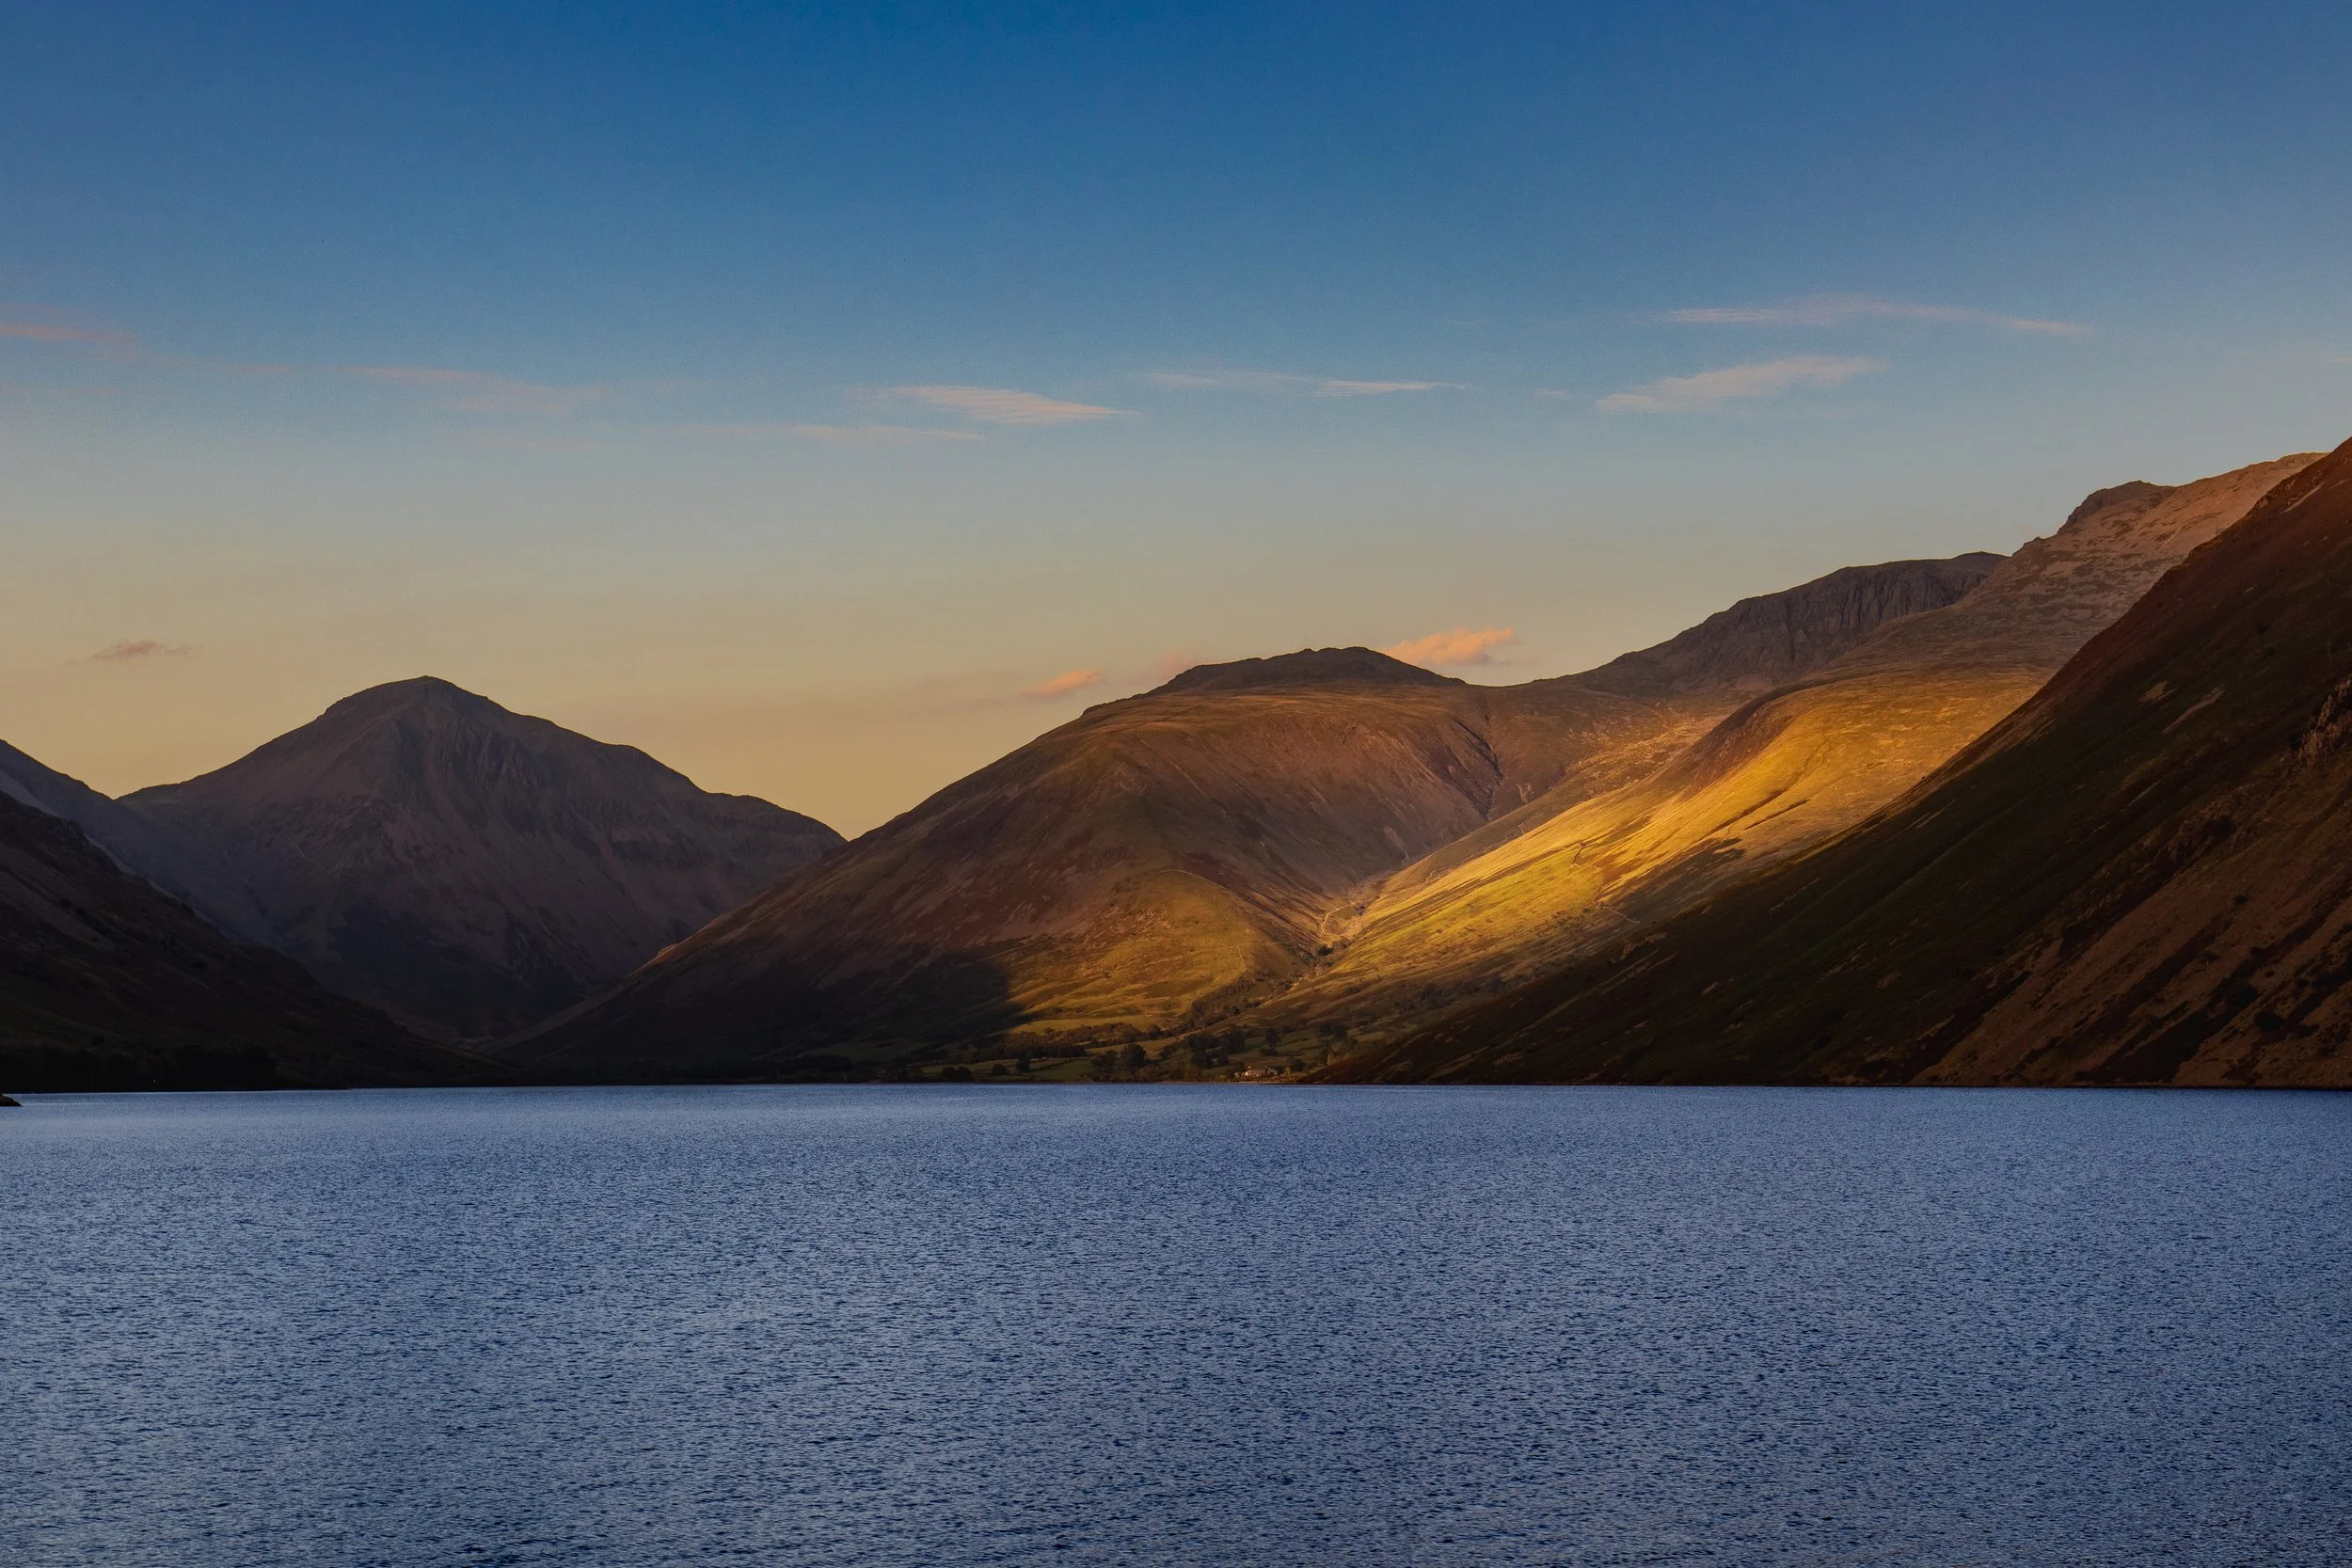
Wastwater
Moving out into the Western Lake District now, and we’re headed to Wast Water. I am not going to include a what3words location for this one, because there are so many great places to shoot from here. You’ll end up on the north eastern shore of the lake (the opposite shore is inaccessible unless you fancy a swim across England’s deepest lake) when you arrived and there is lots of parking at the side of the road (stay out of the passing places and park respectfully, please!). Once you’re parked, you can walk along the side of the lake and scope out some of the compositions that are spread out in front of you. Explore and have fun. This is another one that is great at sunset.
Blea Tarn
This one takes a little more central and comes with a weather warning. If the weather is poor, don’t go - check before your travel. In the winter, the roads leading up here become treacherous and are impassable in bad weather. You have been warned!
That said, in the summer, whilst you need to be careful on the roads, many of which are single track, your patience (and careful driving) will be rewarded with an easy walk up shot at Blea Tarn.
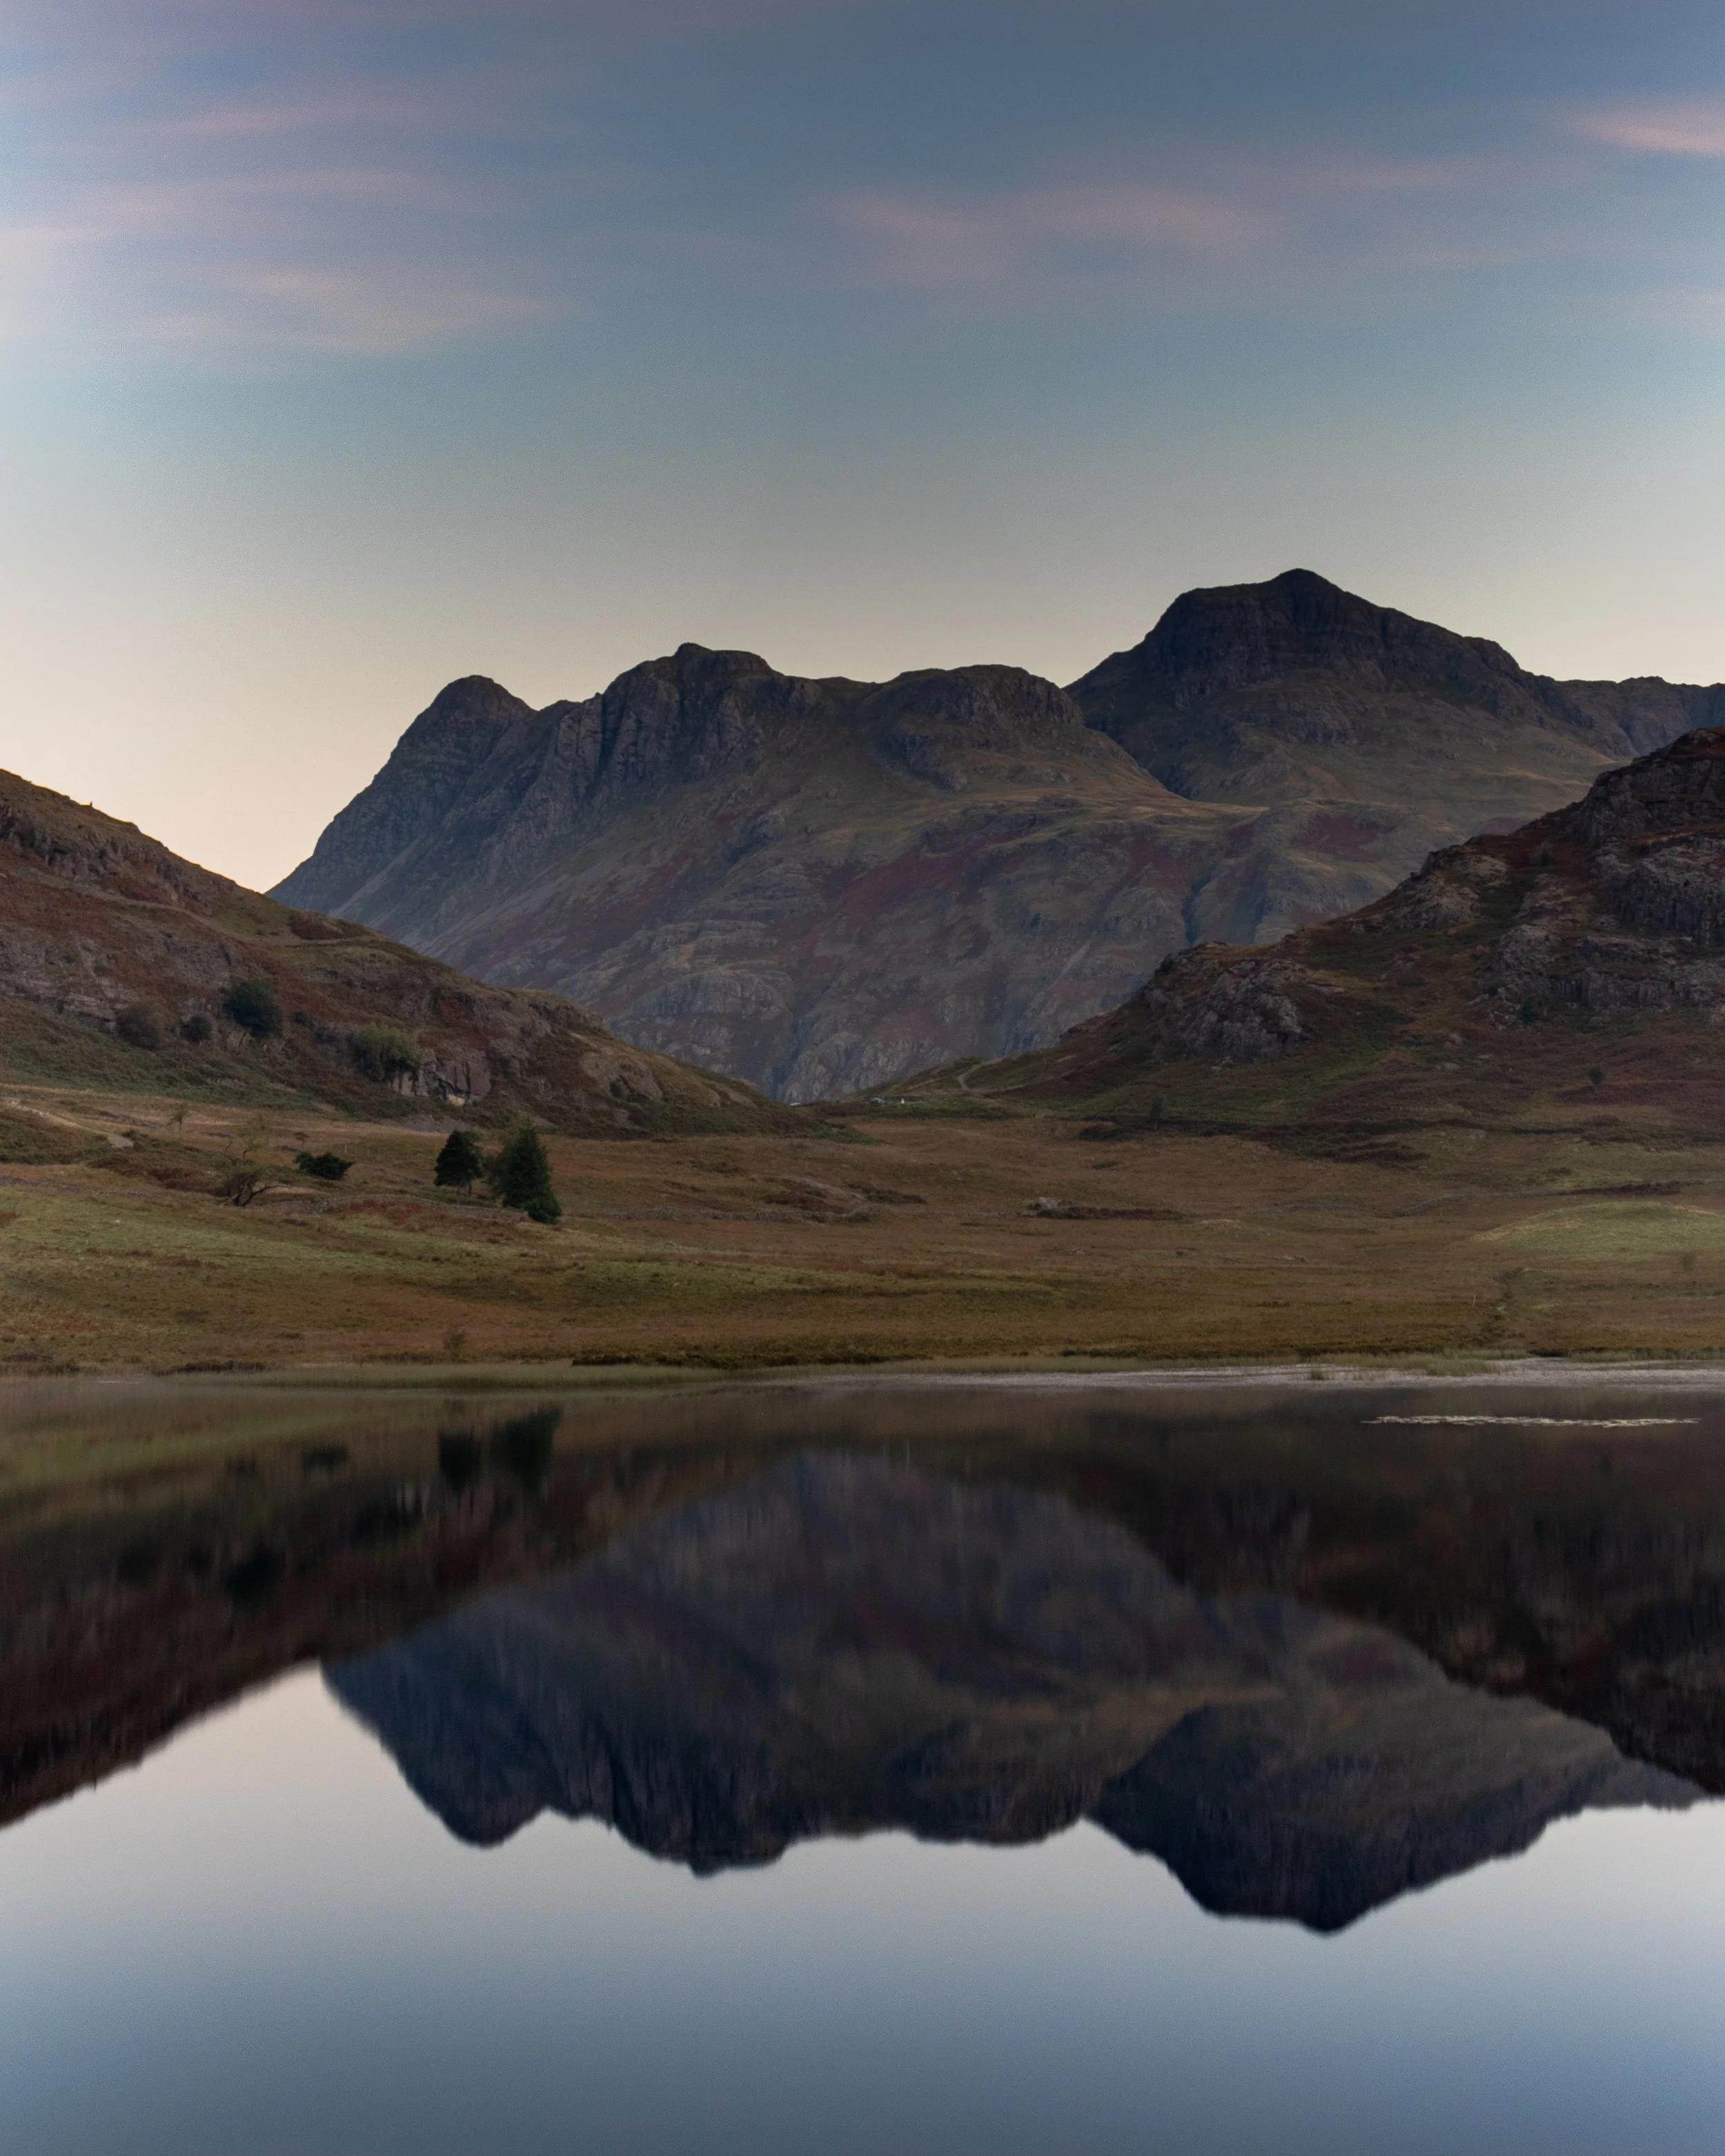
You can park at the National Trust Car Park (free for members!) which you will find at What3Words ///destroyer.marked.groomed . Leave the car park via the entrance you got in through, cross the road and follow the path. From here, the tarn is on your right and you can walk down to it. Make sure you watch where you put your feet and take good shoes - it can be very boggy. There are great shots across towards the Langdale Pikes and you will see some interesting wildlife here if that’s your bag as well.
This one is a good sunrise spot, get here early to secure the best spots.
Bonus Hidden Gem
This one is often overlooked and is little known. It is called Kelly Hall Tarn, which is in a village called Torver on the way into Consiston. There is parking at What3Words ///backdrop.shelters.quitter. Once parked, take a walk towards the back of the car park and follow the path which will lead you to the Tarn. It’s about a five minute walk, which can be boggy after rain and also boggy when it hasn’t rained for days. Be prepared. This is a great sunset spot, and is super dark at night for you astro fans!
And that concludes the blog! If you try any of these locations, let me know how you get on. I’m always interested to hear where people head first, and what conditions they find when they get there. Keep an eye on the blog for more beginner-friendly Lake District photography guides.
These guides are all written from time spent out in the Lakes with a camera in hand. If you’ve found it useful, buying me a coffee is a great way to support the site. You can also join my newsletter for future guides, photography tips, and new content as it’s published.
Check out some more of my latest blog posts below…
What’s in my Camera Bag 2026
Every year my camera bag evolves, and 2026 is no exception. In this updated “what’s in my camera bag” post I break down the full photography kit I actually carry: camera bodies, go-to lenses, filters, tripod, storage and the small accessories that make shoots smoother. If you’re looking for real-world camera gear recommendations, or you’re simply curious how another photographer builds a reliable, travel-ready camera bag in 2026, this behind-the-scenes gear list will walk you through every piece and why it’s earned a place in my bag.
This one always feels like a bit of cop out, everyone does “what’s in my bag” blogs/vlogs etc, but this time, I think my bag has changed enough to warrant one, but yes, I am still shooting with the 80D, that much hasn’t changed. So without further ado, let’s take a look at what’s in my bag this year and why each item has earned its place!
What’s out?
I don’t take my 18-55mm kit lens out with me anymore. I am keeping it, because when I come to sell the 80D, it’ll add a little extra resale value to the camera. I’ve also ditched the GoPro Hero 7 and the 50mm is spending less and less time in the bag these days, as I just don’t seem to have a use case for it at the moment. I won’t get rid of it, because I love it and if I were to not have it, I would be looking for excuses to buy another one.
My 85mm only comes out when I know I am going to be taking portraits or if I am going to indulge in a bit of 85mm street photography; I will NEVER get rid of this lens, it is so incredibly sharp and the bokeh is incredible. It’s one of those lenses that for me, is just irreplaceable!
The bag itself changes frequently. I am forever flip-flopping between the LowePro Fastback 250 AWIII (read my review here), and my LowePro Pro Tactic 450AW. It’s not that I can’t make my mind up, but that they are just both best suited to different things… the 450AW is better if I want to take more camera gear and really load up. If I am taking less gear and travelling a little lighter and perhaps with some sustenance for the day then I am taking to FastPack. Oddly, the 450 is more suited to walking as it’s got great hip straps which help to move the weight around but I tend to take it when I need more kit on a shorter walk or if I am travelling to specific outdoor location. If I am on a set then the 450 is the bag that is coming with me.
I’ve also ditched the Canon camera strap that came supplied with it in favour of a different solution. Read on to see what’s taken its place!
What’s In?
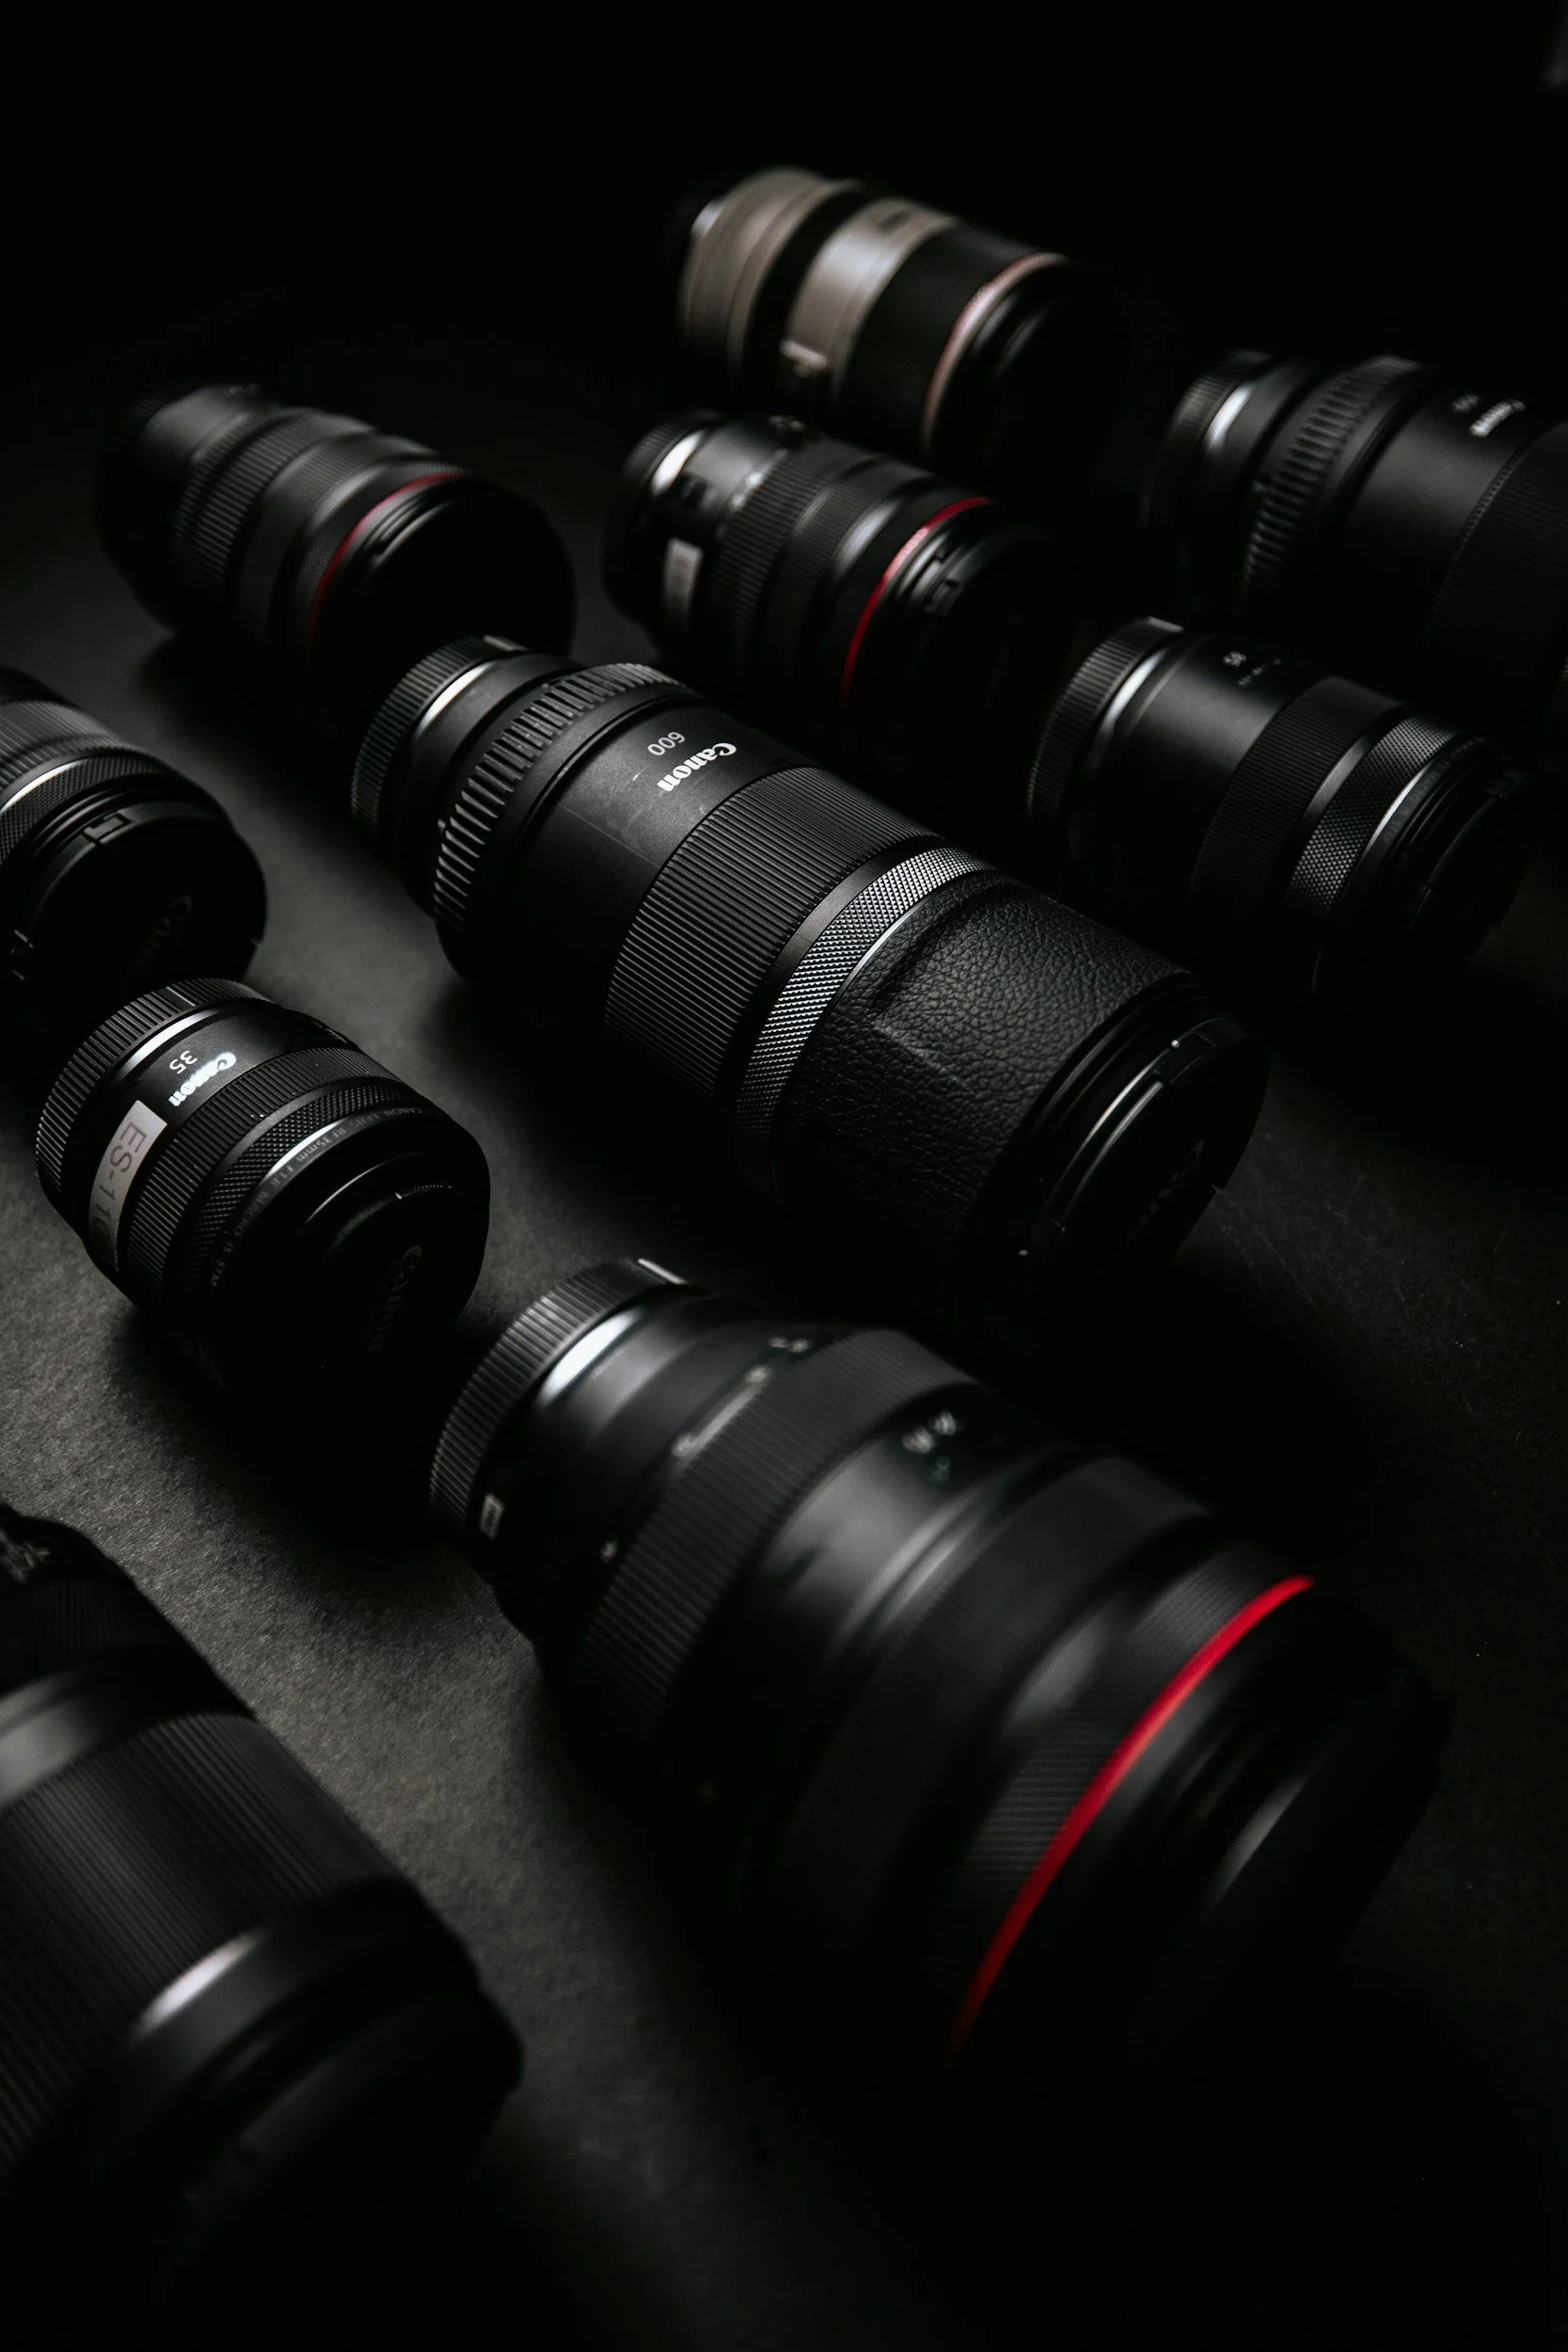
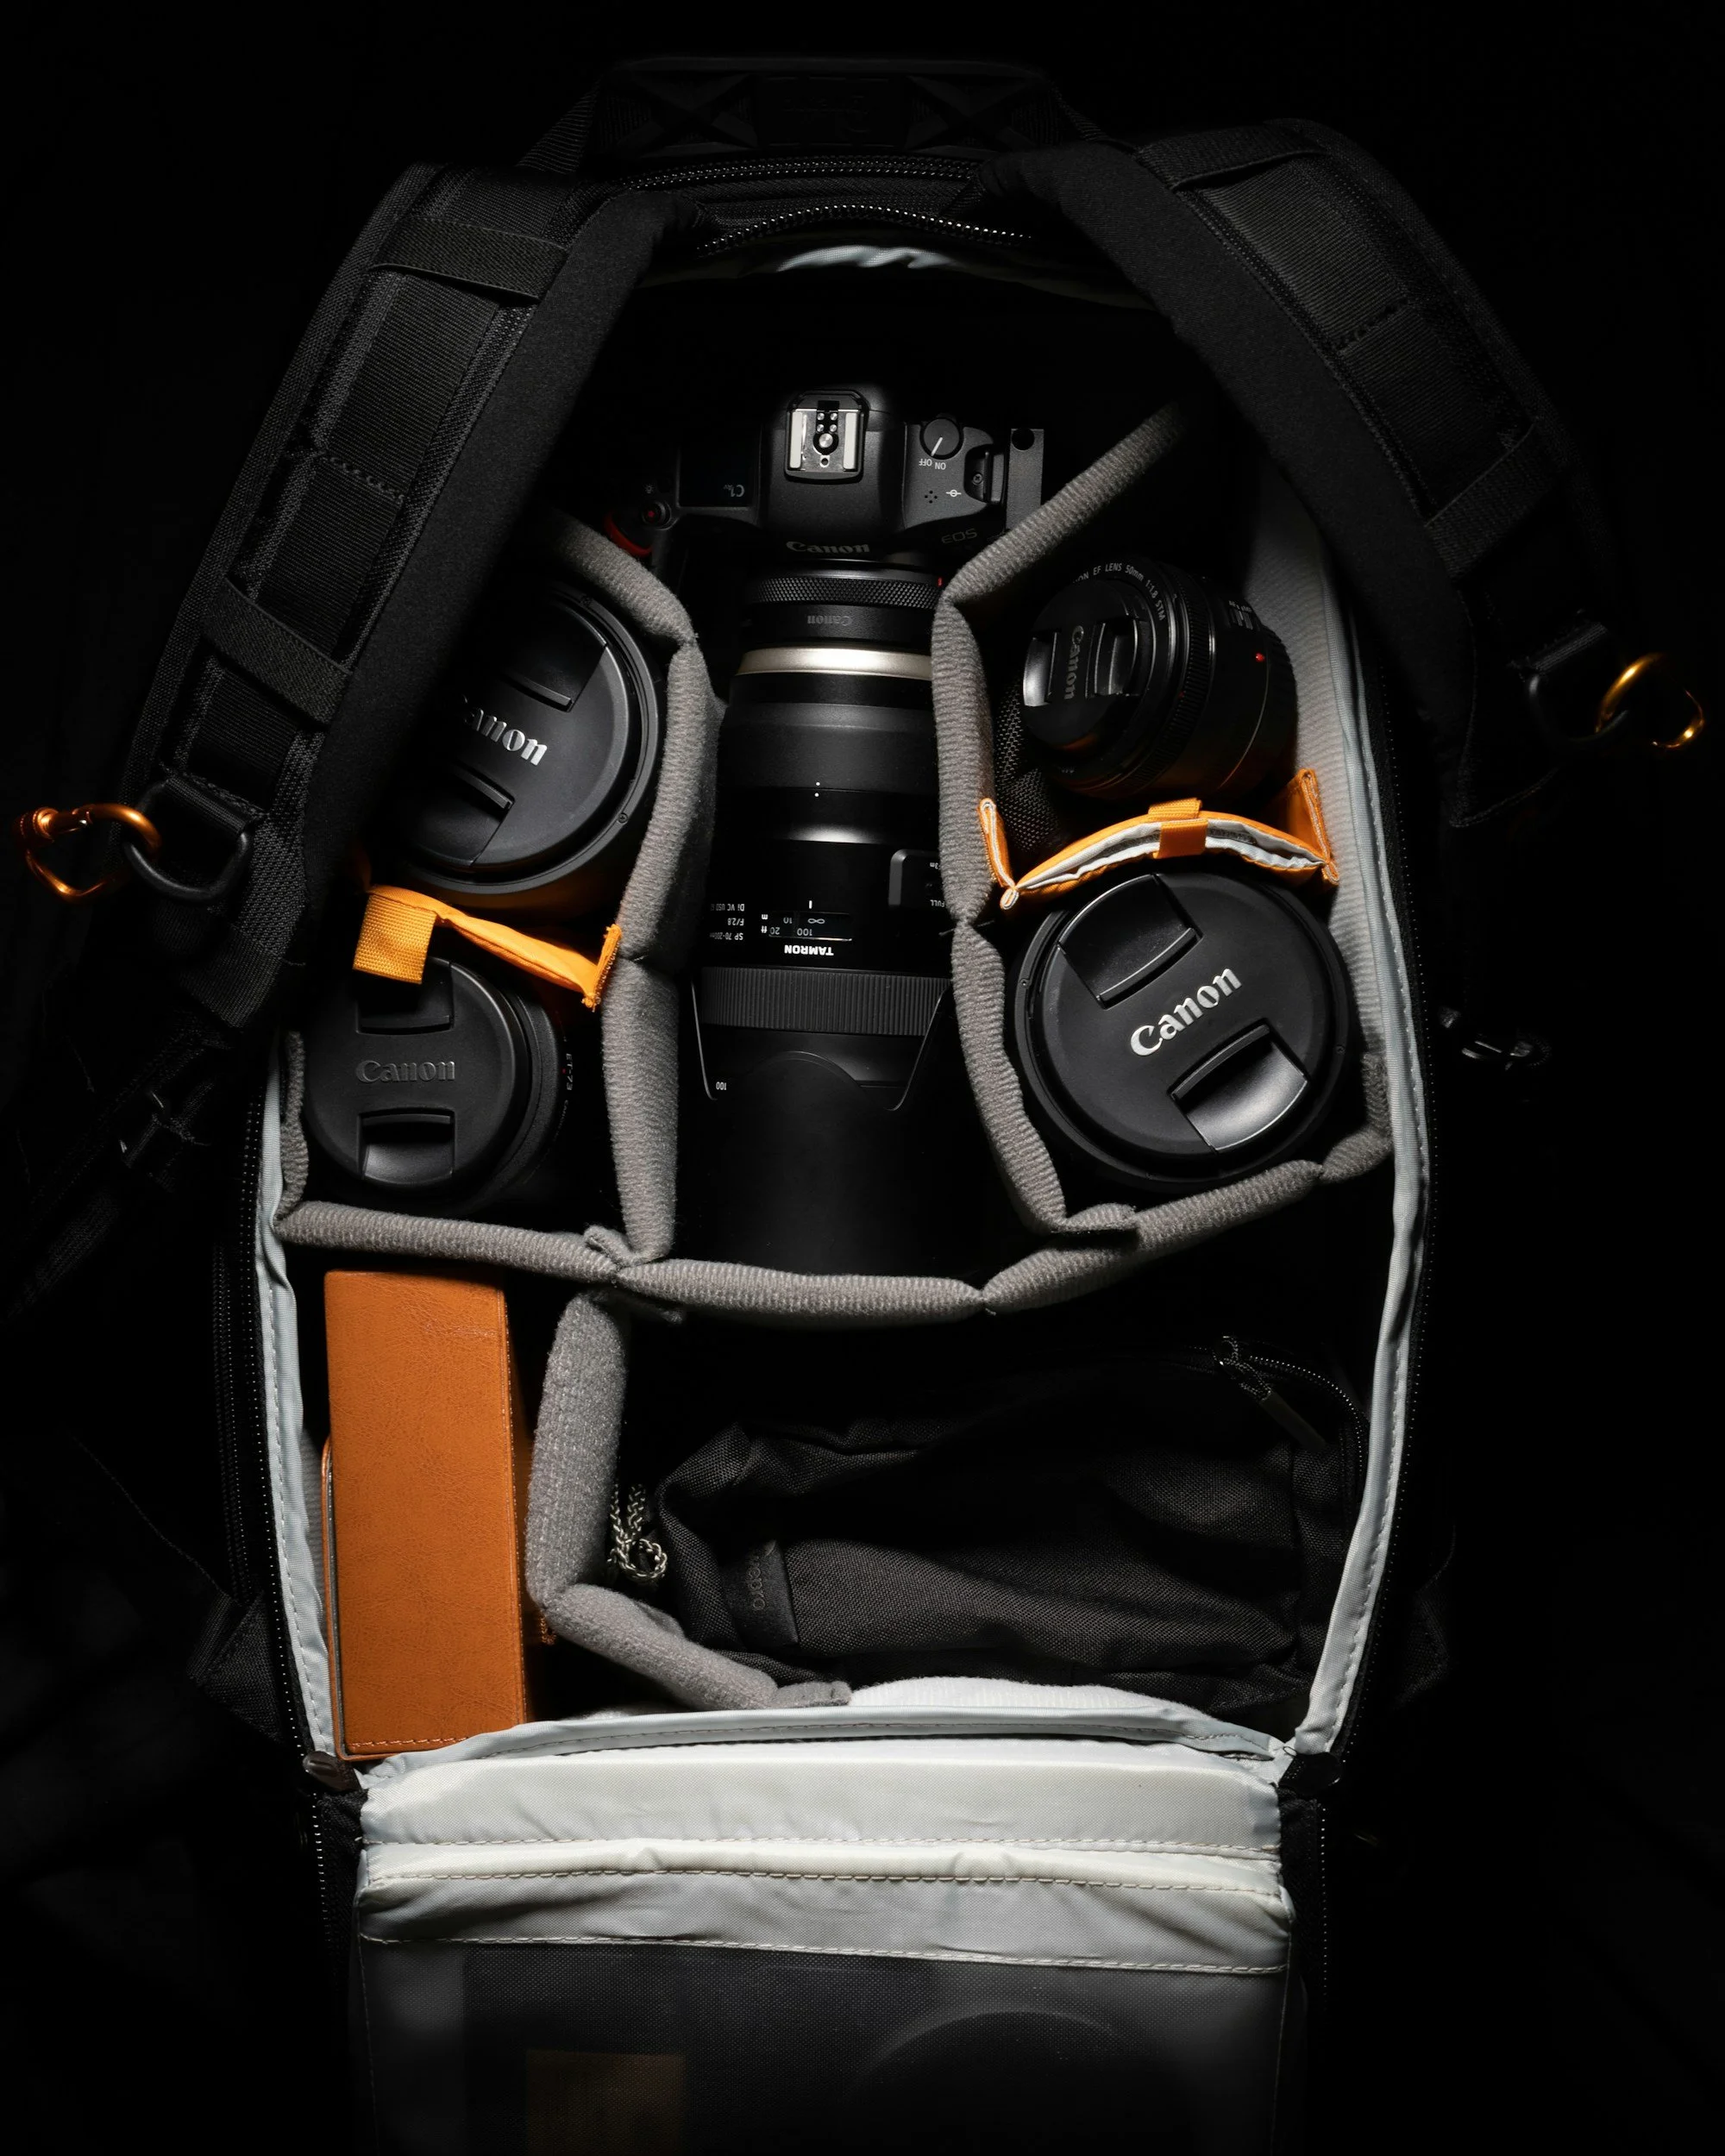
Lets start with the lenses… I’m carrying the Canon EF 70-200 f/4L, the Canon 16-35mm f/4L, the Canon 24-105 f/4L (Yes, I know I have these focal lengths covered in the first two lenses) and the Sigma 105 DG EX Macro f/2.8, I’ve also usually got my Pocket Dispo lens in there as well, for when I want to grab something that feels a little more nostalgic and where corner to corner sharpness doesn’t matter.
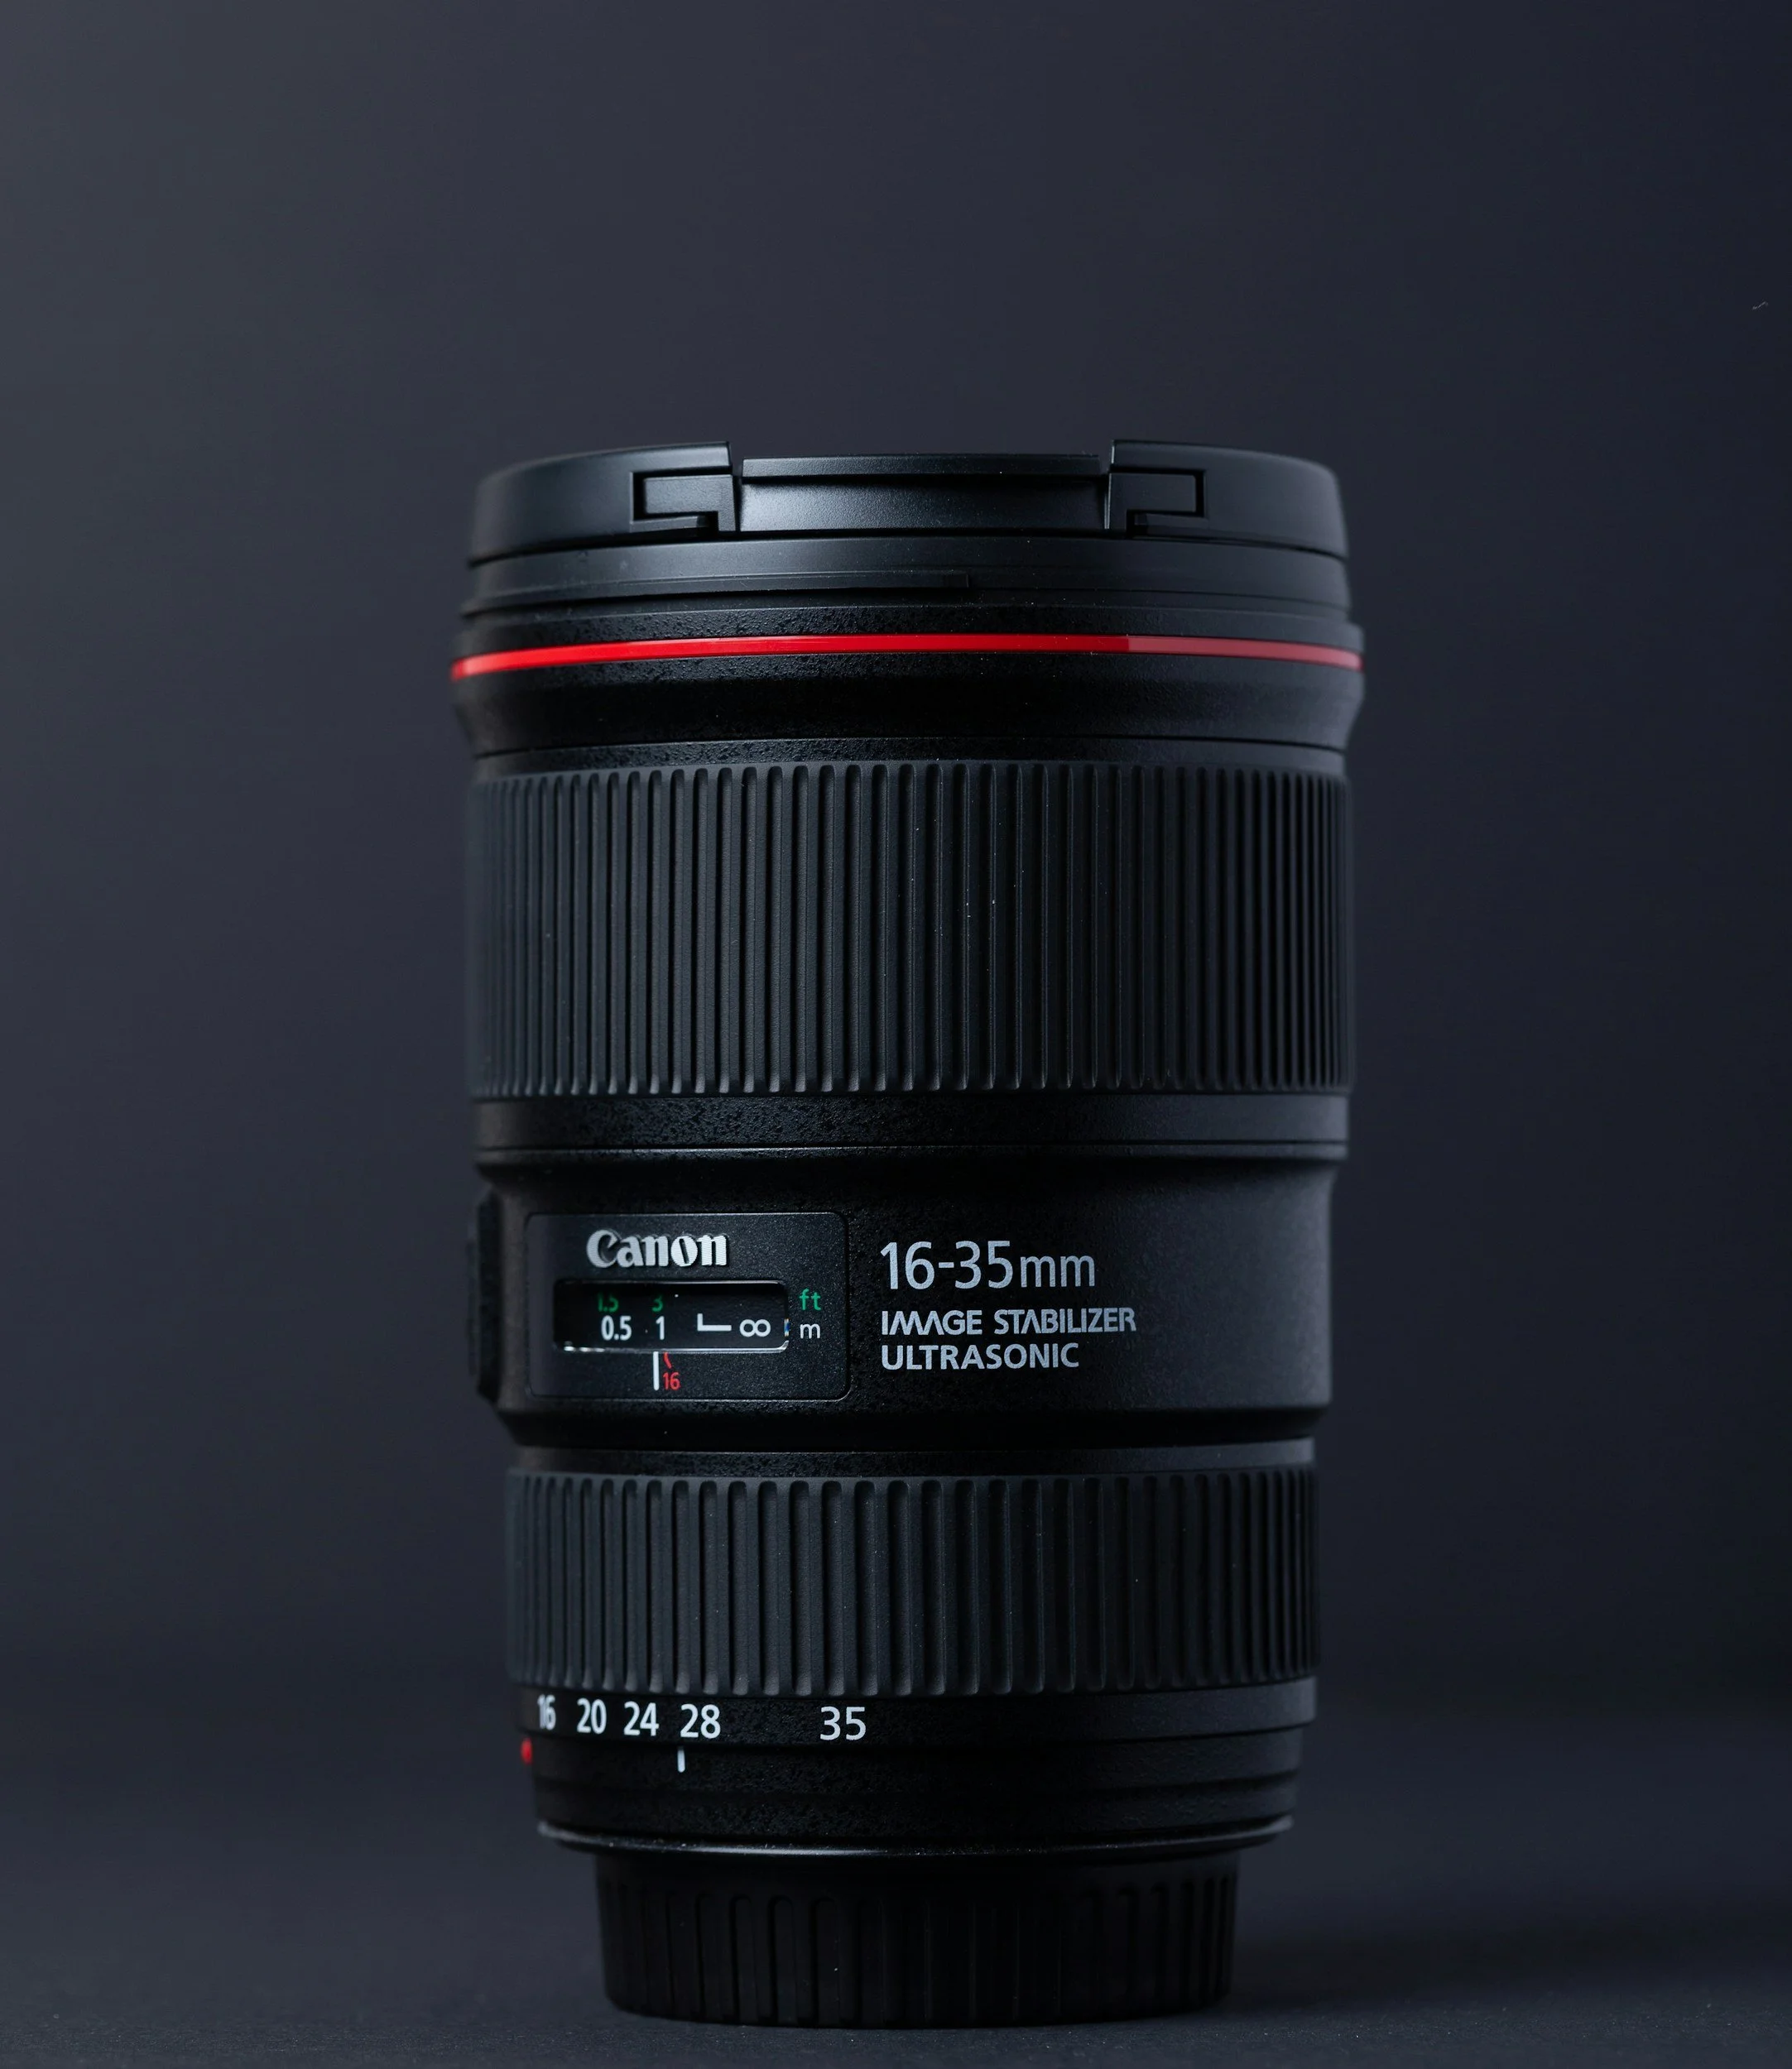
Canon 16-35mm f/4L
This is my favourite lens of the 4 focal lengths I regularly have in the bag. It’s small enough to carry, and being the f/4 version, it is much lighter (and cheaper!) than the faster, f/2.8 version. It’s got great sharpness across the focal range and it’s great for video as well. I’ve done a review of this lens, it’s only a recent addition to my bag; you can read it here.
Canon 24-105 f/4L
So I know there is a bit of cross-over here between the 16-35 and this, but that longer focal length gives me some extra flexibility. It’s sharp and the autofocus is great!
Canon EF 70-200 f/4L
This is a close second to the 16-35 and I often go out with just this lens as it forces me to look for different compositions, and paired with my teleconverter and crop sensor, it gives just about enough reach to dabble in a little bit of wildlife photography if the mood and/or circumstances present themselves.
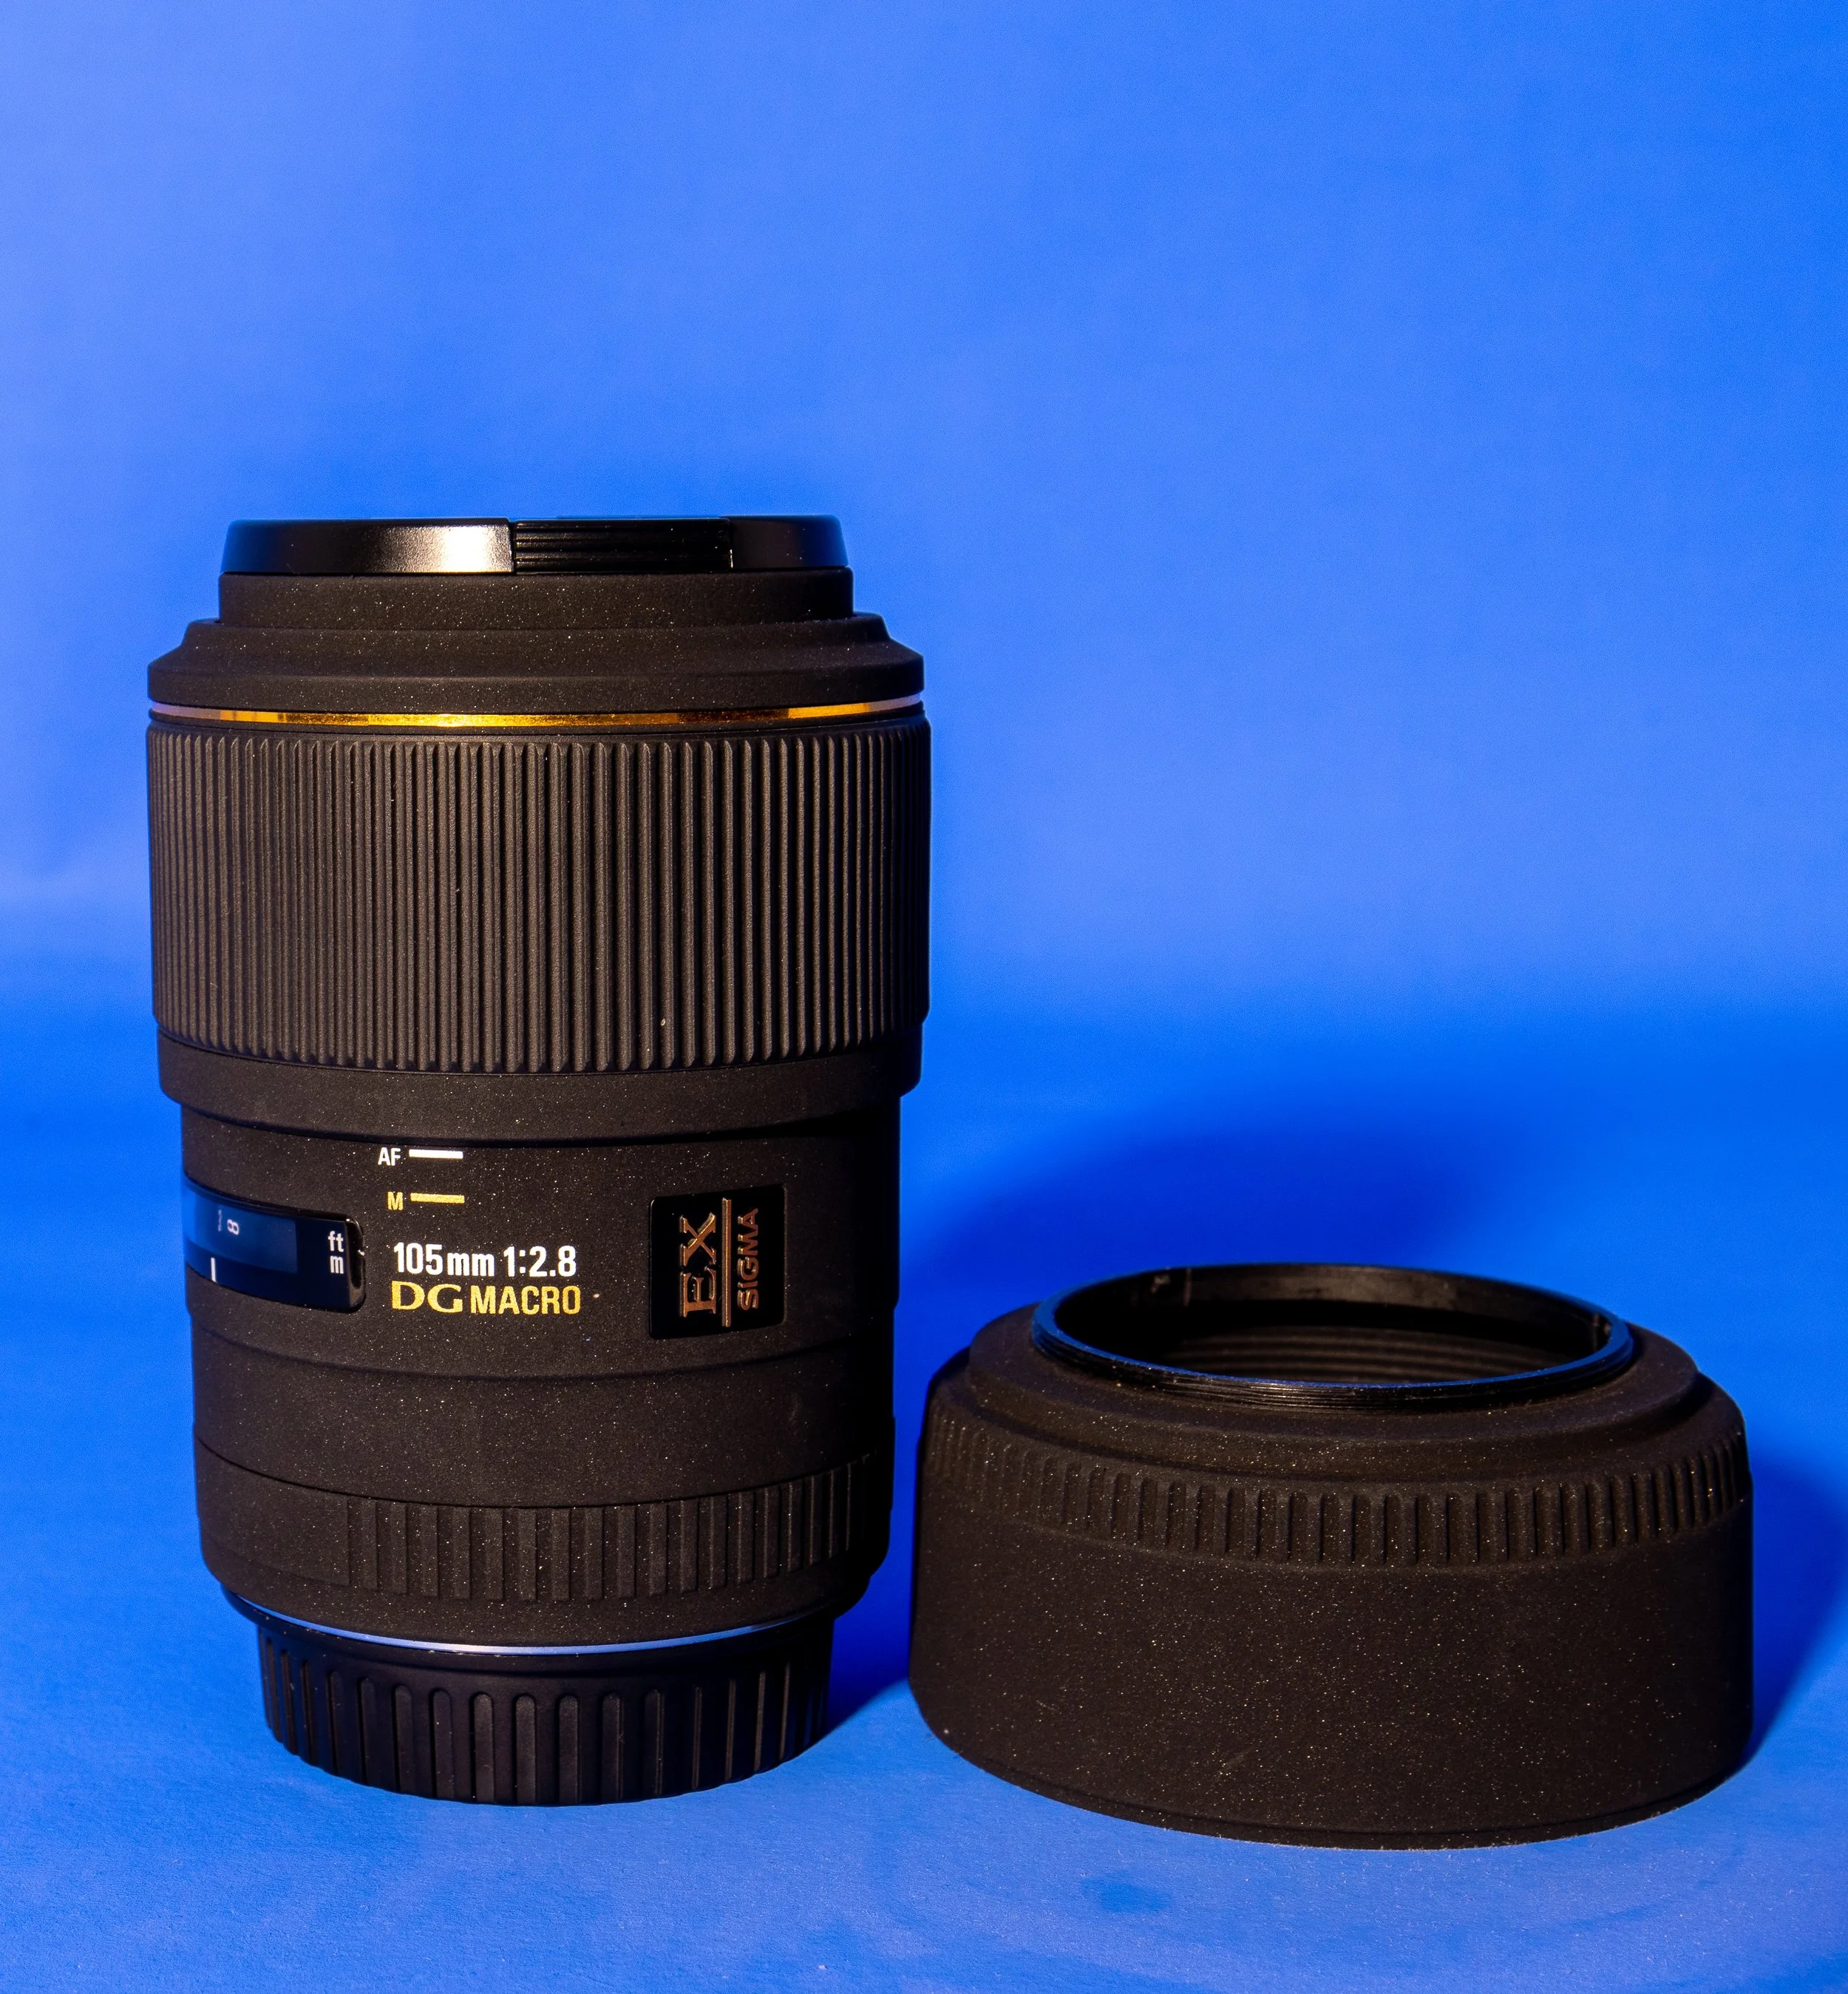
Sigma 105 DG EX Macro f/2.8
This is a recent addition to my bag. A 1:1 magnification macro lens is something I have been looking at for a while and this one came along at the right time. It’s a prime lens and produces some really sharp images. I carry this as it allows me to take better detail shots when I am out in the field and I’m enjoying the challenge of finding smaller, more interesting things to shoot. I’ve done a review of the Sigma 105 DG EX Macro f/2.8 recently, take a look!
Canon EF 2X Teleconverter
I am still carrying this as I am still a little bit unsure about it. What it does, it does really well.
It magnifies everything in your image, including any noise, which is a bit of a bind as it reduces your lens to an f/8 so ISO often has to be high. That being said, I still don’t feel like I have got enough time with it to really understand how it works with my camera and how to get the very best out of it. It’s staying for now, bur I have no doubt that when the time (and money) comes, it will be replaced by a dedicated telephoto zoom with a really long focal length.
Pocket Dispo
Something for a bit of fun. This isn’t hugely sharp, it shoots at one focal length, it used to live in a disposable camera and I love it. It’s a really fun piece of kit, weighs next to nothing and the images it takes are full of nostalgia. I’ve done a review of this lens previously on this blog, and you can read it here.
Video
For video I usually have two action cameras with me, the DJI Action 2 and the DJI OSMO Action 4. Both of these do similar things, but the OSMO Action 4 does them much better and in a way that I find easier. Having the two bits of kit means that I can mount one of them on top of the camera and the other one can be set up for to grab those cheeky time lapses.
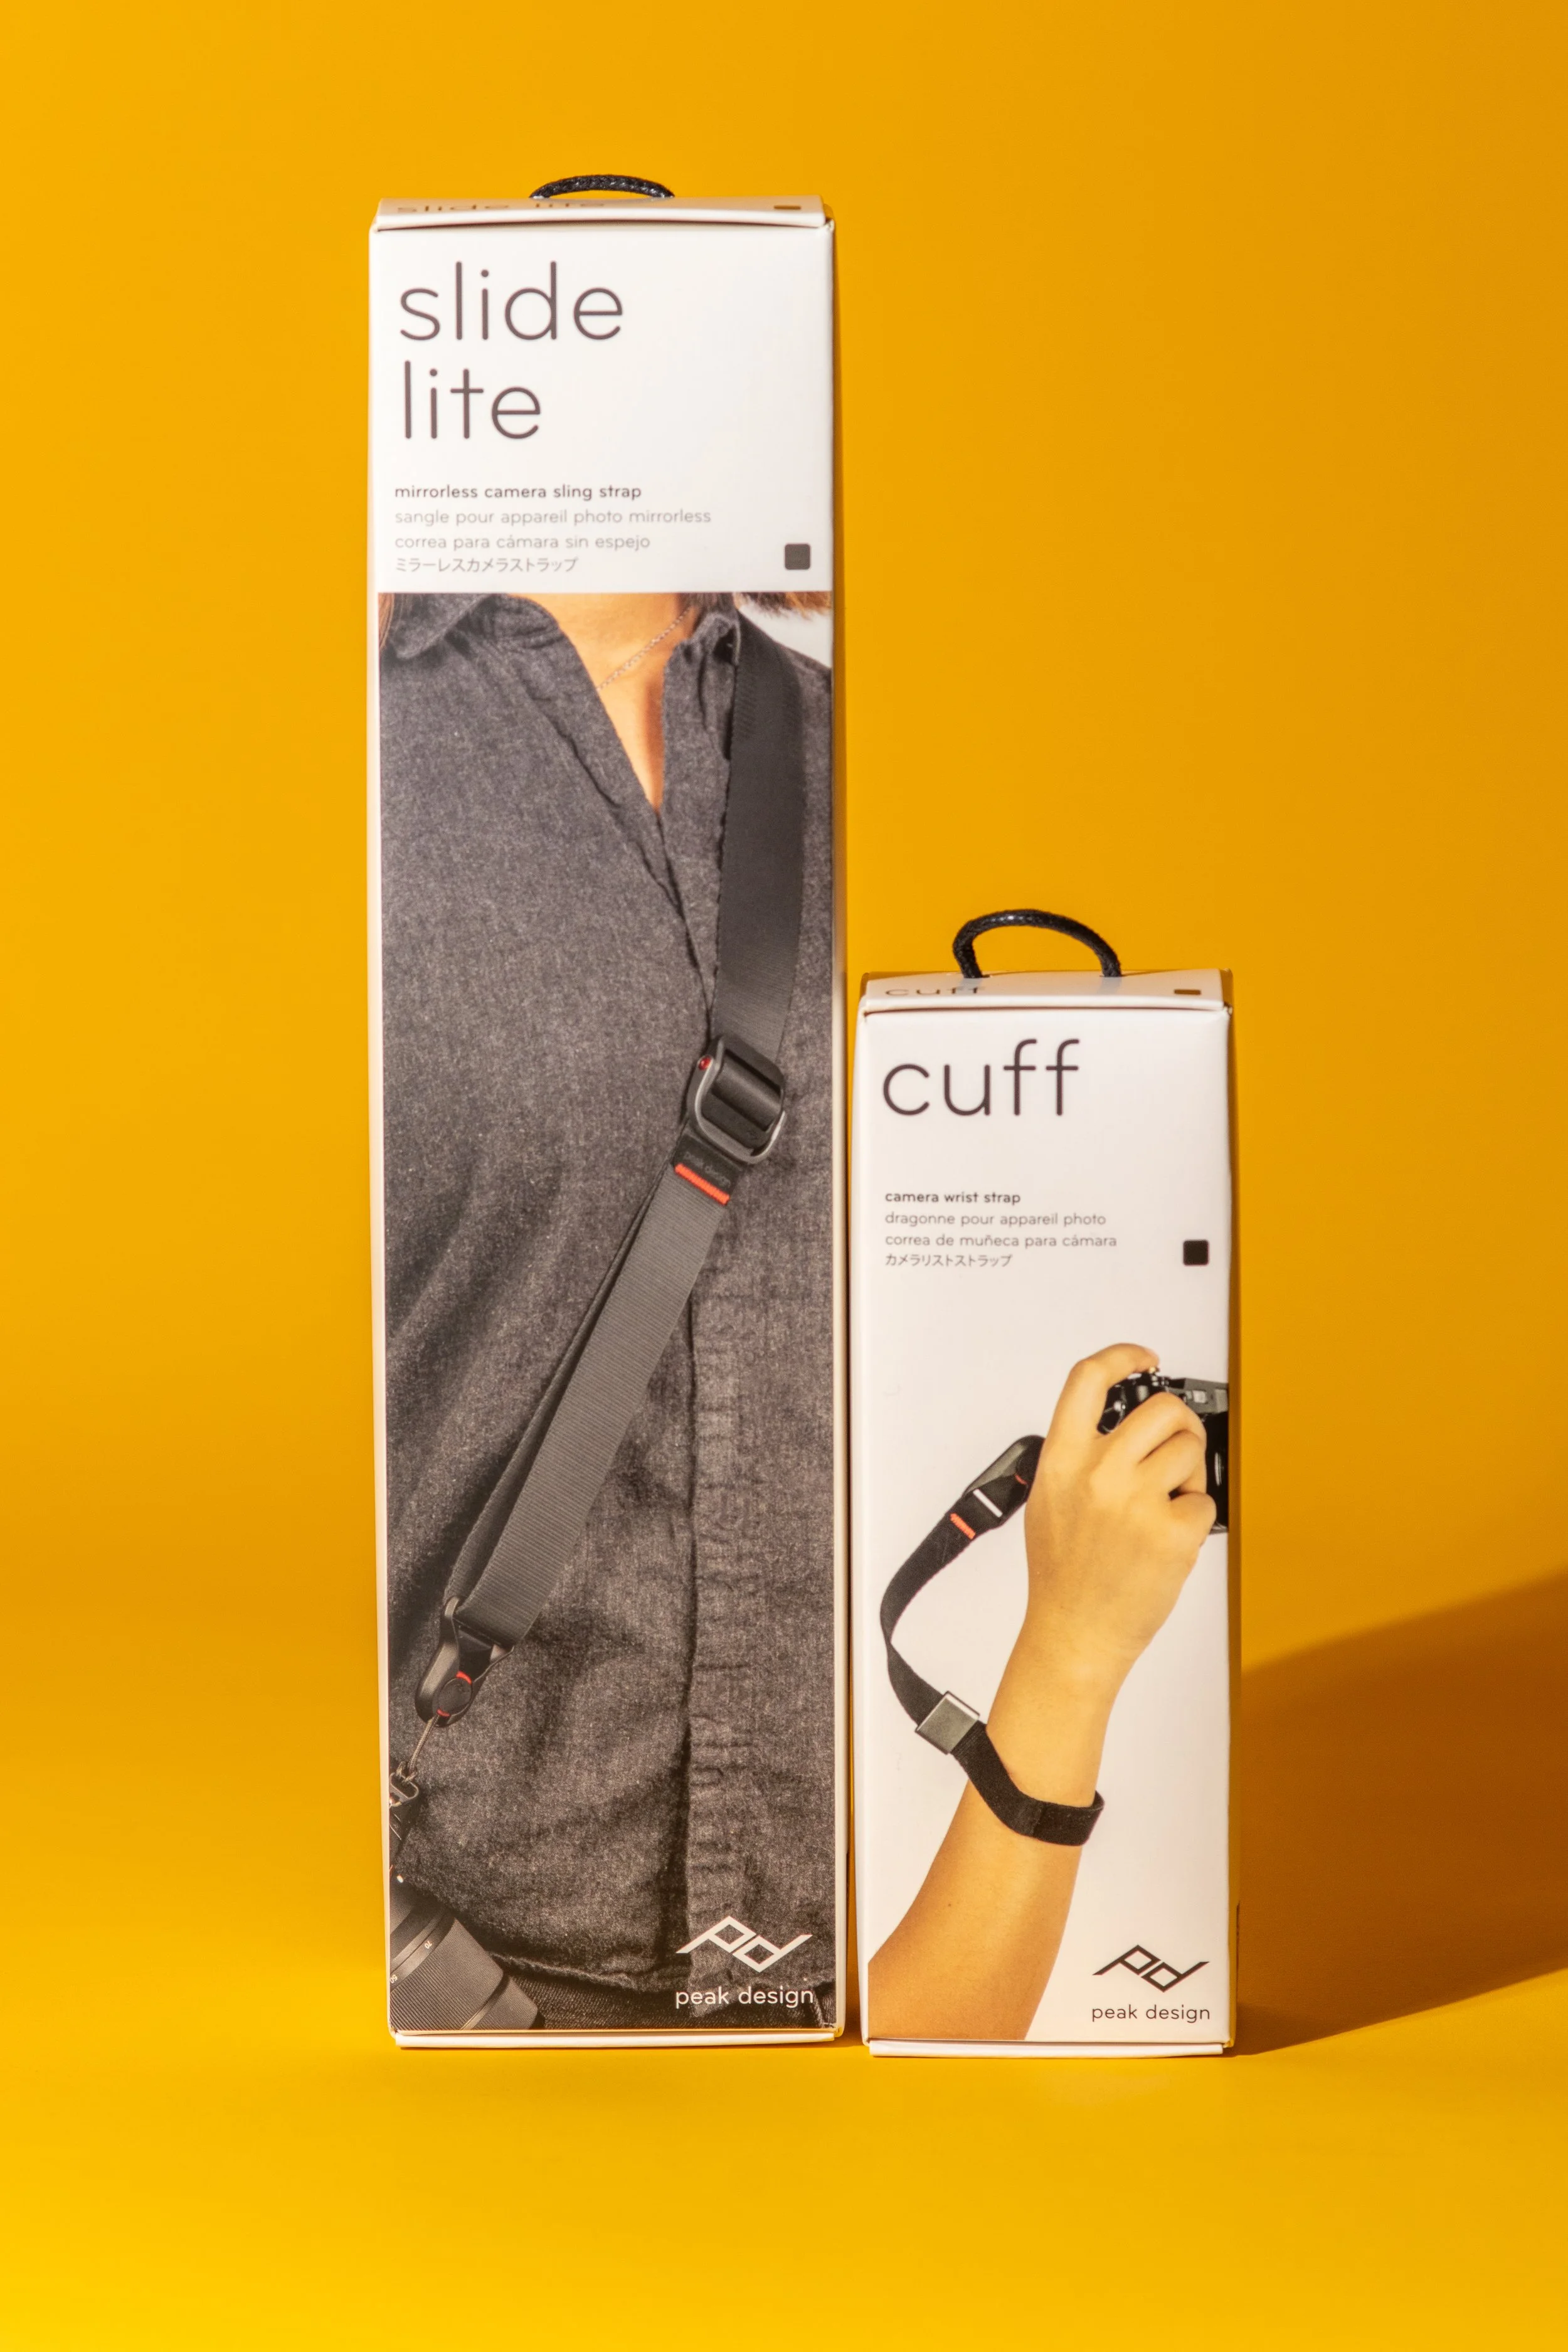
Strap
I am a recent convert to the Peak Design Slide Lite and Peak Design Cuff. Both of these are easy to get on and off of the camera with the clip system, it feels good, looks great and holds the camera really securely.
Tech Pouch
The LowePro Gearup Creator Pouch is the pouch of choice for storing a fair bit of the stuff that ends up rattling in the bag getting lost. It fits neatly inside both of my bags, hold both of action cameras, all of the cables that I am ever likely to need whilst I am out an about. It’s also handy for storing notebooks, a pen and a pencil, the obligatory £20 note and both of the battery packs that I carry with me when I am out and about. Oh and my lens cloths!
MacBook Pro M4 16” 2025
Ok. so this isn’t always in the bag, I’m unlikely to drag up a fell or into a cold wet wood, but this thing is a beast.
If I am going away and need some serious editing power, then this thing really cuts it. It’s quick, it’s sturdy, it’s easy to use, it multitasks without skipping a beat and the render times for video are better than good. The downside is that because it’s quite big, it’s also quite heavy but given that I’m not often carrying it far, usually from the car to where I am staying, this really isn’t a huge concern for me. Oh and I did I mention the screen? The screen is out of this world; it’s bright enough that you can use it in bright light, the colours are great and it really is a joy to edit on - the 16” screen gives plenty of real estate to really give you a good idea of how your edits look.
Canon 80D
This has been my daily driver for a number of years and I love it. I know that the tech in it is pretty outdated now, but it works and it’s the best camera that I have. I know it really well and I don’t feel like there is anything I can’t do with it. I will need to upgrade it at some point as whilst I know it so well, I feel like I am really at the limits of what I can do with it. It has enough resolution for what I do in the studio in terms of cropping, the APSC sensor bags me a bit of extra reach and it’s built really well so it’s suited to the work I do and the manhandling it gets.
Headtorch
Not all photographers are going to need one of these, but landscape photography calls for one (and a good one at that) to be in your bag. If you’re out in low light at the start or end of the day, you need to see where you are putting your feet! This is the one I like, it’s super bright, rechargeable and lightweight.

Editing Software
I am still pretty reliant on Adobe and I know that there is a lot of movement away from it at the moment, with people starting to favour other options because of the pricing model that they use, but I know it, it works and Photoshop is still an industry standard. Lightroom is where most of my landscape edits happen with any little retouches happening in Photoshop, but I do find myself using Photoshop less often as the editing tools in Lightroom are getting so good that it’s just not needed. .
In the studio I am using Capture One, another industry standard. The tethering is better and more stable than it is in Lightroom and the software as a whole interprets raw files much more accurately/effectively.
Audio editing is done in either Audition or in Logic Pro, depending on what I am doing. I am learning DaVinci, but still don’t know it well enough to leave Premier behind.
ND Filters/Polarisers
These are a vital piece of kit for landscape photographers and I have them for all of my lenses, with the exception of the macro lens as I haven’t yet come across a situation where I want less light in it! I like the Nano X filters from K&F concept which are a little pricier, but they are great at what they do and they cause minimal colour cast, which is easily corrected in post. I keep them in this pouch, which is a hardshell but worth the its size because it’s keeping my filters safe!
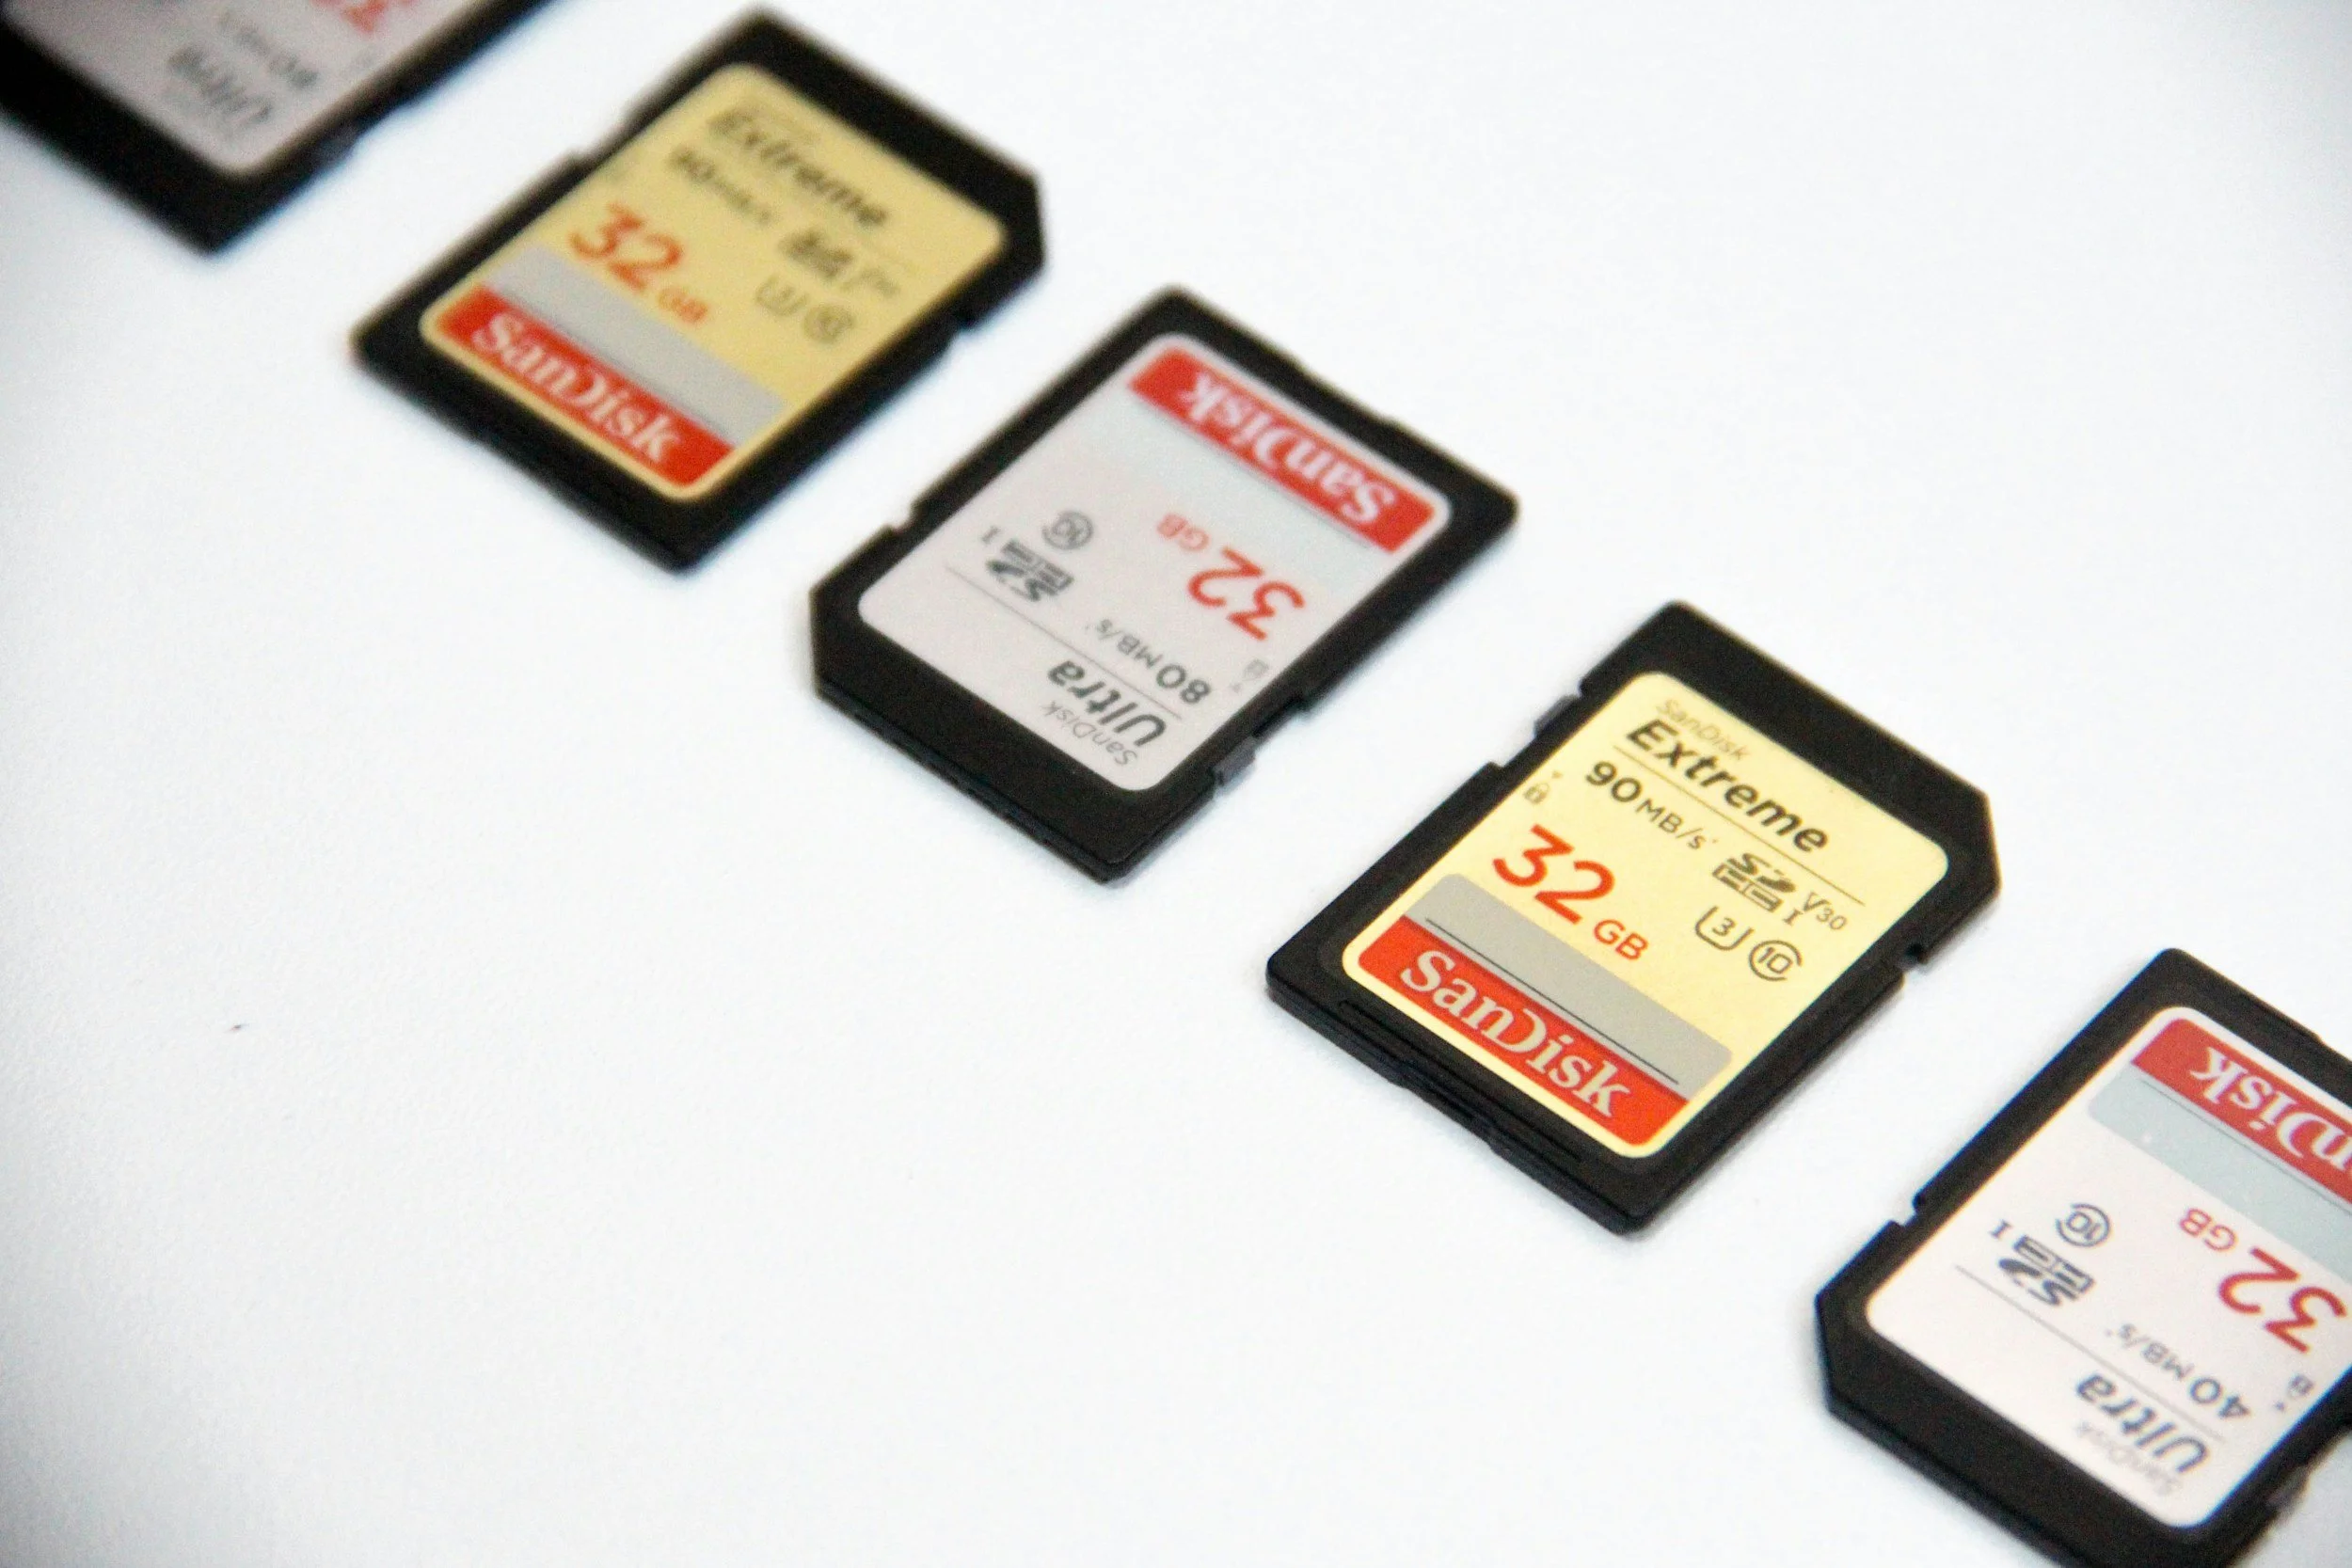
SD Cards
Not much to say about these, they’re an essential part of what we do. I use high speed 128gb Sandisk ExtremePro cards in my camera and I use Lexar V30 micro SD cards in my video kit as they can handle the write speeds needed to write 4K video.
Video Gear
This is nothing fancy I’m afraid. If you’re wanting me to have a ton of cinema stuff, you’re going to be disappointed. What I do have is a DJI OSMO Action 4 and a DJI Action 2. Both of these are actions cams. They’re small and rugged enough to handle a bit of a beating being dumped on the ground in my bag or left on a tripod somewhere to shoot timelapses whilst I run around with the camera. I’ve got a review of the Osmo Action 4 here - take a look!
The Bag
I flit between 2 bags; the Lowepro Pro Tactic 450AW and the Lowepro Fastpack 250 AW III. Both are great bags with plenty of space, but what I am taking my kit in depends on what I am taking and where I am going. If I going to do a full location shoot or if I am taking a lot of kit a long way, I’m taking the protactic as the hip straps really help with the weight. If I am travelling lighter then I’m taking the flat pack. It’s not as comfortable but it has two separate compartments which helps to keep everything apart and the second compartment is a great space for some food!
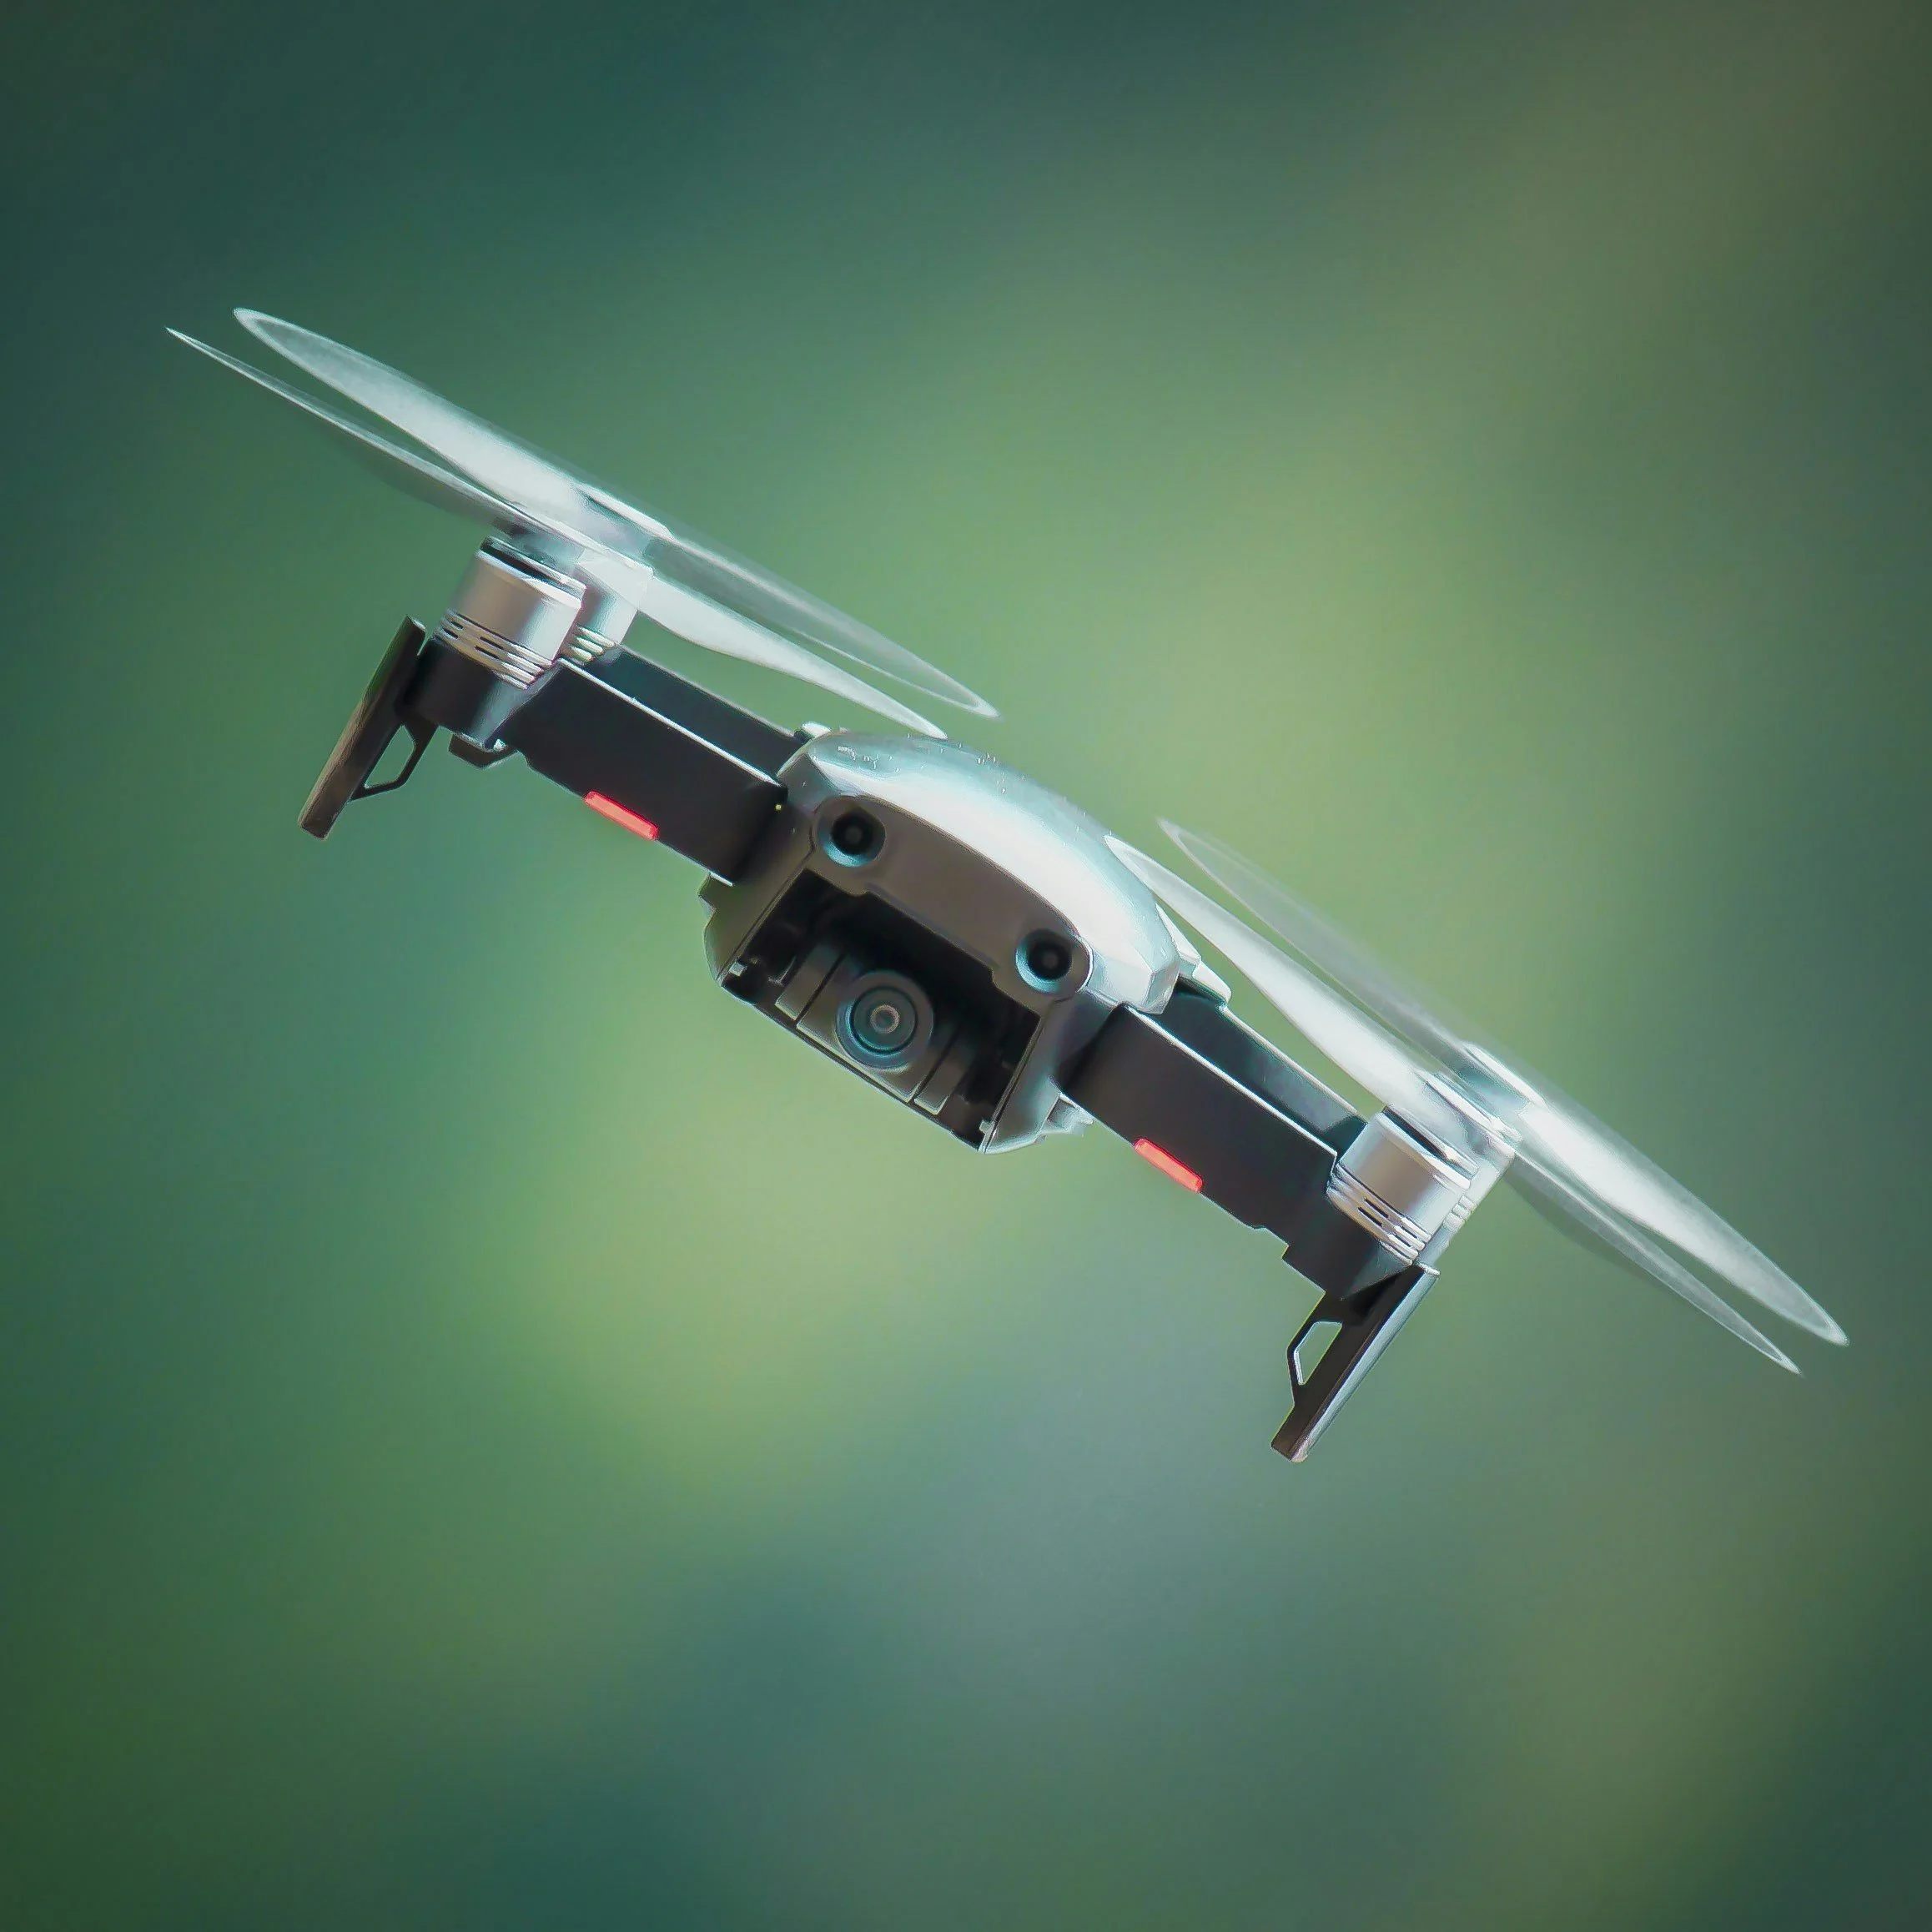
Drone
I don’t use my drone much and the one I have is old, getting on for 5 or 6 years. I have DJI Mavic Air 2. It gets the job done, but not always very well. The small sensor isn’t great in low light and the photos it takes aren’t great. I do like some of the video that comes out of it is decent quality and makes for some good b-roll. This stays out of the bag more than it stays in. I can’t lie you to on this one, they’re hard to find, as are the spares.
So that’s me for this year. I am sure there will be some additions as I move through year, but I think that the majority of it, the core if you will, is going to remain the same. I’ll update you if anything changes.
Thanks for reading - I hope you have found this blog useful. If you want more stuff like this as well all of the updates, please head to the contact page and sign up to my newsletter and get updates direct to your inbox!
If you’d like to support the blog and help me keep producing Lake District photography content, honest gear reviews and regular website updates, you can do so via my Buy Me a Coffee page. Keeping everything running smoothly takes time, and your support makes a real difference. Thank you.
Check out some more of my latest blog posts below…
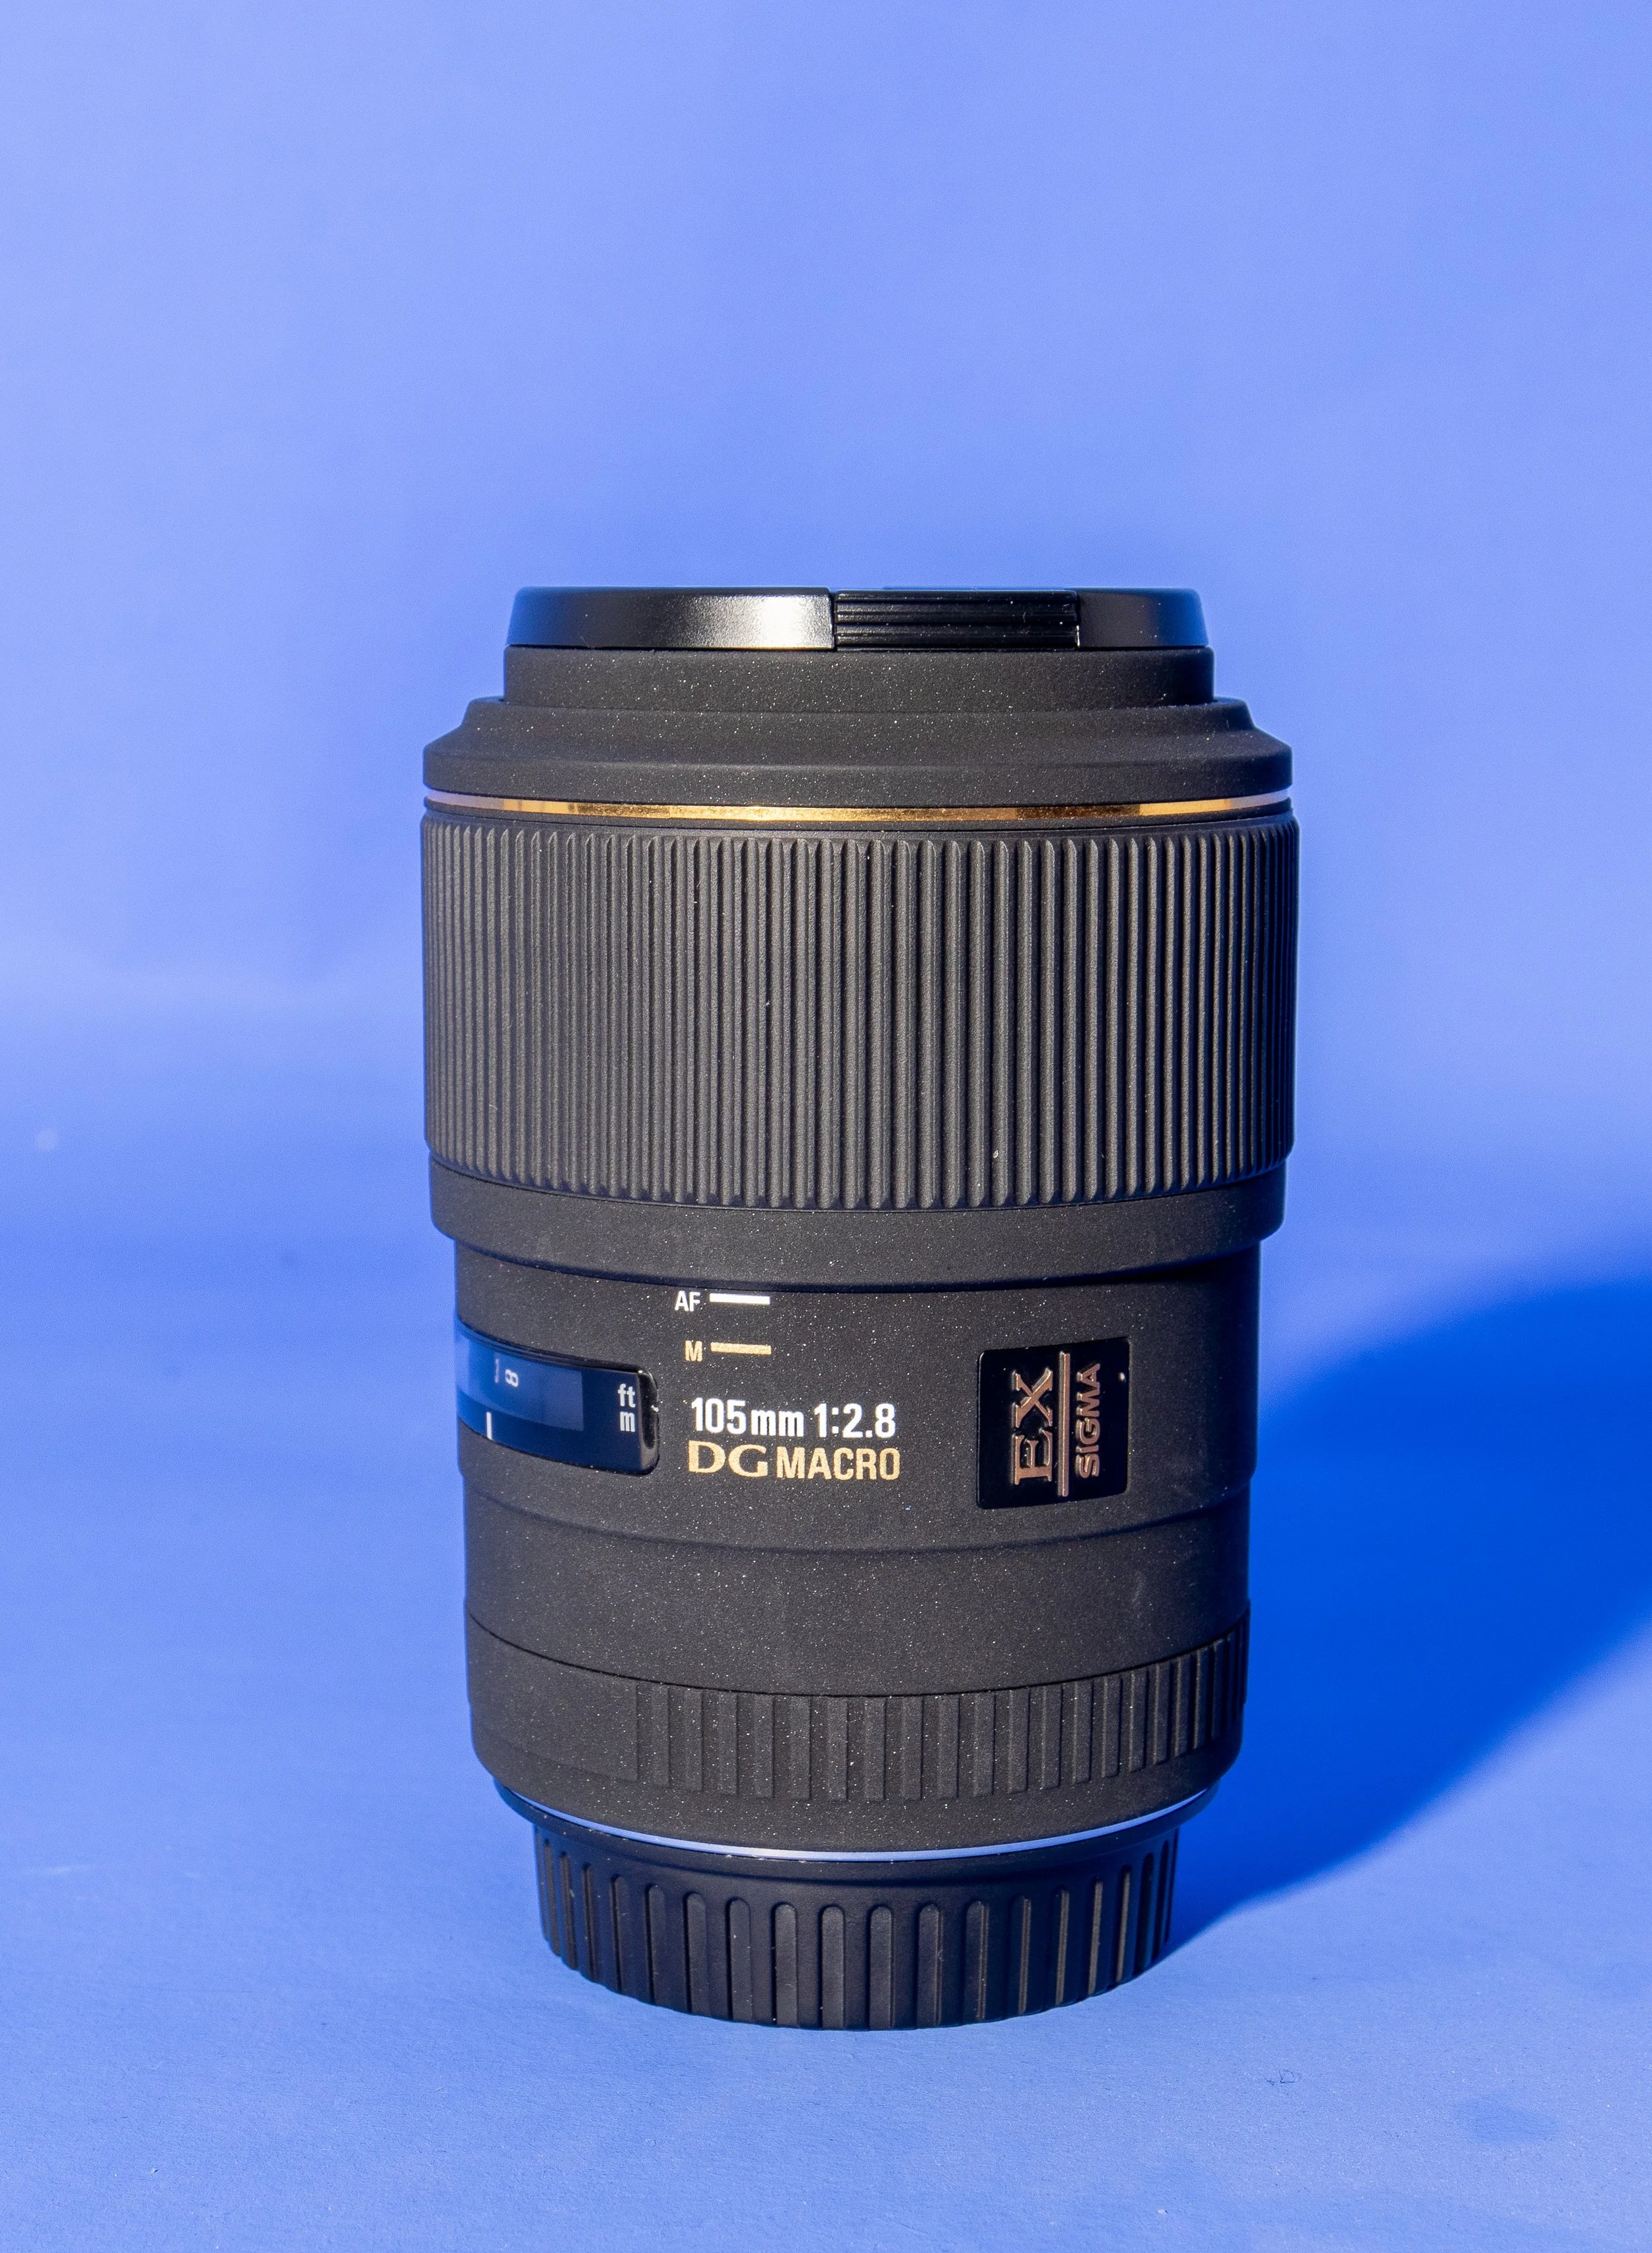
Gear Review: Sigma 105mm f/2.8 EX DG Macro
The Sigma 105mm f/2.8 EX DG Macro has long been regarded as one of the best-value true macro lenses available, offering 1:1 reproduction, excellent sharpness and impressive background separation. In this review I take a detailed look at its real-world performance for close-up photography, product shots and portrait work. From autofocus behaviour to optical clarity, build quality and value for money, this hands-on Sigma 105mm macro lens review explores whether this classic lens still holds up against modern alternatives—and whether it’s the right choice for your macro photography setup.
This is a piece of kit I have owned for a while, but haven’t really used a whole bunch, but now I have got some good hours under my belt with the Sigma 105mm f/2.8, I’m much better placed to give some thoughts on it, and I hope you find them useful. It’s also pretty old, having been released sometime in the 2010’s - I can’t find a definitive date online. this is worth bearing in mind if you’re considering this review or thinking about a purchase.
I’ve been using this in the studio and in the field. Now obviously these are two very different use cases in two very different environments however, the results are broadly comparable but there are some obvious advantages and disadvantages to both.
This blog contains Amazon affiliate links. If you follow one of these links and then make a qualifying purchase, I may receive a small commission and at no extra cost to you. This is a great way to support the blog and allows me to keep writing these reviews!

I’m using this on an APSC sensor, so the focal length is actually around 168mm rather than the 105 it is designed for (I will upgrade to full frame one day, I promise, but the 80D still has plenty of legs in it for now and besides, I enjoy using it though I am getting towards the upper end of its capabilities), but the lens is designed for use on both full frame and APSC sensors, though on a full frame it might not be as sharp in the corners.
I got this lens almost on a bit of whim after seeing someone use it in a YouTube video and seeing the results they were able get with it. The online reviews were strong and MPB had an excellent condition one listed for £154, so this one was a bit of a no-brainer, but also not quite an impulse purchase.
I have included some example raw files at the end of this blog so that you can have a play with some of them and pixel peep to your heart’s content.
First Impressions.
For less than £160, it feels like you have paid a lot more. Okay, so this launched at a price of £600 when it was first released, but in any case, it looks good, feels good and it seems pretty solid. It’s covered in something (I’m not sure what it is and can’t find the information online) that feels really smooth, but it will pick up fingerprints really easily (not that this is something that you were thinking about!).
This lens isn’t without its faults, but for me, second hand and at the price you can get one for, it’s worth it. The faults aren’t with the final images, they’re in its operation. Are there better lenses out there? Yes. Is there anything you can buy for a similar price that is better? I don’t think that there is.

It feels sturdy, and that’s something which is important to me as I am known to have the odd clumsy moment. It attaches to and removes from thee camera body easily.
One thing that I do find slightly annoying is the lens hood. There’s nothing wrong with it, but when you’re not using it and want to store, it doesn't invert and clip to the lens to keep it out of the way. My Canon 50mm has the same issue and it’s my biggest gripe with it.
If you’re shooting on a Canon body, this lens will stop down to f/45 but I am yet to find a genuine use case for this, other than trying to force shutter speeds if you’re outdoors and looking for a longer exposure time because you have forgotten your ND filters.
Speaking of ND filters, the filter thread size on this is 58mm, which is pretty small so you might not have anything which fits. Some step up/down rings could be a worthwhile investment if you don’t want to spend a ton of cash on a new filter.
You might already have a larger filter of 77mm, you can screw into the lens hood which has a thread in it, but then the front element is so far recessed that the lens hood isn’t really providing you with any extra protection for this and if you’re not bothered about filters then the lens hood could probably left at home.
Performance
Like I said earlier, it comes on and off the body of the camera really easily. As you would expect I suppose, but I figured it was worth commenting on.
Ok, so let’s chat about the autofocus. The autofocus isn’t great and it tends to miss quite often. If you’re looking for something which macro capability and which has good autofocus, this isn’t it. I do suppose if you’re doing a lot of macro work with it, this probably won’t be an issue for you. If you want to use it like a standard longer focal length lens then it could be a problem for you unless you are manual focussing. I won’t be using it for wildlife or portrait work any time soon as the number of missed shots means that for me, it’s a non-starter.
The other thing with the autofocus is that it’s slow. Like really slow. It takes a while to hunt for the focus and like I said, its success rate isn’t amazing. It’s also pretty noisy so if you plan on using any of the footage for video then you won’t be able to use the on camera audio, it’s likely to be picked up by off camera mics as well.
There is a focus limiter which will reduce the amount of hunting the lens has to do. The minimum focus distance is 12.3” (about 310mm), which translates to about 4.8” (400mm) working distance from the end of the lens.
Now whilst the autofocus isn’t great in this lens, it’s super sharp, even wide open at f/2.8 and this is one of its biggest selling points. It’s still sharp at f/8, as you would expect, but expect to see some diffraction which will make your images soft beyond f/16.
In the studio, this lens has been great.
Paired with my 80D and tethered to Capture One, I have had some great results, especially when I have been focus stacking images and inching the focus point forward gradually with the software in manual focus.
Using it to focus manually has been a dream, but I prefer using the software to take any shots where I know I am going to need to stack to get that front to back sharpness.
I would expect that if you have focus stacking/bracketing functionality built into your camera then the results would be strong but I can’t comment on this as mine is a veritable antique these days and such luxuries have not been afford to me!


Who is this lens for?
This is a great lens if you are just starting out in macro photography or you want to start working on some product shots/still life in the studio then this lens would be great entry point - it’s much cheaper than going straight in for something like the Canon L Series 100mm Macro which is 7 times the price of the Sigma.
Landscape photographers will love this lens for detail shots or abstracts where the detail and the sharpness in the detail is really important.
Macro or wannabe macro photographers will love the sharpness this has and the wide aperture is going to help to flood the lens with light, coupled with the wide open sharpness means that you’re able to create some impressive images.
Pros and Cons
Pros:
Lightweight and solid build quality.
Sharp wide open at f/2.8
Works great tethered for focus stacking
Focus limiter helps to reduce focus hunting.
Cons:
Autofocus is slow and hunts a lot
Loud autofocus makes it challenging for video shooters
Small filter ring size
External zoom makes close focussing tricky and opens up opportunities for dust.
Downloadable Raw Files:
I’ve taken a couple of shots of an old one pound note, which isn’t legal tender any more (!), they’ve not been for about 37 years, so don’t go getting yourself any ideas about getting rich quick! These are genuine, straight out of camera raw files so have had nothing done to them. Click the buttons below to download these and have a pixel peep.
Tech Specs:
| Spec | Details |
|---|---|
| Lens Name | Sigma 105mm f/2.8 EX DG Macro |
| Lens Mounts | Canon EF, Nikon F, Sony/Minolta Alpha, Sigma SA |
| Aperture Range | f/2.8–45 (45 only available on Canon) |
| Actual Weight | 450 g |
| Measured Size (DxL) | 2.95 × 4.13 in (75 × 105 mm) |
| Lens Length with Hood | 5.6 – 7.57 in (142.2 – 192.3 mm) |
| Minimum Focus Distance | 12.2 in (310 mm) |
| Maximum Magnification | 1.00× |
| Optical Construction | 11 elements / 10 groups |
If you’d like to support the blog and help me keep producing Lake District photography content, honest gear reviews and regular website updates, you can do so via my Buy Me a Coffee page. Keeping everything running smoothly takes time, and your support makes a real difference. Thank you.

Gear Review: Godox X3 Pro Wireless Touchscreen TTL Flash Trigger.
The Godox X3 Pro is a compact, touchscreen flash trigger designed for Canon photographers who want fast, reliable control over off-camera lighting. In this review, I take a practical look at how the X3 Pro performs in real-world shooting, covering its radio triggering reliability, touchscreen workflow, TTL and High-Speed Sync support, and how it fits into a modern Godox lighting setup. If you’re considering upgrading your flash trigger or moving to a cleaner, more portable lighting workflow, this Godox X3 Pro review breaks down who it’s for, how it performs, and whether it’s worth adding to your kit.
Ahhh, flash triggers! For years (for me at least) these have been unnecessarily difficult to use bits of kit with complicated menus, too many buttons and some of the least intuitive things I have ever had in my photography set-up.
The Godox X3 Pro-C was launched in late 2025, with initial availability starting in September/October 2025 and changed that! It is something that I have been wishing someone would make for a number of years and finally something has come along that ticked a lot of the boxes I was hoping for.
I’ve had a number of different flashes and I still own some of them. One of the first sets was some Neewer off-camera flashes (the catchily titled Neewer NW-562 E-TTL Flash Speedlite), which came with their own triggers and a manual which contained some literal translations which were largely unhelpful. They were a lot of faffing, but once I got some settings dialled in for the transmitter and the receivers, I didn’t change them. I could just about work with the plethora of buttons and dials on the flash to change things like the output power and the zoom, and I did find it handy being able to reposition them. I still have them as they make useful lights that I can hide in scenes to light them more creatively.
I eventually upgraded to some more powerful strobes, this time from Godox and went for the Godox SK400III, which I paired with Godox XPRO-C TTL trigger. This was a real step-up from the previous trigger as now I could set up groups and store some different settings. Again however, I found this really complicated to use. The old style LCD screen was, I found, very confusing, difficult to use and to be quite honest, a bit of a pain. It did however give me some more flexibility and allowed me to do a little bit more. When I say ‘allowed’, what I mean is that I could control the strobes from the trigger rather than having to go and off fiddle with two set of buttons on two different flashes.
More recently, I have taken delivery of the Godox X3 Pro C Wireless Touchscreen TTL Flash Trigger. Yep, you guessed it, I got in the Black Friday sale last year, and I have had a couple of months to play with it before giving you my thoughts. One of my overriding thoughts is that they need to come up with some better names for these things!
This blog contains Amazon affiliate links and I may receive a small kick back if you make a qualifying purchase after you have clicked one of these links. This is a great way to support the blog, so a massive thank you goes to you if you choose to make a purchase, all of the money I make from this goes back into helping me to create reviews for the blog, it’t not a huge amount, but every little helps!
First Impressions:
This is much smaller than previous triggers that I have owned, yet you don’t lose any of the screen real estate that you want with a piece of gear like this. It’s light, which is a real bonus when you’re sticking it on the top of your camera via the hot shoe. One of the other things I like about it is that it has a built in rechargeable batter - HOORAY - no more faffing about with AA batteries which cost a fortune or rechargeable ones that never seem to last very long. The battery is rechargeable via a USB C cable which comes supplied.
It’s a lovely little object to hold, the plastics feel solid and the branding is fairly tame which means it looks quite subtle.
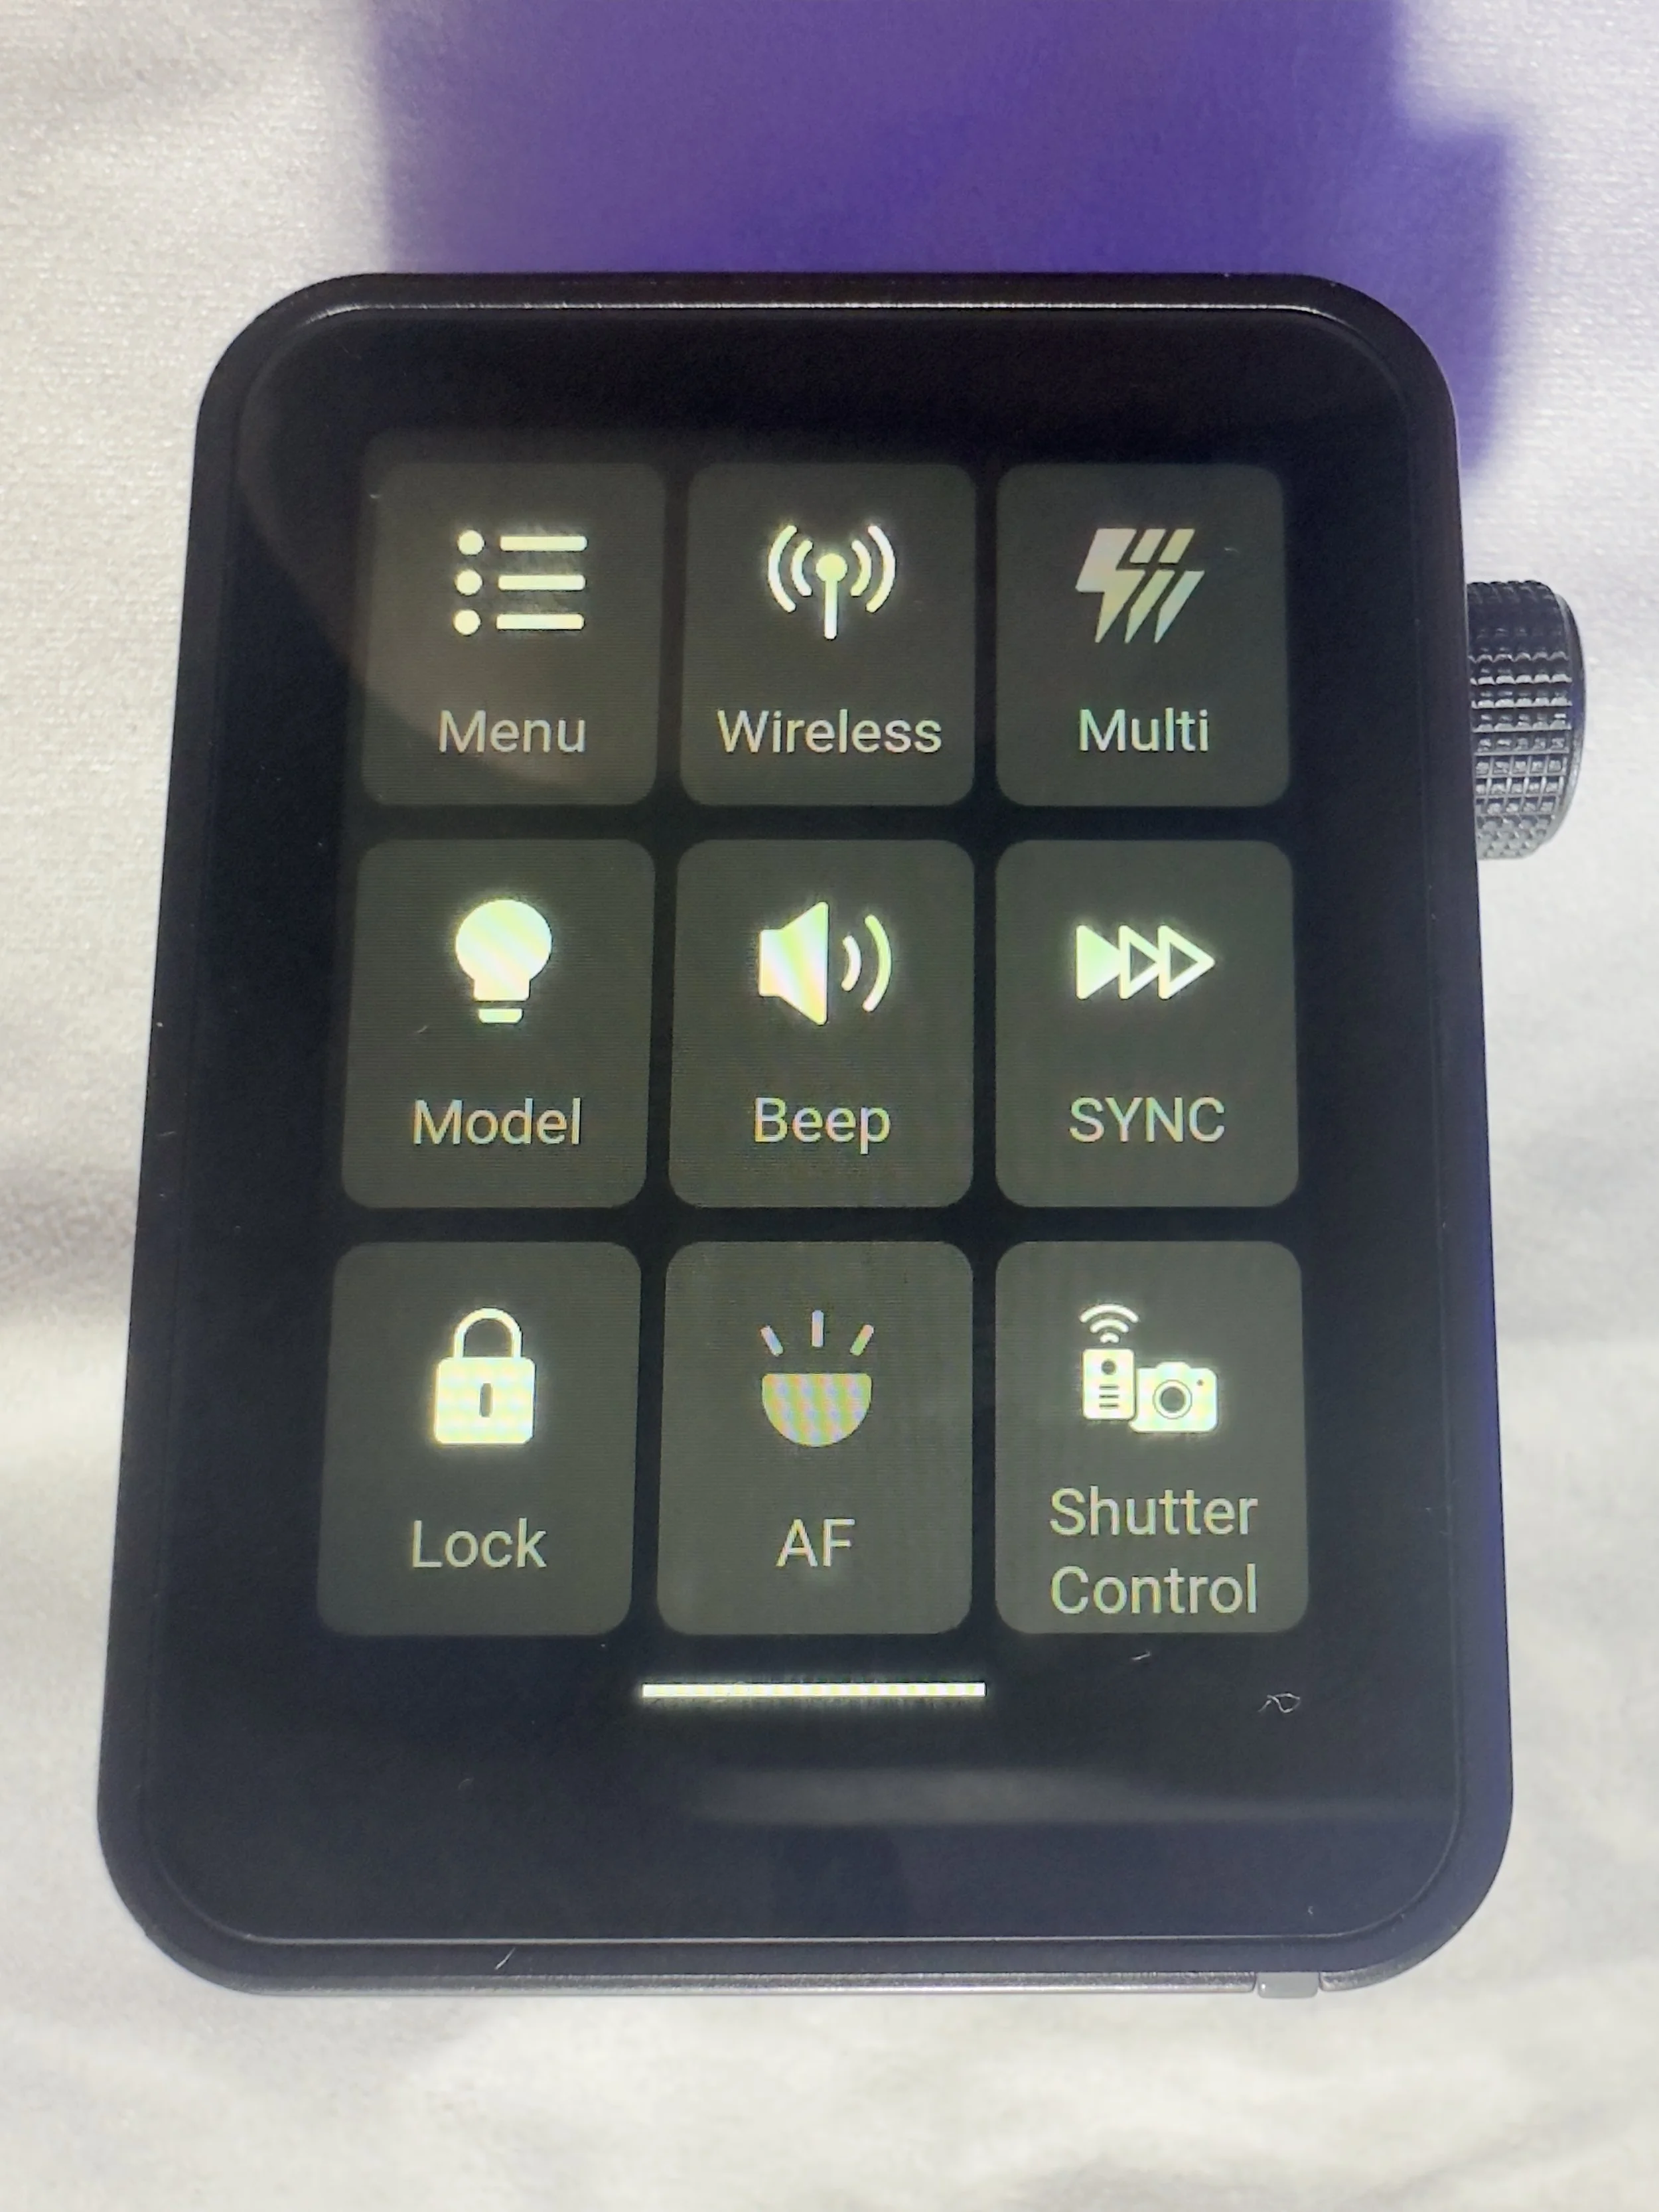
The touchscreen is bright and responsive. It’s also big enough that you’re not forever bumping icons you didn’t mean to and it’s not so sensitive that you’re accidentally changing your settings by just brushing against it.
There are 2 buttons on the right hand side, which give solid feedback when your press them (one of these will test fire the flash and the other is the power/menu button). Finally, on the same side, you have a multifunction wheel, which you can turn to navigate the menus and press to make selections, it has a reassuring click which lets you know you’ve made a selection. This might be handy if you’re working somewhere cold and are wearing gloves, or if you struggle to use your hands to make the changes via the touchscreen.
On the front of the unit there is an autofocus assist beam and at the bottom of it there is mechanical button which retracts a pin on the hot shoe to enable you to release it from the camera when you’re ready to pack down.
It came with about 60% charge already in the battery and to charge it to full took about 45 minutes. I don’t know what the full battery life is, but it’s been enough to get me through a full day’s shooting.
My Experience with The Trigger
I have really enjoyed using it so far. Once I had everything set up (which took no more than a few minutes after I had watched some YouTube videos), I was ready to go and shooting. I had someone booked in for some headshots not long after I took delivery of it and it got me through the whole session with no issues (I did have the old one on standby just incase I ran into any issues), I was able to make range of adjustments which synced to the strobes with no issue.
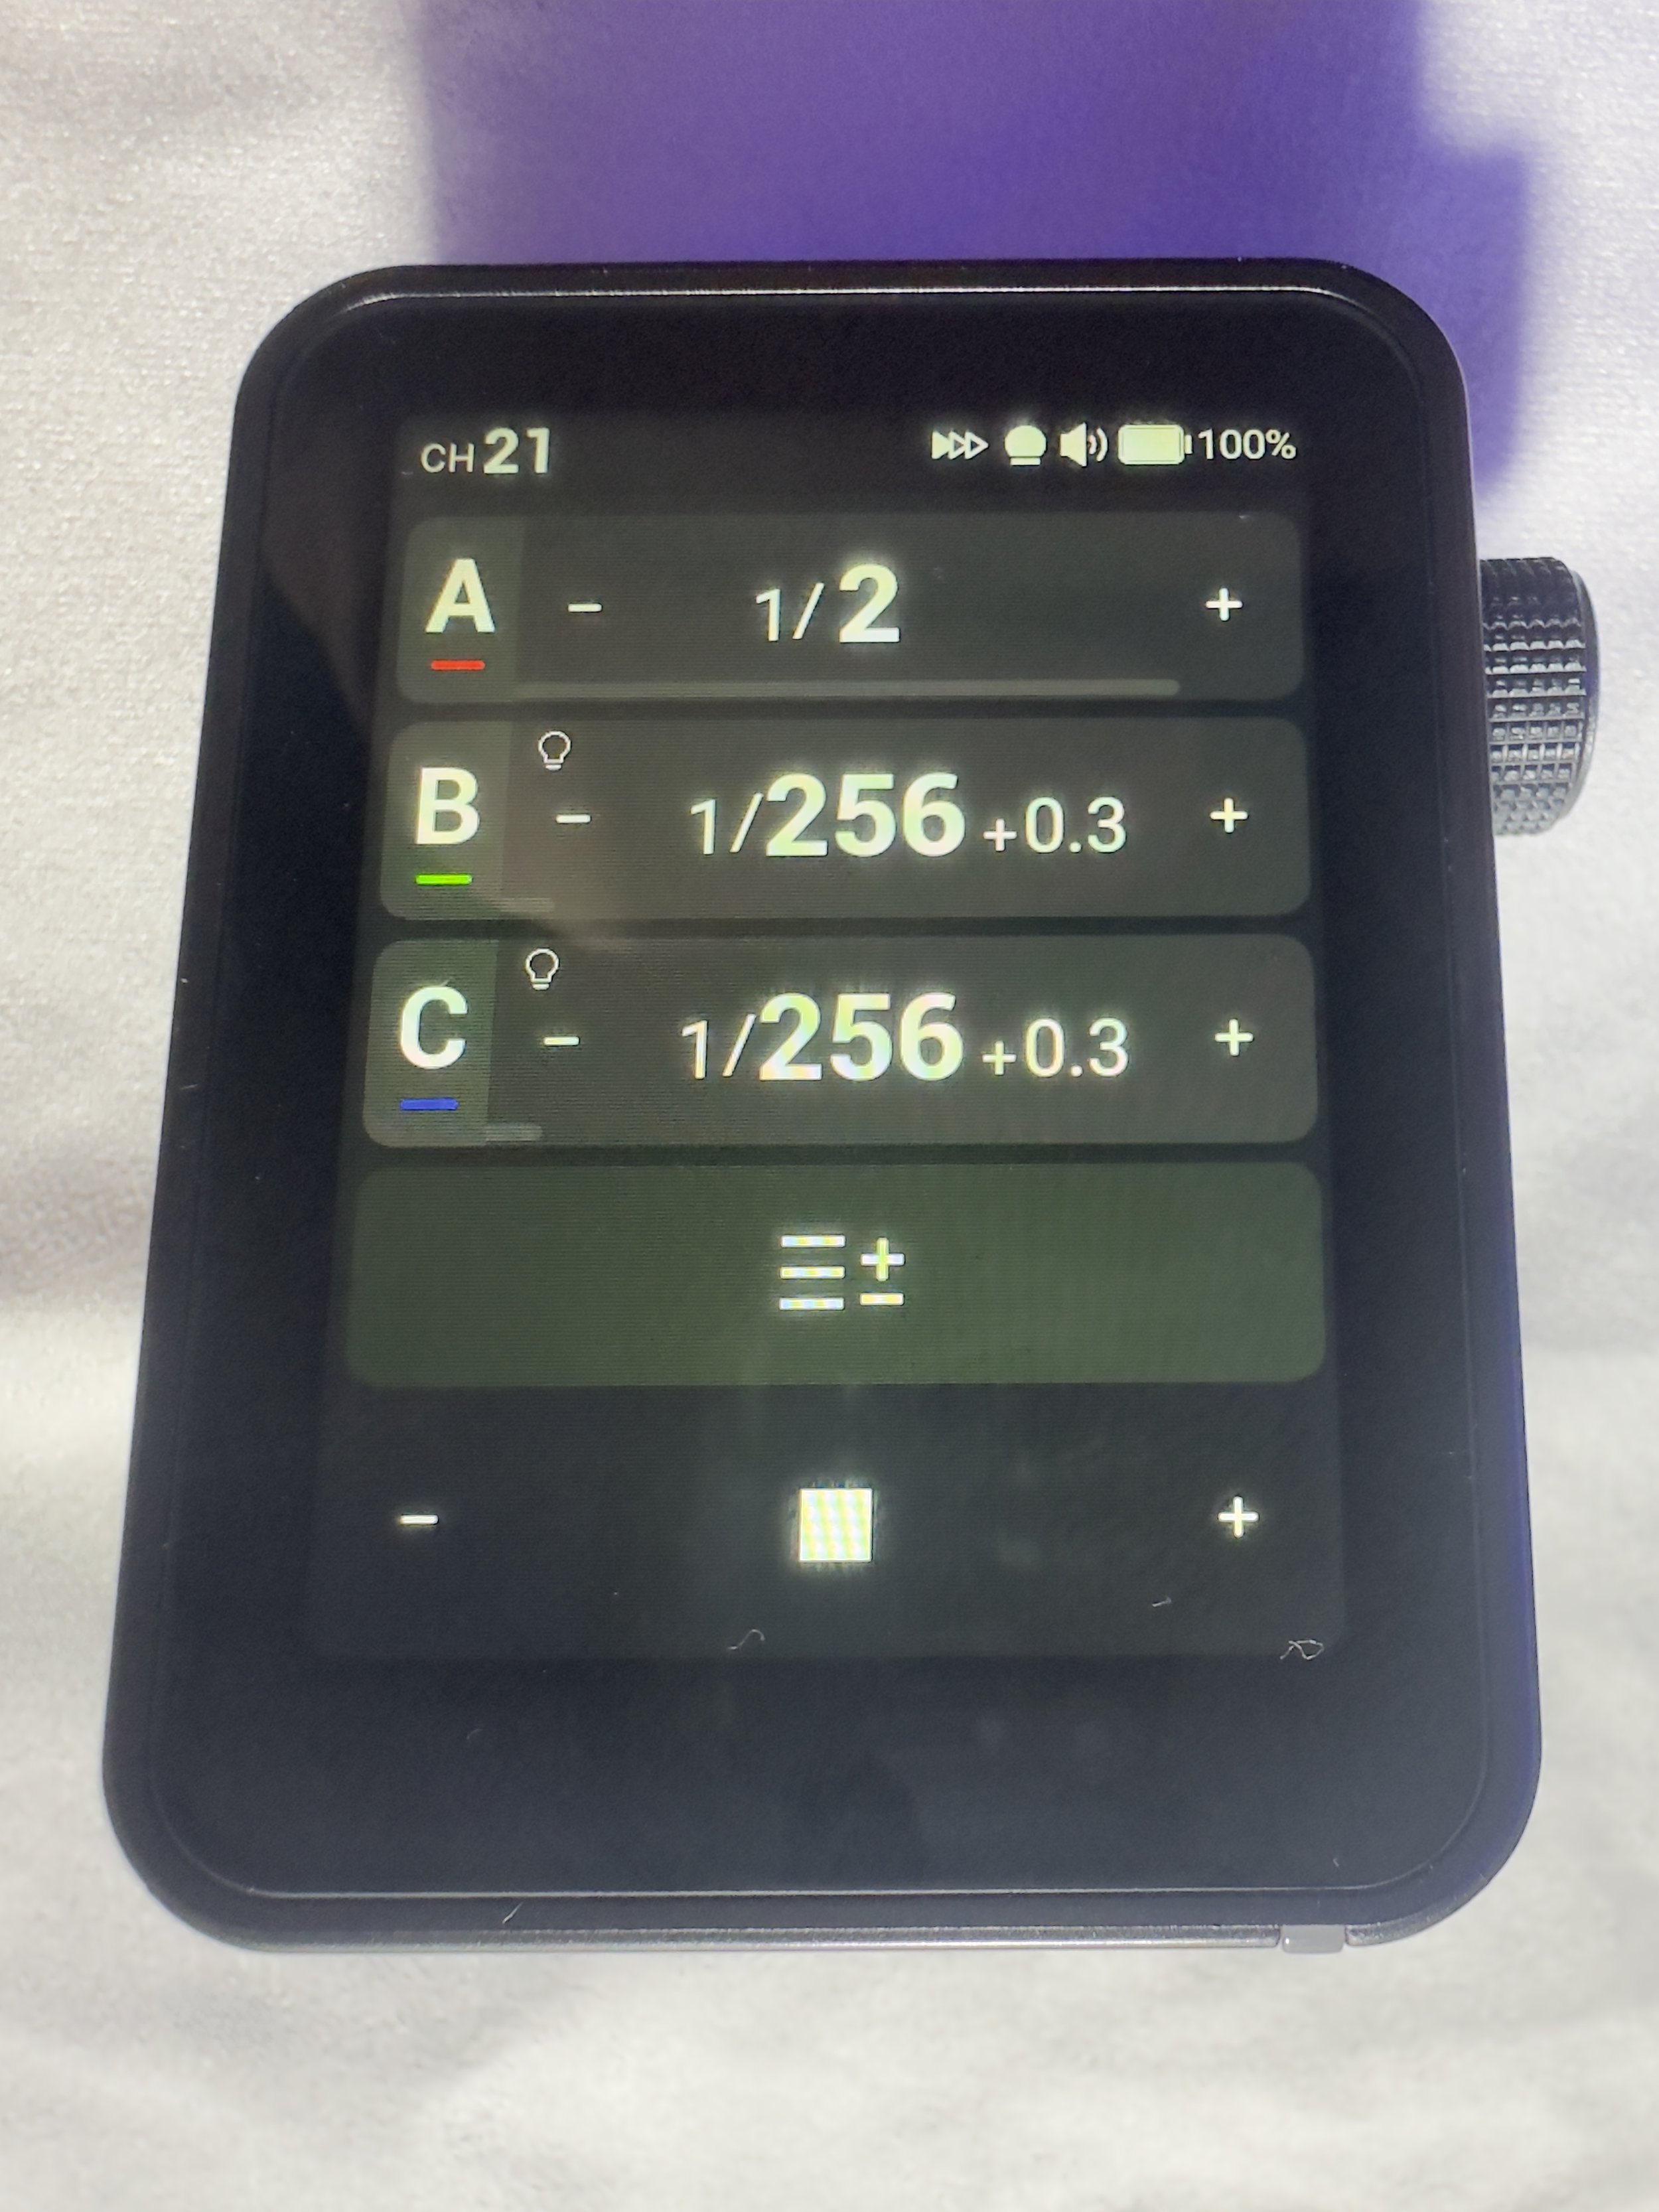
One thing I really like is that you can scan the 2.4ghz frequencies and the trigger will tell you which channels are the clearest ones for use in the environment you are, and then you can set this on the strobes and the trigger. I use each of my flashes in its own group and I don’t bother with the ID numbers as I am not often working in an environment which requires me to do this. I have however, messed around with creating different groups and using ID numbers for the purpose of this review, and have found that it’s a fairly straightforward process.
There is a slight lag from when you make changes on the trigger to them registering on the flash, whilst this hasn't been an issue for me, it’s something worth knowing. We're talking about delay of less than a second, but I know there are people who aren’t going to be into this.
What other features does it have?
One little ‘'bonus’ feature of this unit is that you can also use it as an intervalometer, but you will need to connect the trigger to the camera with 2.5mm TRS cable (male to male). These are less than a tenner for two if you click the link I have just posted, but a lot of you might find that you already have one of these knocking around at home somewhere, especially if you have purchased flash gear before.
One of the big plusses, for me at least, of this trigger is that it is a radio trigger so this does away with the need for line of sight to enable you to trigger the flash, which gives you some more flexibility on set/location and it saves the need for the use of optical slaves.
Switching between TTL and manual flash is straightforward, which is especially useful when working in changing light conditions.
The updatable firmware is also a huge bonus for lighting setups and products which are constantly evolving, and will reduce the need to keep spending money on buying new gear.
You can also change the trigger distance or range and you have two options here, 0-30 metres and 100m. I have found that when I am shooting in the studio, it’s much more reliable and has fewer misfires when working in the 0-30m setting. I haven’t used it outside yet, so can’t say if it works well up to 100m.
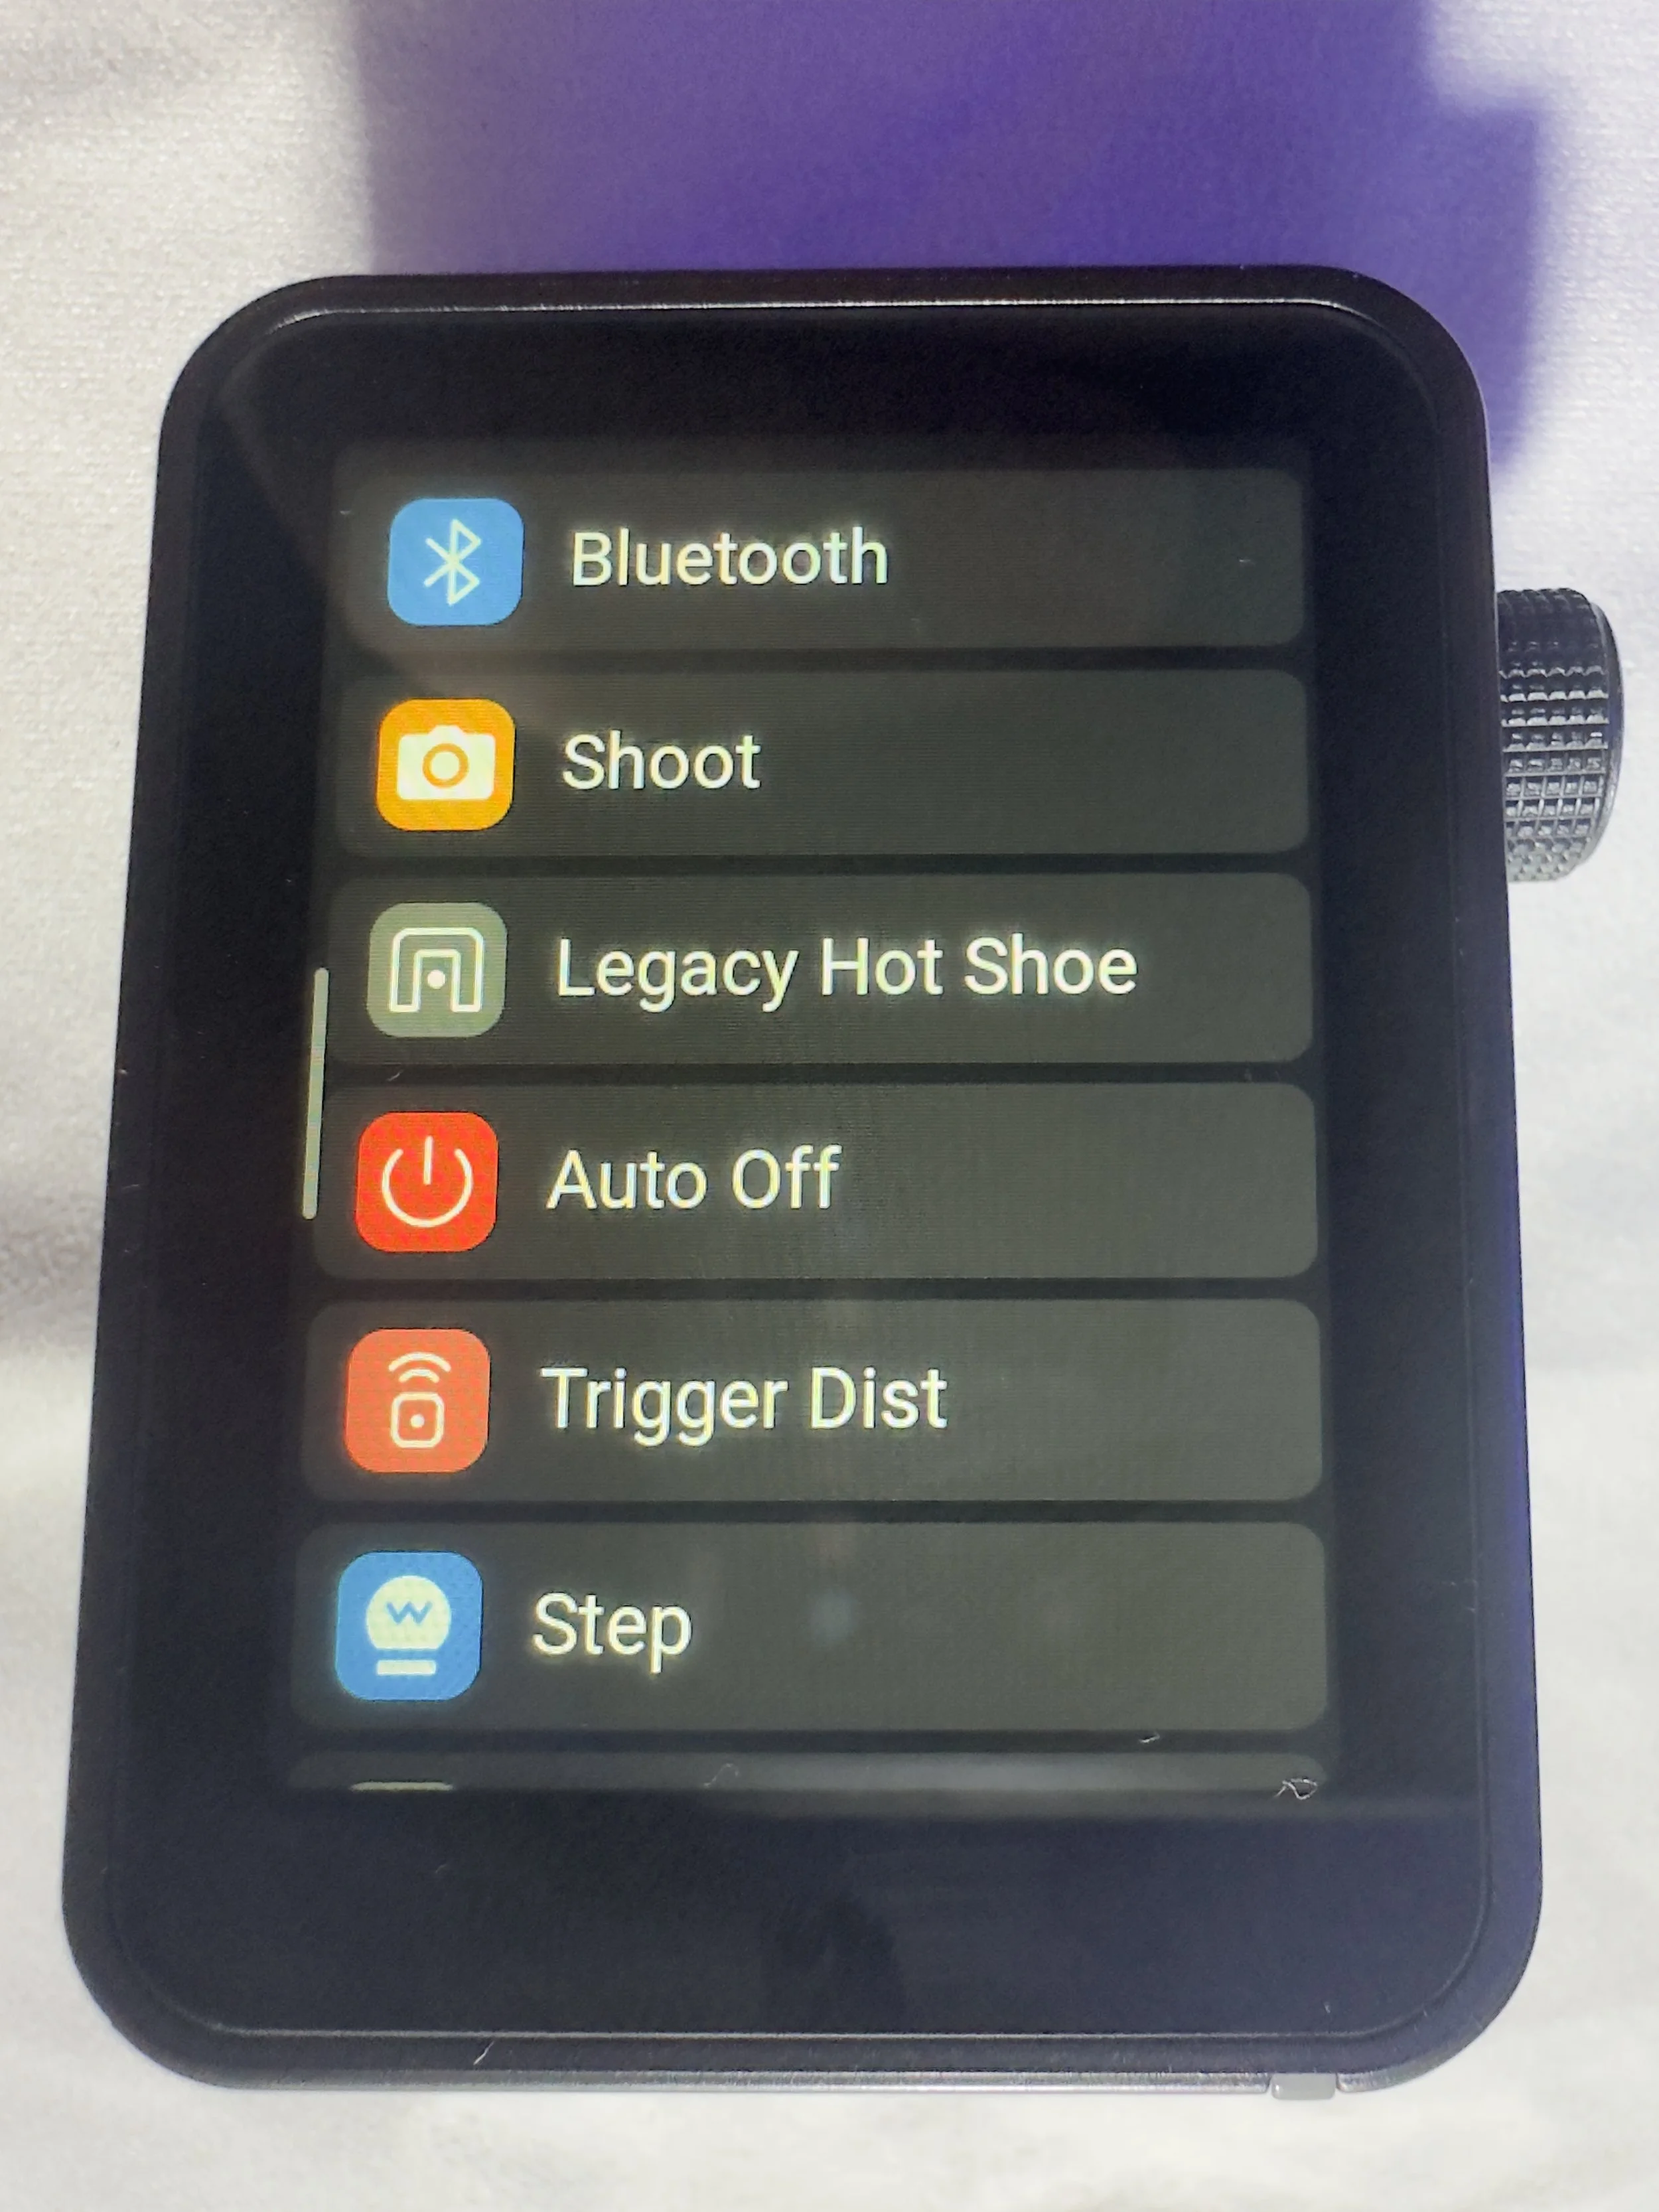
Finally, in the menus there is a function called ‘legacy’ which allows you to turn off all but one of the pins on the hotshot (the centre one), which means that it has greater functionality across a range of older camera bodies. You should be sure to check that your camera is compatible with the unit before you buy it.
Who is this for?
The Godox X3 Pro-C is ideal for photographers who want a compact, modern flash trigger without sacrificing control or reliability. It’s particularly well suited to Canon shooters who regularly work with off-camera flash and want a streamlined, clutter-free setup that travels easily. If you shoot on location, work with multiple light groups, or frequently switch between TTL and manual flash modes, the X3 Pro-C’s touchscreen interface and intuitive layout make lighting adjustments quick and efficient.
It’s also a strong choice for photographers moving away from optical triggering and into a radio-based workflow, offering dependable performance indoors and outdoors without line-of-sight limitations. Those who value portability, a clean camera setup, and fast access to lighting controls will appreciate what the X3 Pro-C offers.
However, photographers who prefer physical dials and buttons, work extensively in cold or wet conditions, or want interchangeable batteries may find a more traditional trigger a better fit.
Where Can I Buy One?
The easiest place to get one of these is on Amazon, where you will find it for around about £88. Make sure that you buy one which is compatible with your camera. There are a number of different versions, so don’t end up with something that you need to return! The ‘C’ in the name of this one stands for Canon, there is an ‘S’ for Sony and so on. They are clearly labelled with the camera brand on Amazon.
Pros and Cons
Pros
Bright touchscreen with intuitive navigation and operation.
Small profile makes it great for travelling and on location marking.
Supports Canon TTL metering and high speed sync
Uses the Godox X system which gives compatibility across a wide range of flashes/strobes
Built in USB C rechargeable battery negates the need for a high pile of AA batteries.
High speed sync speed up to 1/8000 if your camera supports it.
Cons
Touchscreen can be fiddly in cold and wet conditions
Not hot shoe pass through. Once it’s attached, there is no way to connect anything else, which could be a limiting factor in some setups.
More expensive than some other Godox triggers without much development around the core functionality.
Final Thoughts
The Godox X3 Pro-C is a strong choice for Canon photographers who want a modern, streamlined approach to off-camera flash control. It delivers reliable radio triggering, a clean and intuitive touchscreen interface, and a compact design that keeps camera setups lightweight and uncluttered. In real-world use, it offers all the core functionality most photographers need, from multi-group control and TTL support to High-Speed Sync for working in bright or fast-changing light.
While those who prefer physical buttons or interchangeable batteries may gravitate towards more traditional triggers, the X3 Pro-C excels in ease of use, portability and workflow efficiency. For photographers looking to simplify their lighting setup without compromising on control or performance, the Godox X3 Pro-C is a capable and well-designed trigger that fits comfortably into both studio and on-location workflows.
Technical Specifcations
Godox X3 Pro-C (Canon) – Specifications
Quick reference spec sheet
If you’d like to support the blog and help me keep producing Lake District photography content, honest gear reviews and regular website updates, you can do so via my Buy Me a Coffee page. Keeping everything running smoothly takes time, and your support makes a real difference. Thank you.
What Does it Mean? A beginner’s guide to photography jargon and technical info.
Understanding photography jargon can feel overwhelming when you’re just starting out, especially when every tutorial seems to mention terms like aperture, ISO, shutter speed, dynamic range, and focal length as if everyone already knows what they mean. This beginner-friendly photography glossary breaks down the essential camera terms you’ll encounter as you learn manual settings, master the exposure triangle, and start exploring lenses, filters, and more advanced techniques such as focus stacking and exposure bracketing. Whether you're learning how different focal lengths affect your image, why aperture controls depth of field, or how shutter speed creates motion blur, this guide explains each concept clearly and practically so you can feel confident using your camera. If you’ve been searching for simple explanations of key photography terms, this is the perfect place to start.
ISO? Focal Length? F stop? These are all really common terms in photography and there’s loads of others as well; take a look below at my beginners guide to photographic jargon to understand what they mean and what impact they have on you photography.
I am starting to write this at the beginning of December 2025 and will keep adding to it as I think of other bits and pieces to add into. I have also created a free downloadable PDF guide to these term that you keep on your phone or print to keep handy as you start to navigate the amazing world of photography.
Aperture
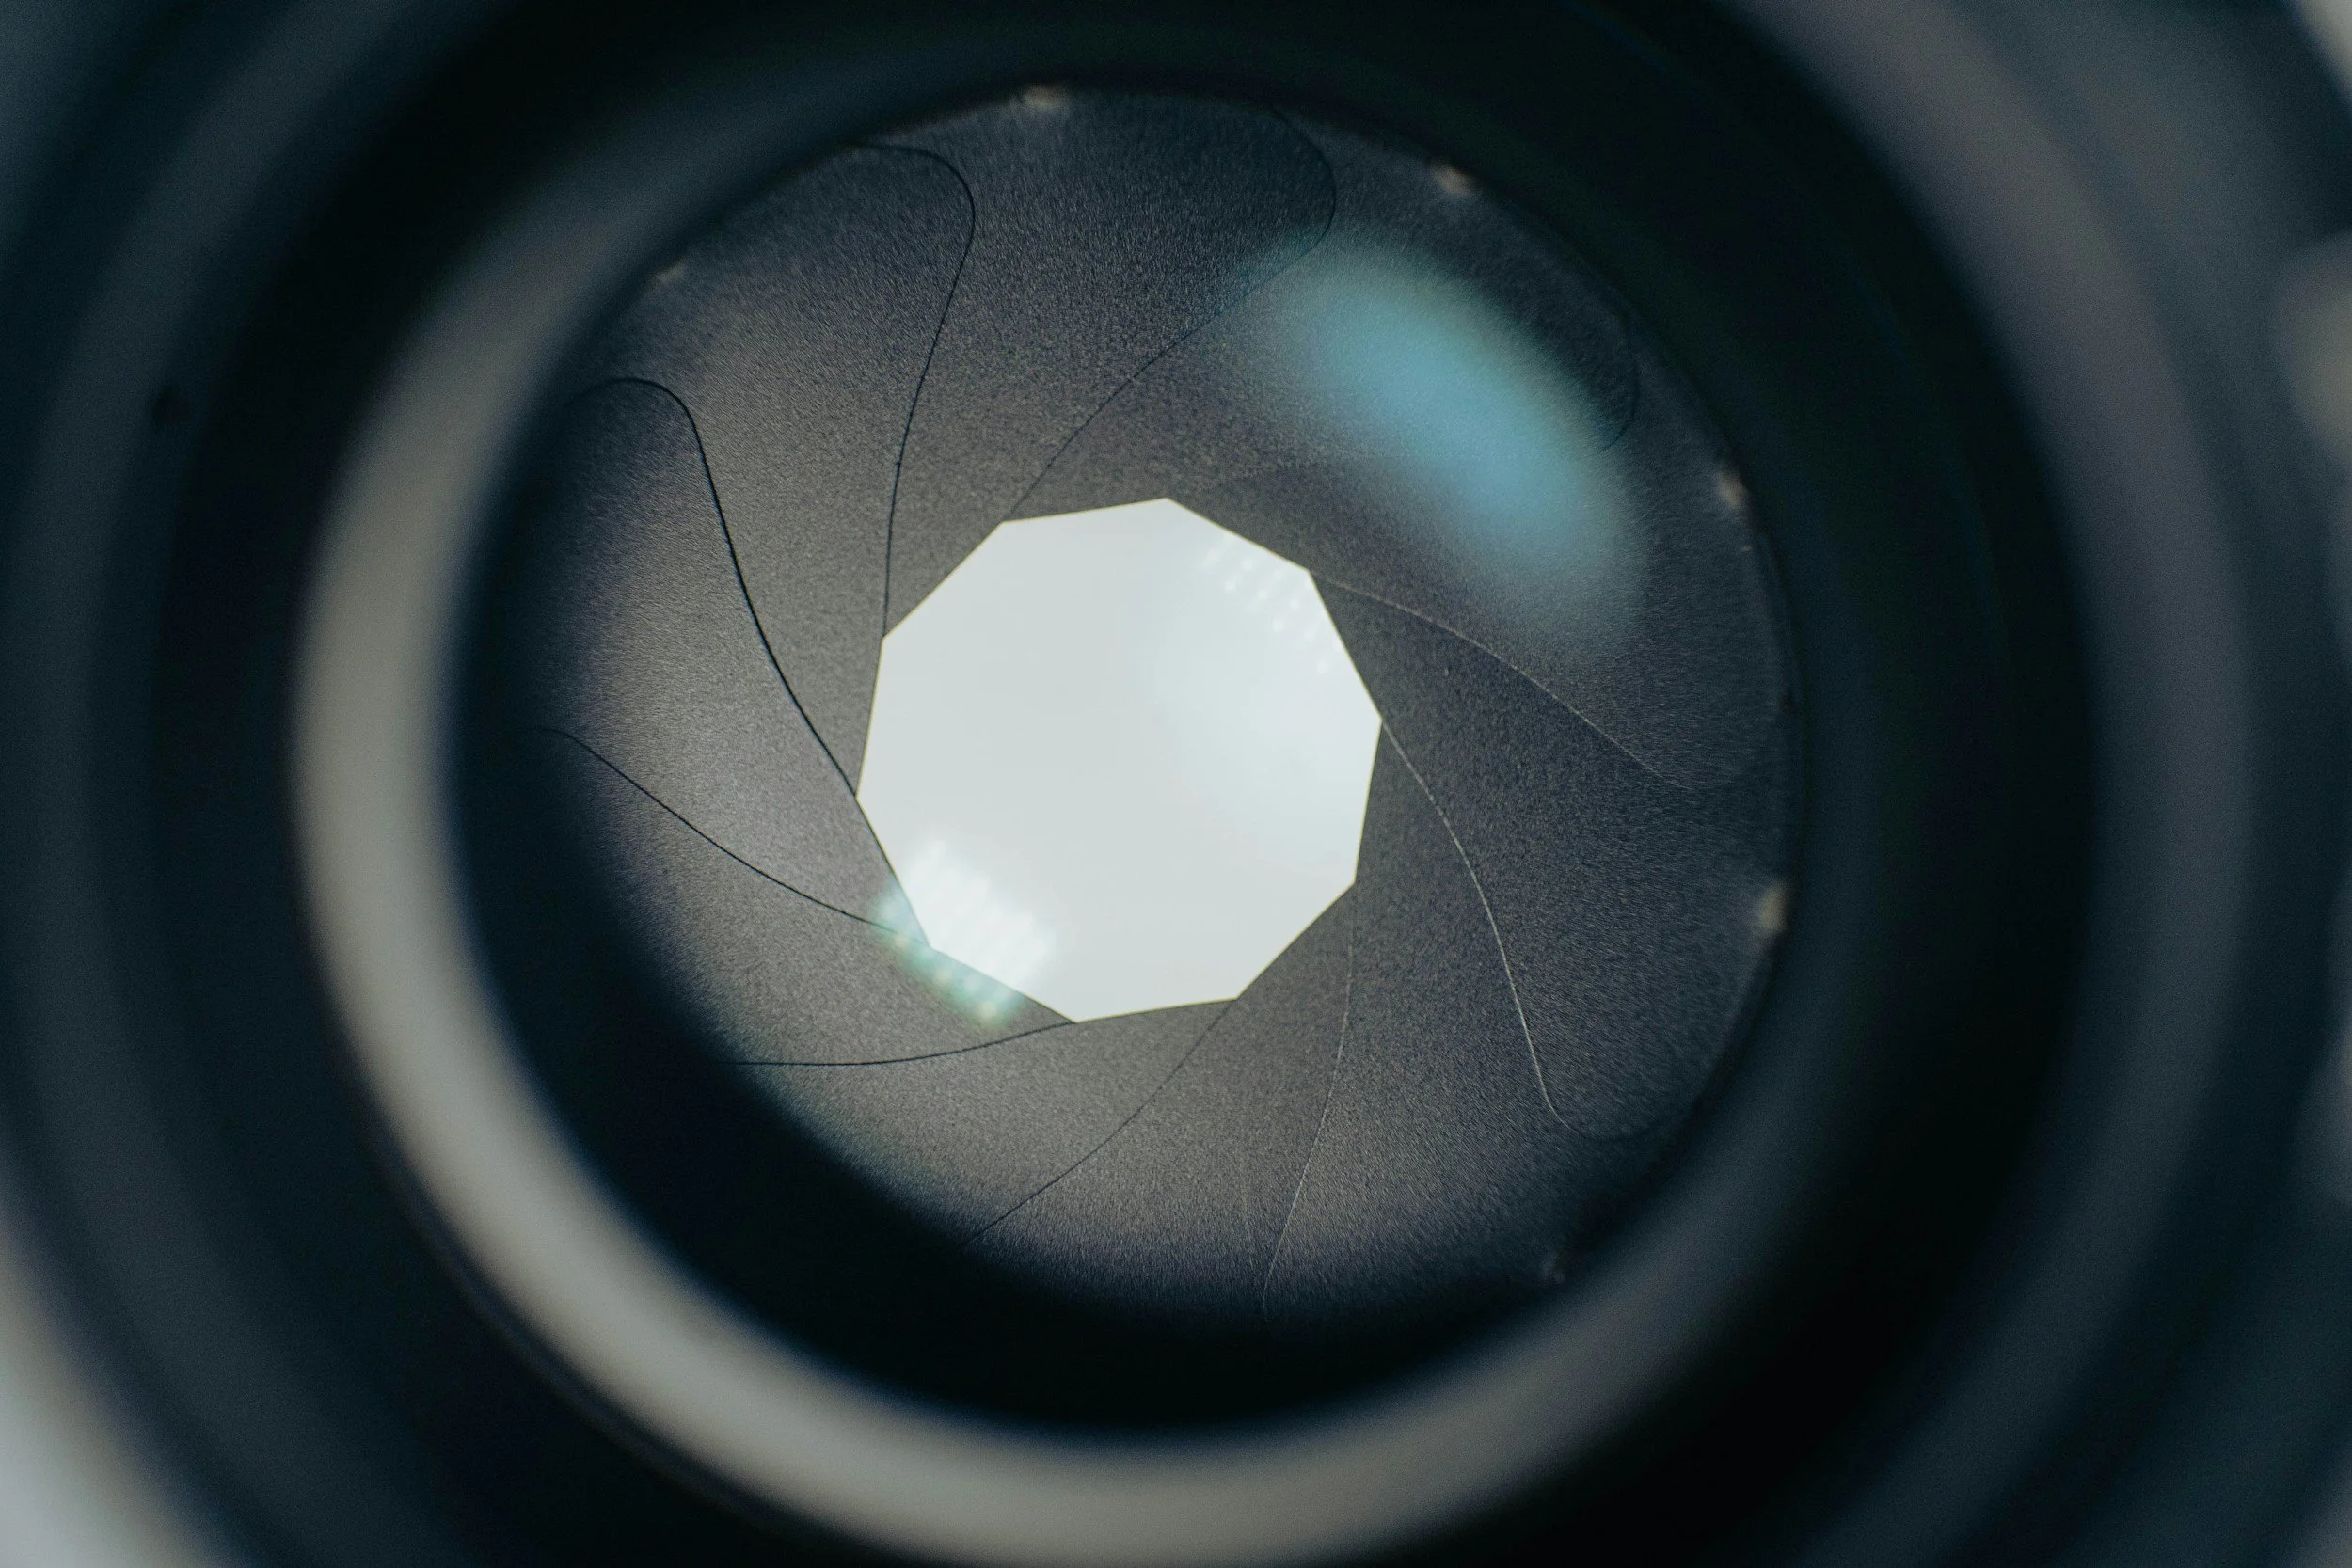
This is the ‘hole’ inside your lens that lets light in. It is controlled by some mechanics inside the lens which control the aperture leaves which open and close to change the amount of light that you let in. It is measured in f-stops, which involve some math that I won’t go into here as it’s not essential to understanding it’s opertation
The ‘f’ stands for focal length and the number that follows is a fraction representing the ratio of the lens's focal length to the aperture's diameter so it will look something like this f/2.8 or f/4.5. It will affect the depth of field of your photo, so how much of it is in focus.stand out
Lower apertures (smaller numbers) have a shallower depth of field so less of your image in focus and higher apertures haves a deeper depth of field, so more of your image will be in focus.
Most lenses are at the their sharpest at around f/8. See also Bokeh.
Aperture Priority/Value
Found on your mode dial. You set your aperture and your camera sets the shutter speed. See your camera’s manual, it varies slightly from brand to brand.
Autofocus (AF)
Autofocus is the system in your camera that automatically adjusts the lens to make your subject sharp. Instead of manually twisting the focus ring, the camera uses sensors to detect contrast, phase differences, or subject movement and then drives the lens to the correct focus point. Modern cameras offer multiple autofocus modes—such as single AF, continuous AF, and subject-tracking and allow you to choose which part of the frame the camera should prioritise. See your camera’s manual for more information about the AF modes your particular model offers, how they work and how and when to use each one.
Blue Hour
The period before sunrise in the morning and the period after sunset in the evening.
Bokeh
Pronoucned bo-kah. Each syllable is equally weighted. It refers to the desirable out of focus elements in the background of an image. Those little balls of light you seen in a night-time portrait? Bokeh. The sharp subject in a portrait against the ‘blurry’ background? The blurry background is the bokeh.
Bulb Mode
Usually indicated by the letter ‘B’ on your camera’s mode dial. Most cameras have a native maximum exposure time of 30 seconds. Bulb mode allows you to exceed this. It’s best used with a trigger or a remote shutter release cable. If you are calculating your exposure time and see that it needs to be, say 52 seconds, your camera can’t do this in manual mode and you will need bulb mode. Turn the wheel or select it from your camera’s menu, press the shutter and wait 52 seconds, then release the shutter. Triggers and release cables (get the right one for your brand of camera, they’re not all cross compatible) are useful for this as they will allow you to hold the shutter release or lock it into place for the desired amount of time without having to touch the camera and inevitably introducing movement into the image.
Chimping
Chimping is the habit photographers have of checking the back of the camera right after taking a shot. We’ve all done it — you take a photo, glance down at the screen, and hope it looks as good as it did in your head. The term comes from the joking idea that photographers crowd around their cameras going “oooh!” like excited chimps.
While there’s nothing wrong with chimping, it can become a problem if you do it too often. Staring at the screen means you’re not watching what’s happening in front of you, and you might miss some great moments.
The LCD can also be misleading, making an image look brighter or sharper than it really is.
That said, chimping has its place. A quick check of the histogram or focus can save you from mistakes. The trick is simply to use it sparingly — review when you need to, but stay engaged with the scene.
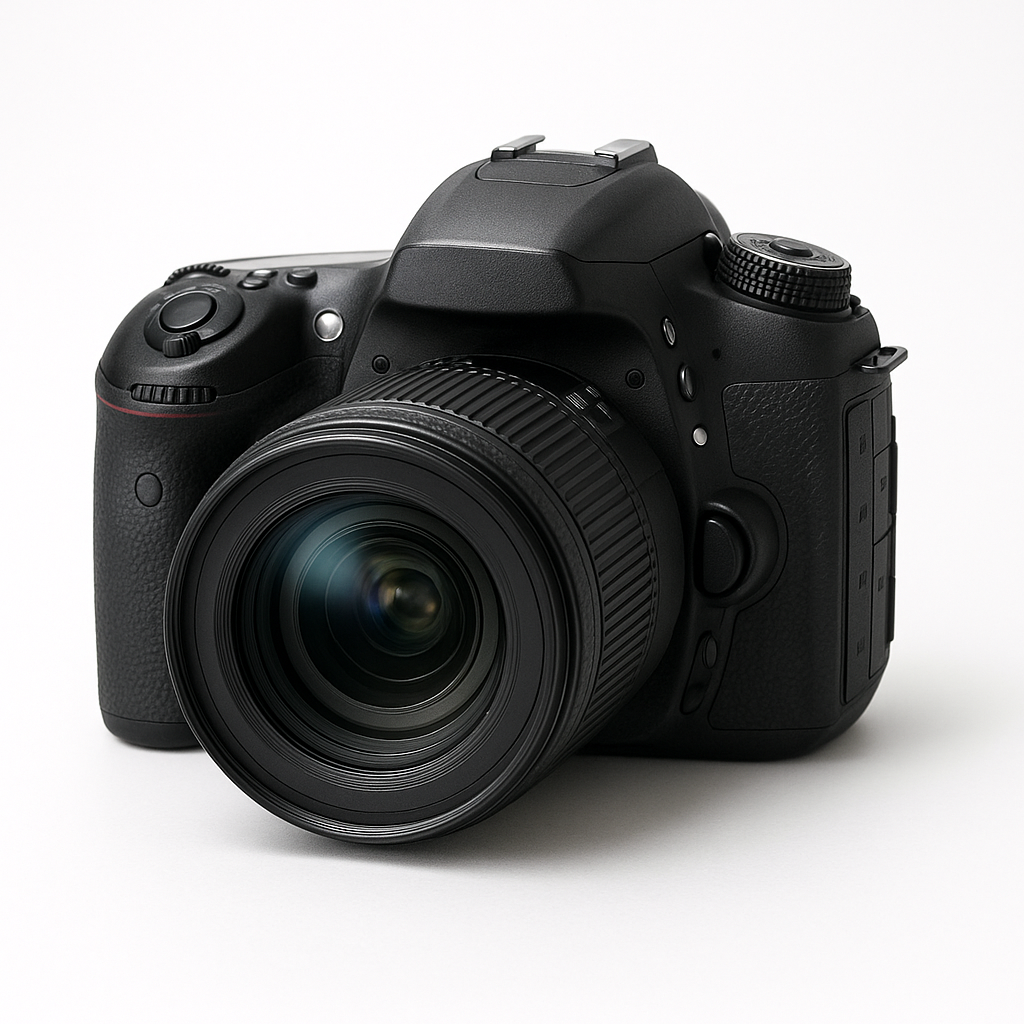
Dioptric Adjustment/Diopter
Important for those of you who wear glasses. You can adjust the diopter in your camera so that you can see a sharp image through your viewfinder without wearing your glasses. You can adjust for near or farsightedness. If you wear glasses and find it uncomfortable to look through the viewfinder whilst wearing your glasses then you should refer to your camera’s manual for information on how to make this adjustment.
DSLR
Digital Single Lens Reflex - a camera which uses a mirror to reflect the image into the viewfinder. These tend to be bigger and heavier than mirrorless cameras. DSLR’s have an optical viewfinder.
Dynamic Range
Dynamic range refers to the range of light a camera can capture in a single image — from the darkest shadows to the brightest highlights. A camera with a high dynamic range can record more detail in both very dark and very bright areas without losing information. A low dynamic range means shadows may look too dark (crushed) and highlights may appear too bright (blown out). Dynamic range is especially important in landscape photography, where scenes often contain both bright skies and dark foregrounds. If you’re struggling with the dynamic range of your camera, then consider using exposure blending to capture all of the details!
Exposure
The overall brightness or darkness of your photo as determined by the exposure triangle made up by your ISO, shutter speed and aperture.
Exposure Stacking/Bracketing
Another more advanced technique which can allow you to capture images with high dynamic range (an image with very bright parts or very dark parts), a sunrise or sunset will often have high dynamic range. Auto exposure bracketing (AEB) is a feature on most cameras which allows you to shoot several images at different exposures so that you expose for the highlights the mid-tones and the shadows and ensure that you preserve the details in all of the different parts of the image. You can combine these easily in Lightroom to produce one perfectly exposed image. You’ll usually need to shoot these types of images on a tripod so that you can combine them easily. If the camera moves too much then it will be difficult for the software to merge them effectively. Check your manual for how to do this on your camera.
Exposure Triangle
This is the trifecta that makes up the basis of all photography. It is made up ISO, shutter speed and aperture. It’s a big subject and one that you need to master to succeed at photography; check my beginners guide to the exposure triangle blog to get a jump start on learning all about it. If you’re new to photography and only click one link in this blog, make sure it’s the one to the exposure triangle blog.
Expose to the Left (ETTL)
Expose to the Left, or ETTL, is the opposite of ETTR. It means intentionally making your photo slightly darker than normal so that the histogram leans toward the left side without clipping the shadows. Photographers sometimes use ETTL when protecting bright areas is more important to them than capturing extra shadow detail. Essentially, you are making your histogram biased to the left.
Digital sensors are more sensitive to overexposure than underexposure. Once highlights are blown out, they cannot be recovered — the detail is permanently lost. By exposing a little darker, you reduce the risk of losing detail in bright skies, reflections, water, snow, or backlit scenes.
ETTL is most useful in high-contrast lighting, sunsets, stage lighting, or any situation where highlights are at risk of clipping. After shooting, you can brighten the image slightly in editing, bringing back midtones without sacrificing the protected highlight detail.
Like ETTR, ETTL works best when shooting in RAW, where you have more flexibility for exposure adjustments.
For clarity, there is also a system of metering light called ETTL, which stands for evaluative thought the lens, and this is more appropriate for the use of flash. I’m not explaining this in this blog as it isn’t relevant to landscape photpgraphy.
Expose to the Right (ETTR)
Expose to the Right, often called ETTR, is a technique where you intentionally make your photo slightly brighter than normal so that the histogram ‘leans’ toward the right side without actually clipping the highlights. The goal is to capture as much detail and information as possible, especially in the shadows. This is the opposite of ETTL and you are biassing your histogram to the right hand side.
Digital sensors record more data in the brighter tones than in the darker ones. By exposing a little brighter, you reduce noise and improve overall image quality. Later, in editing, you simply darken the image back down to the correct exposure — but now with cleaner shadows and more detail.
ETTR works best in RAW and is commonly used in landscape photography or high-contrast scenes where shadow detail matters. It’s not recommended if your highlights are at risk of blowing out or if you’re shooting fast-action scenes where precision is harder to maintain.
Focus Stacking/Bracketing
This is a more advanced technique where you take a number of images where the focus in the image moves, usually one exposure for the foreground, one for the mid ground and then one on infinity. You can then combine these in post production to create an image which is tack sharp from front to back; this can help to ‘get round’ some of the limitations of your kit.
Focal Length
This measured in millimetres and you will find either one number (such 85mm or 50mm) or two numbers separated by a dash, such as 24-70mm or 18-55mm. The smaller the number, the wider the field of view in your image. But what do the numbers actually mean? Your lens is made of up of a number of elements, which are pieces of optical glass that focus the light from you lens onto your sensor. The numbers in your focal length indicate how far from your camera’s focal plane (or the sensor), the rear element of the lens is. In a prime lens, this is fixed, in a zoom lens, this distance will vary from the lowest number to the highest number.
F/Stop
This is the unit that we use to measure how wide our aperture is. The F stands for focal. Lower f/stops, such f/2.8 have a smaller aperture, whereas a number such as f/22 is much smaller aperture. As you move between each stop, the amount of light being let into your camera will reduce by half.
Golden Hour
The period after sunrise in the morning and before sunset in the evening. It’s renowned for flooding the scene with amazing, soft, warmly coloured light which makes photos look
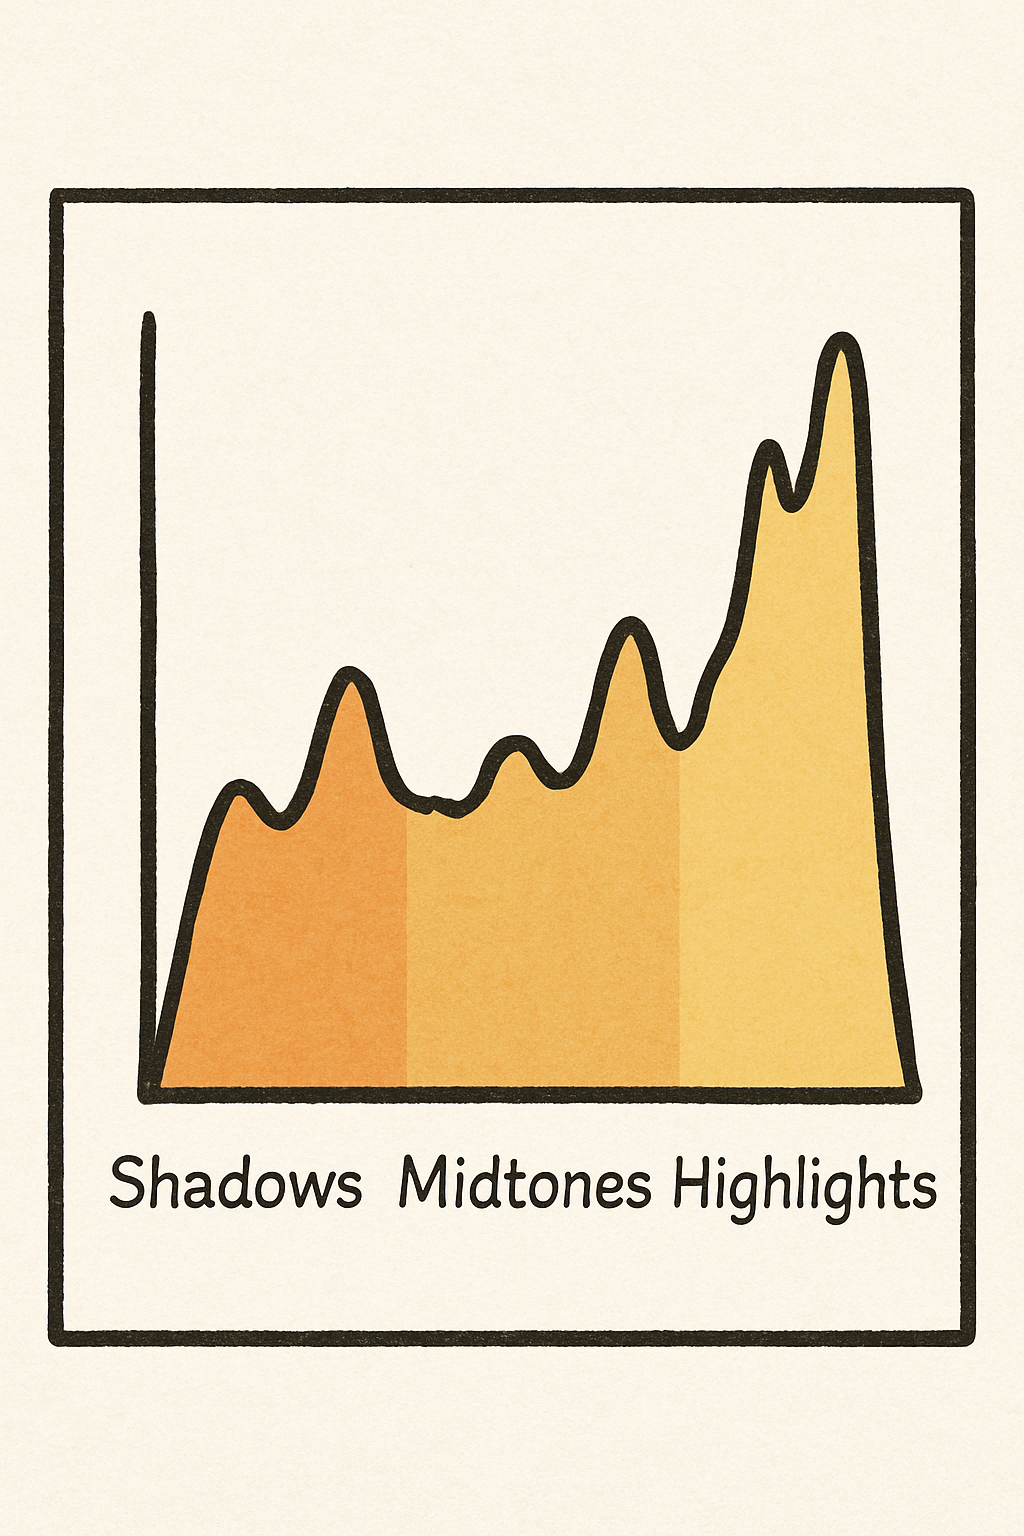
Histogram
This one is definitely going to have you chimping!
A histogram is a simple graph that shows you how bright or dark your photo is. Instead of looking at the picture itself, the histogram looks at the tones in the image and shows how they are spread out from dark to light.
The left side of the histogram represents the shadows (the darkest parts of your photo).
The middle represents the midtones (most of the detail you normally see).
The right side represents the highlights (bright areas such as the sky or reflections).
By checking the histogram, you can quickly see whether your image is too dark, too bright, or well exposed. If the graph is pushed up against the left edge, your shadows may be too dark and losing detail. If it’s hitting the right edge, your highlights may be blown out. A balanced histogram usually means a well-exposed image, although the “perfect shape” will always depend on the scene.
IBIS
In Body Image Stabiliation. Not all cameras have this, more expensive, newer ones often do. Basically a small set of motors in the camera body which help to stabilise your image without the need for a tripod. If you’ve got money to burn then opt for the Hasselblad X2D2 with awesome IBIS allowing your to shoot handheld up to around 3 seconds. If you don’t, get a tripod.
Image Stabilisation (IS)
Similar to IBIS but in your lens and not as pricey. Don’t get me wrong, it’s going to bump up the price but not so much that it becomes out of reach for most photographers. If you’re using a tripod, don’t forget to turn off your IS or your it might make your photos blurry as it’s ‘fighting’ the tripod.
ISO
This is more complicated than then way I am about to explain it, but in simple terms, ISO controls how sensitive your camera’s sensor is to light. The lower the number, the the less sensitive it is. Most cameras have a base ISO of 100 though ISO 64 is becoming much more common. It will affect your image quality, your camera will determine how your image “handles” higher ISO. High ISO can introduce “noise” or “grain” into your image, you’ll need to work with your camera and get to know it to figure out where your ‘cut off’ point is. For example, I know on my camera I am going to start having serious issues above ISO6400 so I try to stay below this where possible, but given the times of day I shoot it’s not normally an issue and in the studio it is never an issue as I have full control over the light.
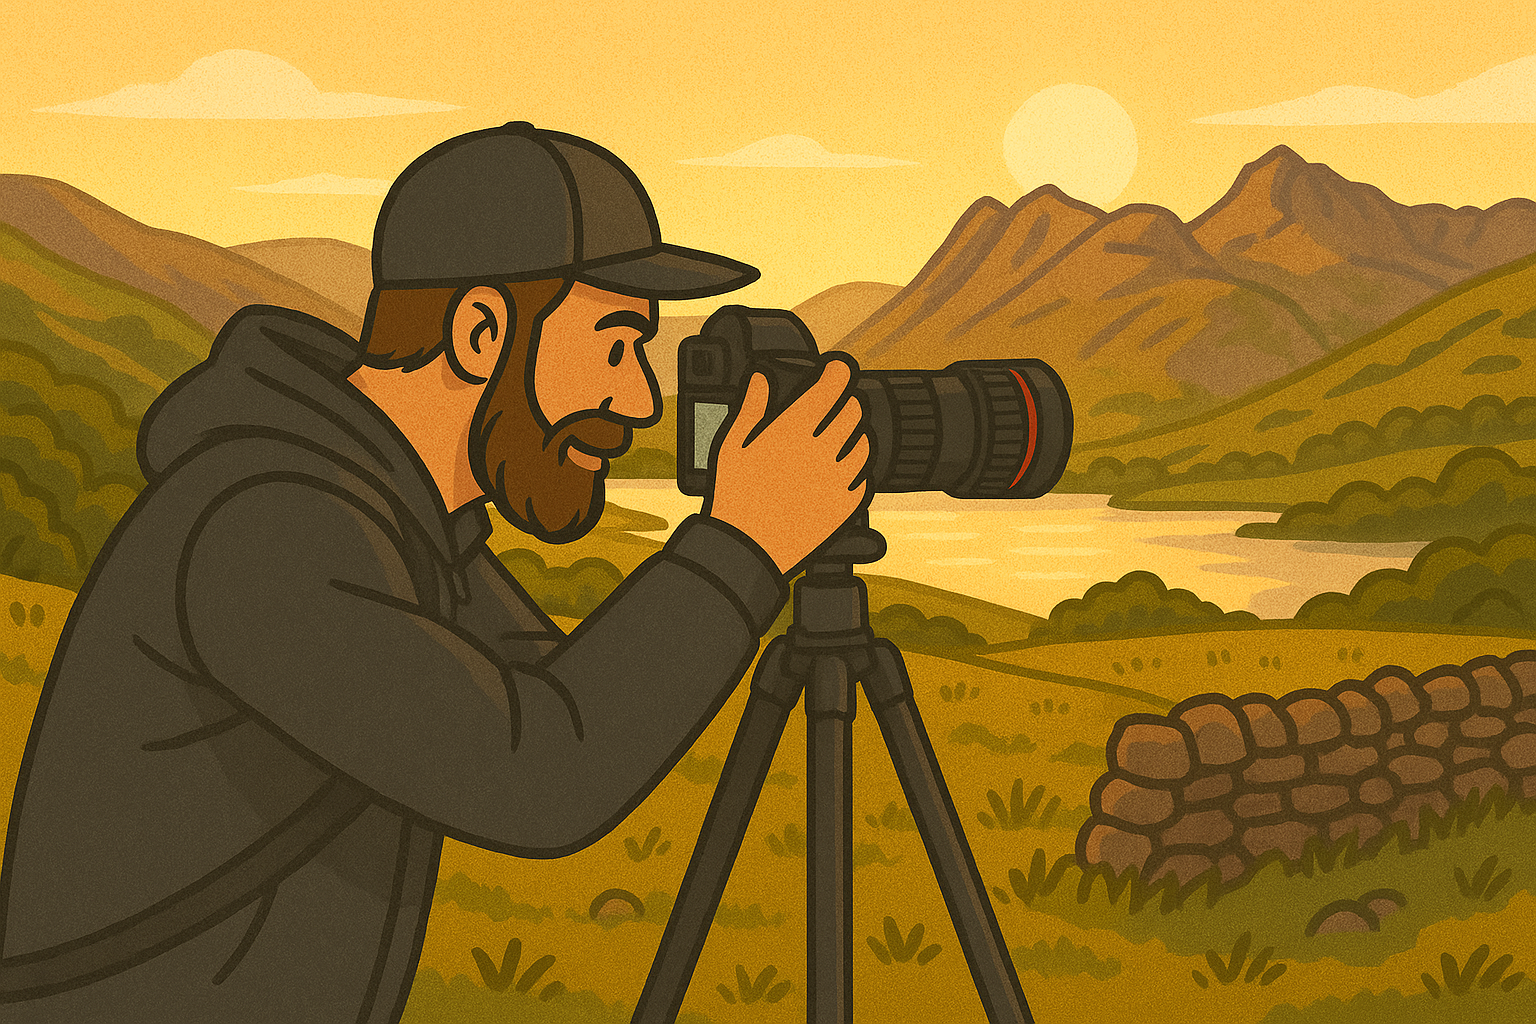
JPEG
A compressed file format that’s smaller but loses some detail. They don’t store as much data as a RAW file so you get far less flexibility in post production. If you want to do a lot of editing, shoot either RAW or RAW+JPEG. See your camera’s manual for more details.
Manual Mode
A mode on your camera, usually indicated by the letter M on the mode dial. This gives you full control over all of your camera’s settings. See your camera’s manual, it varies from brand to brand.
Metering
Metering is the process your camera uses to measure the brightness of a scene so it can determine the correct exposure. The camera analyses the light entering through the lens and decides how bright or dark the final image should be based on your chosen metering mode. Different metering modes—such as matrix/evaluative, centre-weighted, and spot metering—tell the camera which part of the frame to prioritise when calculating exposure.
Mirrorless Camera
A camera which doesn’t have a mirror inside it like a DSLR camera does. Instead of an optical viewfinder, they have an electronic viewfinder (EVF). The EVF is a small screen inside the viewfinder showing a live image of what the camera is looking at rather than showing the actual image through system of mirror and prisms like in a DSLR. They tend to be smaller and lighter than a DSLR camera; they’re also more expensive.
Motion Blur
Blur in your image which is caused by a subject moving during your shot, sometimes this is desirable and can help to tell the story of a photo (street photographers and sports photographers (to some extent) really benefit from this) and sometimes it isn’t what we want, especially as landscape photographers when sharpness is often the key. Sometimes, we want to get some motion blur in things like clouds or water as this helps to give a sense of time passing during your photo.
Minium Focussing Distance
The minimum distance that your lens can be from your subject and in relation to the camera’s sensor and still be able to focus. This varies from lens to lens and will usually be indicated by the word “macro” followed by the distance which is printed somewhere on the barrel of you lens. If it doesn't have the word macro, look for the little glyph of a flower with the number printed after it. Macro lenses tend to have a closer minimum focus distance than a ‘standard’ lens.

N.D (Neutral Density)
Usually applies to ND Filters. ND Filters are pieces of engineered glass which you can screw onto the front of your lens and it limits the amount of light allowed into your lens, a bit like a pair of sunglasses for a camera. They are called neutral density filters as they are supposed affect all of colours of light equally meaning that the colour of your scene is preserved in your shot with giving any colour cast; most of them don’t do this and you end up with a slight colour cast on your image which needs to be corrected in post production.
True ND filters do exist (they don’t give a colour cast and they do affect all colours equally), but expect to pay a premium for these.
Polarising Filter
This type of filter is really useful if you’re shooting near water or around a lot of glass. It can help to minimise the reflections and glare that you get from water and glass. Really useful if you want to see through water or minimise the reflections in the glass if you do a lot of automotive photography.
Prime Lens
This is a lens which only shoots at one focal length. Common prime lens focal lengths are 50mm, 85mm, 35mm and 24mm. The advantage of prime lenses is that they better image quality, that is to say that they are sharper but they don’t offer the flexibility that you get with a zoom lens.
RAW File
An uncompressed image format which is great for editing. Don’t be disheartened when your images don’t look like they did on the back of the camera when you look at them on the computer - these were made to be edited! The preview on the back of your camera is a JPEG so you can get an idea of what your image looks like. Raw’s are quite large and you’ll need plenty of storage!
Shutter Priority/Time Value
Another camera mode, you set the shutter speed, the camera selects your aperture. See your camera’s manual, it varies from brand to brand.
Shutter Speed
The shutter controls how long your sensor is exposed to light for. If you want to freeze motion, such as at a sports game, you will need a fast shutter speed - the faster the subject, the faster the required shutter speed. Slower shutter speeds help to create motion or motion blur in your images and can be great at night for capturing light trails. Shutter speed combines with ISO and aperture to form the exposure triangle.
Stopped Down/Stopping Down/Stop Down
Reducing the aperture size of your camera. For example ‘I need to stop down’, ‘I shot this image stopped down all the way to f/22’, or ‘It’s really bright day, I am going to be stopping down a lot’.
Telephoto Lens
Telephoto lenses are generally lenses which have a focal length of 70mm and upwards. Anything between 35mm and 70mm is considered to be a ‘normal' or ‘standard’ focal length.
Thread Size
This refers to the filter which is on the front of your lens, which allows you to attach filters of the screw-in type. You can get some which attach via brackets or magnets, but these tend to be more expensive. Some lenses which have large front elements don’t have threads on the front, but do have a location at the back of the lens where you can use a drop in filter which sits between the lens and your sensor.
Wide Angle Lens
A wide angle lens is generally accepted to be any lens with a focal length of less than 35mm (on a full frame camera).
Wide Open
When a photographer says they are shooting wide open, they are saying that they are using their lens at its widest aperture setting.
Zoom Lens
The opposite of a prime lens. Your focal length will be written as two numbers with a dash, such as 24-70mm. This means that the lens can “zoom” into a longer focal length to pick out bits of a scene.
Image credits - aperture blades/camera lens - @mjtang on unsplash.
If you’d like to support the blog and help me keep producing Lake District photography content, honest gear reviews and regular website updates, you can do so via my Buy Me a Coffee page. Keeping everything running smoothly takes time, and your support makes a real difference. Thank you.
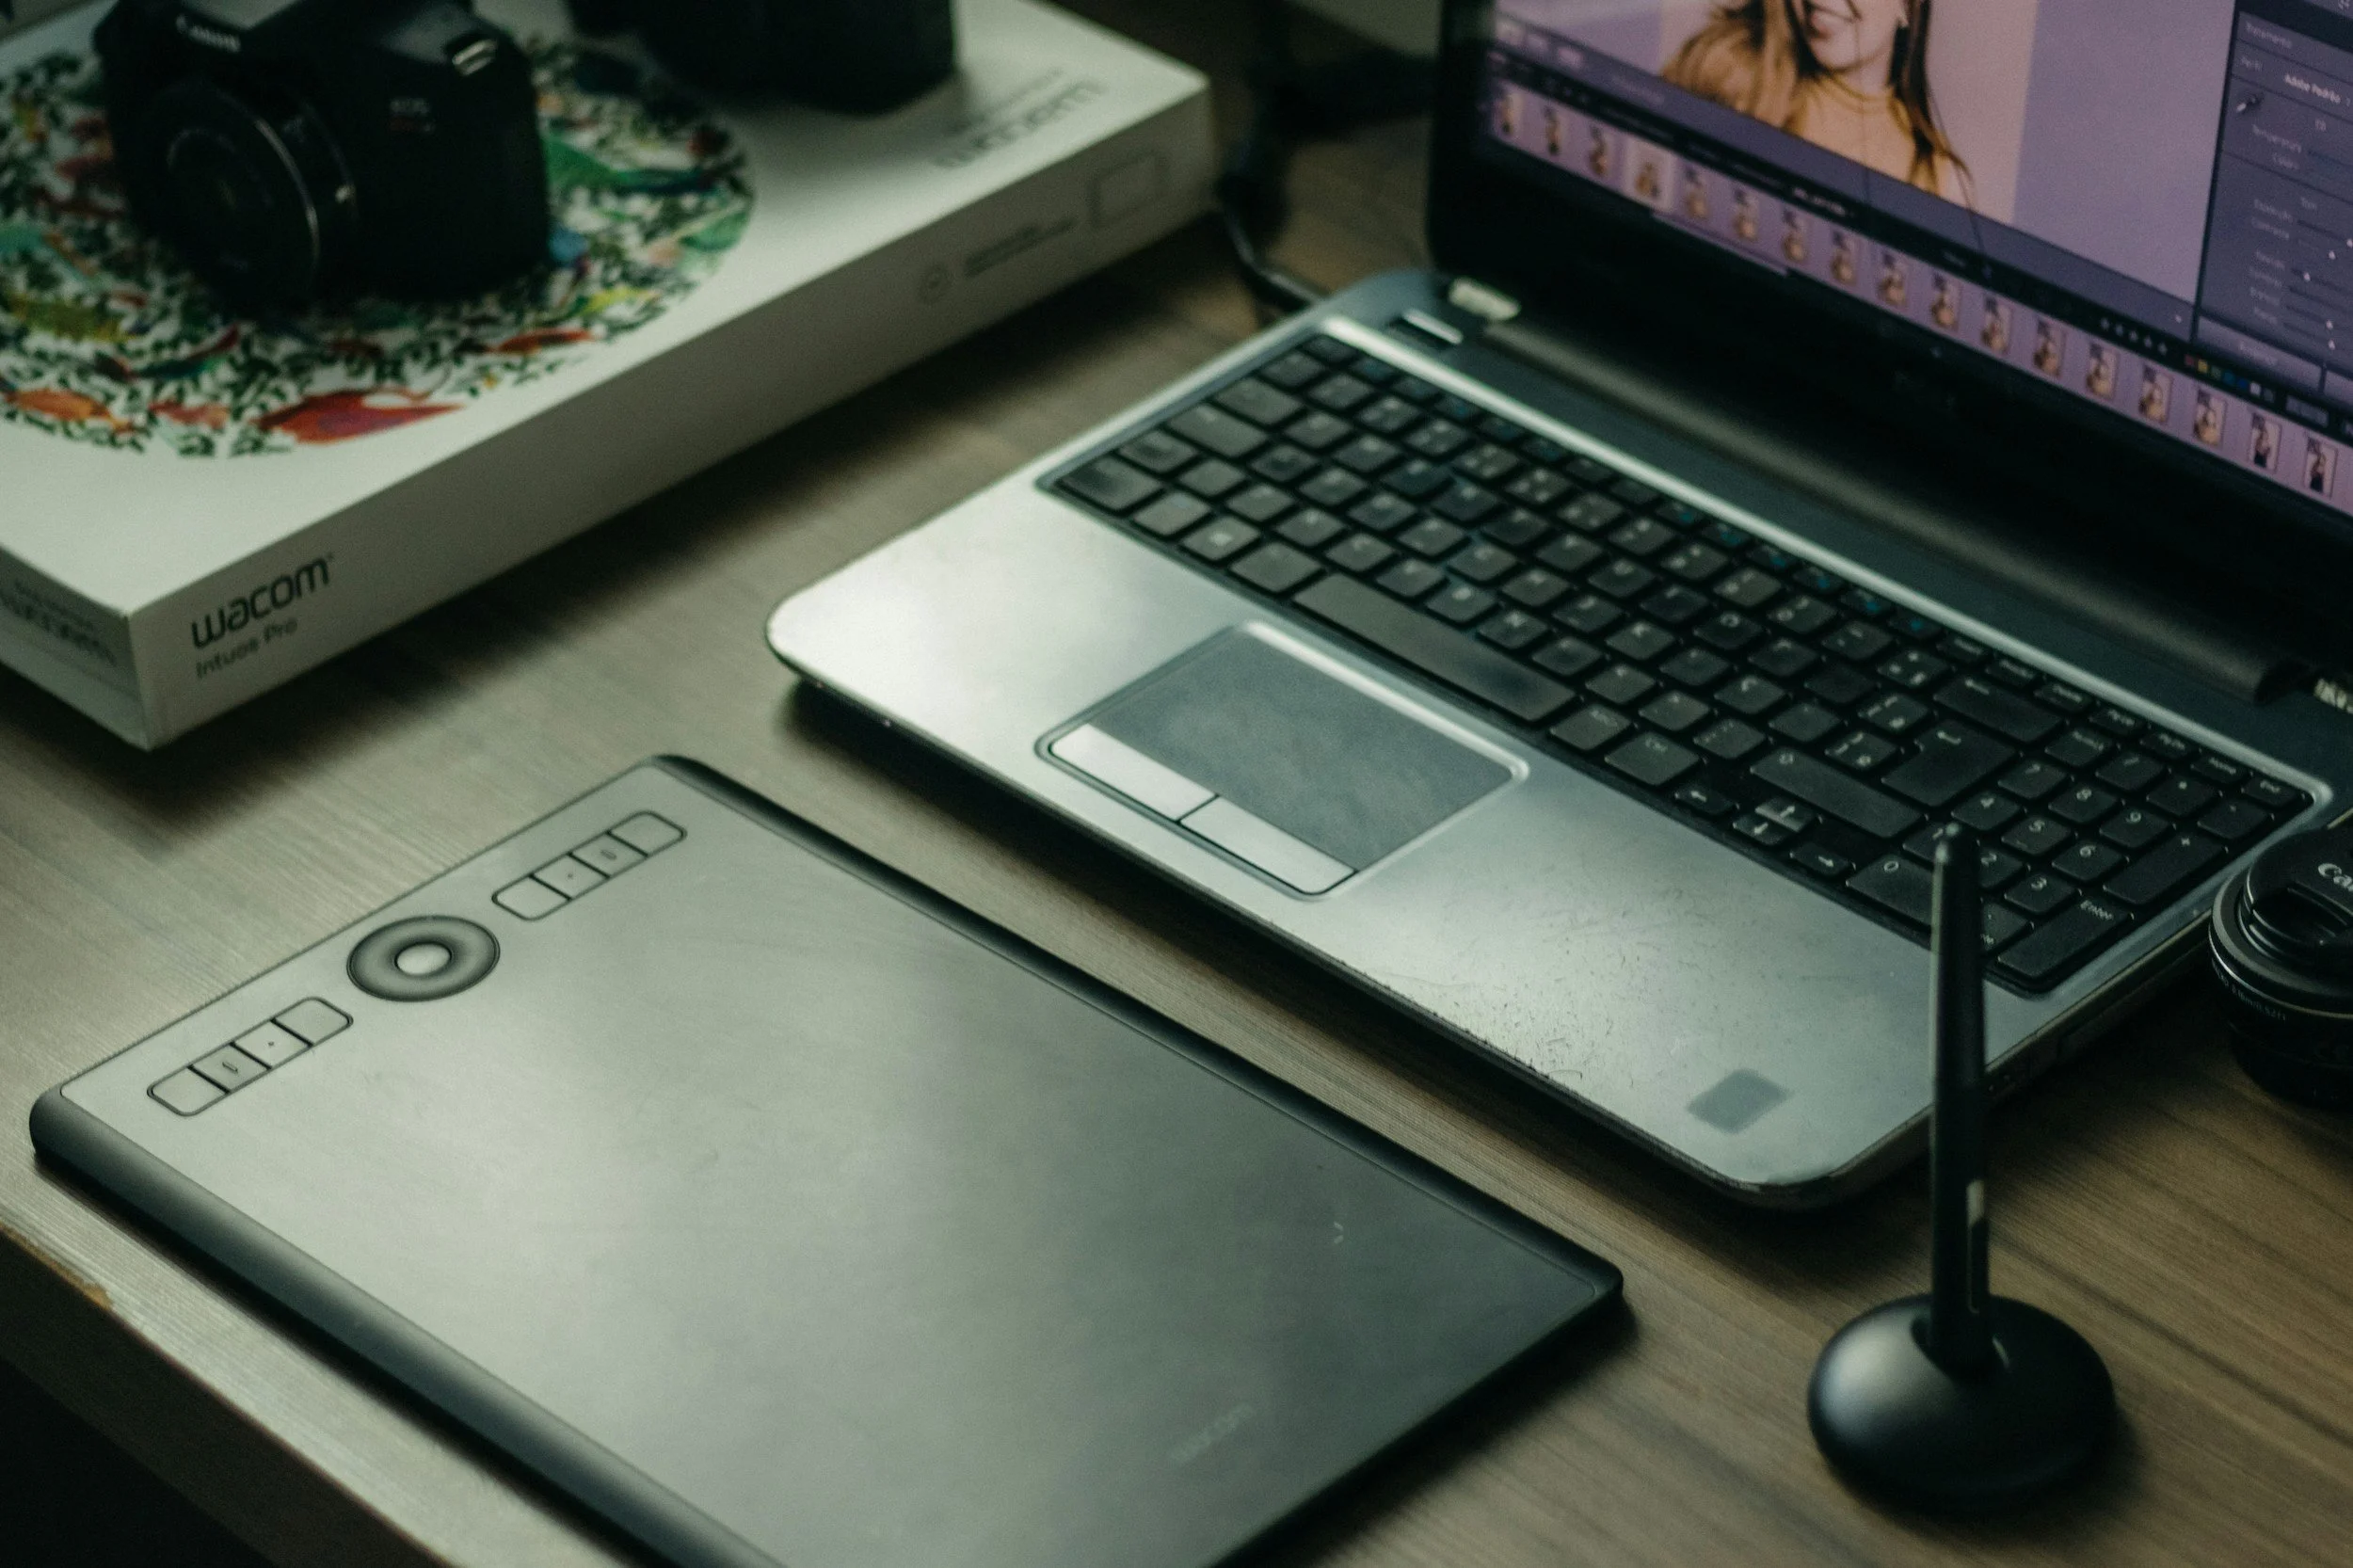
Do You Need A Graphics Tablet for Landscape Photography?
Is a graphics tablet worth using for photo editing, or is a mouse still enough? In this article, I explore whether a graphics tablet is a genuine upgrade for photographers or simply an optional extra. Drawing on real-world experience editing with both a mouse and a tablet, I break down the key differences in accuracy, speed, and creative control — particularly when it comes to masking, dodging and burning, and local adjustments in Lightroom and Photoshop.
I also compare traditional mouse editing with modern AI masking tools, explain the learning curve involved, and outline who a graphics tablet is actually for. If you’re an intermediate or advanced photographer looking to refine your editing workflow, this guide will help you decide whether a graphics tablet deserves a place in your setup.
Should You Use a Graphics Tablet for Photo Editing?
The answer to this question is dependent on a couple of variables: where you are in your photography journey and how much you edit your photos.
We can then add a few more variables to those two — what kind of edits are you making, and what are you trying to achieve in your photos?
I am coming at this from the perspective of someone who edited purely using a mouse (and sometimes a trackpad), and then got hold of a graphics tablet, which completely changed my workflow and my edits.
TL;DR: Are Graphics Tablets Worth It for Photographers?
A graphics tablet isn’t essential for photo editing, but for the right photographer it can be a genuine workflow upgrade. If you regularly use local adjustments, dodging and burning, or detailed masking, a tablet offers greater accuracy, speed, and creative control than a mouse. For beginners, it’s better to focus on learning your editing software first, but for intermediate and advanced photographers, a graphics tablet can be a worthwhile investment.
Graphics Tablet vs Mouse for Photo Editing: What’s the Difference?
For me, since you asked, it has been about three things: accuracy, speed, and creativity. I did some research before making a purchase to ensure I was buying the right one for me, and I ended up opting for the Wacom PTH-660-N Intuos Pro with the Pro Pen Stylus 2. This has since been superseded by the Wacom Intuos Pro Medium with Wacom Pro Pen 3.
Ultimately, you’re swapping your mouse for a stylus and tablet, and using these alongside your keyboard to navigate.
It means that, as well as navigating your way around your software with the pen, you’re also using your software as “virtual paper” — something you can draw on, sketch on, and “click” on to make the adjustments you want in your images.
One of the things this really sped up for me (and it’s even quicker now that editing software is streets ahead of where it was even three years ago) was removing small distractions from images. When I lived in London and shot street portraits, I would spend a lot of time removing blobs of chewing gum from images, and it would take a very long time. Having the stylus meant I could be done in a few minutes. I don’t do this as much now as a landscape photographer in the Lake District, but this is the speed I mentioned at the start of the blog.
As a landscape photographer, the accuracy aspect really comes into play. Having a stylus and tablet allows me to accurately “paint in” things like exposure and saturation exactly where I want them, rather than being limited by mask edges or the occasional jolt of a mouse. It feels much more like working with paint or a pencil. If you’re using pressure sensitivity, you also gain an extra layer of creative control. Once you’re well practised with a tablet, you’ll be surprised how fluent your adjustments can become.
I have to admit that the masking tools in Lightroom have improved massively over the last couple of years, especially with the addition of AI-powered masking. Even so, I still find that using a stylus allows me to place adjustments exactly where I want them and accurately control how much I’m doing. If you’re doing a lot of dodging and burning, editing landscape photos with a graphics tablet can be an absolute dream.
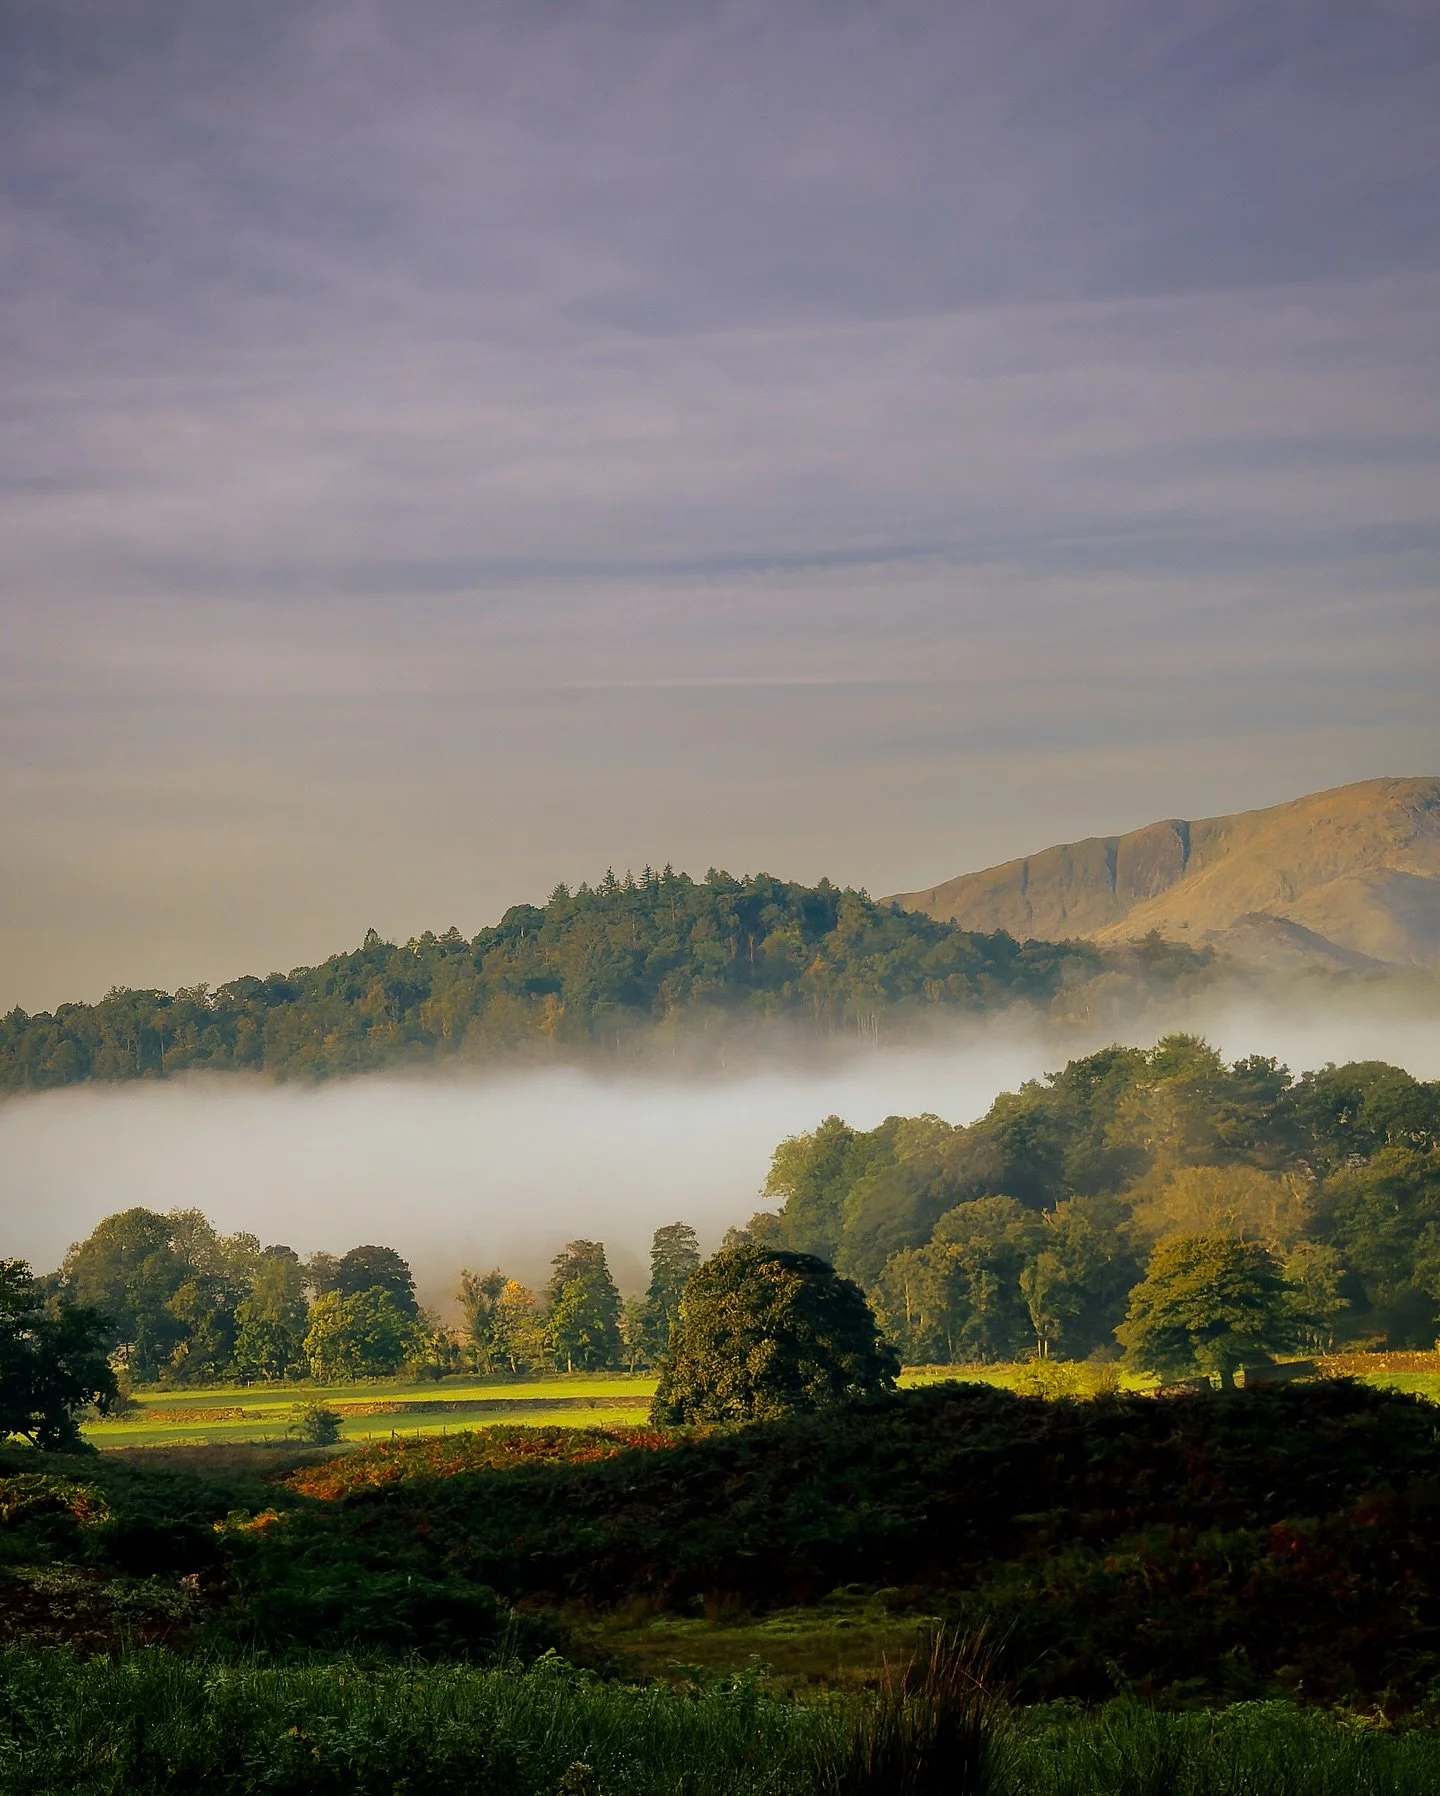
Mouse vs Graphics Tablet vs AI Masking in Lightroom and Photoshop
Modern editing software has come a long way, particularly with the introduction of AI-powered masking tools in applications like Lightroom and Photoshop. Subject selection, sky masks, and automatic object detection can now handle many adjustments quickly and with impressive accuracy.
A mouse remains perfectly capable for general editing tasks and works well for global adjustments and simple local edits. It’s familiar, precise enough for most uses, and requires no additional setup.
A graphics tablet, however, excels when you want fine control. Painting exposure, contrast, or colour exactly where you want it — and controlling how strongly those adjustments are applied — feels far more natural with a stylus. Even with AI masks, a tablet is often the best tool for refining edges, blending transitions, and making subtle, creative tweaks.
AI masking is incredibly powerful and continues to improve, but it works best as a starting point rather than a complete solution. Combining AI masks with a graphics tablet allows you to work faster while retaining creative control, rather than relying entirely on automated selections.
Is There a Learning Curve When Using a Graphics Tablet?
Yes, but it’s a brief one. For me, it was mostly about getting used to how it feels. It can be quite an alien sensation at first — moving your hand around a tablet and seeing the cursor move on the screen. For many of us, this will be a completely new way of interacting with a computer or piece of software.
One thing you’ll need to set up and experiment with is the active area of the tablet and how much of your screen that area represents. For example, I have my tablet set so that I use roughly a quarter of its surface area, which maps to my entire screen. This means that to move my cursor from the top left to the bottom right of the screen, I only need to move the pen tip around 4–5 inches. My hand stays in roughly the same place.
By contrast, if you use the full tablet area, the same movement would require the pen to travel across the entire tablet (around 10 inches in my case). For me, that’s too much movement, and I find working in a smaller area both easier and more accurate.
The learning curve isn’t steep in terms of time investment — it won’t take weeks. After about 30 minutes, you’ll have a good feel for it and may already be wondering how you ever edited without one.
What Photo Editing Software Works with a Graphics Tablet?
More than you might expect, including programmes outside the creative sphere. I mainly use mine with the Adobe Creative Suite (largely Lightroom and Photoshop) and Capture One.
There’s a wide range of software that supports graphics tablets, but it’s always worth checking the manufacturer’s website to ensure compatibility with your specific needs.
You also have two main connectivity options: USB-C or wireless (via Bluetooth). Connectivity is straightforward and generally very stable via bluetooth but I do favour the USB-C connection as for me, it feels a bit less laggy.
Can You Customise a Graphics Tablet for Editing?
Oh yes. Wacom tablets come with Wacom Centre, which allows you to customise the tablet alongside your Mac or PC system settings.
This is where you set the active area of your tablet and assign functions to the eight programmable buttons, the centre button, and the touch wheel.
For example, I have my buttons mapped to select different tools in Lightroom and Photoshop, the centre button launches a menu, and I use the touch wheel to control zoom. There’s also a button on the side of the stylus, which I’ve set to “undo”.
The software also supports automatic switching between applications. If your active window changes from Photoshop to Lightroom, the tablet recognises this and switches to the relevant shortcuts automatically. It’s seamless, and you rarely have to think about it once it’s set up.
Which Graphics Tablet Should Photographers Buy?
I can’t answer this definitively for you. I chose Wacom because it was a brand I already knew and trusted, and because their tablets were on display at my local camera shop, allowing me to try them before buying.
There are also options from Xencelabs, Ugee, XPPen, and Huion. I can’t vouch for these personally, as I haven’t used them, so I’d recommend doing your research, reading reviews, and making sure whatever you buy fits your needs and workflow.
Who Should Use a Graphics Tablet for Photo Editing?
If you’re new to landscape photography, this shouldn’t be at the top of your shopping list. Spend your time learning your editing software, understanding how to use your camera to get the image as close as possible in-camera, and investing in things like lenses or other tools that will benefit you more at an early stage.
If you’re reading this and parts of it don’t make sense, take the time to learn what those things mean and revisit the idea of a graphics tablet later, once you’re more confident and know what you want to achieve.
I’d recommend a graphics tablet to photographers at an intermediate or advanced level who understand their software and have a clear idea of how they want to work. If you regularly paint in exposure, contrast, or other local adjustments and find a mouse limiting, a tablet could be a very worthwhile investment.
Pros and Cons of Using a Graphics Tablet for Photo Editing
Pros
Improved accuracy when painting masks and local adjustments
Faster workflow for retouching and removing small distractions
More natural, intuitive control that feels closer to drawing or painting
Pressure sensitivity allows for more subtle and creative adjustments
Better ergonomics for longer editing sessions compared to extended mouse use
Cons
Initial learning curve, especially if you’ve only ever used a mouse
Desk space required, particularly with medium or large tablets
Additional cost, which may not be justified for casual editing
Not essential for beginners, who may benefit more from mastering software basics first
Conclusion: Is a Graphics Tablet Worth It for Photo Editing?
A graphics tablet won’t suddenly make your photos better, but it can change how you work on them. For photographers who regularly use local adjustments, masking, and retouching, a tablet offers a more accurate, fluid, and enjoyable way to edit — one that often feels closer to drawing or painting than clicking and dragging with a mouse.
That said, it’s not a requirement. If you’re early in your photography journey, your time and money are better spent learning your editing software and understanding what you want to achieve with your images. But if you’re comfortable with your workflow and find yourself limited by a mouse, a graphics tablet can be a meaningful upgrade that speeds things up and gives you greater creative control.
Like most tools in photography, its value comes down to how and why you use it. Used intentionally, a graphics tablet can quietly become one of the most useful parts of your editing setup.
Thanks for reading, I hope you found this useful/insightful! If you’d like to be the first hear about new blogs and reviews and to keep up to date with what I am doing and see my latest work, please consider signing up to the mailing list via the contact page.
If you’d like to support the blog and help me keep producing Lake District photography content, honest gear reviews and regular website updates, you can do so via my Buy Me a Coffee page. Keeping everything running smoothly takes time, and your support makes a real difference. Thank you.

Gear Review: Peak Design Slide Lite Camera Strap
If you’re looking for a comfortable, secure way to carry your mirrorless or DSLR, the Peak Design Slide Lite and Peak Design Cuff are two of the most popular options on the market. In this review I put both the Slide Lite camera strap and the Cuff wrist strap through real-world use, from landscape photography walks to everyday carry. I cover how the Anchor Link system works in practice, how the Slide Lite performs as a sling, neck and shoulder strap, and whether the Cuff offers enough security as a minimalist wrist tether. If you’re trying to decide which Peak Design strap is best for your camera setup – or whether it’s worth upgrading from your stock strap – this Peak Design Slide Lite and Cuff review will help you choose with confidence.
Black Friday was an absolute blast last year… seems like such a long time ago already, doesn’t it!? The Peak Design Slide Lite strap, and the accompanying “Cuff” were two of the things I managed to bag a bargain on, but were they worth it - let’s take a look…
This blog contains Amazon affiliate links, if you make a qualifying purchase after clicking any of the links to Amazon in this blog, I may receive a small kickback.
I have recently taken delivery of a Peak Design Slide Lite camera strap as well as its little brother, the “cuff”.
I brought both of these items with my own money, so this is a completely transparent, warts and all review!
As well as bagging some bargain Christmas presents for loved ones, I did manage to grab myself a couple of little treats as well - I got some handheld lighting which is going to be great in my studio and a couple of new photo books (I also got some little RGB lights which are going to be great for field based macro photography, I’ll review these when I have had the chance to play with them properly), but I also treated myself to the Peak Design Camera strap and the wrist cuff strap that goes along with it!
A lot of landscape photographers don’t use straps at all, as their camera spends time in their bag or on their tripod, there isn’t much of an inbetween. You’ll know from previous blogs that I love my Peak Design Camera Capture Clip, for keeping my camera attached to my bag and freeing up my hands, so why on earth do I need a strap?
There’s a number of reasons, but the 2 that really influenced the purchase were 1) I don’t exclusively do landscape photography, I love a bit of street photography do and I find the strap can sometimes be useful for that and 2) I am really clumsy at times. When my camera is in my hands not attached to my bag or my tripod, it really pays dividends for me to have attached to my body in some way or other!
So why did I choose the Peak Design Slide Lite Camera Strap?
Well, my camera spends a lot of time on its tripod. Having a strap attached to the camera when it is on your tripod isn’t the greatest idea. It gets tangled up with everything you’re trying to do, it can introduce movement into your shots when you really don’t want it to, can obstruct your lens or LCD Screen and when it’s windy, the strap essentially becomes a sail attached to your camera waiting to blow it away or knock it over.
The Peak Design Camera Strap uses their “Anchor Link” system to attach your camera to the strap. This consists of two “anchors” which attach to either side of your camera where your strap usually attaches which slide neatly into the opposite shaped receivers which are on the strap. This makes attaching and removing the strap an absolute breeze, and let’s face it, a lot of the straps on the market are a pain in the a**e to remove and reattach, causing you more stress than in necessary for what should be a simple task. This makes it simple.
On top of that, the anchor links are rated at 90kgs each which is way, way, way in excess of anything you’re going to be carrying around your neck.
There are two versions of this strap, “Slide” and “Slide Light”. The major difference between the two is the width of the strap. The Lite has a width of 1.3” (32mm) and the Slide is 1.8” (45mm) wide. I opted for the slimmer one as I find wide straps to be quite bulky and restrictive.
Why Peak Design? Well I already own some of their products. I like them. I trust them. This was an easy decision.
What’s in The Box?
Slide Lite
1 slide lite strap
Anchors
Anchor Mount
4mm hex wrench
Microfiber pouch
Cuff
Cuff
Anchors
Microfiber pouch
Both if the items also come with a spare anchor and a small kit which can help you to attach the anchors to the anchor points on your camera if there’s something stopping from attaching in the regular way, though I am not sure what that would be.

Build Quality
This is a really well made it of kit, as we would expect from Peak Design - these guys don’t do half a job. The materials are excellent and seem to be pretty hard wearing. It’s made of the same nylon webbing as a car seatbelt, there’s a PVC shoulder pad and the hardware is made of aluminium and glass filled nylon. The connectors are solid and made from Glass-reinforced nylon with stainless steel springs, and comprise a 2-layer anti-abrasion woven thermoplastic Anchor cord, the covers are made from thermoplastic. The materials are the same for both the slide and the cuff, but if you opt for the Coyote colour way, then expect 30%recycled nylon in the material for that extra sustainability tick!
They’ve tried to be as sustainable as possible with this one and if you want to read some more about this, head over to the Peak Design website and you can see it all in their words.
Both times feel solid and like they are going to last a long time, even if you give them a bit of beating, they’re soft to the touch and aren’t going to irritate your skin.
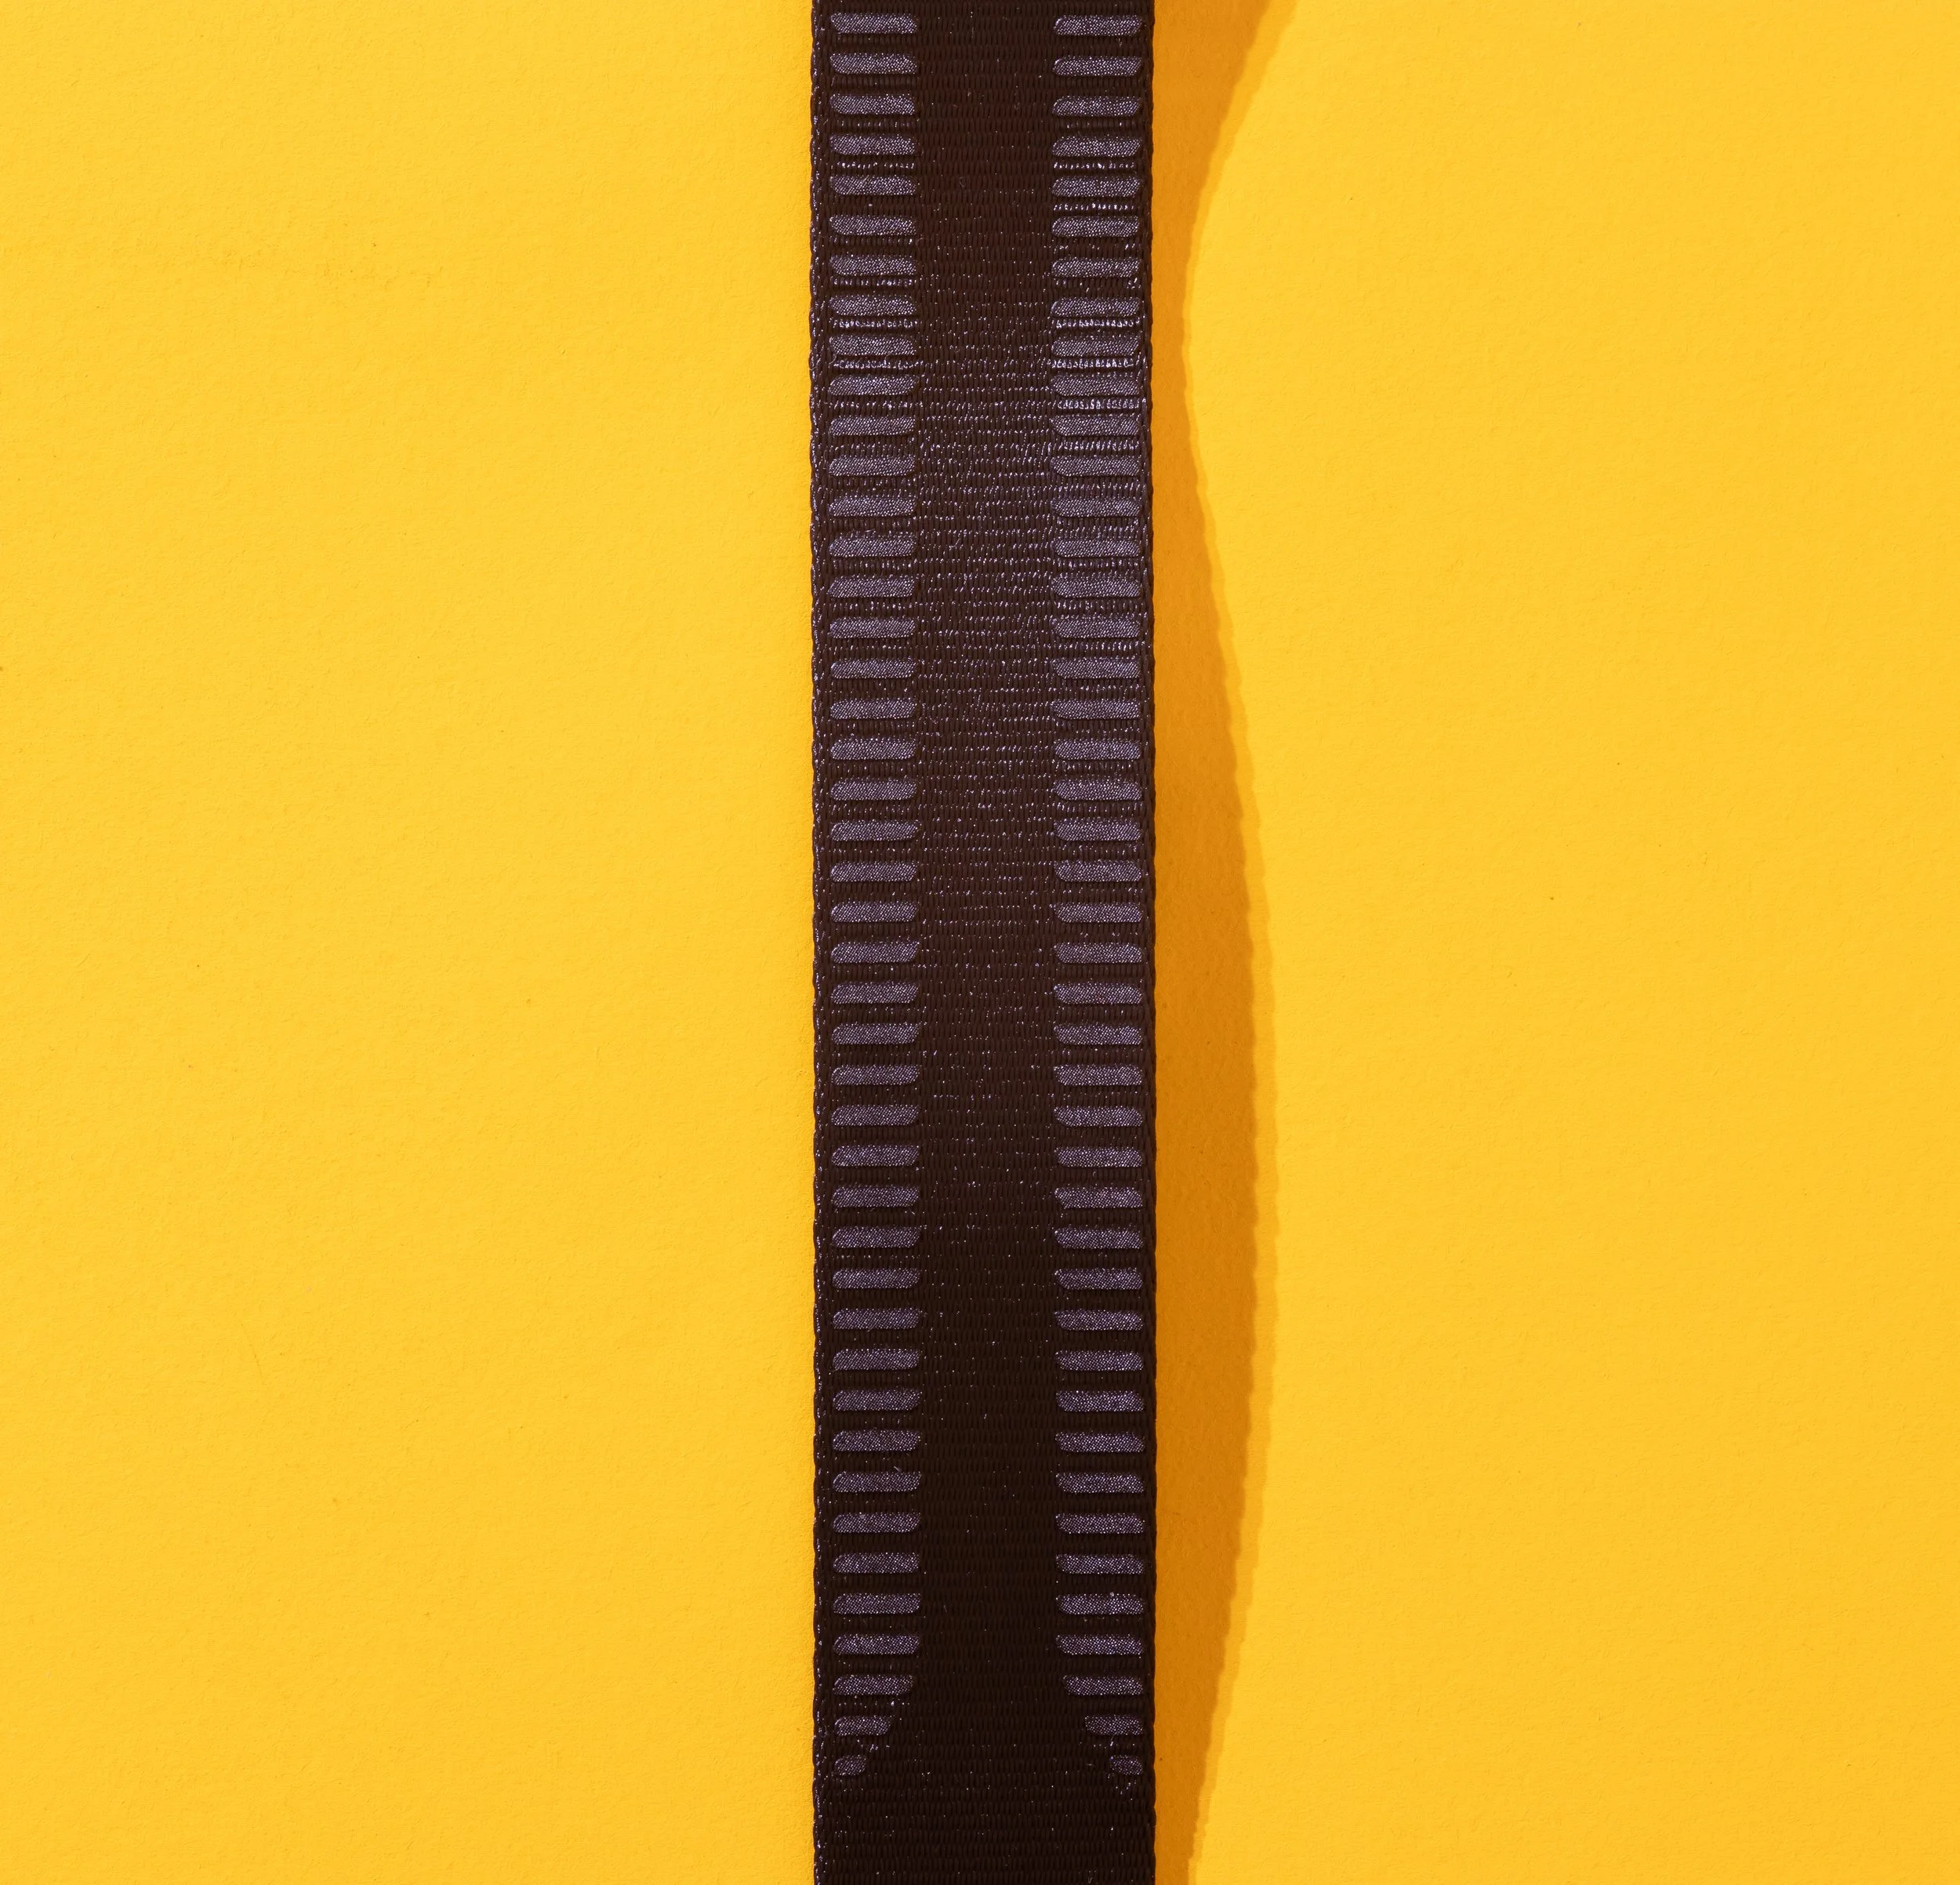
First Impressions
Slide Lite
These are well packaged items and the packaging feels really premium, a little bit like the materials you’ll find Apple products in. I know that to an extent, commenting on the packaging feels a but redundant, but if a company is taking time to make the packaging solid, they’re putting effort into the product you’re buying, and that’s definitely the case here.
When you hold the strap, it feels good in the hand and you can see the stitching is good quality and the bright red thread stands out well against the dark colour of this strap giving a couple of nice accents, without being too garish.
The hardware, which is made from aluminium and nylon is solid and has the feel that it is going to last a long time.
It feels good when you’re wearing it, and it’s really long - at its smallest length, it’s 37inches (about 95cm) and fully extended it's 57.5” (around 146cm, or just under 1.5metres). I’m not a small chap and I’m just over 6ft 1 tall, and this is plenty long enough for what I need.
I was interested to see the anchor points and how they work, and it’s super easy. You remove your old camera strap and then attach the anchors to wear your old strap was attached. Once that’s done, it’s just a case of looping the anchors through themselves and cinching them up. Once that’s done, you just have to slide them into the receivers on the strap. To remove them, you just apply some light pressure to the actor inside the receiver and they just pop out. It’s really easy, but I think in cold weather it might get a bit fiddly, but this is a really minor consideration that isn’t going to apply to everyone or every situation.
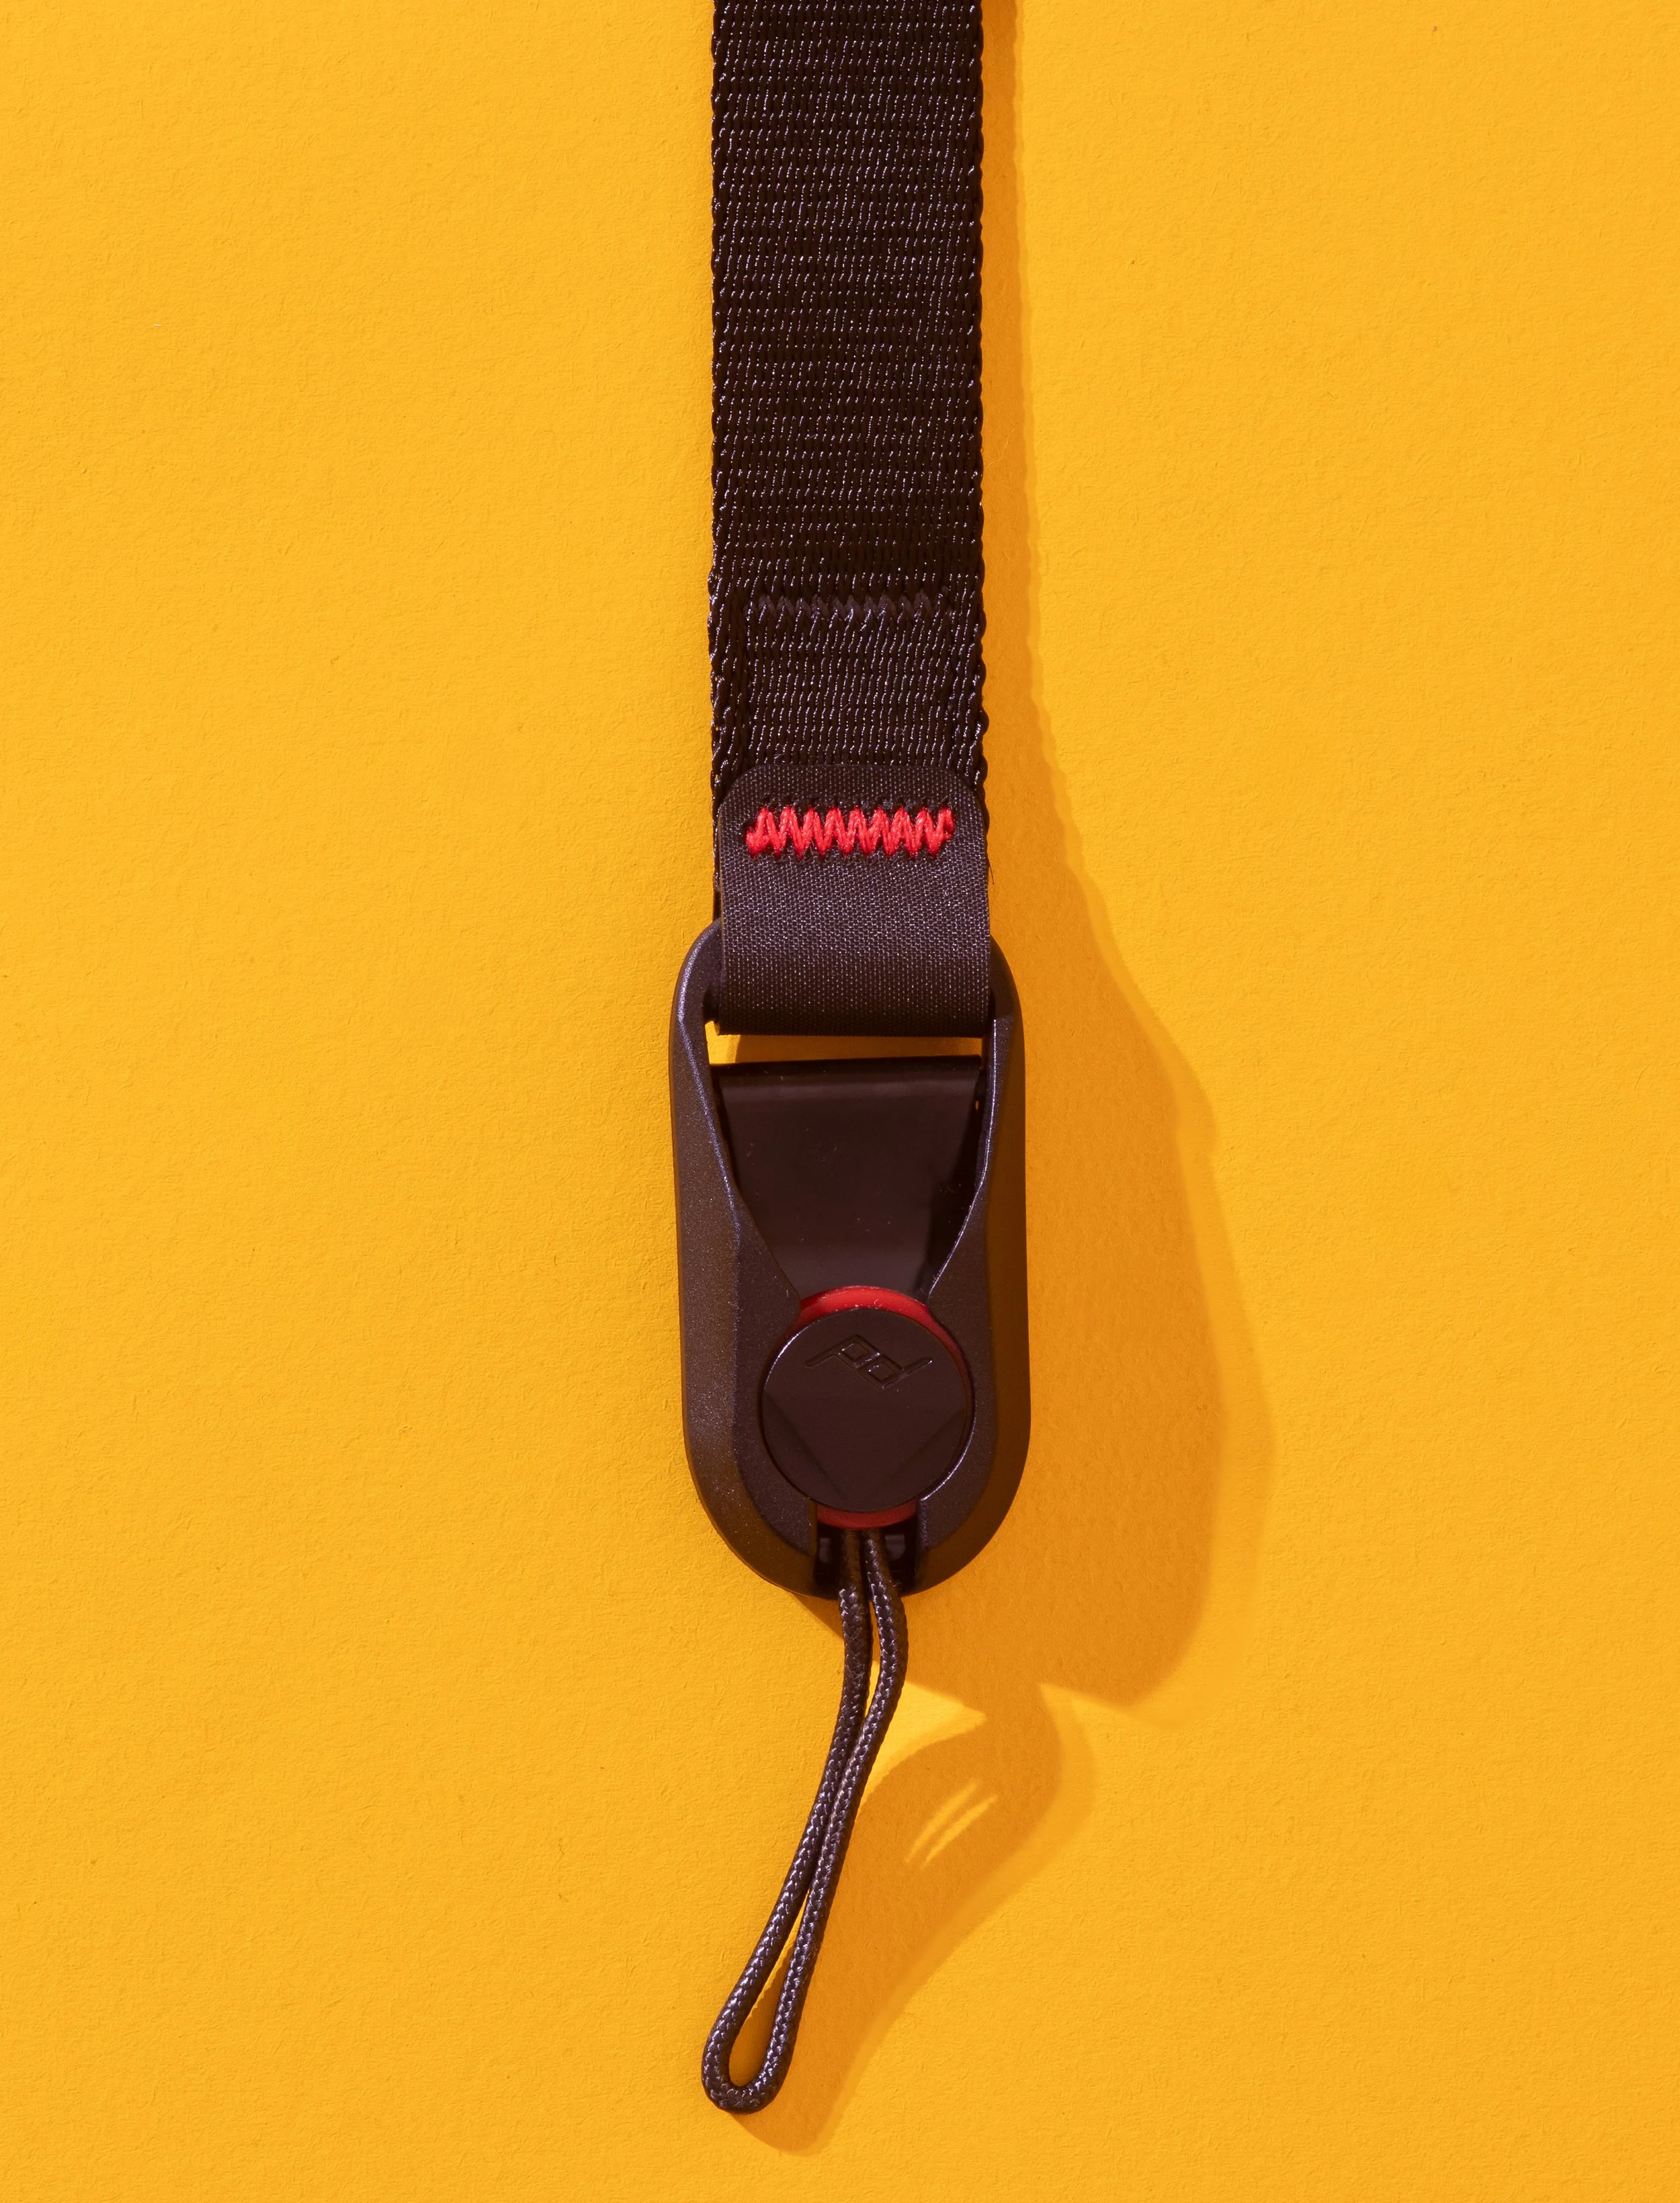
It’s a similar story with the cuff, it’s easy enough to attach and remove and the anchors are interchangeable between the two “systems” so you don’t need to keep swapping your anchors.
I was a tad worried when I ordered the cuff that it would be on the small side - I have quite big wrists and things like this don’t always fit me, but this is plenty big enough, and if you’re at the other end of the “wrist spectrum”, then it adjusts right down to a nice small size.
Despite the fact that this is essentially made of the same/very similar to a seatbelt, it is surprisingly soft and comfortable to have around your wrist. The ‘clasp;’ that tightens the strap around your wrist is a nice piece of aluminium which looks good and isn’t going to wear out.
Another thing worth knowing about the cuff is that if you crop your camera whilst wearing the cuff, the metal loop acts like brake and will tighten everything up to stop your pride and joy from ending up as a heap of scrap metal, plastic and glass all over the floor.
All in all, I am really impressed with both of these items, the real test of them both, for me at least, will be to see how much the edges wear over time and how quickly they start to show any signs of wear, but to be honest, give how well made this feels and looks, I don’t think this will be an issue.
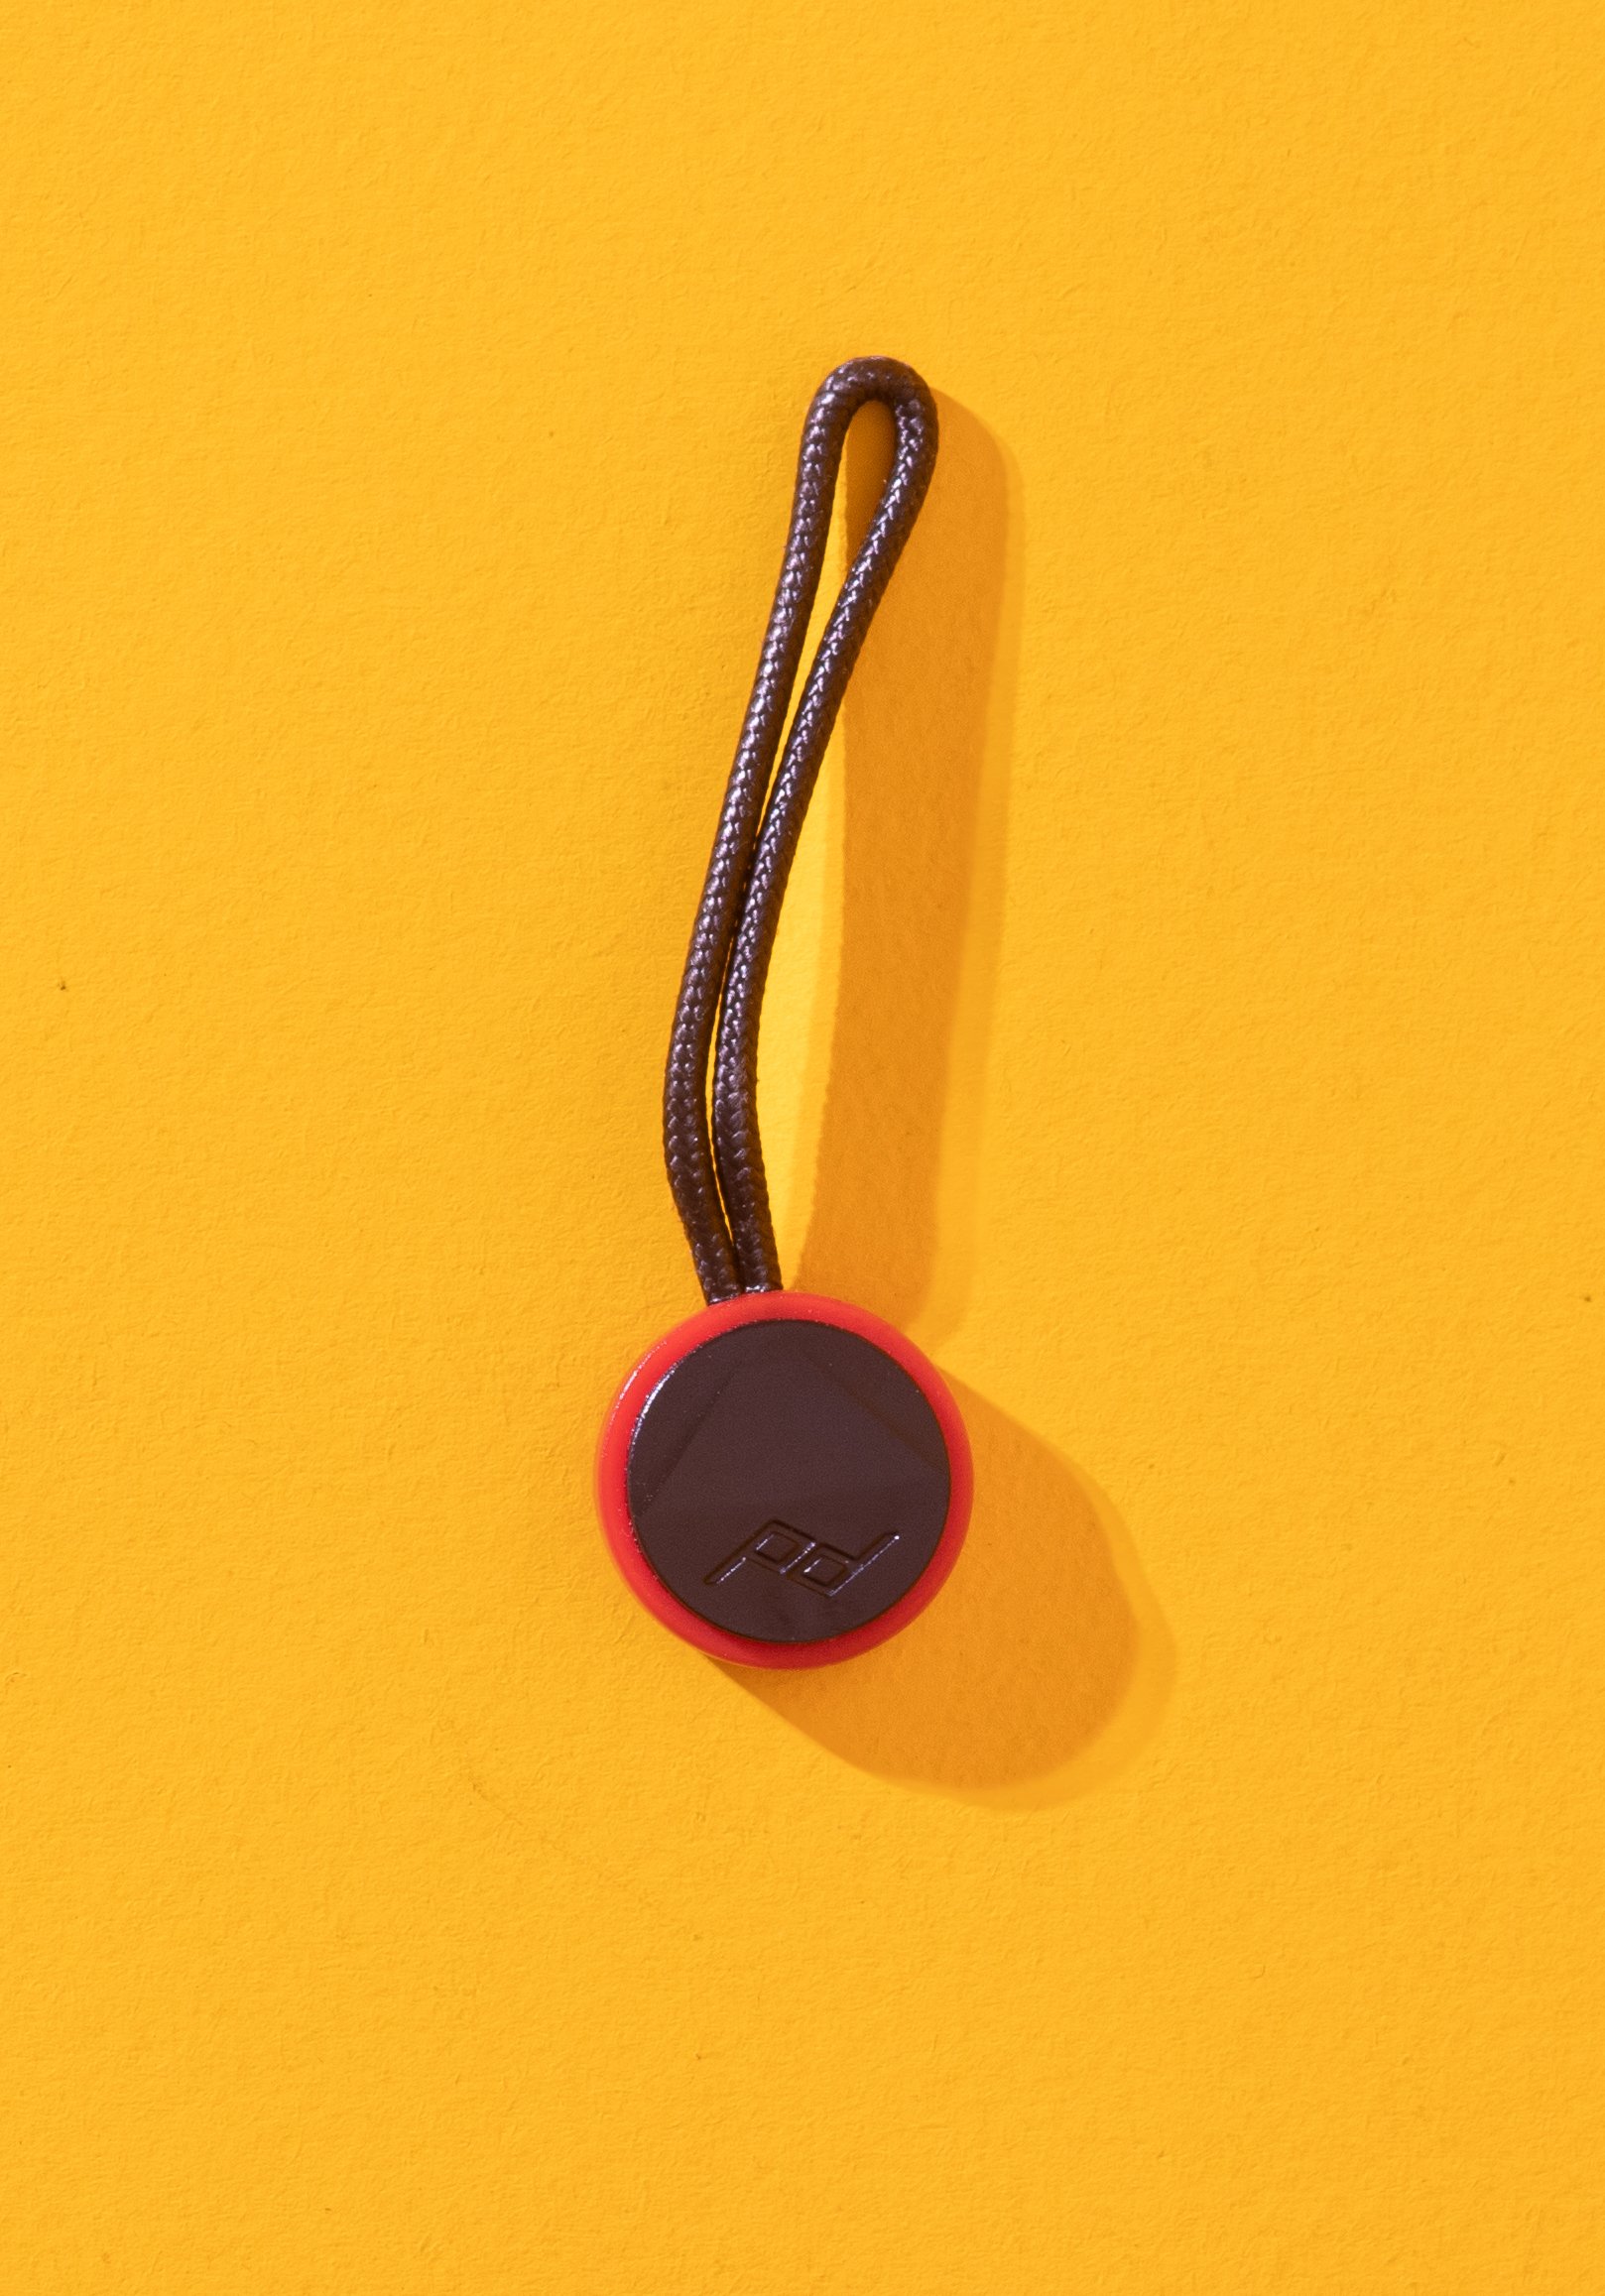
Impressions after a couple of months use.
I had thought I was just going to come to this around February time and just write a bit of something about how it’d gone with the new strap, but I find myself jumping back after only a couple of weeks to say that in the studio, it’s completely changed things for me. I only own one camera that’s good enough for working in the studio with and it's the same one I use for my landscape work as well. That means that invariably the strap is attached, it’s (was!) a pain to take on and off and it puts me off wanting to do my studio projects, because I can’t be bothered with the faff. Having this really changes that, the strap doesn’t live on the camera now, it lives in the bag and the anchor clips stay on the camera and I am more productive than ever!
Ok, so the actual two months later part…
First off, the “Cuff”; I don’t have a whole bunch to say about it. That’s not because I don’t have anything to say, just I haven’t used it as much as I thought I would do. Maybe it’e because I haven’t been out doing much street photography, but when I have it’s been fine. Comfortable, discreet and secure, it hasn’t caused me any issues and it’s nice to have the camera ready to go at a moment’s notice.
The strap. What I can say? Following on from the 2 week update, it’s all very positive. I might even go as far to say that for me, it’s been a real game changer. Being able to clip the strap to the camera and take it off just as quickly means that I’m not constantly wrestling to take it on and off, and the speed I am now able to do this at means that I am doing more with my camera, and for me, that is always being to be a big tick in the positive column.
I’m impressed with the way this has worn. It’s been out in rain, hail, sleet and cold conditions and it’s doing fine. I’ll be honest, I was expecting some wear around the edges or some fraying but there’s nothing - this is a truly heard wearing piece of kit and is going to be handle most things that you are able to throw at it.
I’m happy with the width I chose, it’s comfortable around the neck and the length of the strap means that you can find a comfortable position for it to hang against your body. If there was one thing I could change about the strap that came with my camera, and a couple of others I have tried, it would be that they were longer as I found them uncomfortable, even cumbersome, but the Slide Lite eliminates that entirely, for me at least.
I love that that neither of these items are covered in really overt branding, it draws less attention to the expensive and highly desirable thing that is hanging around you neck!
*****************************************************************************************************************************
Pros and Cons
Slide Light
Pros
Great materials with an eye on sustainability.
Excellent build quality
The slide and slide light are available in a couple of length options giving some choice in how you wear the strap
The anchors are solid and offer a quick way to attache and remove the camera/strap.
Lifetime warranty!
Cons
Quite pricey, but you get what you pay for. There are cheaper options, but are they as good?
The metal hardware can be a bit abrasive so check where you are storing it in your bag to avoid marking anything.
Slimmer strap on the light means that weight isn’t as well spread out as with it is with the Slide, so if you’re carry heavy rigs, this should be a consideration.
Anchor links can flap about in the wind, creating issues for audio for video shooters.
Cuff
Pros
Ideal for shorter shoots or when you need the camera in “ready position” for those quick opportunities.
Great for mid-size setups.
Great materials with an eye on sustainability.
Excellent build quality
Minimal look.
Cons
A little expensive, but again, you get what you pay for.
Can be a little fiddly and restrict movement if you’re wearing gloves or a thick coat.
In Conclusion
Honestly, I think that both of these pieces of kit are well worth their respective money. In both cases, you’re getting a premium product and this is why they attract a higher price than other more generic straps. I’m a big believer in “buy cheap, buy twice” and you’re not going to be buying twice if you decide to make this investment.
If you’re concerned about flashing your camera model and advertising your camera to people who would like to relieve you of it, then the lack of obvious branding is also a plus.
The materials look great and are hard wearing, just be careful with the metal hardware and don’t let it scratch up your kit. this is east to avoid now you know it has the potential to be an issue - just be careful.
The Cuff is a good option for a secondary strap, especially if you are shooting in a variety of situations and need that flexibility and don’t want to have wear your camera around your neck or over your shoulder all day.
Both items are backed up by a lifetime warranty, software if you look after it, you might never need to buy another camera strap, as long as you are using it within the terms of the warranty!


Disclosure: This page contains Amazon affiliate links. If you make a qualifying purchase after clicking a link, I may earn a small commission at no extra cost to you. It helps support the blog and keeps new guides coming.
Who is it for?
Slide Lite
This really is for everyone who wants a good quality, hard wearing strap which you can buy in a variety of colours. It’s ideally suited to people who want to have the flexibility of having the strap attached and removed from the camera and not having to go through a massive effort to do it. Landscape photographers are going to find this useful, as are street photographers who value a strap as opposed to something like the cuff.
Cuff
I think that street and travel photographers are going to love this. It’s comfortable, compact and secure. Your camera is already in your hand when you’re wearing this and if you happen to let go of your camera then the strap is going to give you a better chance of catching it. If you’re on holiday and you’re trying to keep your pride and joy safe in hadn't, then this is definitely a worthwhile investment.
Where can I buy one?
You can get these from most reputable camera retailers online, and they are available direct from PeakDesign as well.
I got mine from Amazon and got both for less than £80 but there was a considerable discount on the cuff. Head to Amazon and get yours here!
Thanks for reading - I hope you have found it useful. If you want more stuff like this as well all of the updates, please head to the contact page and sign up to my newsletter and get updates direct to your inbox!
If you’d like to support the blog and help me keep producing Lake District photography content, honest gear reviews and regular website updates, you can do so via my Buy Me a Coffee page. Keeping everything running smoothly takes time, and your support makes a real difference. Thank you.
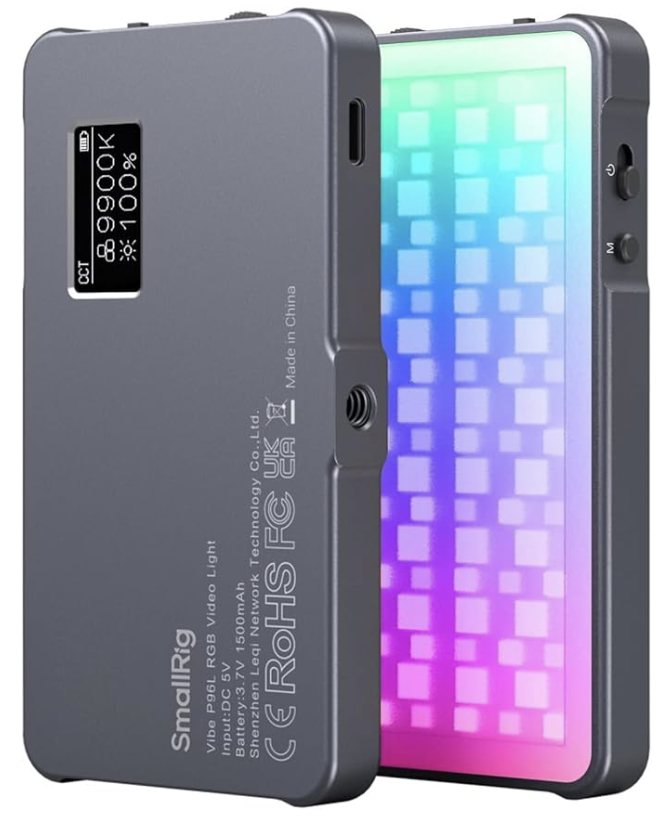
Gear Review: SmallRig Vibe P96L RGB Video Light
The SmallRig Vibe P96L RGB video light is a compact, pocket-friendly LED that’s ideal for content creators, vloggers and photographers who want reliable on-camera fill light without carrying a full lighting kit. In this review, I’ll cover real-world performance for macro photography, product photography and quick portraits, including colour accuracy, usability, and how well it works as a travel-friendly light. The P96L offers RGB plus adjustable colour temperature (2500–8000K), an OLED display for quick settings checks, and a sturdy aluminium alloy body designed for durability and heat management.
I’m sticking an extra entry in this week, as I wanted to review this light, 2 of which I received as Christmas gifts. These were things that I asked for after having done a bit of research so I had a decent idea of what I was getting and a rough idea of what it would do. This is my quick review after a couple of weeks of using them. I am going to try and keep this fairly short and concise.
This blog contains amazon affiliate links. If you click one of these links and then make a qualifying purchase, I may receive a small kickback - this is at no extra cost to you. This is a great way to support this blog and allows me to do things like creating these reviews.
So let’s jump into this quick review of the (not so) memorably named SmallRig Vibe P96L RGB Video Light.
Why Did I Get Them?
I wanted these not as video lights, which is there inteded purpose, but as small, portable, constant light sources that I could take out with me when I want to get a bit more creative, especially with macrophotography and when I want to use lower apertures, but keep the shutter speed as fast as I can. I don’t think I will use the effect feature that has been designed into these lights, but I will absolutely use the CCT and HSI functions (more on these features below), to creatively light some macro shots and to give myself some more creative flexibility. I have got some Pavotubes, but these are too big to cart around in my bag for occasional use so only really get used in the studio.
What’s in The Box?
This one is straightforward. You get the unit, an instruction leaflet and a charging cable (USB-C).They’re well packaged, and come in a well made Apple-esque box, which gives them plenty of protection on their journey.
First Impressions
The first thing I noticed when I opened the box was the build quality and look of these things. They look great and appear like they’re much expensive than the less-than £40 you have paid for them. I like the tacitly of the admittedly quite small buttons, and this will be beneficial when you’re working low light but could be problematic if you’re wearing gloves.
Interestingly, even though I got two of them, the amount of battery in each was vastly different. One was over 80% charged, whereas the other one almost completely flat. Don’t expect that you’re going to be able use it straight out of the box without having to charge it first.
Build Quality
These are really well made pieces of equipment. They are made out of an aluminium alloy which feels really premium, the front of them is covered in plastic which is textured and creates a nice bit of diffusion so you’re not just battling with bare LEDs. They measure around 108x60x11mm and weigh less than 120g, which means that they don’t take up much room in your bag and they’re not too heavy to carry around with you. It also means that they are small enough to hold in your hand but that they have a wide enough “base” to stand up on their own. They do have a 1/4” threaded tripod mount (female) if you want to attach them to anything, but if you want to mount them to your camera’s hot-shoe, you’re going to need to invest in something like the SMALLRIG Tilting Mount with Cold Shoe Adapter - I have a couple of these and they are great little bits of gear which will do the job of holding this light to your camera nicely without adding too much extra weight to your setup.
They aren’t weather sealed, so if you’re using them in poor conditions, or expect to be using them a lot in the rain, then look for a different, weather sealed option or plan ahead to make sure that you don’t get them soaked.
Ease of Use
These are really easy to use. The controls are simple, the LED display on the rear of the unit is clear, bright and easy to read. The buttons and dials on the top and side of the light are really tactile, which makes them easy to use when you’re working with limited light but might be a bit more of a challenge in cold weather or if you’re wearing gloves.
There is a mode switch on the top which cycle through the three modes, which are CCT, HSI and Effect.
CCT is Correlated Colour Temperature. The light has a range of around 2500 to 8000k and you can adjust the brightness and temperature this feature by using the wheels on the side of the unit. This will give you clean, accurate light. They are rated at CRI 96 so not too shabby in this regard, especially at this price point.
HSI is Hue, Saturation and Intensity. You can change the hue and saturation using the top wheel, which is “pressable”. Pressing the wheel in toggles between hue and saturation and you can adjust this by nudging the wheel up and down. Intensity (or brightness) is controlled using the bottom wheel. This will give you much more creative control.
Effect is exactly that. These are a group of pre-programmed settings which will create effects such the light from a TV, police, fire and ambulance lights and strobe effects. These aren’t something that I will use much as photographer, but those of you who shoot video may be able to find a use case for this. This will give you creativity and atmosphere.
These are all pretty intuitive and won’t take much learning, so ease of use gets a big thumbs up!
Battery
These come with a built-in rechargeable 1500 mAh lithium-ion battery, which charges fairly quickly and carries a decent amount of power. You can charge these with the supplied USB either hooked up to your computer or from a battery pack if you think you are going to run the battery down during a full day of shooting. I’ve been out with these for a full day and haven’t run them to empty, but this is going to be dependent on a number of variables such as the ambient temperature (they’ll not last as long in cold temperatures), how much your using them and what brightness you are using them at.
Who is This For?
The SmallRig Vibe P96L is best suited to photographers who need a compact, colour-accurate LED light for close-range work and creative lighting control. It’s a strong fit for product photography, still life, behind-the-scenes content and studio desk setups, where accurate colour rendering and quick adjustment matter more than raw power. With a CRI of 96, it’s particularly useful for photographers who want consistent, reliable colour when shooting details, textures or reflective surfaces. Its small size and built-in battery also make it a practical option for location work, travel photography and content creation, where portability and fast setup are essential. While it’s not designed to light large scenes or act as a primary key light, it works very well as a fill light, accent light or creative colour source for photographers looking to add flexibility to a lightweight setup.
Where Can I Buy Them?
I got mine from Amazon , and they cost £39.90. They are sold at wide range of photography retailers, so shop around for the best price.

Pros and Cons
Pros:
High colour accuracy (CRI 96) – produces natural, reliable colour, particularly useful for product and still life photography
Wide colour temperature range (2500K–8000K) – easy to match daylight, tungsten or mixed lighting conditions
Full RGB control – useful for creative accents, backgrounds and experimental lighting
Compact and lightweight – ideal for desk setups, travel and location work
Built-in rechargeable battery – no need for external power; convenient for portable use
Simple, intuitive controls – quick adjustments without breaking workflow
Multiple mounting options – 1/4″ thread and cold shoe compatibility increase flexibility
Good value for money – strong feature set for its size and price point
Cons:
Limited output power – not suitable as a primary key light or for lighting large scenes
Best suited to close-range use – effectiveness drops quickly with distance
Small control buttons – can be fiddly when working quickly or with gloves outdoors
RGB effects more niche for photography – some modes are more useful for video than stills
No weather sealing – care needed when using outdoors in poor conditions
Conclusion
The SmallRig Vibe P96L isn’t designed to replace a full lighting setup, but that isn’t really the point. Where it works best is as a compact, dependable and colour-accurate LED light that earns its place in a photographer’s everyday kit. The high CRI rating, wide colour temperature range and RGB control make it genuinely useful for product photography, still life work and close-range creative lighting, while its small size and built-in battery keep it practical for desk setups and location use.
If you regularly need a portable fill light, accent light or creative colour source, the P96L offers a strong balance of control, build quality and value. It’s not the light you’d reach for to illuminate a large scene, but for photographers who want flexibility without adding bulk, it’s a well-judged and versatile option that punches above its size.
If you’d like to support the blog and help me keep producing Lake District photography content, honest gear reviews and regular website updates, you can do so via my Buy Me a Coffee page. Keeping everything running smoothly takes time, and your support makes a real difference. Thank you.

The Problem with Social Media and Photography.
Social media has become deeply embedded in modern photography, but its influence is not always positive. From chasing likes and trends to comparing yourself endlessly with others, platforms can quietly shape how photographers create, edit and even value their own work. In this article, I explore the real problems social media introduces into photography, how it affects creativity and confidence, and why stepping back can sometimes help you reconnect with what matters most behind the camera.
Photography has never been more accessible — or more distracting. We’ve never shared so many images, yet spent so much time consuming other people’s.
Welcome to another blog post, can you believe it’s already Sunday evening again? Where on earth do the weekends get to?
Anyway…
I came up with this blog idea when I was writing my 10 Photobooks YOU Should Own Blog and I was typing about “On Photography” by Susan Sontag, a book in which she talks about the way in which we consume photography and how it could mean that we become desensitised to things such as the artrocities of war, how we could end up with a distorted view of the world around us. She explores the idea of control we have as photographers and also looks at how we can end up becoming people who consume life through photography instead of actually living our lives.
Strap in, I feel like this could end up becoming more of an essay than a blog entry, but we will see how we get on. I’m not even sure how long this one is going to take me to write (it’s currently 1 minute to midnight the night before the Amazon Black Friday Sale goes live and I am hoping to grab some bargain last minute Christmas gifts (EDIT: it’s now gone midnight and I was successful!), I have just finished and scheduled the photo books blog and I am trying to be productive instead of just sitting here scrolling. .
All of the things Sontag said resonated with me, especially that final point about consuming life through photographs (I’m going to include video in this as well). I think more so because I had myself just been consuming a couple of videos on YouTube about a couple of people who had brought “Brick” devices for their phones to limit the amount they are using them and to enable to break out of the cycle of doom scrolling.
This is a big bit of inspiration for this blog, alongside what I have read in Sontag’s book, coupled with some of my own experiences and those that have been shared with me by friends.
Social media is everywhere now, it has been for some time. It’s everywhere a lot of the time, because we take it with us. It’s on our phones, it’s in our pockets, it’s right in the palm of your hand, or at least within arms reach. And I’m not just talking about the obvious things such as Facebook, Instagram and X et al. I’m thinking about things like WhatsApp and Telegram, Discord and LinkedIn. I didn’t know until a few months ago when I was doing a digital marketing course that LinkedIn pre dated all of the things that I have just mentioned!
(Case in point… I finished writing the previous paragraph 15 minutes ago and that fifteen minutes has been lost because something popped up on my phone and I got stuck scrolling!)
The Internet Used to be a Place Where You Went.

When the internet first started to take off in the 90’s, it was clear it was going to be a big thing and that it was going to be important and was going to permeate every aspect of our lives. But back then, things were very different. Computers were huge, had massive CRT monitors, sat on big console style desks and took up a lot of room in the house.
At this point in time, mobile phones were similar… they were huge and didn’t do much other than make phone calls and there certainly wasn’t any internet on them.
But back to my original point about computers.They were so big that they didn’t move easily and the chances are that it was the only internet connected device in the house. It would be parked in a corner of a room, often a lounge, sometimes an office or a dining room. This meant that you had to move yourself to go the computer to access the internet… This meant that the internet was a place that you went.
There was almost a certain kind of ceremony to it - you’d log on and then have to connect to the internet through the phone line using your dial-up modem and if it connected first time then you had the world at your fingertips and a lot of what you could access was pretty basic! As Bo Burnham put it in “Welcome to The Internet”, it was a place of “catalogs, travel blogs, a chat room or two”. And as he goes on to say in the same song, these day’s it’s “a little bit of everything, all of the time”, and that can be quite distracting, especially as photographers when we are naturally predisposed to enjoy anything that is visual.
Now We Take The Internet Everywhere With Us.
And I mean everywhere. I think most people take their phone to the bathroom with them. Long gone are the days of reading the backs of the bottles of shampoo or a discarded copy of Take-a-Break. Now, we have the entire internet at our mercy, and social media is a huge part of the internet as we know it today. Facebook alone has over 3.07 billion active users. There are 8 billion people in the world so that’ almost 40% of the population, and that means there is an absolute ton of information being uploaded to it.
Then there’s YouTube. At the time of writing, you would need approximately 18,000 uninterrupted years (yes years) to watch all of the videos that exist on YouTube (you’d better have a premium account to ensure that you’re not wasting any of your 18,000 years watching adverts! (It was originally 17,000 year when I looked 3 weeks ago: the amount of content uploaded there is huge!)
And then there’s Instagram - the app that loves us to share our photos videos in the (often) vain hope that we will get our images seen by people other than our closest family and friends.
Oh, and TikTok… this can end up being a thief of life if you let it.
And let’s not forget X (formerly Twitter).
Now depending on the way you use social media and what you are looking/watching, how you consume it and what you’re into really affects this point that I am making:
I watch a lot of photography videos on YouTube (Nigel Danson, Thomas Heaton, Henry Turner, Peter McKinnon, James Popsys etc), I also watch a lot of popular science type content and I love watching ‘Kinging It’ doing up their “Scottage”! My other vice on here is fishing videos (something else I dabble in, but am not very good at). The first and last things in this are going to help me to make this point…
I love learning, I love getting better and I love cosuming this content and hearing the stories. But whilst I am watching YouTube and looking at other people doing it, I am not out there actually doing two of the things that I love. Sure, it’s great watching others and learning from them, but you can’t learn properly yourself without making your own mistakes. I work as a music teacher in “real life”, and I know that not one of my students would get better at playing the piano just by watching me and hearing how I corrected the mistakes. They need to make their own mistakes to be able to learn how to overcome them, and the same is true for us as photographers.
I have my own strategies for managing this; I tend to watch most of my YouTube when I am working in the studio (I am watching Henry Turner as I write this), it’s usually just on in the background and I will fully engage if something piques my interest.
I am on my phone too much, I know I am, mainly on Instagram for my sins. I upload my own content and consume that of others, but it still comes down to the same point; if I’m scrolling, I’m not shooting. If I’m not shooting, I’m not learning and if I’m not learning, I am most certainly not getting any better.
Making Comparisons
We all do this, we look at other people’s work and we compare our own work to theirs. This is great if you’re doing competitor analysis, but it can be harmful to your progress and growth, especially if you’re finding that people aren’t engaging with what you think is the best photograph you have ever taken!
Then, we fall into the trap of seeing an image we like and then going out and trying to take the same image. It’s probably one we have seen elsewhere before and this serves as a bit of a memory jog for us. When we stop scrolling and go out to take our own image, we don’t think it’s as good or we didn’t enjoy the experience, or when we got there, everyone else was there trying to take the same shot that they have also seen on Instagram and now yours is just going to get lost in amongst all of the others. Now, it’s overdone and no one is bothered any more. Social media is full of a lot of noise.
If you get stuck in a scrolling-cycle, you are becoming one of those people who is consuming life through photos and not enjoying life by living it. Be the person who people want to copy, get that original shot, find the new angle on an old favourite, but you aren’t going to do that sat on your bottom, in your lounge trying to get to the bottom of Instagram/YouTube/Facebook/etc/etc/etc.
So What Can You Do About It?
This is going to feel a little bit like a PSHE lesson, so prepare yourself…
Ultimately, this will be down to you and how you think you can manage it. I’ve already mentioned that I try to limit my YouTube consumption to times when I am working on stuff like this blog or when I am editing photos. I must admit though, I do still enjoy a bit of YouTube whilst I am eating!
Scrolling is a bit more of an issue for me, especially when I am sat in front of the TV. I have made it a bit of a mission for the new year to try and scroll less and to be more present, and it’s going to take a lot of discipline and/or will-power, but if it gets too much I might try one of those Brick devices that I mentioned at the start of this blog. All of these things will, if I do them, help me to be a little more present, and it might even help my sleep as I won’t be saturated with blue light before I try and get my head down.
Remember, social media isn’t always real. In fact, I would say that it’s largely not true to life, and this is even truer with the advent of AI and the bubble that is continuing to grow. I know I have been using some AI images in this blog, but I think these ones are particularly obvious, (although they do look a little bit like me). I do it because it’s easy and I can get exactly what I need, relatively quickly. There are some very good AI images and videos that have been made by people far better at it than I am, which are really convincing (maybe not the Coca-Cola Christmas advert though!), and you need to be on it if you want to spot them.
To add to this ‘lack of reality’ (or maybe it’s a lack of truth), people only tend to share the good stuff or the exciting stuff. You don’t see the less exciting stuff, you don’t see the events that have happened that are dull or maybe to private to warrant sharing online. Don’t be sucked into thinking that someone has a perfect life - they don’t. No one does. I think people are getting better at sharing more of the less perfect things, but there’s a long way to go with this.
Instagram has moved on a great deal since the days of people uploading pictures of their dinner and it’s not just about photos anymore, in fact, it’s probably less about photos at the present moment and is very much a video-first platform, because that’s what people are more likely to engage with. The sad reality is that if you want to grow and get yourself out there on most platforms these days, you need to be creating and sharing videos.
Get out there, live your life and don’t live yours through someone else’s experiences. You’ll thank yourself for it later.
Final Thoughts
Social media isn’t the enemy. It never really has been. It’s a tool, and like any tool, it’s all about how you use it. Used well, it can inspire you, connect you with like-minded people and help you learn. Used badly, it can quietly eat away at your time, your confidence and your motivation to actually go out and make photographs.
As photographers, we’re naturally drawn to visuals. That’s what makes social media so compelling for us, but it’s also what makes it so dangerous. It’s very easy to convince yourself that scrolling counts as learning, or that watching other people do the thing is the same as doing it yourself. It isn’t. You don’t get better at photography by consuming more photography. You get better by going out, making mistakes, missing shots and occasionally getting something right.
Try to be mindful of how and why you’re using these platforms. Notice when they’re helping and when they’re just filling time. And if you catch yourself stuck in that endless scroll, remember this: every minute spent watching someone else make photographs is a minute you could have spent making your own.
Get out there. Be present. Live the moments you want to photograph, don’t just consume them through a screen. Your photography — and probably your headspace — will be better for it.
If you’d like to support the blog and help me keep producing Lake District photography content, honest gear reviews and regular website updates, you can do so via my Buy Me a Coffee page. Keeping everything running smoothly takes time, and your support makes a real difference. Thank you.
Gear Review: Benro Mach 3 Tripod and Benro GX30 Ballhead.
The Benro Mach3 tripod with GX30 ball head is a lightweight yet highly stable support system designed for photographers who need reliability in the field. In this in-depth review, I look at build quality, usability, stability for long exposures, and how it performs for landscape and travel photography, helping you decide whether it’s the right tripod for your kit.
I am way more excited about the purchase and delivery of a new tripod and ball head than I should be. These two things aren’t known for being the most exciting things in (or attached to) a landscape photographer’s bag; they’re engineered bits of aluminium, plastic and rubber which are designed to keep our cameras steady. So no, not exciting, but are they essential? Absolutely they are. Even with in body image stabilisation (IBIS) and the advances in lens stabilisation that we have seen in the last few years, there is still a necessity for us to own a tripod so that we can get the shots that we need, especially for long exposure work.
This blog contains Amazon affiliate links, if you click one of these links and make a qualifying purchase, I may receive a small kickback. This is great way to support the blog means that I can write reviews like this one as the blog moves forwards.
This review is of the Benro Mach 3 Series Three Aluminium (Long) Tripod.


Disclosure: This page contains Amazon affiliate links. If you make a qualifying purchase after clicking a link, I may earn a small commission at no extra cost to you. It helps support the blog and keeps new guides coming.
Benro Mach 3 Tripod.
There are a number of different options for you to consider when you make this purchase. The first decision you need to make is what do you want it to be made of? This is going to decide two things; how heavy the tripod is, and how much you pay. You have two choices: aluminium and carbon fibre. Carbon fibre ups the price quite considerably. The aluminium version which is the one I have, is currently listed on Amazon for £145 whereas the carbon fibre version with set you back £299. It’s a considerable amount more, so if weight is a serious consideration for you then be prepared to pay for it. If not, then opt for the aluminium.
You can then choose between twist locks and flip locks. This one comes down to personal choice, but I like the twist locks as I have found in my experience, these have been easier to operate, especially when it gets cold and I have snapped a couple of the flip locks on older tripods.
The final choice you have is about the height of the tripod. It comes in 3 different heights, the standard, L and XL. The height and the material are both going to impact the weight of the tripod. I have put all of this into a table so you can compare the different versions for yourself to help you make a more informed decision.
| Benro Mach3 Tripods – Key Specifications | |||||||
|---|---|---|---|---|---|---|---|
| Model | Max Height | Min Height | Closed Length | Material | Weight | Load Capacity | Eye-level up to |
| TMA28A | 155.5 cm (61.2″) | ~54 cm (21.3″) | ~54 cm (21.3″) | Aluminium | ~1.8 kg | ~12 kg | ~165.5 cm (5′5″) |
| TMA27A | 161.5 cm (63.6″) | ~51 cm (20.1″) | ~51 cm (20.1″) | Aluminium | ~1.7 kg | ~12 kg | ~171.5 cm (5′7½″) |
| TMA37C | 161.5 cm (63.6″) | ~51 cm (20.1″) | ~51 cm (20.1″) | Carbon Fibre | ~1.3 kg | ~10 kg | ~171.5 cm (5′7½″) |
| TMA38CL | 177 cm (69.7″) | ~60 cm (23.6″) | ~60 cm (23.6″) | Carbon Fibre | ~1.5 kg | ~10 kg | ~187 cm (6′2″) |
| TMA37AL | 179 cm (70.5″) | ~57 cm (22.4″) | ~57 cm (22.4″) | Aluminium | ~1.9 kg | ~12 kg | ~189 cm (6′2½″) |
| TMA48CXL | 210.5 cm (82.9″) | ~68 cm (26.8″) | ~68 cm (26.8″) | Carbon Fibre | ~1.9 kg | ~10 kg | ~220.5 cm (7′3″) |
| AL Series 4 XL | 216.2 cm (85.1″) | ~70 cm (27.6″) | ~70 cm (27.6″) | Aluminium | ~2.4 kg | ~12 kg | ~226.2 cm (7′5″) |
*Eye-level up to: approximate guide based on tripod maximum height plus ~10 cm. This excludes ball head and camera height and is intended for comparison only.
- Most portable: TMA37C (light carbon) and TMA27A (compact aluminium).
- Best all-round height: TMA38CL if you want extra reach without going XL.
- Best for taller photographers: TMA37AL (long aluminium legs).
- Maximum height: TMA48CXL and AL Series 4 XL.
- Best value: TMA27A / TMA28A.
I have opted for the ‘Long’ version of the Mach 3 (TMA37AL). This extends up to around 70.5” (including the centre column) which is a really comfortable working height for me at 6ft 1 tall.
Finally, you can choose between three section and four section tripods. This is purely the number of ‘pieces’ that the legs of your tripod are divided into. I have gone with the 3 section because some of the places I shoot need the stability that is provided by the wider leg section construction, it also means that there is much less faffing about when you are putting up and taking down your tripod.
Benro GX30 Ballhead.
So here, again, we have a number of options available to us when choosing GX ball head. There is is the GX25, GX30 and the GX35. This one comes at a price of around £109, depending where you choose to buy from. I got mine from Amazon.
| Benro GX Ball Heads – GX25 vs GX30 vs GX35 | ||||||
|---|---|---|---|---|---|---|
| Model | Max Payload | Weight | Height | Ball Diameter | Base Mount | Key Features |
| GX25 | 25 kg (55 lb) | ~340 g | 8.5 cm (3.34″) | 30 mm | 3/8″ | Dual panning, Arca-Swiss QR, safety lock |
| GX30 | 30 kg (66 lb) | ~380 g | ~9 cm (3.54″) | 36 mm | 3/8″ | Dual panning, smoother control, higher capacity |
| GX35 | 35 kg (77 lb) | ~400 g | ~8.5 cm (3.34″) | 40 mm | 3/8″ | Largest ball, highest load handling |
In the case of the ballhead, I have opted for the GX30 which is the middle of the range. Thos will handle (on paper) up to 30kg, which is way more than I need, but gives me plenty of headroom and lots of security for my kit when is mounted on the camera. I think for me, this choice was about flexibility and ultimately, peace of mind.
What you’re paying for more here is more material and more engineering to work that material into something which handles more weight on your ball head. They all have dual panning, safety locks and have the Arca Swiss Plate mounting system. They are made out of CNC machined aluminium which means the build quality is great, they’re consistent and they are light weight.
What’s in The Box?
Benro Mach 3 Tripod
Unsurprisingly, you get the tripod, which comes in a decent carrying bag, all inside a protective blue bag, which I thought was a nice touch and means everything arrives in pristine condition. You also get a set of spiked feet and a spanner to attach them, a long, adjustable carry strap for the bag and there’s also a short centre column if you want to do some macro or low level work, though if you didn’t want the height of the tall centre column or if you just wanted to save a bit of weight as it’s quite a heavy piece of kit, coming in at just under 2kg before you have attached the ball head.
Benro GX30 Ballhead.
This one is more straightforward. You get a box with a well packaged ball head in it. It doesn’t need much else. The first one that was sent to me had a stuck locking bolt which wouldn’t turn and meant that the bottom panoramic section of the ball head wouldn’t lock. This meant that the ball head was all but useless. I got mine from Amazon and the returns process is currently underway, a replacement has been dispatched and I will update when it arrives!
It’s now two days later and the replacement has arrived and is perfect. Everything turns as it should do, it’s well made and I really like the look of it.
It all feels really smooth and everything tightens down (and loosens up) really well.
First Impressions:
Benro Mach 3 Tripod
The first thing you will notice about this is that it’s a big ‘ol piece of kit; folded up it’s just over 2 feet long and it weighs just under 2kg. If you’re looking for something small and light, then this isn’t for you. If, on the other hand you are looking for something sturdy and stable, then this is going to be right up your street. When erect, it has a wide footprint which gives plenty of stability, and with the correct adjustments, this tripod will get nice and low to the ground for when you’re grabbing some of those flower shots or you’ve found some interest low down.
The twist locks are smooth, quick to operate, hold everything really securely in place and will give you some real confidence that it’s going to hold on to your precious gear.
In spite of its chunky legs, if you use a smaller bag such as the Lowerpro Fastpack, it fits snugly into tripod straps at the base of the bag. If you’re using something larger like the LowerPro Pro Tactic 450AWII then it’s going to need to be attached to the back of your bag via the webbing; it’s not going to fit into the side pouches, which I think are for your water bottle anyway!
Fully extended, without the centre column raised, this comes up to my eye level (I'm 6ft 1) and with the centre column at its fullest extension it’s getting on for 6’6”. That’s more than enough height for my landscape photography needs.
Benro GX30 Ballhead
Like I said at the start, the first iteration of this I was sent was faulty and a replacement was sent out very quickly and Amazon will be dealing with the rest of it.
Now that I have my (fully functioning!) replacement unit, I’ve had a chance to play with it and I really like what I have. The first thing the you notice that for something which is so well made, this is surprisingly light, though not as light as its GX25 counterpart.
I can now turn all of the knobs properly and I can say that they’re really smooth and tighten up really quickly. The panoramic axis knobs don’t turn as much as the others, but this is a useful ‘feature’ insomuch as you don’t need to spend ages tightening them back up when you’re done.
One thing that I really like, although it may take some getting used to is the safety release mechanism which holds the Arca Swiss plate in place. This knob sits on a spring which you need to pull so that you can remove the plate from the tripod, meaning that, if for what ever reason you knock it, it comes loose (which to be honest, feels incredibly unlikely) or you don’t tighten it up enough, you’re not going to end up watching your beloved camera hurtling to the floor.
The Swiss plate is beautifully machine and sits perfectly since its slot on top of the ball head. If you prefer an L-bracket, then it will (according to my research!), accommodate most L-brackets. I have a fairly basic one attached to my camera and it fits with no issue, secures easily and feels solid.
The whole thing sits comfortably atop the tripod to make a wonderfully smooth, secure base for your camera.
Real World Use
The Benro Mach 3 and GX30 ball head are a great combination. After getting used to the new setup and a bit of figuring out the new twist locks and collar brackets (Where you can set the angle of the legs), it goes up really quickly and provides a really solid base to shoot from. The spread of the legs is really wide, which makes it a really stable platform.
The hook on the centre-column means that if you’re needing the extra security of some more weight, you can hang your bag/similar on here and you’ve got something which is well anchored to the floor and your camera is going nowhere.
The whole thing seems just as at home on soft ground as it does on hard ground, the ground spikes give you that bit of extra security in the really soft stuff, or if you’re out in the in the snow and ice, then you can be confident that your kit isn’t going to start sliding away from you.
I don’t think, for me at least, I will be using the carrying bag very often. Whilst it’s great for keeping it safe and secure when it’s not in use, it’s a bit on the cumbersome side if you’re carrying your bag as well. You’ll be better off strapping the tripod to your bag and leaving the case behind/
On the other hand, if you’re travelling light and you’re not out putting in the hard miles, the carrying bag might make a more sensible decision to take with you and have the camera on your strap.
I think the Mach 3 is ultimately going to end up becoming my “daily driver”. My previous mainstay has now found itself set up (already) in the studio with a macro rail on it, ready for some more precise commercial work. I think that given the amount of space I have in the studio, the Benro Mach 3 is a tripod that will be used mainly in the outdoors.
Disclosure: This page contains Amazon affiliate links. If you make a qualifying purchase after clicking a link, I may earn a small commission at no extra cost to you. It helps support the blog and keeps new guides coming.
Pros and Cons
Benro Mach 3 Tripod Pros and Cons
| Benro Mach3 – Pros |
|---|
|
| Benro Mach3 – Cons |
|---|
|
Benro GX30 Ballhead Pros and Cons
| Benro GX30 – Pros |
|---|
|
| Benro GX30 – Cons |
|---|
|
Who is This Tripod For?
This is most expensive tripod I have ever owned, but in the grand scheme of things, it isn’t a super expensive tripod/ball head combination; these can run into many more hundreds of pounds that we have talked about in this blog. I wouldn’t urge you to run out and buy one as your first tripod for the simple reason that if you buy this and then decided it’s not for you, it’s an expensive ornament and there’s not a lot else you can do with a tripod, other than tripod.
For me, this tripod is aimed at serious landscape photographers with some experience under their belt. It’s rugged and well made, which means it will handle some of the roughest terrain you can throw at it.
Conclusion
Ultimately, the Benro Mach3 sits firmly in the “reliable workhorse” category rather than the ultra-light travel end of the spectrum. If your priority is stability, durability, and confidence when working with heavier camera setups in challenging conditions, it’s a tripod that makes a lot of sense. It may not be the smallest or lightest option to carry all day, but what you gain in rigidity and dependability often outweighs that trade-off, particularly for landscape, long-exposure, and low-light photography. As with most gear decisions, it comes down to how and where you shoot, and for photographers who value stability above all else, the Mach3 remains a solid and dependable choice.
In the context of ball heads, the Benro GX30 strikes a compelling balance of strength, smooth control, and everyday versatility. It’s robust enough to confidently hold mid-to-large camera and lens combinations, yet compact enough to stay out of your way when you’re out in the field. While it isn’t the lightest or lowest-profile head on the market, its combination of load capacity, dual panning options, and Arca-Swiss compatibility makes it a reliable choice for landscape photographers, travel shooters, and anyone who likes to shoot with both precision and ease. If you want a ball head that can do it all without feeling overbuilt or overly complex, the GX30 is a solid, dependable tool that’s well worth considering.
All in all, when put together, this is a strong, solid and ultimately very dependable combination of a tripod and ball head which will serve you well in rough terrain, as well on the waymarked. Whilst quite heavy in comparison to other tripods of a similar height, what you gain in weight you gain in a strong, stable platform from which to create your new favourite photo.
If you’ve found this post useful and would like to keep up with future blogs, gear reviews, and Lake District photography updates, you can sign up to my newsletter via the contact page. I only send emails when there’s something worth sharing, and it’s the easiest way to stay in the loop without relying on social media algorithms. If you’d like to support the blog more directly, you can also do so via my Buy Me a Coffee page. Any support goes straight back into keeping the site running and creating more in-depth guides, reviews, and photography content. Thanks for reading — it’s genuinely appreciated.
Check out some of my other blogs below
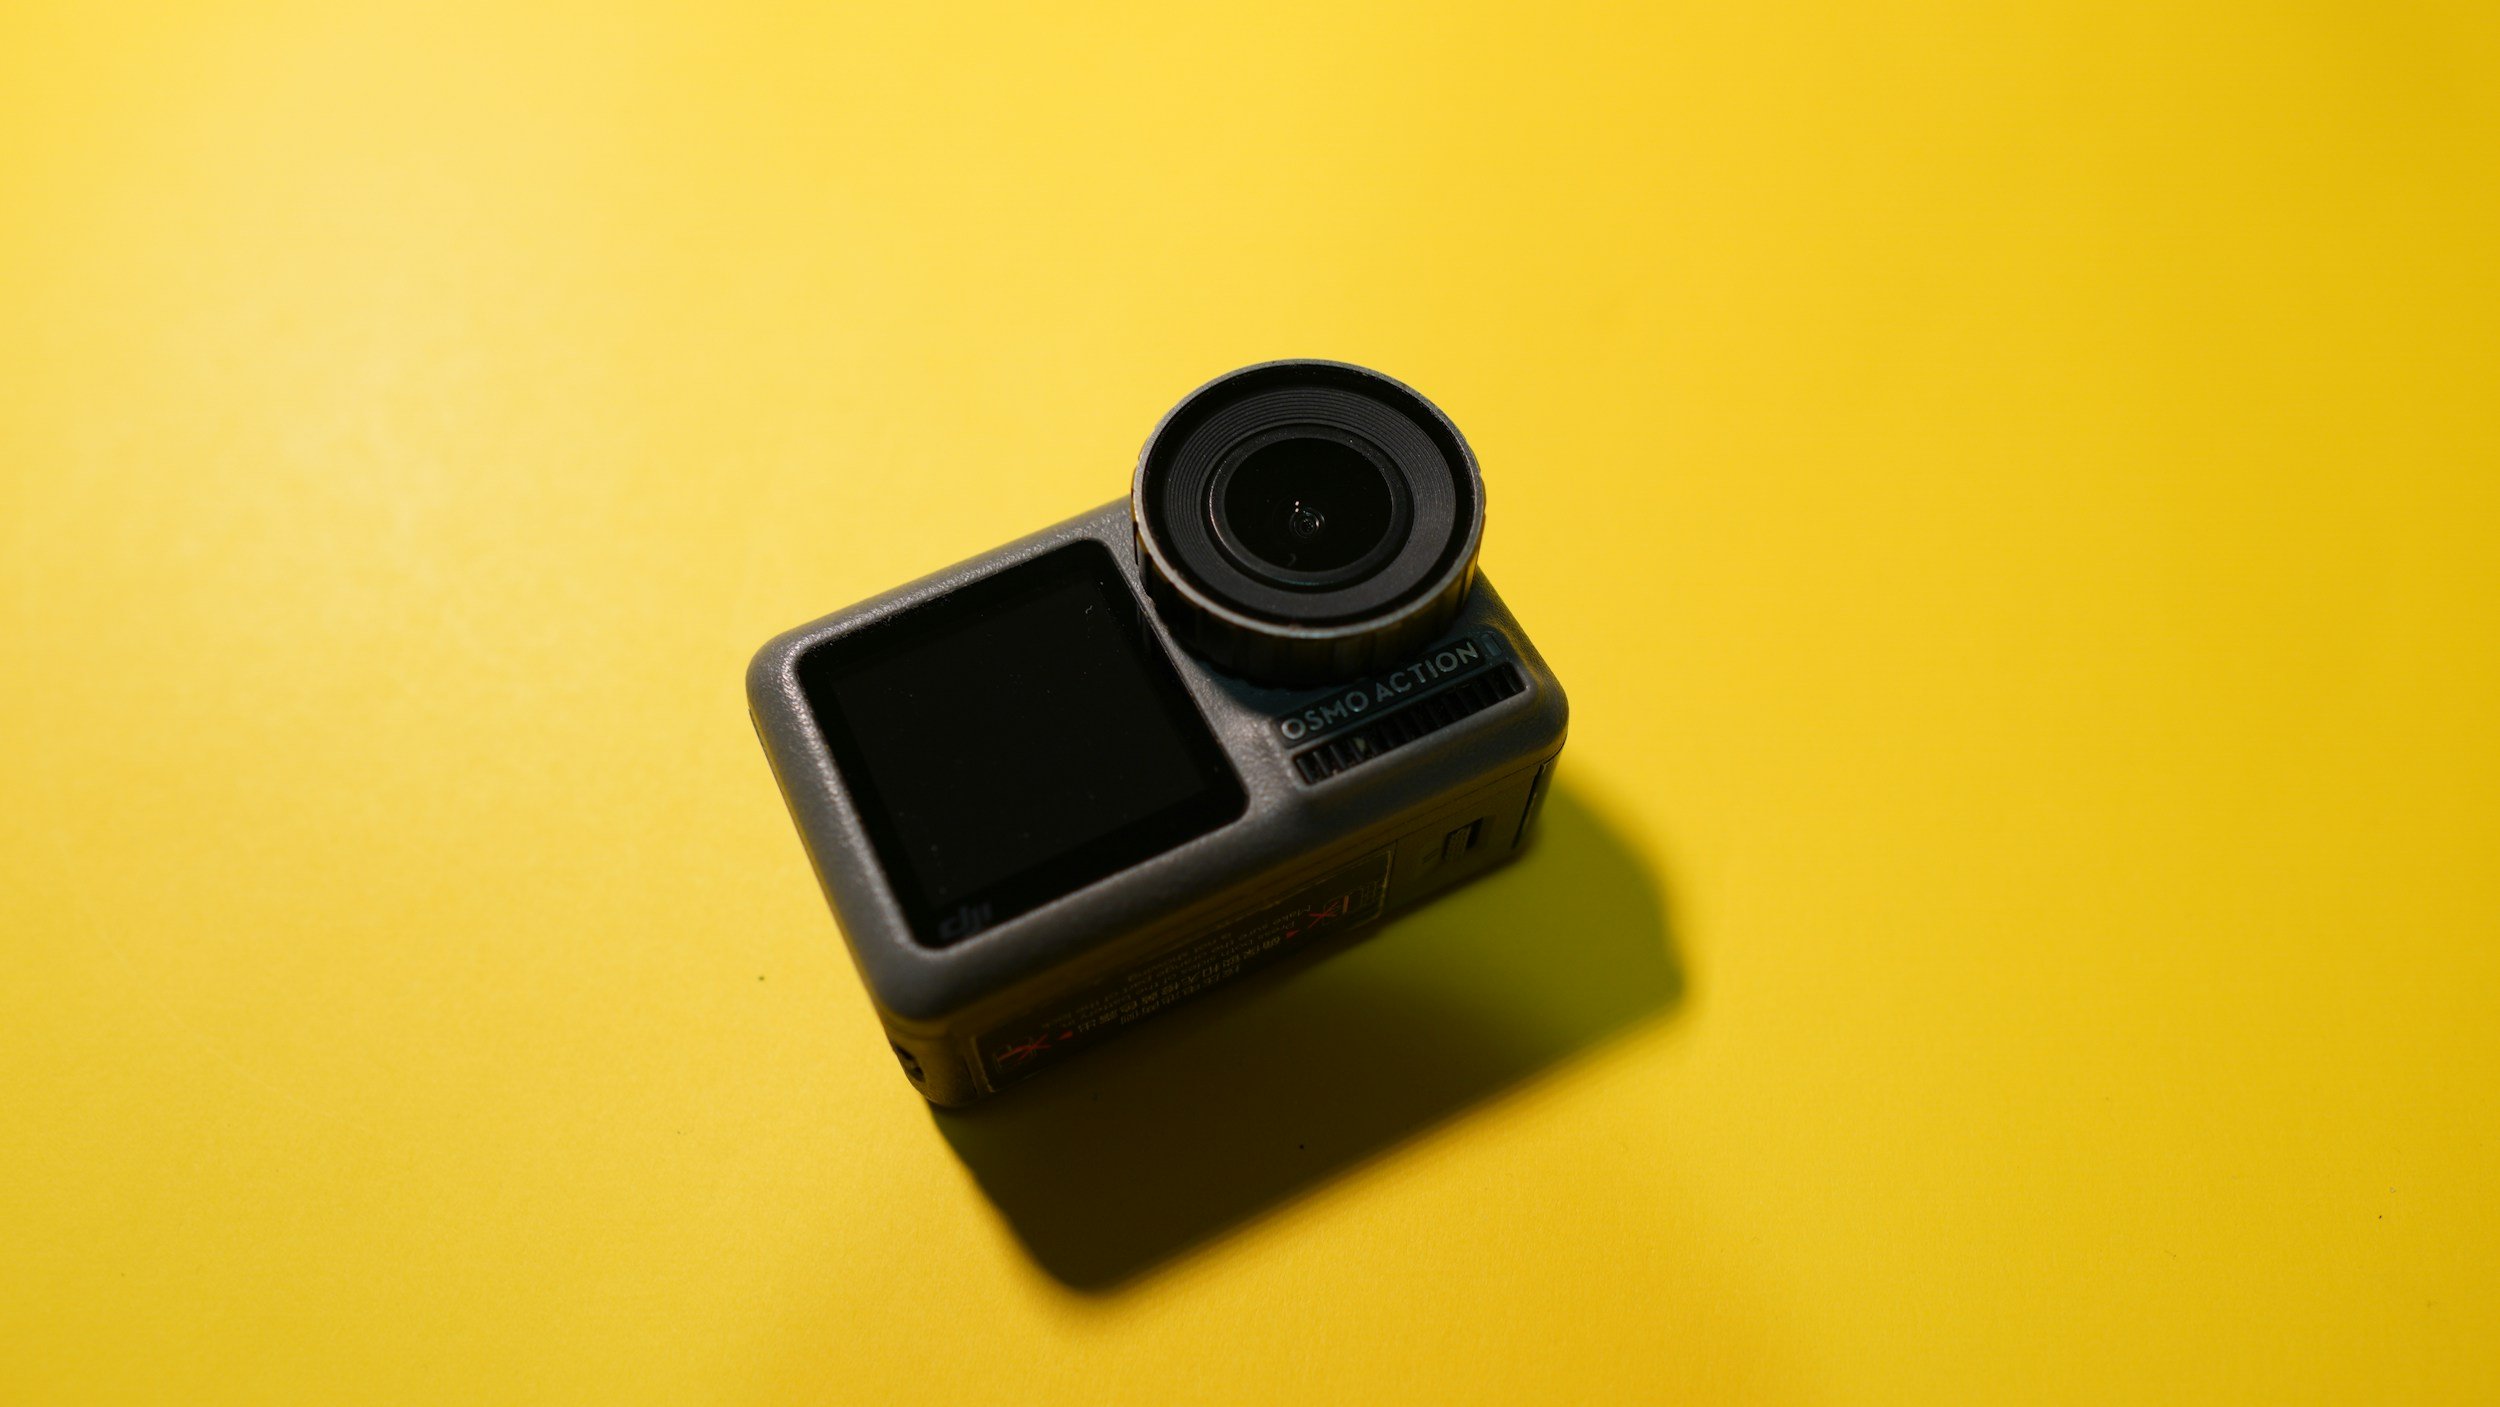
Gear Review: DJI Osmo Action 4. Worth it in 2026?
The DJI Osmo Action 4 is a compact action camera designed for photographers and filmmakers who want high-quality video and reliable performance in challenging conditions. With its larger 1/1.3-inch sensor, improved low-light performance, and robust weather sealing, it promises more than just point-and-shoot convenience.
In this review, I take a closer look at how the DJI Osmo Action 4 performs in real-world use, including image quality, stabilisation, usability, and how it fits into a photographer’s kit alongside a mirrorless or DSLR camera. I’ll also cover who this camera is best suited for, where its limitations lie, and whether it represents good value compared to other action cameras on the market.
Ok, so full disclosure here, I got this in the Amazon Black Friday sale on December 1st, last year, (that’s 2025 if you’re here really late!). It was part of a flash sale they had on some DJI products and I bagged the DJI Osmo Action 4 for £150; an absolute bargain when you consider that on the same day, it was on sale on DJI’s own website for £289. I’m pretty chuffed with the bargain I bagged on this one. I wasn’t actually looking for anything but this was too good to miss.
But why the Osmo Action 4, it’s had two successors since its launch, haven’t I just bought something that is already out of date? For me this was about value for money and adding value to what I do. No it’s not going to produce cinema worthy movies (at least not in my hands!), but it is going to give me felixibilty and add value to what I do, particularly to my social media offering in ways that my current kit doesn’t allow me to. At least not as well or as conveniently as this does.
I already own the DJI Action 2 and I like it, but it’s a touch on the fiddly side and I wanted something that gives me a bit more (the OSMO Action 4 already trumps it on being able to shoot in D-Log, something which will be a game changer for me) and that will also give me some more flexibility if I want to talk to camera but not have to break out the DSLR to do it.
This blog contains Amazon affiliate links. If you make a qualifying purchase after clicking one of these links then I may receive a small kickback.
First Impressions?
I was surprised how small the box was, but then remembered it’s only an action camera so I am not sure what I was expecting. I’ve not had a massive amount of time to play with it, but it feels good quality, the screens (front and rear) are both really clear and responsive.
One thing that was quite quickly brought to my attention when I put my SD card in is that it wasn’t fast enough. This is something I should have known/realised, but if you’re shooting memory dense 4K footage then you’re going to need a V30 memory card in the DJI Osmo Action 4 - it just means that your card will be handle the mountains of data that are being thrown at it in a way that won’t lead to constant crashes. I’ve ordered one and hopefully this will be enough. I like cards from Lexar and Sandisk. I would recommend 256gb or 512gb for this camera. (Update: It’s arrived now, I went with a Lexar 256GB. I have it formatted in the camera and it’s working a dream and at 4k 30FPS is indicating it will hold about 4 hours worth of footage, more than enough for my needs)

I went for the ‘essential’ combo, and in that you’ll get the camera, a battery, a mounting cage and a bolt to attach it to GoPro type accessories. I’ve tried some of the generic GoPro attachments I have in the studio and they all fit fine. You also get a USB cable and some stickers. The final thing you’ll find is a lens hood which is great for attaching if you break the protective lens cover, but be aware that if you don’t have the protective cover fitted, the camera isn’t waterproof!
It’s solid feeling little unit, but I think it will need to be handled with care in order to protect the lens. It’s not too heavy and will likely spend a lot of time in a Smallrig cold shoe mount attached to the top of my camera for some BTS and timelapse work.
The unit comes supplied with a plastic protective “frame”, similar to what you would get with a go-pro, but if you’re not familiar with these, then it’s a bit like a bumper case for a mobile phone. You also get the magnetic quick release mount, which I really like. The magnets are strong and the way it attached to the bottom of the camera feels really secure. It’s the same as on on DJI action cams and it works (for me) really well. You’ll also get an Osmo locking screw, which is for attaching the camera to tripod mounts, handlebar mounts or whatever other attachment you decide you want to put it on. You name it, there’s probably an attachment for it. If you’re coming from GoPro then you’ll find that most of the stuff you already have will fit onto it quite easily without the need to buy a ton of new stuff.
I have an old GoPro Hero7 Silver, and the DJI Osmo Action 4 is slightly bigger than this, but that bigger sensor has got to go to somewhere, as well as all of the tech to support the front and rear screens. The touchscreen is bigger than on the GoPro and this is a very welcome addition. The menus are easy to navigate and the settings are where you would expect them to be. If you already own a DJI action cam or any of their gimbals then the menus are going to feel very familiar to you. They’re not quite as easy (for me at least) as the Canon menus, but then maybe I am a bit biased!
Battery Life
This is advertised as being upto 160 minutes, so well over two hours, but this is obviously going to depend on a number of variables such as the camera settings you are using.
Charging this camera isn’t the fastest, I haven’t completely emptied it yet, but even from 60%, it takes well over an hour to charge. Your experience may vary, but this is one of the drawbacks for me.
Using the OSMO Action 4
Pairing with the DJI Mimo app was a breeze, and like with other things from DJI, you can use your phone as a sort of field monitor to get things framed up well. I have always found this to be beneficial with things that have a smaller screen to work with, no matter how clear the screen is.
Talking of the screen, it’s clear, it’s responsive and easy to use. Navigating the menus is easy and with up to 750nits of brightness, it’s going to be easy enough to see in bright sunlight.
This is a really intuitive piece of kit, and within minutes of getting the battery inside it, I was ready to go and play with it, but the weather and the darkness put paid to that for its first night.
The menus are really intuitive and easy to find your way around, there’s nothing complicated here. Everything is easy to find and is where you would expect it to be. Make sure to activate pro-mode if you’re wanting to take advantage of the d-log profile inside here.
One thing I don’t like, and its a gripe with a lot of action cameras is that it’s a pain in the you-know-what when you need to the card out of the camera - the whole cage has to come off so you can access the doors and their slots. I know this isn’t a massive issue, I really do, but I also hate the faff that comes with getting the card out of the camera!
The first use out and about was easy, just using the controls on the camera. Nothing fancy, just hand-holding and shooting. This is probably really picky, but the buttons on the camera itself are quite stiff and take a fairly firm press to activate. Again, not a huge issue and I’d be complaining if it started recording when I didn’t want it to because the buttons were pressed to easily. Just make sure you have got the shot and then leave a little pause before you press the button to stop recording so as not to introduce unwanted movement into your footage.
Who is it for?
There’s the obvious audiences for this; people who want to record FPV sports, people who want to record FPV anything, cyclists… the list goes on. But what about applications for photographers and content creators?
I bought this as I want to do some more BTS footage for my social media, as well as some small pieces to camera, and this was an ideal camera for me to do this with, and at the price point I got it at, it was a no brainer. It also has time-lapse functionality, something else which I value and it records slow mo in 1080p at 240fps. I’m not sure what my application for this will be yet, but I am sure I will come up with something in the future.
Video Quality
This is what you would expect from DJI. It’s pretty damn good. One of the major selling points for me with this camera was the ability to shoot in D-Log; I have been longing to be able to shoot and grade my own log footage for sometime, and this is going to allow me to do that.
This camera shoots in 4K upto 120 and in 1080p, you can double that to 240fps.
The stabilisation in this camera is first rate. I am not known for being the steadiest person at times and having this is great when I am hand holding, or if the camera is on a tripod being battered by the wind!
Have a look at the video below and take a look at the difference between the graded and the ungraded footage. I have done all of the grading in PremierPro, I’ve still not quite got my head round DaVinci enough to be willing to share it yet! I’ve also popped a download link to some ungraded log footage at the bottom of this page, so that you can have a play with it before you make a purchase, if that’s the kind of thing you like to do.
DLOG Footage transitions to a really basic, saturated colour grade using DJI Input LUT and some basic colour correction.
Pros and Cons
Pros:
Clear, easy to navigate menus make using the camera easy.
Large f/2.8 aperture and large sensor aid low light shooting.
Dual touchscreens are really useful for vloggers.
Good video specs — 4K video up to 120 fps, 10-bit colour, and 240 fps slow-motion at 1080p make it versatile for cinematic clips, action shots, or creative video.
Cons:
Charging takes a long time.
400mm minimum focus distance makes some close up shots unachievable
Photo output is 10MP which isn’t a massive amount of resolution.
No ultra-high (e.g. 5.7K) video resolution — For creators needing very high detail or future-proof 4K oversampling/creative cropping, the 4K max could feel limiting.
Where can I buy one?
I got mine from Amazon in the Black Friday sale, so you might not get the sam great price that I did, but check them out by clicking here.
In Conclusion
I really like this piece of kit, it will give me flexibility and a wide variety of options when it comes to recording video out in the field and I need my “big camera” for the business of taking photos. I will probably stick to using something more substantial in the studio when I need video, though the D-Log makes it a very appealing option for the added colour grading flexibility.
It comes with enough accessories to get you started, but if you don’t have many attachments then I would recommend getting a few adapters and such like so that you have some of your bases covered. Oh, and don’t forget to get that V30 memory card when you order it.
The 4K is a really nice thing to have and the d-log profile gives you a ton of extra flexibility when you’re editing allowing you to make the footage look how you want it to and not how the camera things it should.
It’s lightweight enough that you’re not going to break your back carrying it around with you but you’ll want to make sure it’s well protected in your bag so that your preserve the lenses.
Thanks for reading, I hope you found this useful/insightful! If you’d like to be the first hear about new blogs and reviews and to keep up to date with what I am doing and see my latest work, please consider signing up to the mailing list via the contact page.
If you’d like to support the blog and help me keep producing Lake District photography content, honest gear reviews and regular website updates, you can do so via my Buy Me a Coffee page. Keeping everything running smoothly takes time, and your support makes a real difference. Thank you.
Downloadable Log Footage
Click the button to start the download. This is raw, 4K, ungraded footage, straight out of camera but with the audio removed.
The Nerdy Techie Stuff
The spec table below should answer any questions you have about the spec of this camera.
| DJI Osmo Action 4 – Key Specifications | |
|---|---|
| Image Sensor | 1/1.3-inch CMOS |
| Effective Photo Resolution | 10 MP (≈ 3648 × 2736) |
| Lens / Field of View | f/2.8, 155° ultra-wide |
| ISO Range | ISO 100 – 12,800 (photo & video) |
| Max Video Resolution | 4K (3840 × 2160) up to 120 fps (16:9); 4K 4:3 up to 60 fps |
| Slow Motion | 1080p Full HD up to 240 fps |
| Video Colour / Codec | 10-bit colour, D-Log M; H.264 / HEVC (MP4) |
| Stabilisation | RockSteady 3.0, HorizonSteady, HorizonBalancing |
| Screens | Dual colour touchscreens (front & rear) |
| Waterproof Rating | Waterproof to 18 m (without housing) |
| Operating Temperature | Cold-resistant down to –20 °C |
| Dimensions | 70.5 × 44.2 × 32.8 mm |
| Weight | 145 g |
| Battery Life | Approx. 160 minutes (varies with settings) |
| Connectivity | USB-C, Wi-Fi (2.4/5 GHz), Bluetooth 5.0 |
| Photo Formats | JPEG, RAW |
My New Year Photography Goals as a Landscape and Commercial Photographer 2026
In this entry, I am talking about my 10 photography goals for this year, both as a Lake District based landscape photographer and as a commercial photographer working out of my studio in Cumbria. Jump in to see what I am going to try and do to improve my photography, grow my business and the way that I print my images.
Welcome back to my blog, and welcome to 2026; Happy New Year!
I hope that you had a wonderful, restful Christmas and that you managed to find some time to relax and shoot during the break.

That being said, it’s time to get back into it and think about the year ahead and what you want to achieve. In this blog I am going to share some of my goals for the year and I’ll evaluate these and let you know how I get on throughout the year taking a final look at these at the end of the year - hopefully you will be able to learn something from all of the mistakes that I am bound to make!
In a blog post before the Christmas break, I spoke about new year’s resolutions and how I don’t make them. I don’t think they (for me) are the right way to bring about any sort of meaningful change in my life. What I do like however, is setting goals and targets for myself, as well as learning new skills.
Photography seems like a great place to learn some skills and set some goals and what follows this is some of the targets I have set myself.
None of these are going to be about growing on social media. I’m not here to do that, I don’t have a magic wand or the “secret sauce” that I can give to you. I haven’t even really figured it out for myself so it isn’t something I feel that I can speak about with any authority. I also don’t like setting goals that aren’t within my full control. I can try to influence other people to like my content, but ultimately, they will either like it or they won’t. My social media strategy is about posting what I like and what I enjoy and if someone chooses to engage with it, great! But, I can’t make people like my work and I don’t know how the alogorithms work well enough to give you guidance.
So now that’s out of the way, let’s have a look at some of the goals I have set for myself. I am hoping that writing them down and sharing them will bring an extra bit of accountability!
1) Go out and shoot every month.
This one I think will be fairly easy to tick off, especially now that I have given myself some kind of accountability for doing it. I live in one of the most beautiful parts of the entire country(landscape photography in the Lake District really is a gift) and I have some of this beauty on my doorstep. There are things I want explore in photography, macro being one of these things. Getting out into nature reserves and local spots can yield some incredible results and I want to be able to explore these spots in more detail, but I want to explore more places as well… See point 6!
This is also going to mean, for me at least, that my content on social media will stay more relevant and it might even give me enought decent images to do a calendar this year!
2) Build the community aspect of my website.
This one is going to need some research and some serious time investment. I want it to be effective and I want it to be free. I don’t know what this looks like yet, but I am keen to explore the idea and to build it - it would be great to run some kind of meet-up with like minded photgraphers to walk, chat, hang out, take photos and maybe have some nerdy gear talk with other people who get it! Look out for more news in future blogs, keep and eye on the website and make sure you are signed up to my newsletter via the contact page, to get information about it first hand!
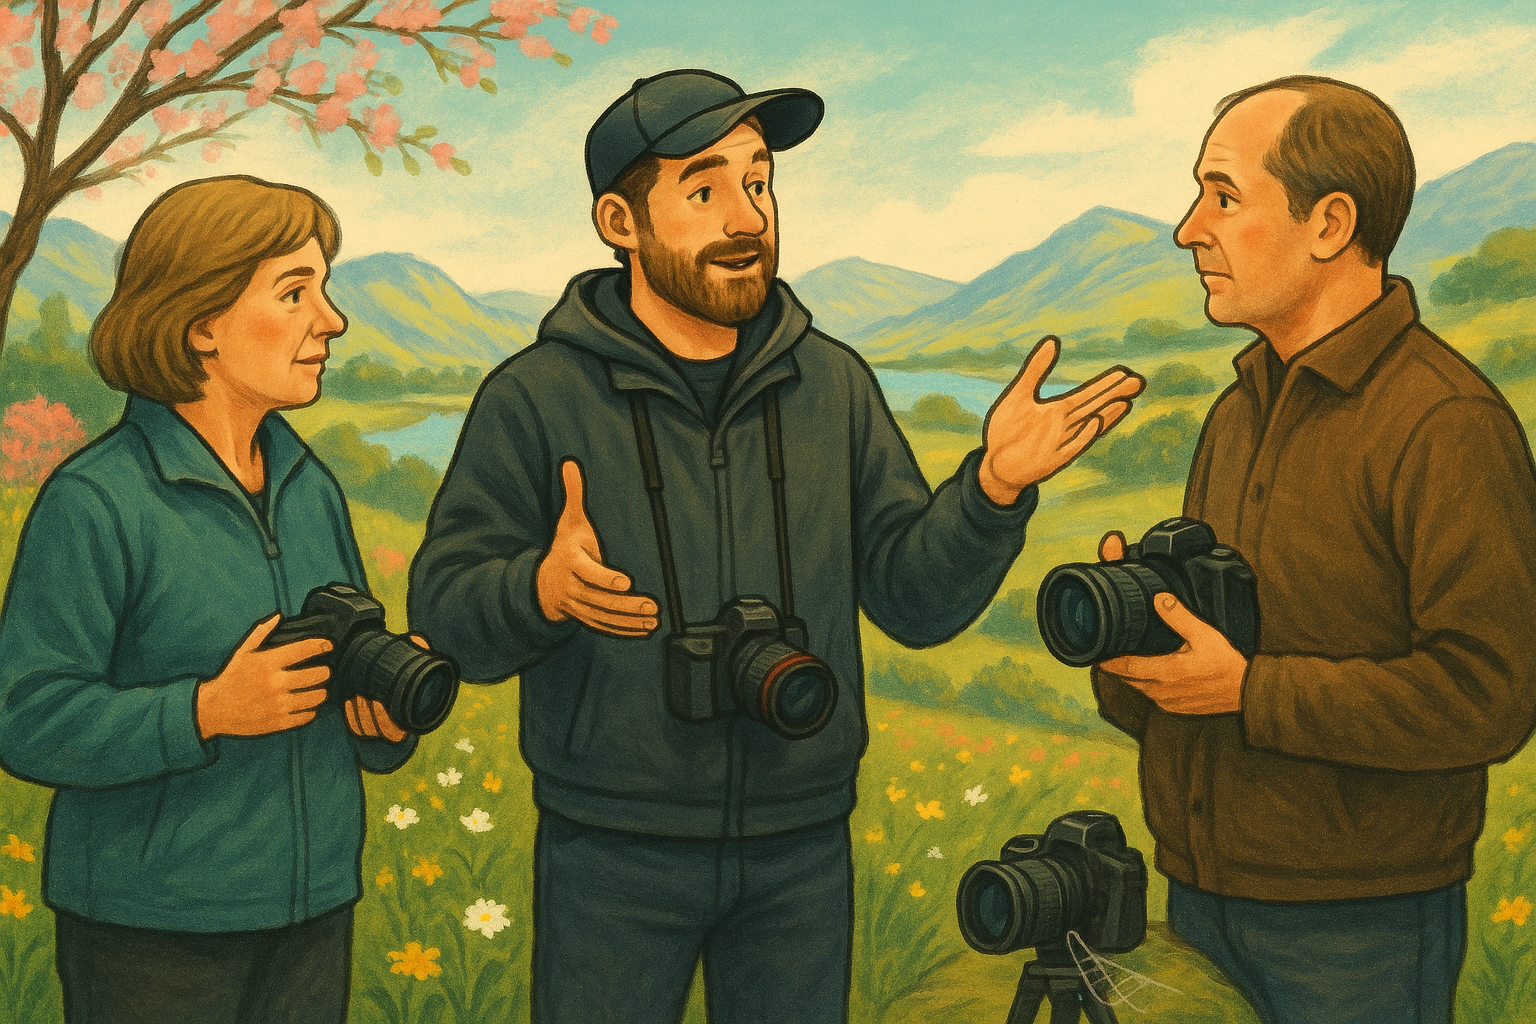
3) Sell at least one landscape photography workshop.
I have sold only sold one of these, and I need to work on the marketing a little bit. I love to share my knowledge and skills with people and this can be a great way to do that, so if you want to develop your skills or learn a new technique, get in touch and lets chat!
These can be tailored to you, be you a beginner or a more experienced photographer… let’s go and shoot!
4) Get my print store back up and running and sell enough prints to be able to buy a new set of inks for my printer.
Again, we are talking about something that needs time and this ones needs some money spending as well. Printer ink isn’t cheap and to avoid wasting it (and it’s almost empty!), I print my stuff quite often for my own use, but buying a new set of inks for my printer can cost around £500! I love selling the prints because I love the idea that people want to display my work and it also means that the printer can stay fulling functioning and not just become something else to dust!
The time needed to do this is not in considerable - I’ve already done and evaluated the market research for this, but now I need to edit the images to get them ready for print and then get them uploaded to my shop in a way which gives people an idea of what they are buying. The printing and posting part of this is the easy bit, but all the work that needs to go into this before getting to the print stage is massive and juggling this and working full time means that the days can end up being very long indeed!
5) Try something different with my photography - I think this is likely to be intentional camera movement.
Fairly straightforward this one. I want to add some more creativity into some of the stuff I am doing and this is a free way to to do that! I also have a macro lens which I don’t use as much as I could do and with winter in full flow and the spring colours and textures starting to come to the forefront of our minds, this could be a great time to really enhance this skill and make some use of the kit that I already have…
6) Shoot in at least one new location each month.
This ties in really nicely with point number one and if I can compelte this one, by default I complete number one this last as well. Each time I visit somewhere new, I enhance my knowledge and I also get ideas for things to write here… coming to think of it, twelve new locations is twelve blogs for the year and that also saves more brain space for other things, as this is 12 weeks where I won’t need to have an extra idea for some to write about.
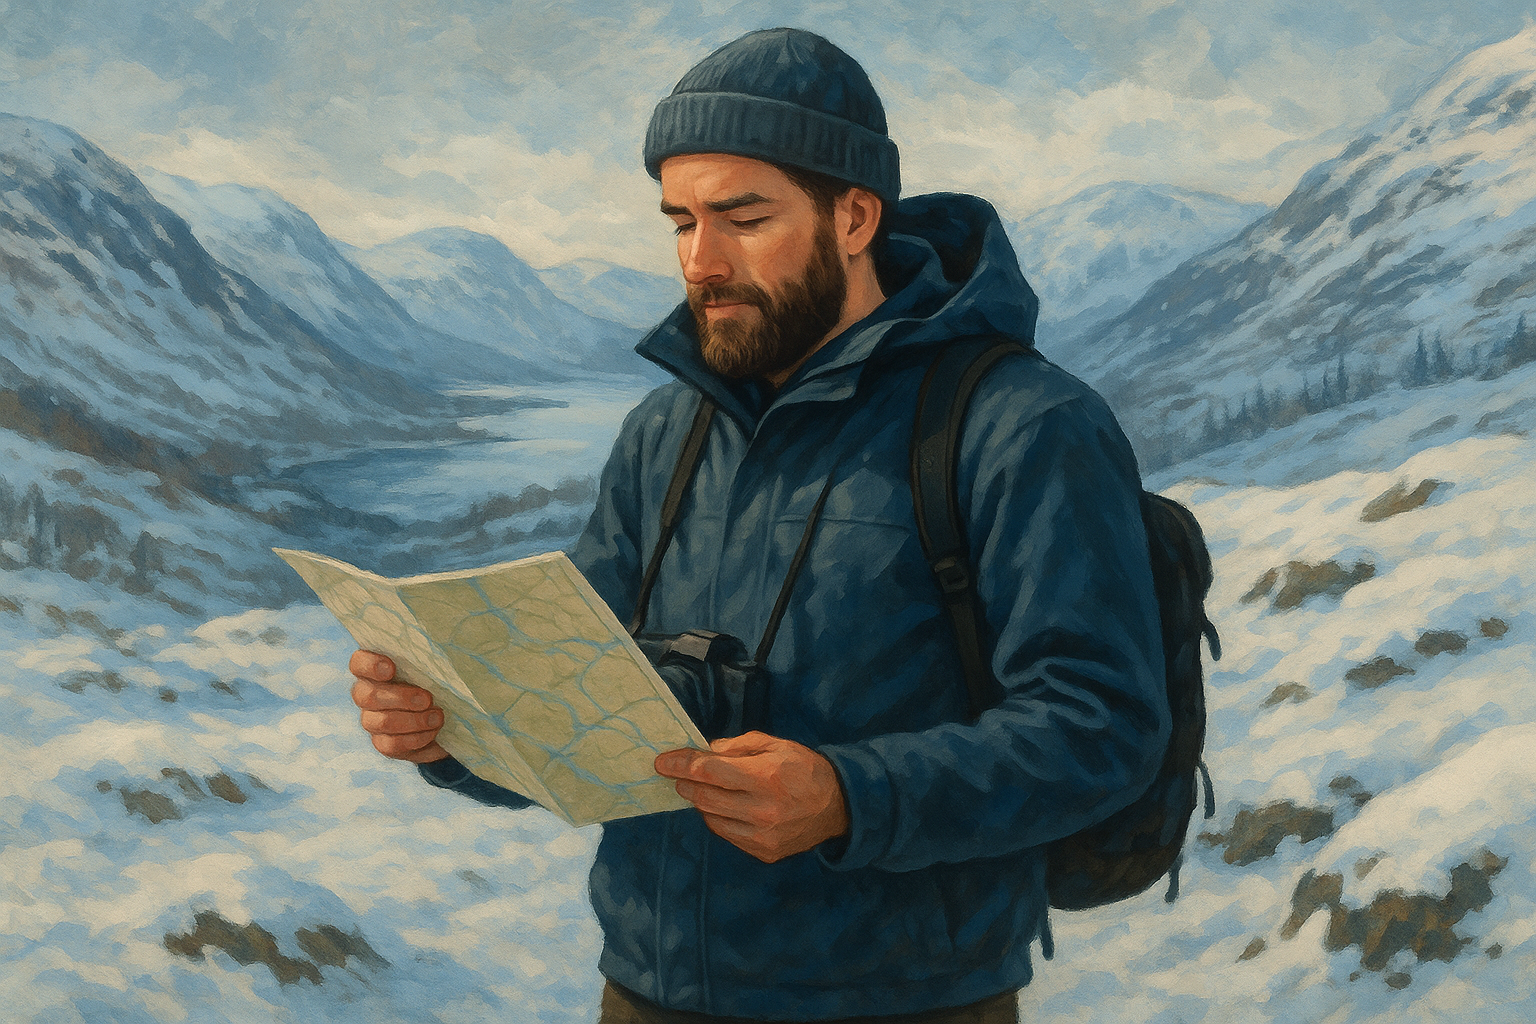
Laziness aside, this one is actually really important to me because I still don’t feel like I have explored anywhere near of much of The Lake District as I should have done after having lived here for almost 3 years now. It’s a big old place and there is a lot of stuff to photograph.
Part of me thinks that I have been a bit lazy, but the other part of me knows that this is because I have found some preferred locations that I like to get to - they are all quite close to home and are achievable in an evening after work. I need to broaden my horizons!
7) Develop my woodland photography skills.
I live near a lot of woodland but don’t have many shots of it. A big part of the reason for this is that woodland photography is notoriously tricky. There are often busy, messy and cluttered scenes that we need to make sense of. This is something that isn’t my forte, but by the end of the year, I am determined that I am going to be better at this… watch this space… and my Instagram…
8) Explore macro photography as way to broaden my skills in landscape photography
I’ve already touched on this one, but it really is something that I want to get better at. We are surrounded by beauty in The Lake District and tons of different textures which can make really effective abstract photos. I’d also like to be able to get some good photos and some of the strange little mushrooms that crop up. Oh and did someone mention bluebell season? Again, this is something I will be blogging about, so watch this space. Oh and one more thing, did I mention you can sign up to my newsletter for more regular updates?
9) Shoot more personal/portfolio work for the commercial side of my business and in doing so, increase my knowledge and skills in studio lighting.
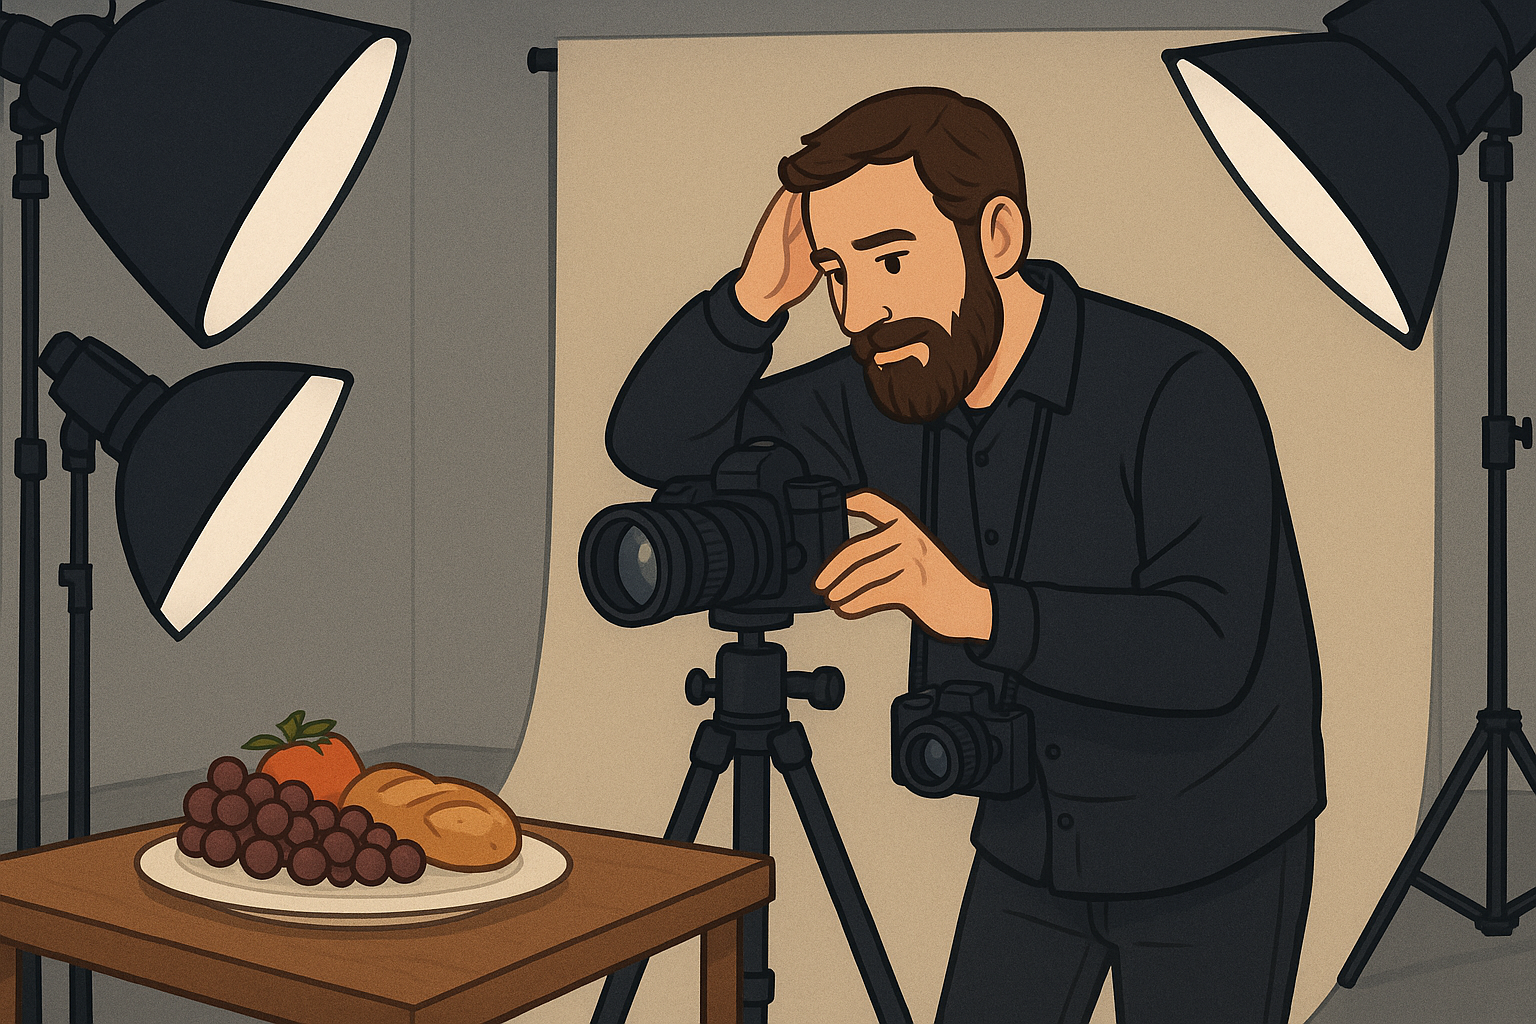
This is probably the biggest one for me as I know that I need to work on my lighting skills (as well as my set building!). I am all to acutely aware that the commercial offering in my portfolio is in need of a refresh - the photos don’t reflect my current skill level so it’s little wonder that no one is really noticing these shots. There’s a lot to think about, but fortunately I already have the kit I need, I just need to work out how to put it to gainful employment!
10) Carry on enjoying doing what I love.
Speaks for itself does this one! I love photography, I love editing, I love creating and I love learning more about it every day, so it really a no brainer and I promise to keep sharing what I learn, how I have learned it and probably, most importantly, how I learned it. Keep coming back to the blog so that you can learn from my mistakes… there will probably be plenty of them!
If you’d like to support the blog and help me keep producing Lake District photography content, honest gear reviews and regular website updates, you can do so via my Buy Me a Coffee page. Keeping everything running smoothly takes time, and your support makes a real difference. Thank you.

2025 - My Landscape Photography Year in Review
This is my final blog post of the year, before I take a couple of weeks away from writing and focus on all of the fun of Christmas and try to get out to shoot some winter stuff! In this blog I take a look at some of my successes and failures across the year and look ahead to the photography challenges of 2026!
Welcome to my final blog of 2025! I’m going to take a couple of weeks away from writing this once I have published this entry and I thought it would be good to take a look back at what’s gone in my photography world this year and to have a look ahead to the new year and what it has in store. The images I share in this blog are some of my favourites from this year, I hope you like them!
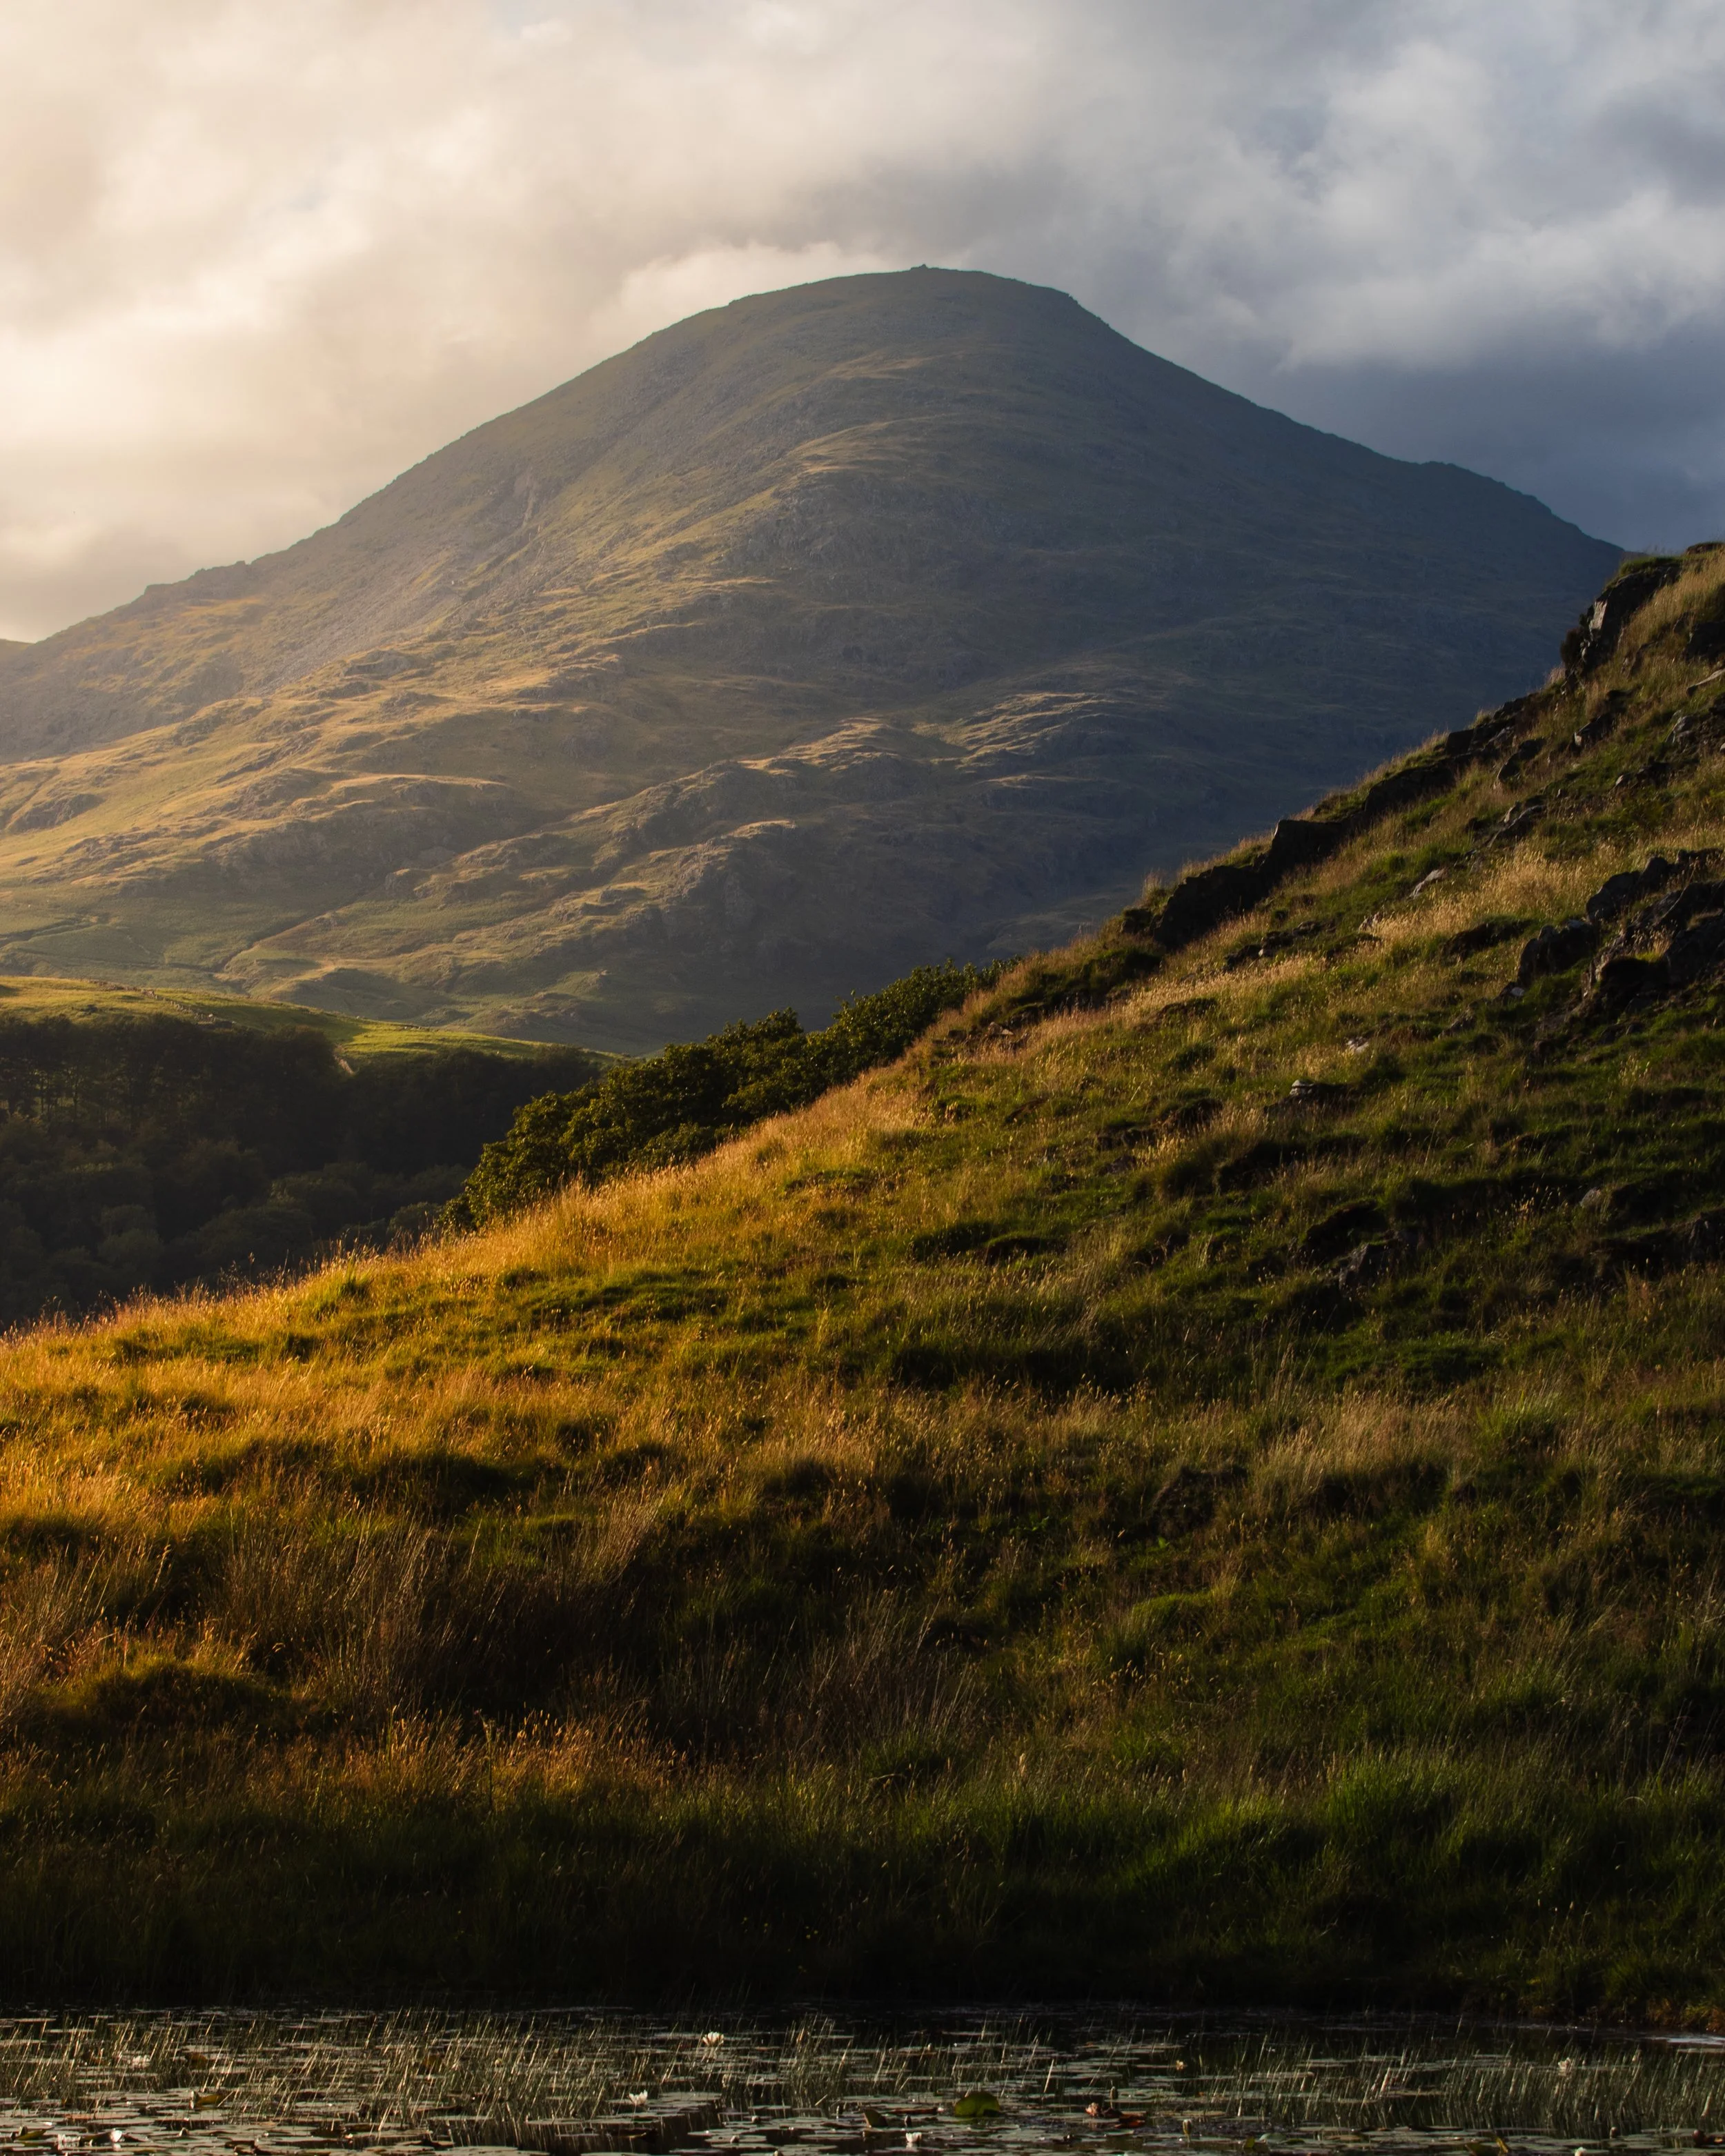
These blogs take a lot of writing, usually on a Sunday evening whilst I am consuming some non-photgraphy related YouTube and thinking about the week ahead. I reckon it takes me anything up tp two hours to write one of these and do all of the back end “nerdy” stuff, so I am hoping have a couple of weeks away from it will leave me feeling reinvigorated come the new year.
It’s been quite a year in many ways, I’ve moved jobs a couple of times and feel busier than ever. Photography remains the constant theme in my spare time and the thing that I love to spend the most of my time doing, yet I don’t feel like I have had a lot of time to do as much of it as I would like. Try as I might, work is very busy and takes a lot of my energy and this is something I really want to address in the new year.
I’ve had some great times shooting this year, but I think that one of my favourites was when I went out for a spontaneous evening’s shooting in poor conditions, with a blog post about it being foremost in my mind. What an evening it was. As I pulled up at the location, the heavens opened and I was expecting a complete washout.
What ended up happening was one of the most incredible 15 minutes of light I have ever had as a photographer. It goes to show that in order to get the shots and to see the light, you have got to be there, and being there is another thing I plan to work on in the new year.
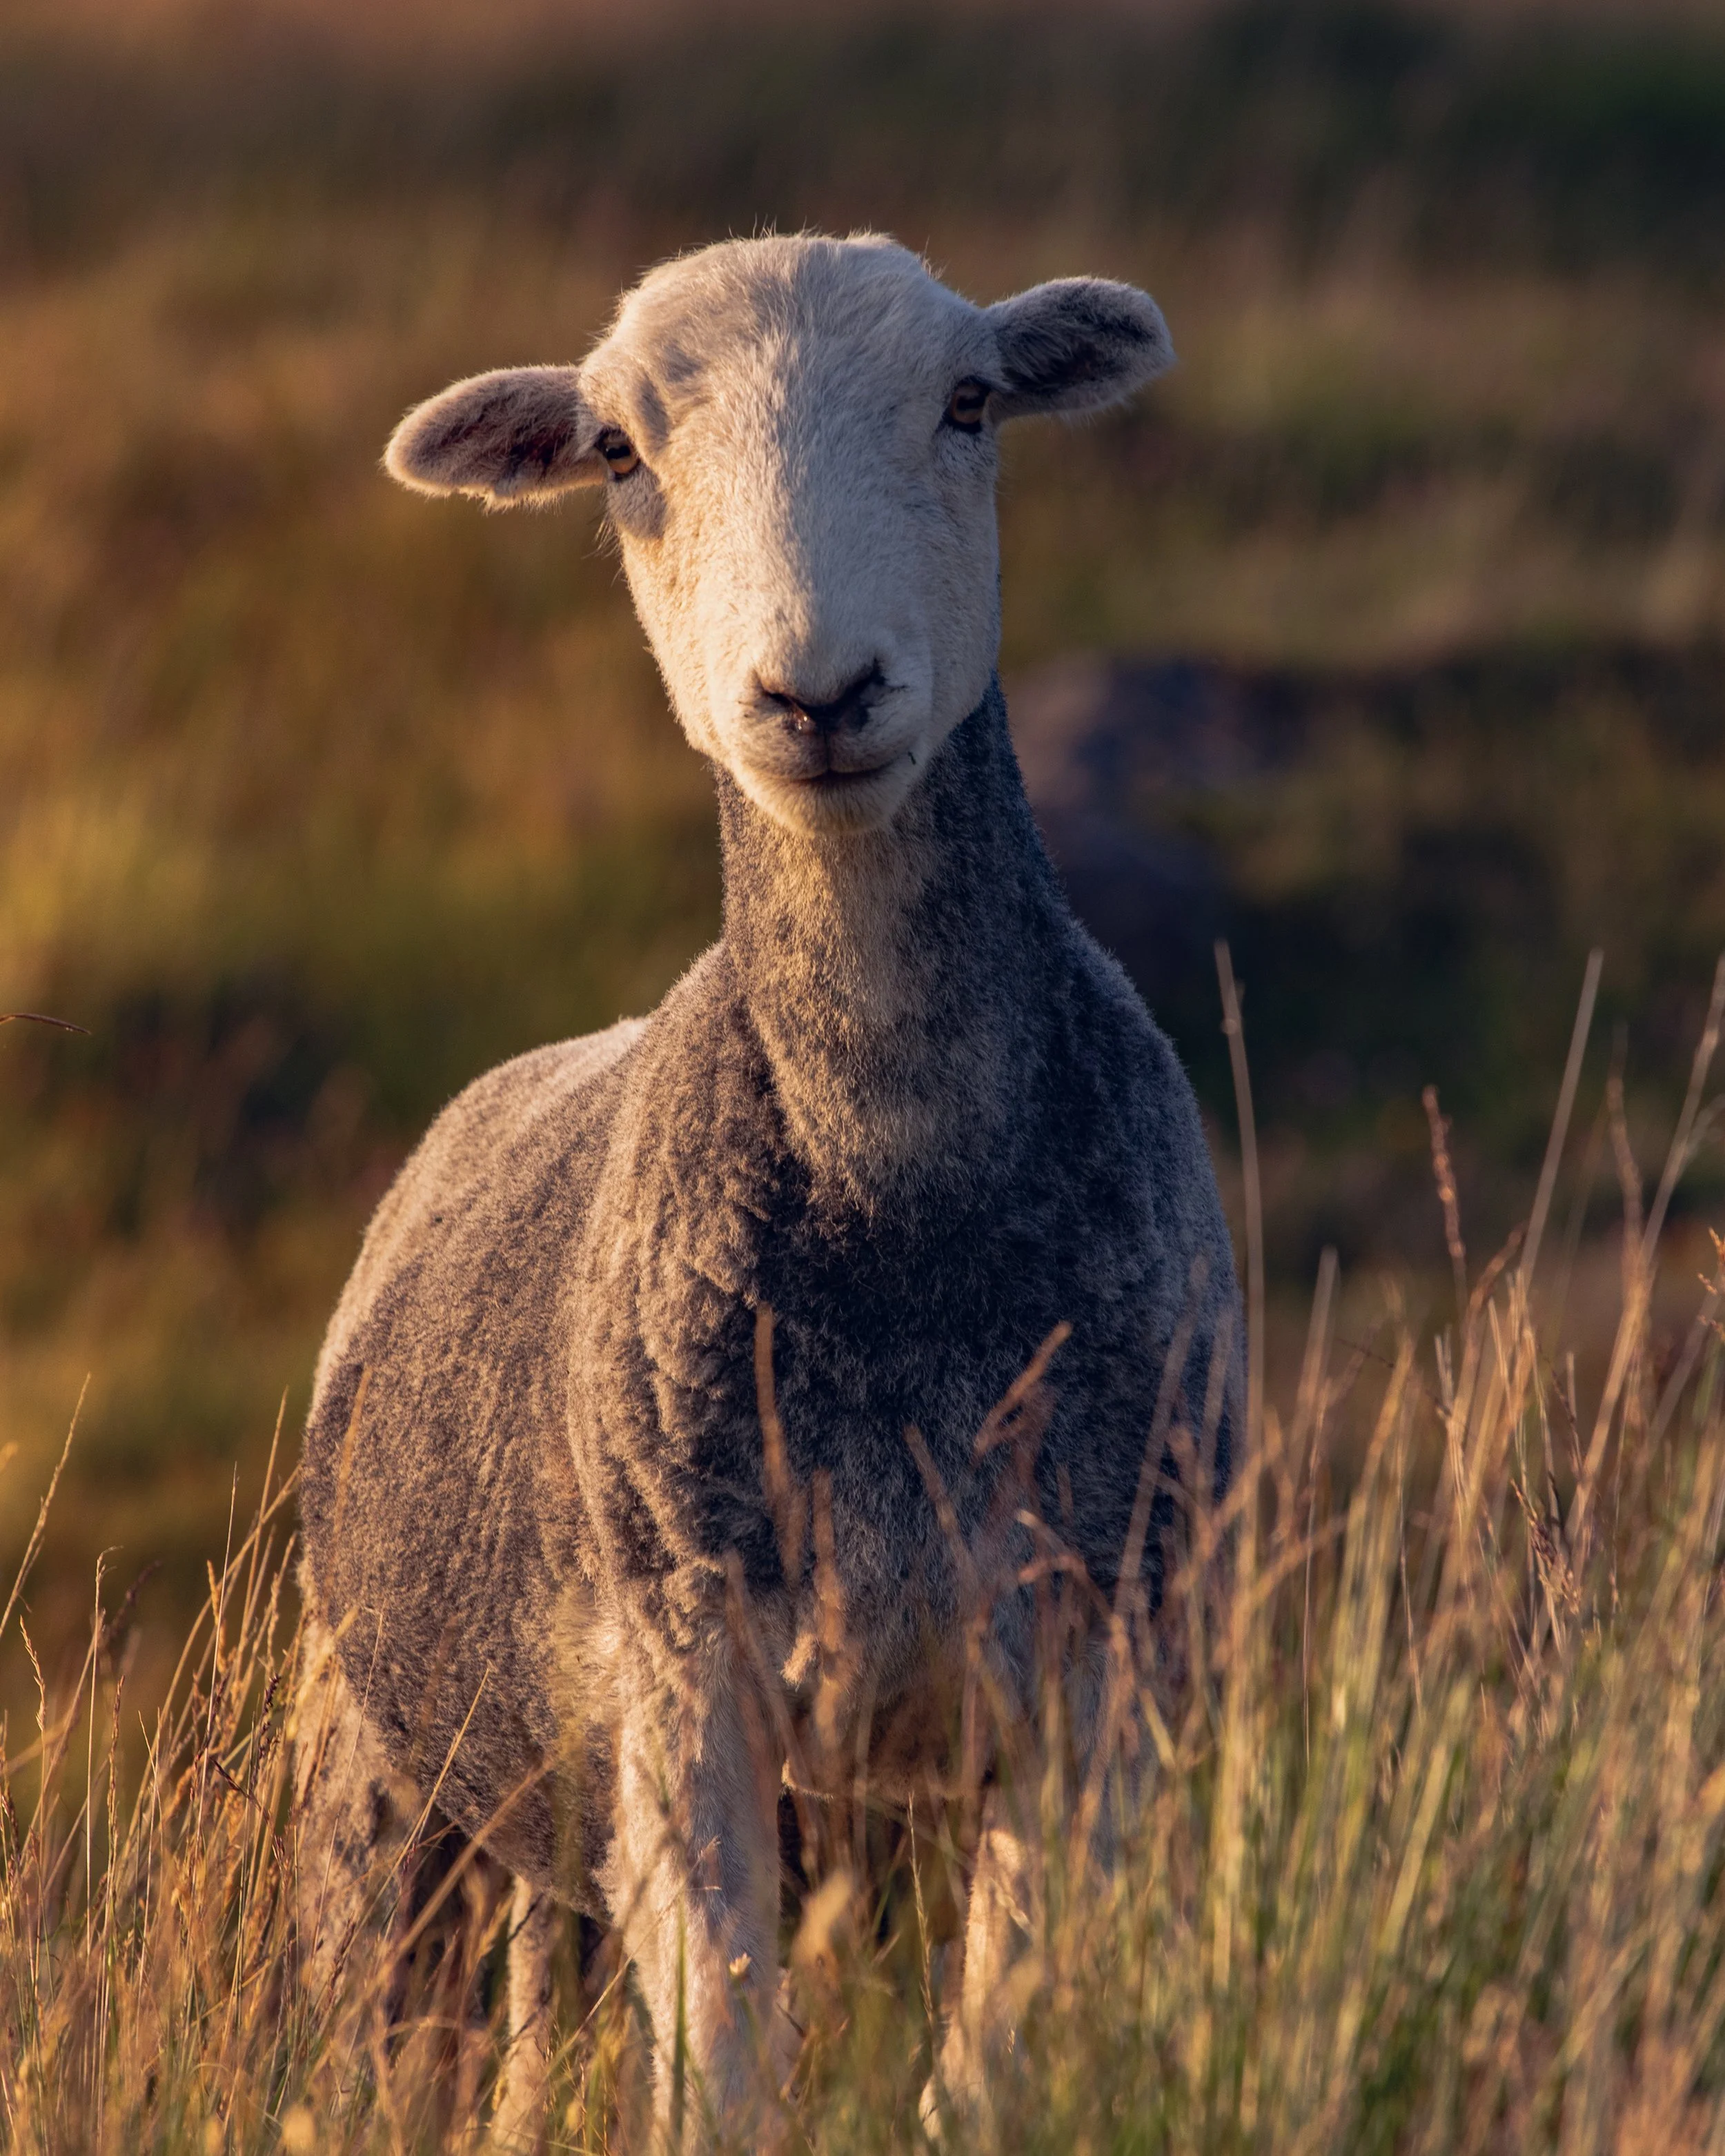
I am not one for making resolutions, but what I do like to do is to try and work on some things that I need to improve and I always try and learn at least one new skill (previous years have seen me learning to make cocktails, card magic (don’t ask me to do any of that because I have forgotten all but one trick) and golf (this one actually went quite well, and I was an 8 handicap at one point , but photography won out and I could only afford one money pit!). I don’t quite know what this skill is going to be this year, but I do know it is going to be something photographic; you can expect blogs about it when I have made a decisions and committed to it.
So what else has happened for me? I got some new photo kit: A 16-35mm lens, a 2x teleconverter and a 105mm macro lens. I love two of these and those are the lenses. I am not a huge fan of the teleconverter, and if you have read my review of it, you’ll know that I got it instead of the 150-600mm Sigma telephoto. I don’t regret the teleconverter, I enjoy using it for what it’s meant for, I just don’t love what it produces. The lesson here is that even though I don’t love it, I can still use it to develop a skill sets and see compositions I might have otherwise missed.

At some point, I will sell it and upgrade to a decent telephoto but that’s going to mean I need to sell some prints and to do that, I need to get my print shop back open.
Speaking of the print shop, if you’ve been here a while or are a regular on the site, you will have seen that this has been closed for a while. This is down to nothing other than a lack of time to get the images I want to sell edited for print and then listed on the site. It’s on my to do list for the new year, I just need to organise my time a little better to allow me to get it done. At the moment, my printer is gathering dust and I want to get it fired up again!
I’ve got some upgrades planned for the studio as well. This is going to involve adding some more work-surface, some better light to work by and some better space organisation. I want to ‘up’ my product and still life photography output and having a more workable space is going to be really important in allowing me to do this efficiently and to the standard it needs to be. It’s something I have been neglecting and if I want to move out of my home studio and into a dedicated space, I need to make sure that I am shooting and putting personal projects out there.
Social media has been a but hit and miss, I haven’t been consistent for much of the year, but for the last three months I have managed to post (almost) every day, and this is something I want to try and keep up in the new year.
If you’re not already following then please head to my Instagram feed and drop me a follow, it really helps me out, especially since I have had to start from scratch after my previous account was lost with getting on for 10k followers!
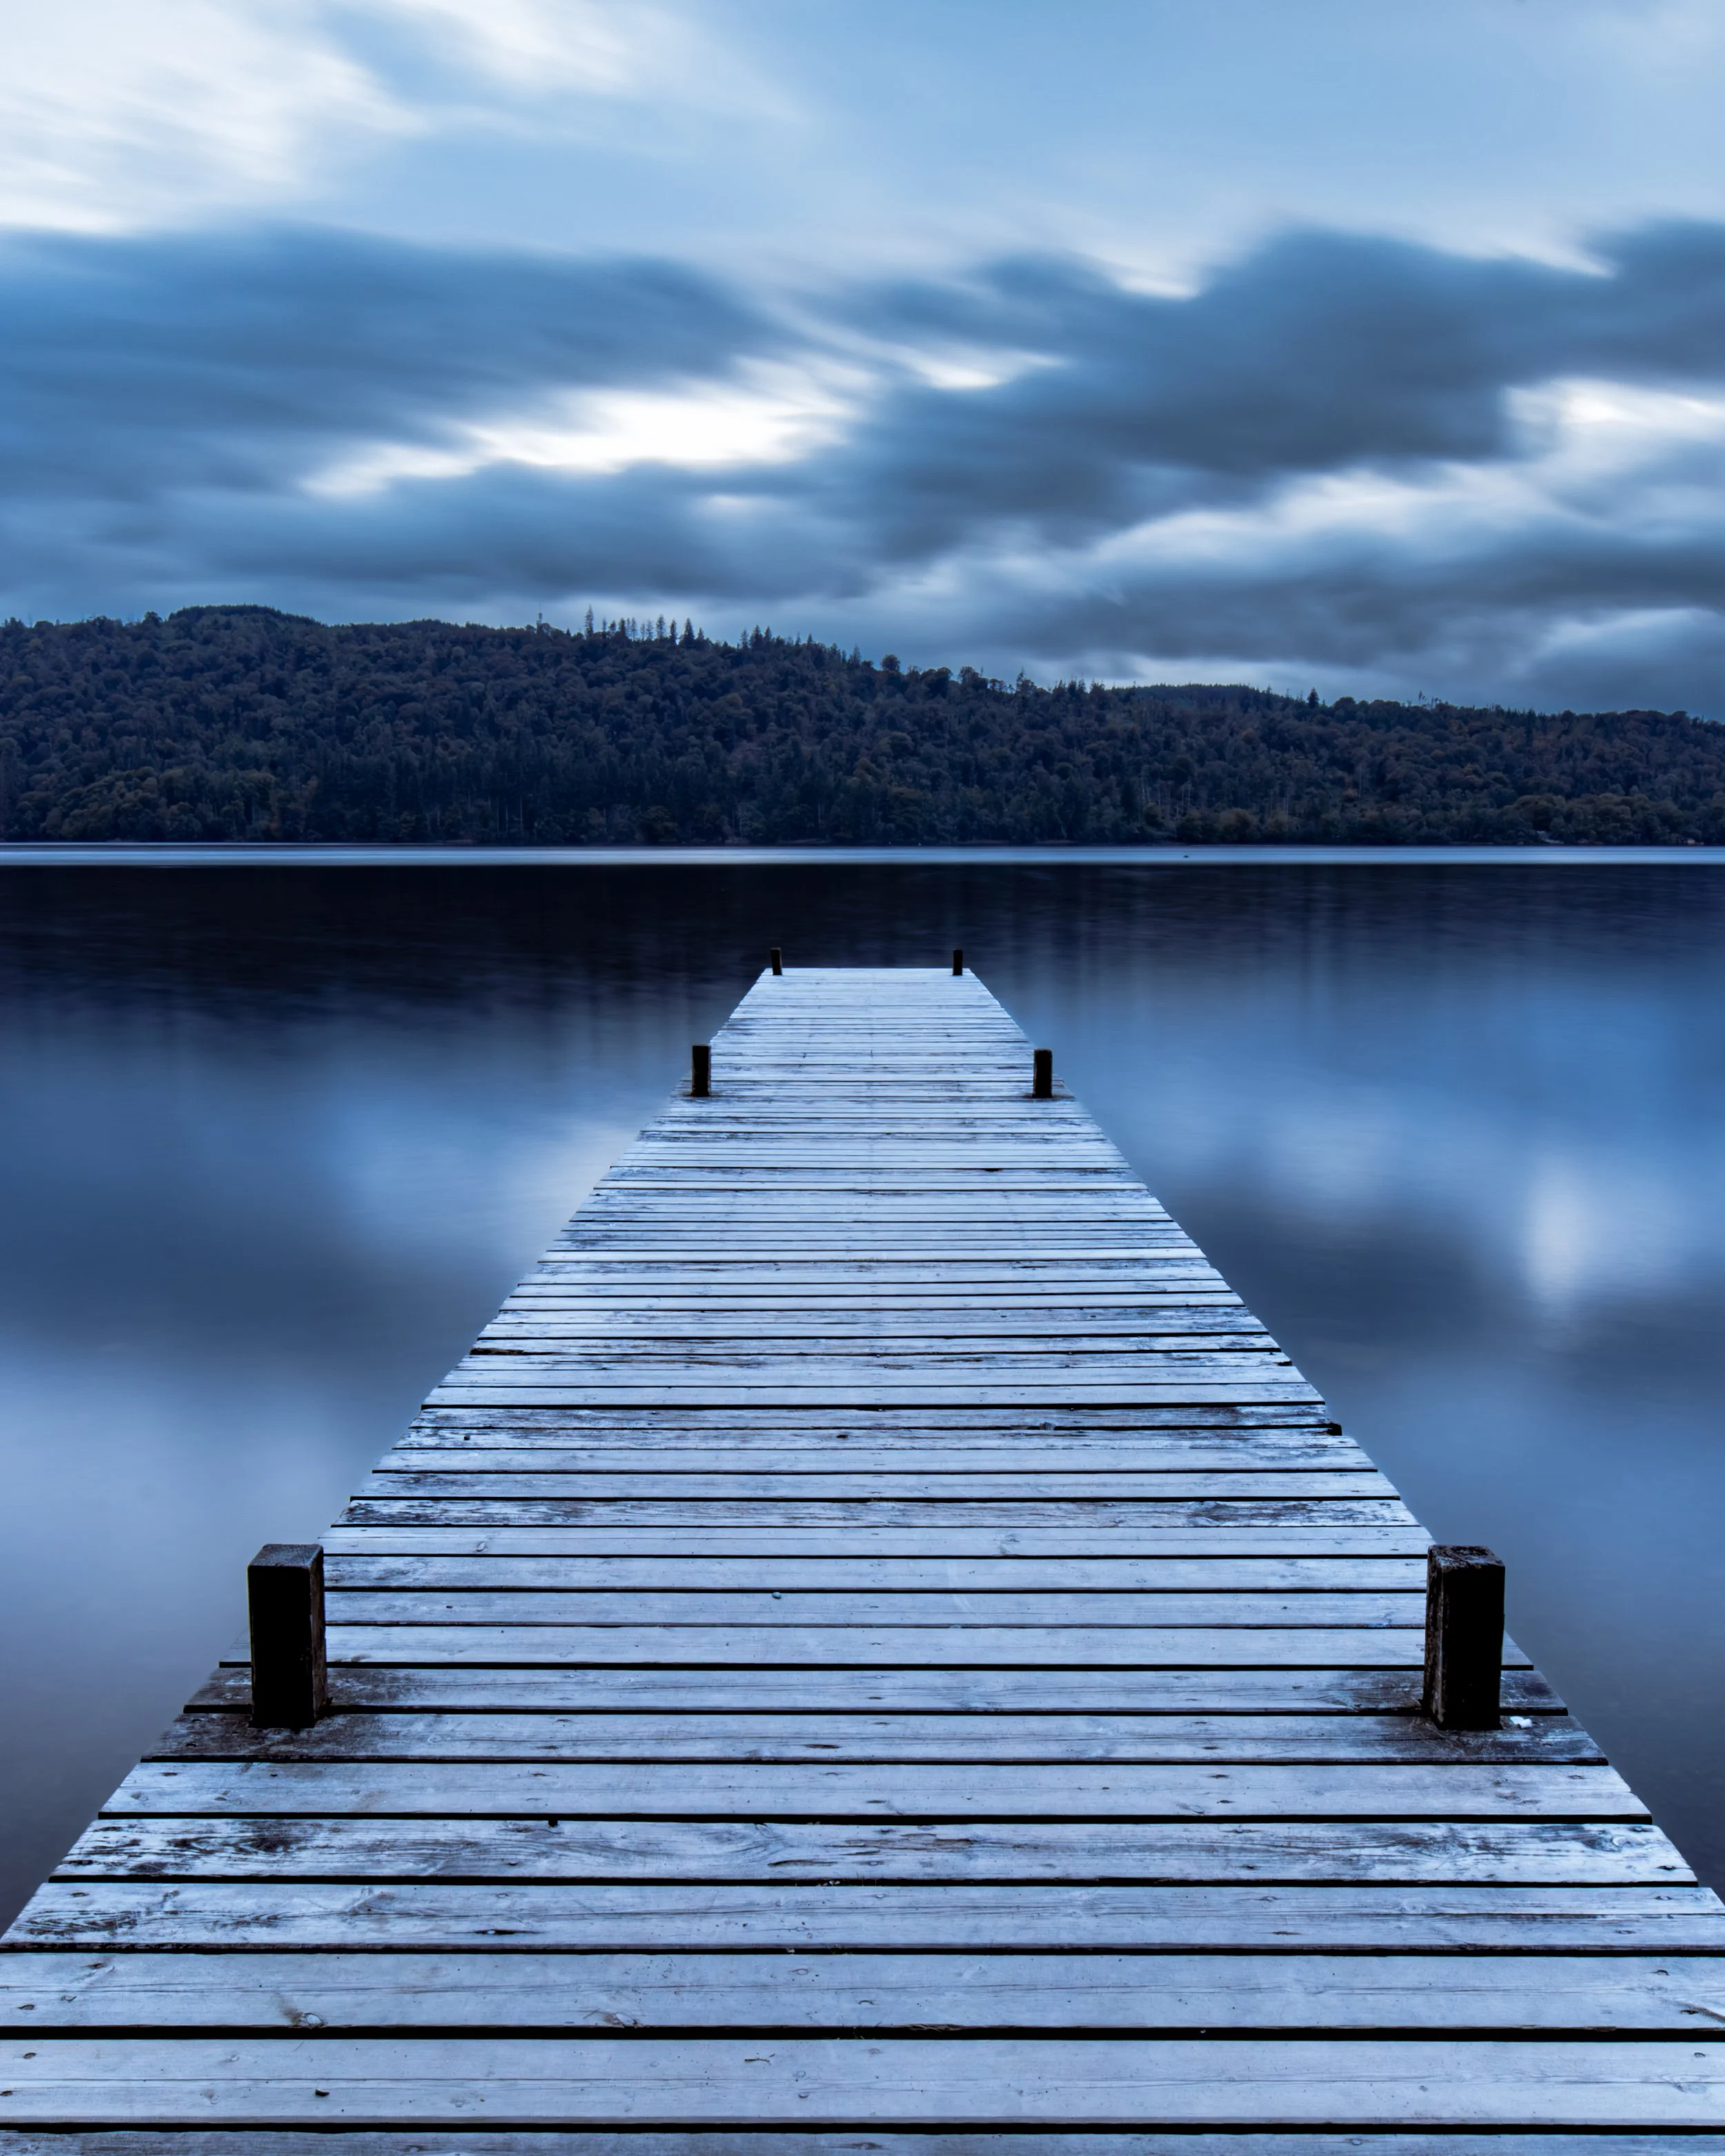
Another thing that I want to do this year is to explore more of The Lake District. I have lived here for almost 3 years but I don’t feel like I have even scratched the surface. It really is a landscape photographer’s playground, but I have fallen into a bit of a trap.
That trap is realising I have got comfortable with a small number of locations, and these are my go-to’s because I know them. I like them and they are close to home. All of this is lovely, but reflecting on this makes me see that what I am wasting time in these locations if I keep going back constantly.
I have a list of places already planned out that I would like to visit and I want to tick these off over the course of the year.
Overall, 2025 has been a decent year for me in terms of my development as a photographer; I have learned a lot, haven’t shot enough and still have a lot to learn about landscape photography, which I am finding a lot more challenging than I did when I was doing street and cityscapes when I still lived in London.
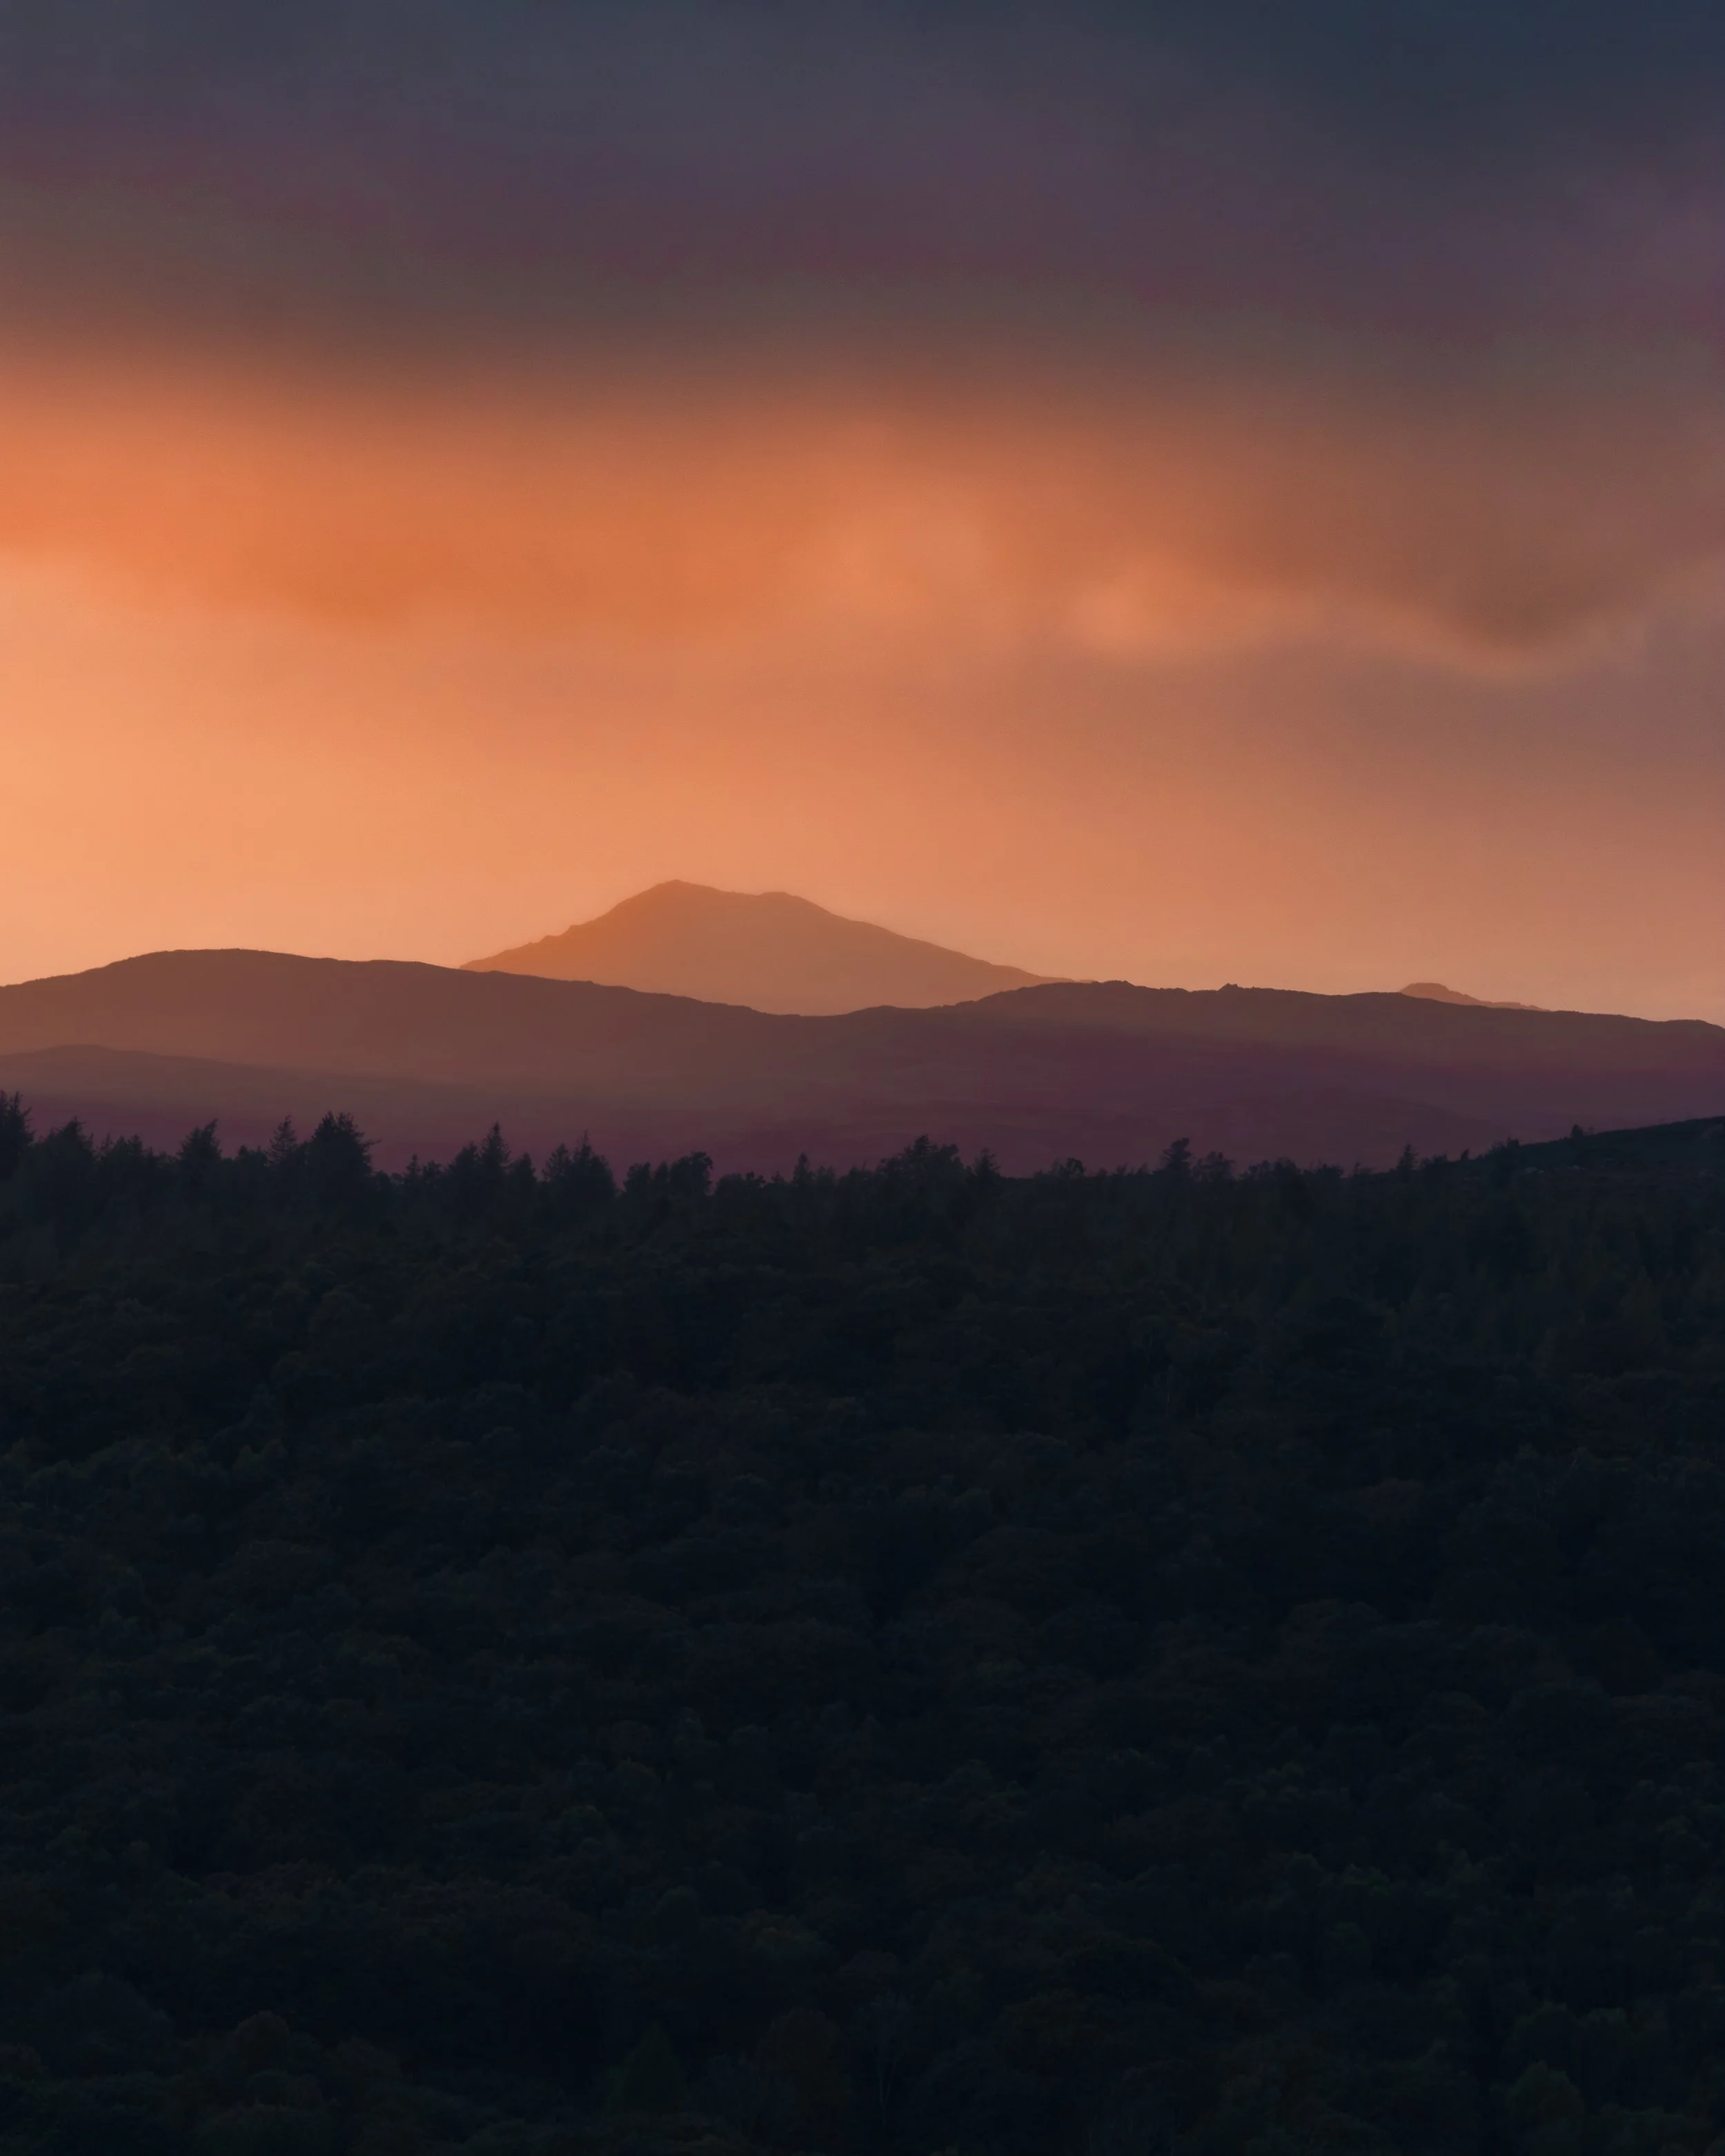
So what else?
This has been quite the year both photographically and on a more personal level.
I am already looking forward to seeing what 2026 has in store for me, but I also know that a lot of this is down to me keeping my motivation up, getting out there to shoot and sharing my images and my learning with you.
All that remains now is to say thank you to all of you for reading this entry and for reading my blog throughout the last 12 months. It means a lot to see so many of you reading what I have to say, and I hope that you find it useful, interesting and maybe even a little bit entertaining at times.
Before I go, I would like to wish you a very happy & peaceful Christmas and a happy, safe and prosperous new year.
Stay safe,
Chris
If you’d like to support the blog and help me keep producing Lake District photography content, honest gear reviews and regular website updates, you can do so via my Buy Me a Coffee page. Keeping everything running smoothly takes time, and your support makes a real difference. Thank you.

5 Underrated Landscape Photography Spots in The Lake District
In this short blog, the penultimate one before Christmas, I explore 5 (in my opinion), underrated landscape photography spots in the Lake District, and true to form, they are largely easily accessible in your car. It’s only a short one so have a quick read and see if you can discover somewhere new, or consider somewhere you haven’t been before.
Welcome to this latest blog post, where I am going to look at what I think are 5 underrated landscape photography locations in The Lake District, and I must admit, I feel like one of them is a bit of curveball, as I think it’s popular but not rated as highly as it perhaps should be.
Grab a brew and settle in.
Gummer’s How
This is a favourite of mine as it’s so close to home and so easily accessible. Gummer’s how is one of the fells that Wainright covers in his book “The Outlying Fells of Lakeland”, and it’s a real beauty. It sits high above Windermere with views across the water and right out to the Langdale Pikes.
You can park (usually pretty easily) in the free car park (what3 words ///rated.soup.looms) which is close to the hill, or in one of the many lay-bys at this location. The lay-bys are big enough that you won’t impede passing traffic if you park sensibly. From the car park, the walk to the summit is probably about 25 minutes and the rewards for exceed the effort that you put in to getting up there.
There are some views on the way up as well, so take your time and really soak it in!
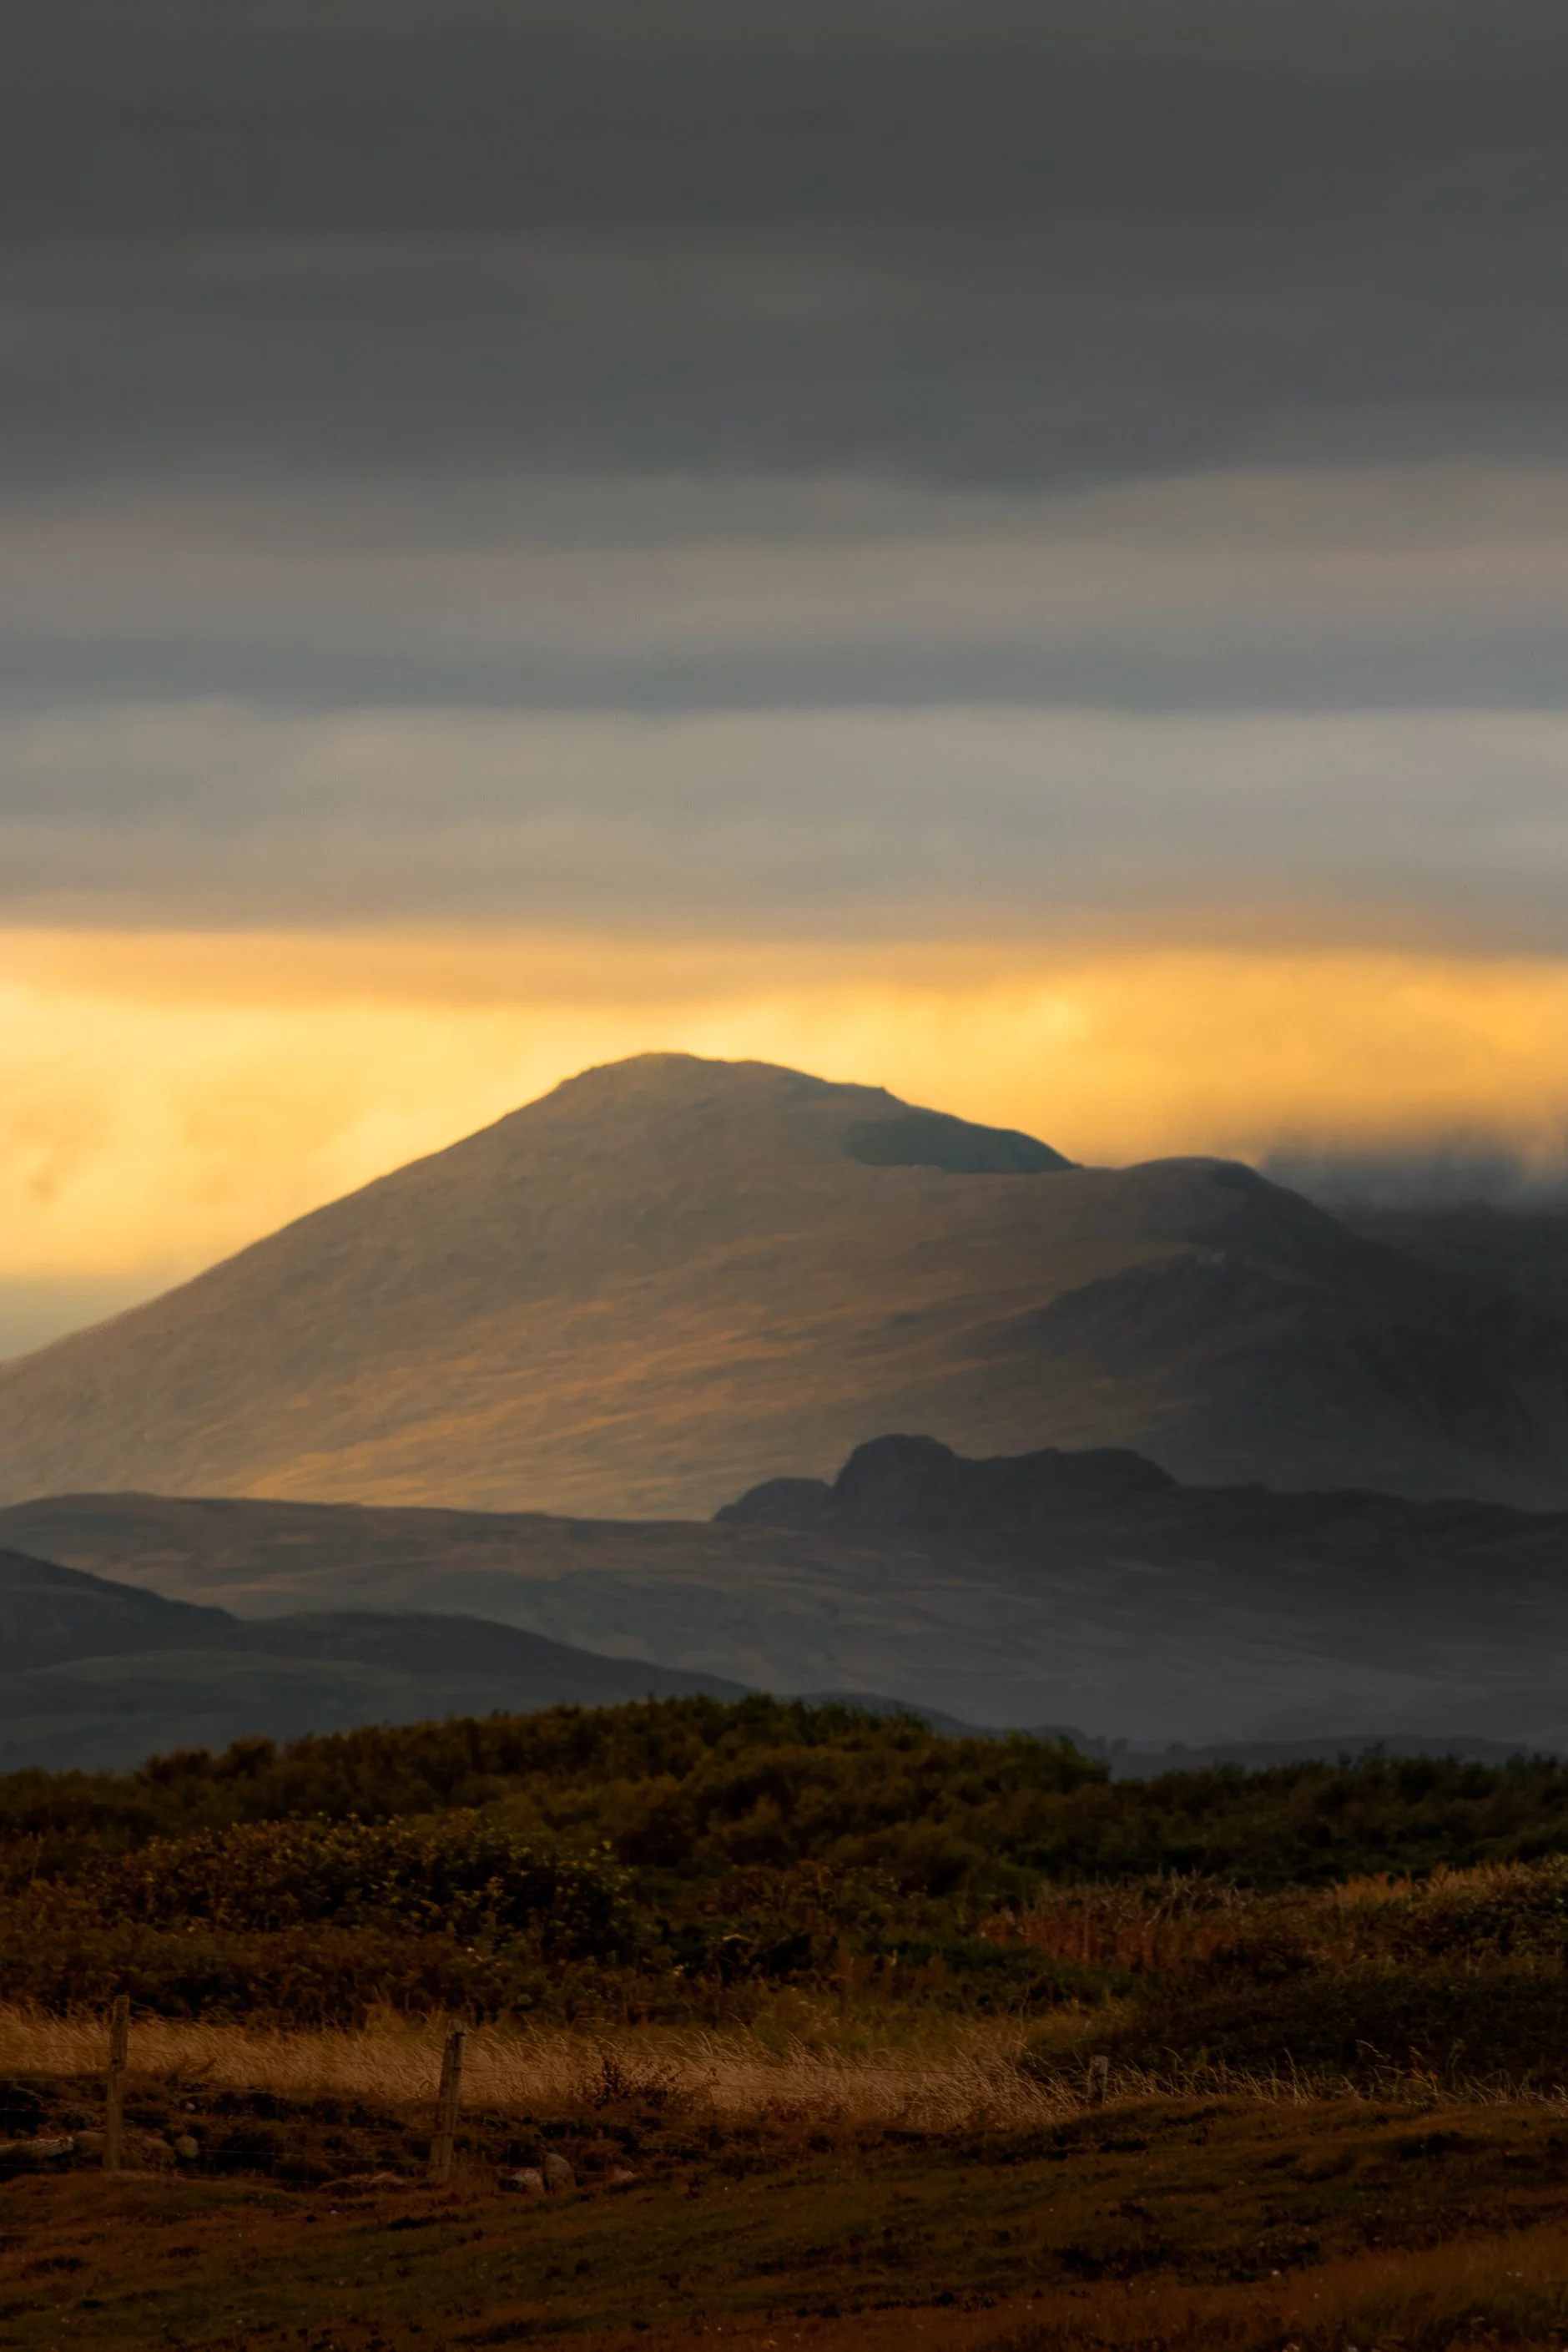
Walney Island
This one isn’t the Lake District as such, but Walney Island some incredible views of The Lake District. It’s short drive (about 20 minutes) west of the town of Ulverston, which is definitely worth a look on the way in. Walney Island itself is small island with a population of around 10,000 accessed via a bridge from Barrow in Furness. There’s some great coastline here and the waves can be pretty dramatic when the wind is blowing.
One of my favourite spots here is on the West Shore, but facing north back towards the Lake District Fells. Parking is in a small car park (///class.dent.late) near to the end of the West Shore Road. You’re on foot from here as you can’t drive much further on this road as it turns to the north; it’s been closed to vehicles for some time, so you’re feet are going to be your friend. The sunsets on this island can be incredible in the right conditions, as can the sunrises, but conduct your resarch and make sure you give yourself a fighting chance.
You’ll also find some beaches on here and a huge breeding colony of seals at the south end of the island. There are some lovely walks and bird life here too, and you can park at South Walney Nature reserve for a small fee.
Although I don’t like to use the term, Walney is really a little bit of a hidden gem in the northwest and is somewhere you should definitely consider checking out.

Kelly Hall Tarn
This is lovely little town next to the village of Torver, which you will find on your way into Coniston. There is ample free parking right next to the path that leads to the tarn (///class.dent.late) and you will find the tarn itself about a 3 minute walk from your car, which you can park on the piece of land adjoining the access to the tarn (///pinch.inspects.giggled). Parking is free, but be careful in the cold weather when the ground is icy as it can get very slippy.
I love this place; it feels a lot further away from civilisation that it actually it. Whilst your here, there is a well known composition shooting a lone tree from the far side of the water and there are often Herdwick sheep wandering around here as they graze; they’re inquisitive, but not so much that they are intimidating. The last time I was there, they were kind enough to pose for me for a few minutes and I got some the best Herdy shot’s I’ve ever managed to get.
If you’re there at the right time of the year, you’ll also be able to get a great shot of some the water Lillies that cover the water in the summer.
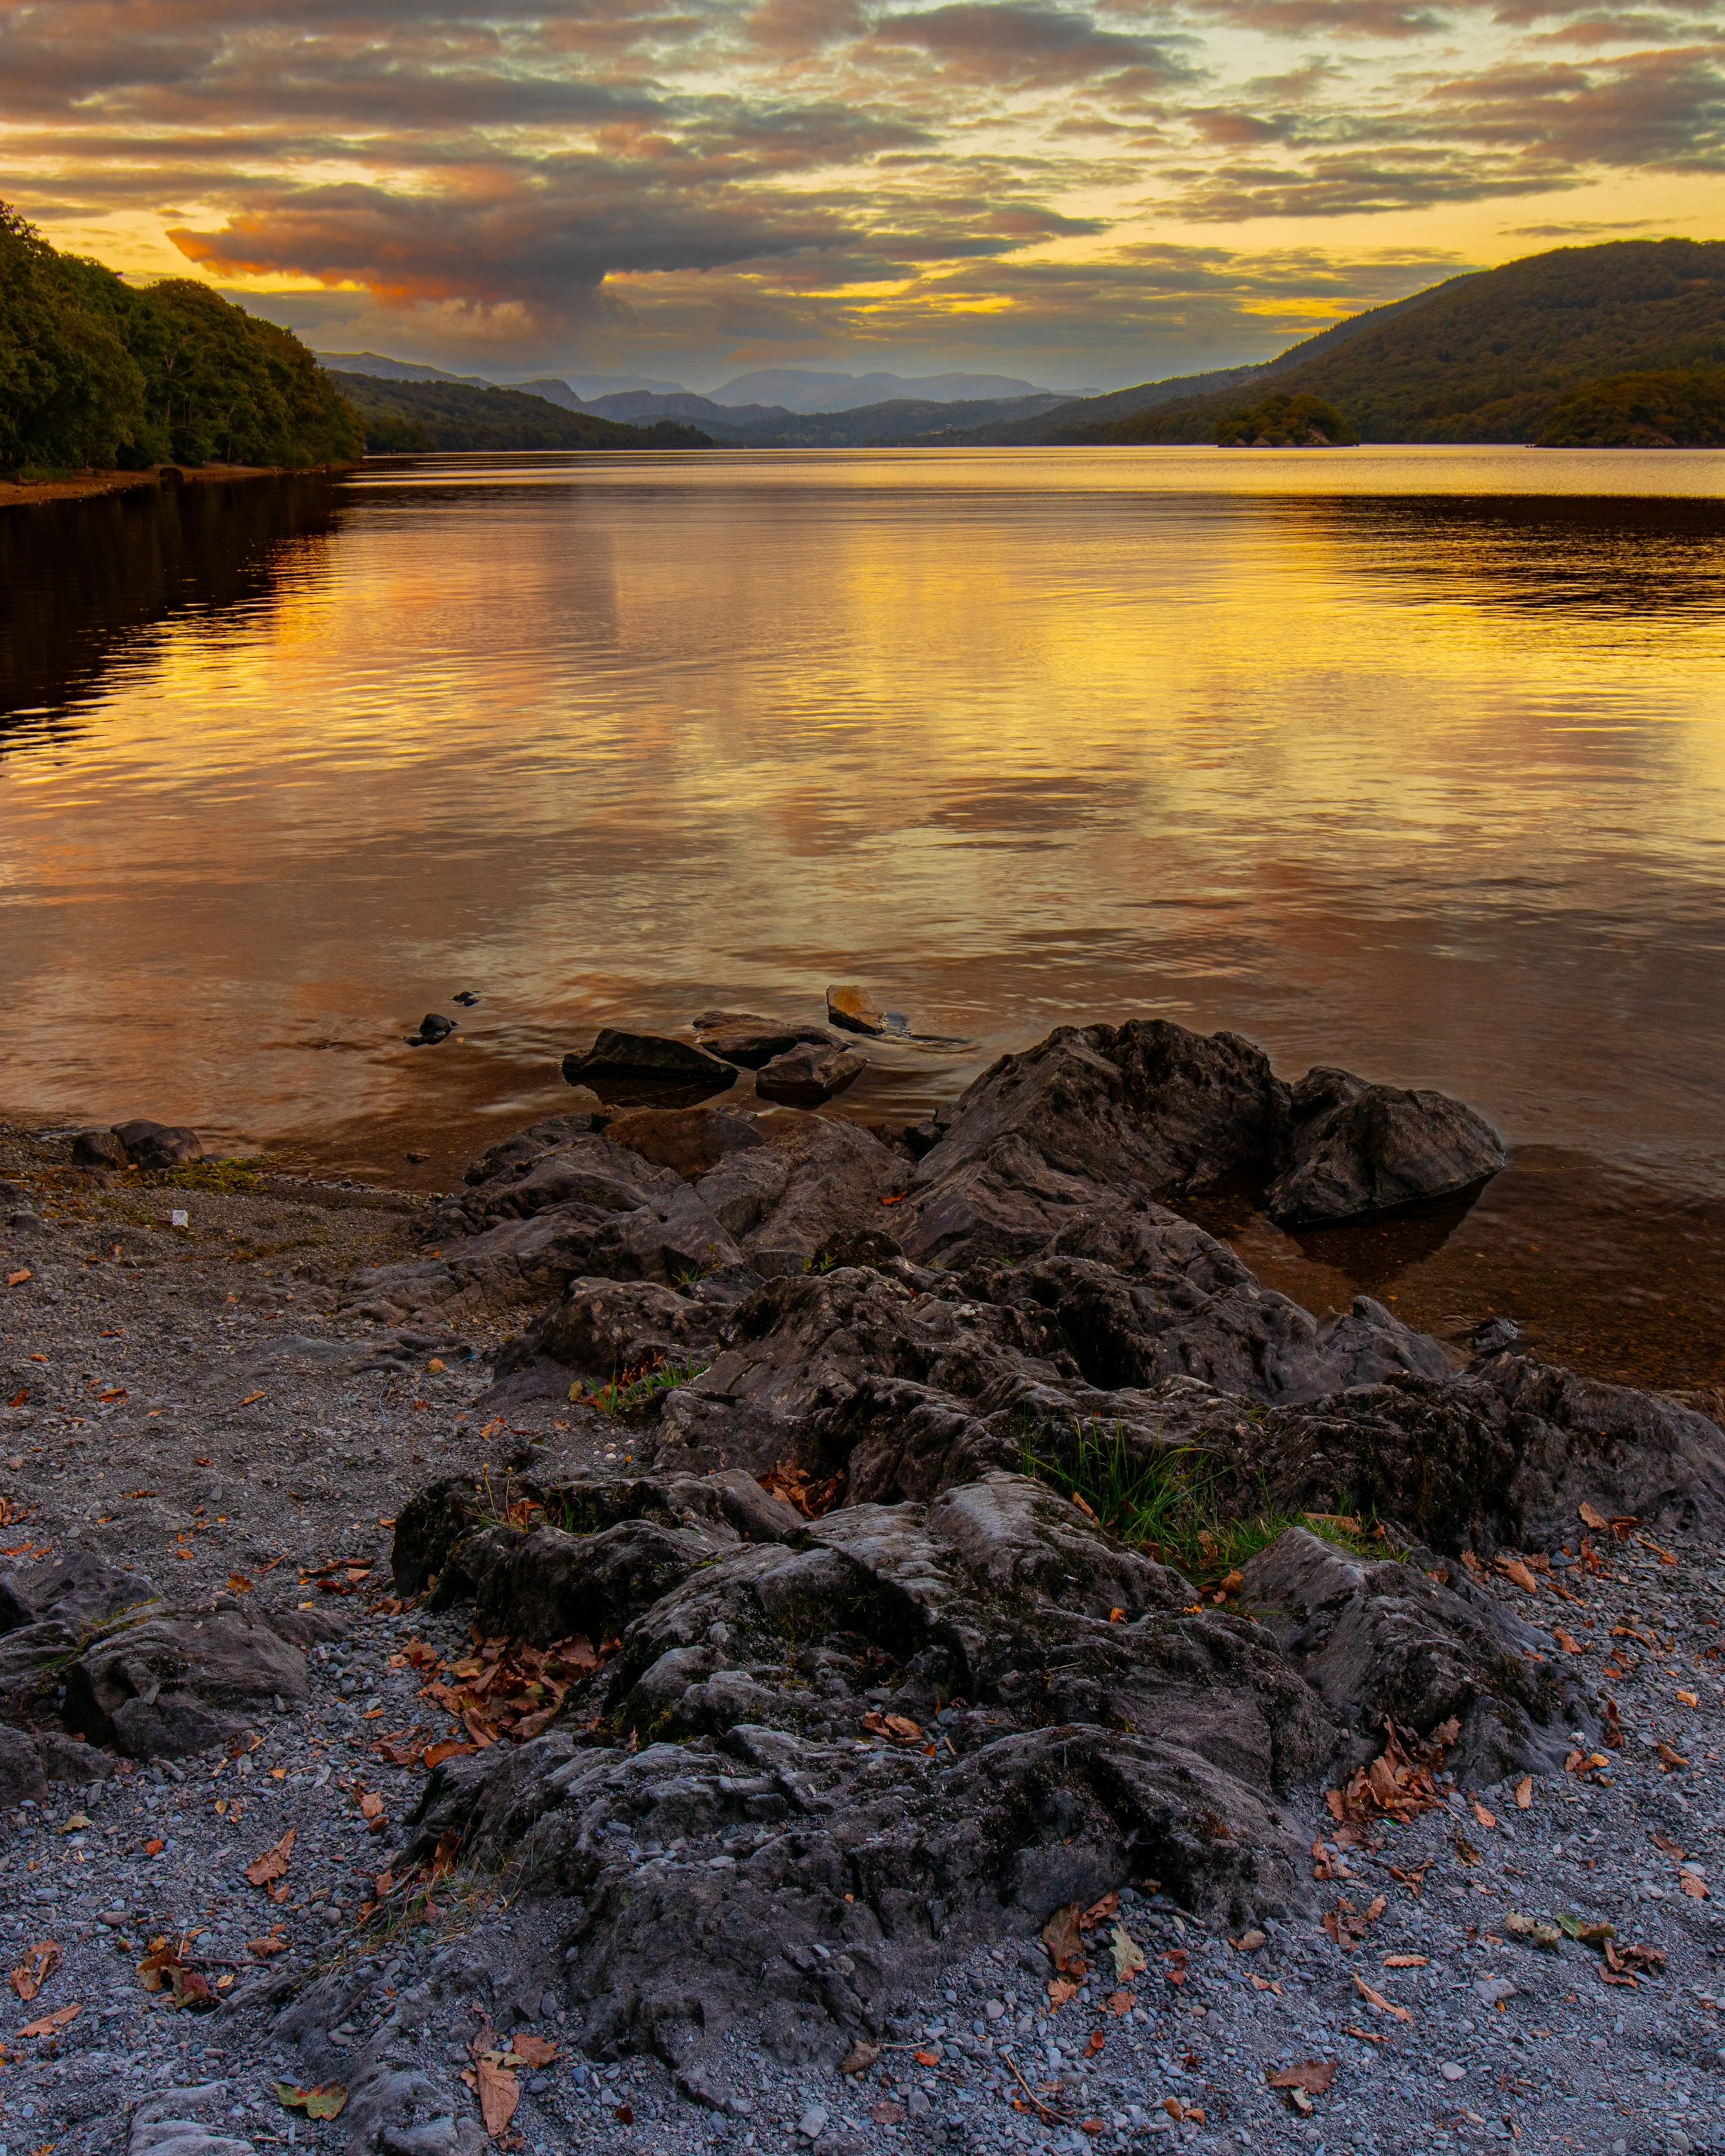
Coniston Water
Hear me out on this one, I know Coniston Wawter is far from hidden and'/or underrated. What I love about this place is the access to the water side, the convenient parking at the side of the road, but I also love that at night time, it’s so incredibly dark. All of the above combine to make a really great spot for astrophotography. There is plenty of foreground interest and on a still evening, the water makes for some great reflections.
I’ve not managed to get an astronaut shot that I am happy enough to share yet, but having it so close by and knowing that during the winter it is MUCH quieter, means that I will be a frequent visitor here throughout the winter as I look to nail the first one I want to share!
Wast Water
This one is my curveball; Wast Water is known for being Englands deepest lake and it is situated in the shadow of Scafell Pike, which as many of you will know is the highest mountain in England.
It’s a bit of a drive for me to get there from the South Lakes, but I am always blown away by this place. At night time it’s dark with some decent Milky Way opportunities when the conditions are favourable. The sunsets up here are awesome and the light catches the fells and the screes in some amazing golden colours.
This place also looks amazing under moody skies, and if you can get a day with some moody but patchy cloud and the sun starts breaking through, then you’re onto a winner.
It’s also really accessible with lots of parking close to the edge of the water, so a lot of shots aren’t a huge walk from your car (the availability of this parking is going to depend on a number of factors, such as the weather, the time of year and the time of day). If you’re partial to a bit of wild swimming alongside your photography, then it’s a pretty epic place for a dip - just don’t look down, the depth (almost 80 metres in places) means that it’s very dark down there. If you are swimming here, don’t go alone and let someone know where you are - don’t do anything stupid and make sure you get out in one piece!
So that wraps this weeks landscape photography blog, and I hope you have found something useful in here. I’ll keep an eye on how much this page gets viewed and if the stats are looking good, I will put another one together in due course!
If you’d like to support the blog and help me keep producing Lake District photography content, honest gear reviews and regular website updates, you can do so via my Buy Me a Coffee page. Keeping everything running smoothly takes time, and your support makes a real difference. Thank you.
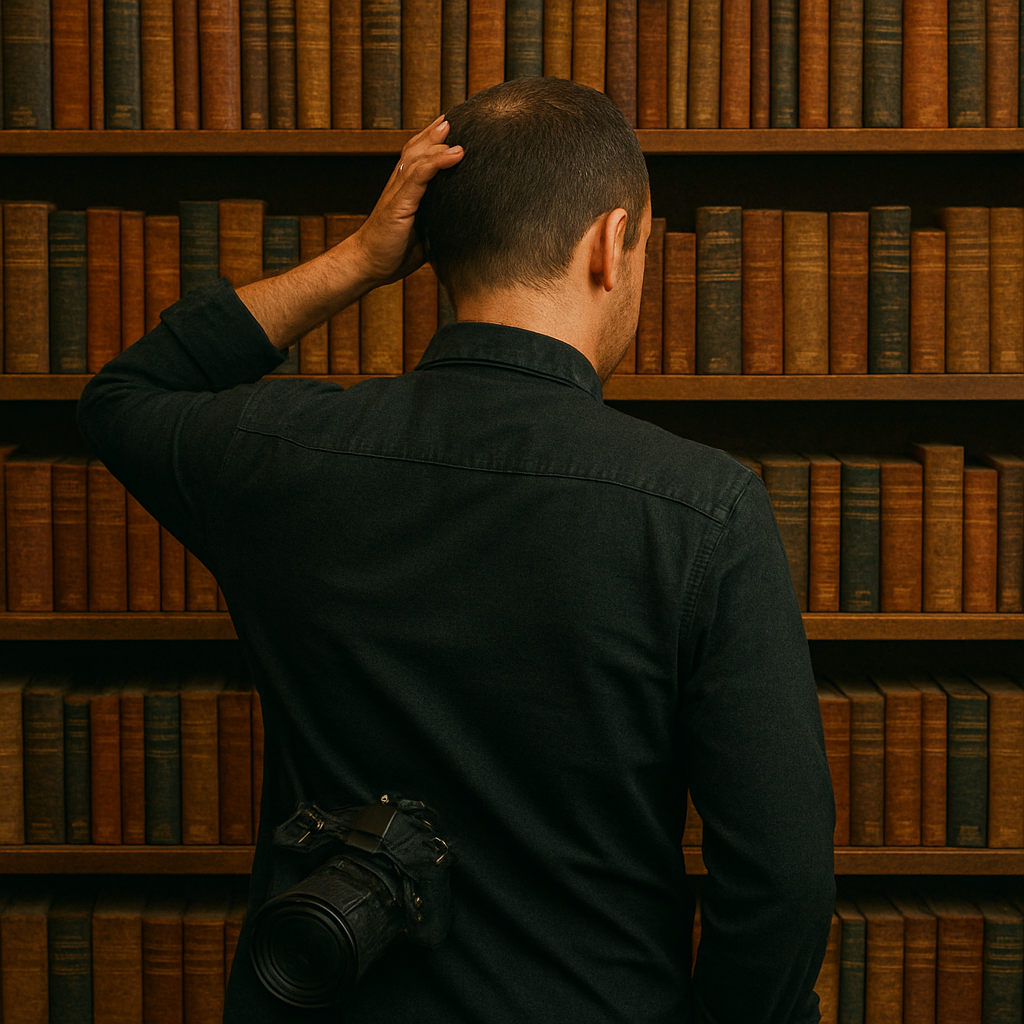
10 Photo Books YOU should own.
Choosing the right photography books can transform the way you see and approach your work. With so many photo books available, knowing where to start can be overwhelming — whether you’re a beginner or an experienced photographer.
That’s why I’ve curated a list of 10 photography books every photographer should own. These aren’t just coffee-table books; they’re titles that challenge your eye, strengthen your understanding of composition and storytelling, and help you grow creatively. If you’re looking to build a photography book collection that genuinely improves your images, this is a great place to start.
Welcome back! In this fairly quick entry, I am going to list and give a brief outline of 10 photobooks that I own and that I think you should too. This is going to cover everything from landscape photography to street photography and the craft of photography in general.
This blog contains Amazon affiliate links and I may received a small kickback if you make a qualifying purchase after clicking one of the links in this blog.
I own all of these books, with the exception of one of them; the last one on the list (which I am hoping to receive for Christmas, or bag a copy in the Black Friday sales.

I think what surprised me about the list when I wrote it was that I haven’t chosen a lot of landscape photography books. In fact, there are only 3 ‘real’ landscape books. I like to have a variety of photography to look at. I don’t want everything I consume to be the stuff that I am shooting, I don’t want to be sat looking at what I could be taking - I want to be out there taking it and on top of that I don’t want my creativity to be limited by thinking about how I can recreate images that I have seen.
I think that the last point applies even more so to social media, but that’s a whole other blog I am going to write need to unpick that!
Anyway, here goes with the list. I will include a link to each one of them on Amazon so that if the mood strikes, you can go ahead and grab a copy for yourself or maybe to give as a gift to a very lucky photographer.
Susan Sontag - On Photography
I think that this is a really important book and one that every photographer should read. In this book, Sontag discusses many ideas, but chief among them (for me anyway) is that photography makes us spectators of life, rather than people who participate in it. I think this rings ever more true the more prevalent social media comes in our lives.
She also looks at several other themes such as photography becoming a form of control, explores how it can distort our perception of reality (social media again, anyone?) and how we can becomes desensitised to things such as the atrocity of war because of how much we see it in the course of our daily lives.
If you haven’t read this then you probably should, it’s also really reasonably priced at less than £10 on Amazon.
Liam Wong :TO:KY:00
This isn’t just one of my favourite photo books, this one, and it’s sequel After Dark are two of my favourite books that I own. They might even be two of my favourite possessions full stop. The images in these books are just incredible and Wong’s training as a video games artist really shows. The images are crisp, the compositions are simply incredible and the colours… just WOW.. serious cyberpunk vibes! There’s a lot of neon lights going, the photos are dark, moody and tell some incredible stories.
The other thing worth mentioning about these books is that they are so incredibly well produced. They have lay flat binding so that you’re not going to get them all creased up and ruin the spines and there are fold-out panoramic shots as well so you can really enjoy the images the way in which they were intended to be seen.
Ansell Adams 400 Photographs
Would this list be complete without some kind of mention of the Godfather of landscape photographer, Ansell Adams? If you want to enjoy as much of the great man’s photography as possible, and in one palace, then this is the place to do it. The images are organised into groups, starting with some of his earliest stuff in Yosemite around 1916 up until some of the work he did around the National Parks in the 1960s.
If you’re into landscape photography, or just like the natural world then this is something you need on your bookshelf. You can pick this one up for around £30 here on Amazon
The Photographer’s Eye - Michael Freeman
If you are looking for a way to improve your landscape photography, then this is a good place to start. This is well organised book which guides you through a process which ultimately will change the way you view the world. What I like about this is the clear language it uses and moreover, the way the book uses such a wide range of example images from all around the world so that it doesn’t fill your head with images that are a stones throw from your front door that you can just head out and copy. I really like that.
This book has recently been updated and you can grab a copy of the latest edition for about £18 on Amazon by clicking here.
This Pleasant Land - Hoxton Mini Press
This is one I have had a couple of years and frequently dip into. It shows a modern perspective on the UK landscape as it exits today, and it isn't just classically ‘beautiful’ photographs. It looks at the beauty that can be found in decay as well as exploring the more traditionally aesthetically pleasing side that we associate with landscape photography. Is it predictable? No. Is it traditional? No. Do you need a copy? Yes. Yes you do. It’s available on Amazon for just shy of £22
Magnum Contact Sheets - Kristen Lubben
Another one which isn’t a landscape book, but I don’t know a single photographer who hasn’t been fascinated by this book. It’s a collection of contact sheets and stories as told by the incredible photojournalists that have worked for the Magnum Agency. We’re talking big names in this book… Robert Capa, Henri Cartier-Bresson, Eve Arnold, Elliot Erwitt and Bruce Gilden to name just a few.
I find the stories behind the images fascinating and perhaps at times, the reasons behind the selects even more so. It’s just an incredible book and even you’re not into photojournalistic work, you can learn a heck of a lot about storytelling and composition by spending a couple of hours with this book. It’s one of the heavier books on the list both in terms of physical weight and price coming in at around £45 on Amazon
Ernst Haas - New York in Colour - Prestel
Haas moved to New York from Vienna in 1951 and qucickly set about photographing it. What he captured was just incredible and marks his move away from his career shooting in black and white. All of the images have the classic New York vibe that we have come to expect from the city that never sleeps. The images explore the technical challenges he encountered shooting with Kodachrome and then printing the images in colour. I can’t tell you exactly what it is about this book that makes it so good, it’s just an incredible set of images that you need to see. This one is currently selling for £35 on Amazon
William Eggleston - Portraits
Do you like shooting in colour? Do you like looking at colour images in galleries and at exhibitions? You do? Well then you have William Eggleston to thank for that. At a time when colour photography was for amateurs and the establishment’s attitude was that in order to be considered a true professional and a ‘serious’ artist then you had to shoot in black and white. There was a lot of snobbery about the use of colour and Eggleston broke down that barrier. The potraits in this book show colour photography at its very best, the compositions are often hectic, playful and the way people are portrayed in them feels really authentic. There is a whole bunch of books by Eggleston that could have made this list (The Democratic Forest and 2 1/4 are fantastic, but unless you have very deep pockets, you might struggle to justify the £6100 that a copy of the former is currently listed for on Amazon). Portraits has a much more wallet friendly price, coming in at around £35 on Amazon.
Life on The Mountains - Terry Abraham
You didn’t think I was going to complete this blog without talking about The Lake District, did you? This gorgeous book which talks about a ten year project Abraham worked on, documenting the fells of Lakeland, encountering some pretty sketchy weather and taking some nasty falls along the way. The photography in this book is nothing short of stunning, helped of course by the quality of the environment he was shooting! It’s a book that really does speak for itself and is as equally at home in the hands of a photographer as it is with an outdoor enthusiast and love of The Lake District; I reckon Wainwright would have loved it! You can grab your copy on Amazon for just under £20!
The Decisive Moment - Henri Cartier-Bresson
Ok, so full disclosure, I don’t own a copy of this book, but I have had the chance to peruse one in a library when I still lived in London. If you had asked me to write this list 6 months ago, this book would’t have featured; it was out of print, hard to get hold of and if you wanted a useable copy, you were looking at deep into three figures territory. So why is it on here now? There has been a new print run and it’s available to buy again!
This is one of, if not the most famous photobooks in existence. It looks at the concept of the decisive moment in photography. The exact meaning of ‘the decisive moment’ is a bit of a bone of contention amongst photographers, but it boils down to waiting for the right moment to capture the image, but its a bit deeper than that at the same time. This really is a genre defining book and is definitely something you should own!
The reprint is currently going for £40 on Amazon.
And here endeth the list.
This just my opinion based on what I own and what I have read. I don’t profess to be the oracle of photographic literature, but I reckon a number of these would pop-up in conversations about books with fellow photographers. I love owning photo books, they bring me a lot of joy and have pride of place in my house, they’re a great talking point and who knows, maybe one day, I will have one of my own!Prices are correct as of 11pm, Wednesday 19th November, please bear in mind that I am writing this as I waiting for the Amazon Black Friday to start at midnight (I really do love a bargain!), but that means that Amazon have an absolute raft of deals going on in the run up to the start of their event so please don’t be mad if the prices have gone up by the time you get round to reading this!
Thanks for making it this far! If you’d like to support the blog and help me keep producing Lake District photography content, honest gear reviews and regular website updates, you can do so via my Buy Me a Coffee page. Keeping everything running smoothly takes time, and your support makes a real difference. Thank you.
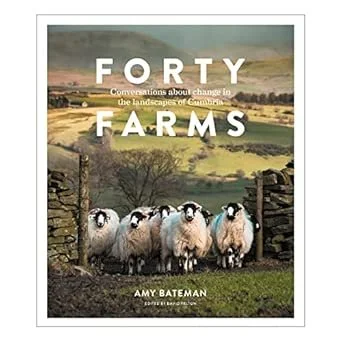


Escaping Golden Hour Jail in Landscape Photography
Break out of the golden hour mindset and discover how to shoot powerful landscape photos no matter the time of day. In this guide, Chris explains why limiting yourself to sunrise and sunset light can hold back your creative potential — and shares practical techniques to help you see light, weather and composition in a fresh way. From bold midday shadows to overcast skies and unexpected conditions, you’ll learn to make the most of every shoot. Whether you’re juggling work commitments or exploring new creative approaches, this post will help you expand your landscape photography beyond the classic golden hour.
We’ve all heard all of the tropes about landscape photography and how “Golden hour is the best time to take photographs” and “Golden hour has the best light”, but sometimes we end up only shooting at these times and forgetting about all of the other opportunities we have to go out to make images.
In this blog, I am going to looks at some ideas to get you out of the habit of only shooting at this times.
This blog contains Amazon affiliate links and I may receive a small kickback if you make a qualifying purchased after clicking one of these links.
SO… for the uninitiated, golden hour is the hour after the sun has risen in the morning, and the hour before it sets in the evening. There’s also blue hour: The hour before the sun rises and the evening, the hour after it has set.
If you’re thinking of long, lingering summer sunsets, you’re thinking of golden hour. If you’re reminiscing about the times you have watched the sunrise, wherever you are in the world, you are thinking of golden hour.
Like I said at the start of this blog, we hear so much about how this is the best time to go and shoot, and yes, the light is often incredible; it’s warm, it’s soft and it has the ability to make even the most ordinary of scenes look beautiful. However, we also often forget that these aren’t the only times that we can go out with our cameras.
When we get into this habit of only shooting at these times, I say that we have ended up in “golden hour jail”. Whilst this isn’t a horrible place to be, it can be a restrictive place to be.
If you’re anything like me, and have a proper job during the day, this is going to mean that you are often driving to work during golden hour in the winter, and in the very depths of the coldest of the seasons, you’re sat behind your desk whilst the golden hour in the evening flies past your eyes.
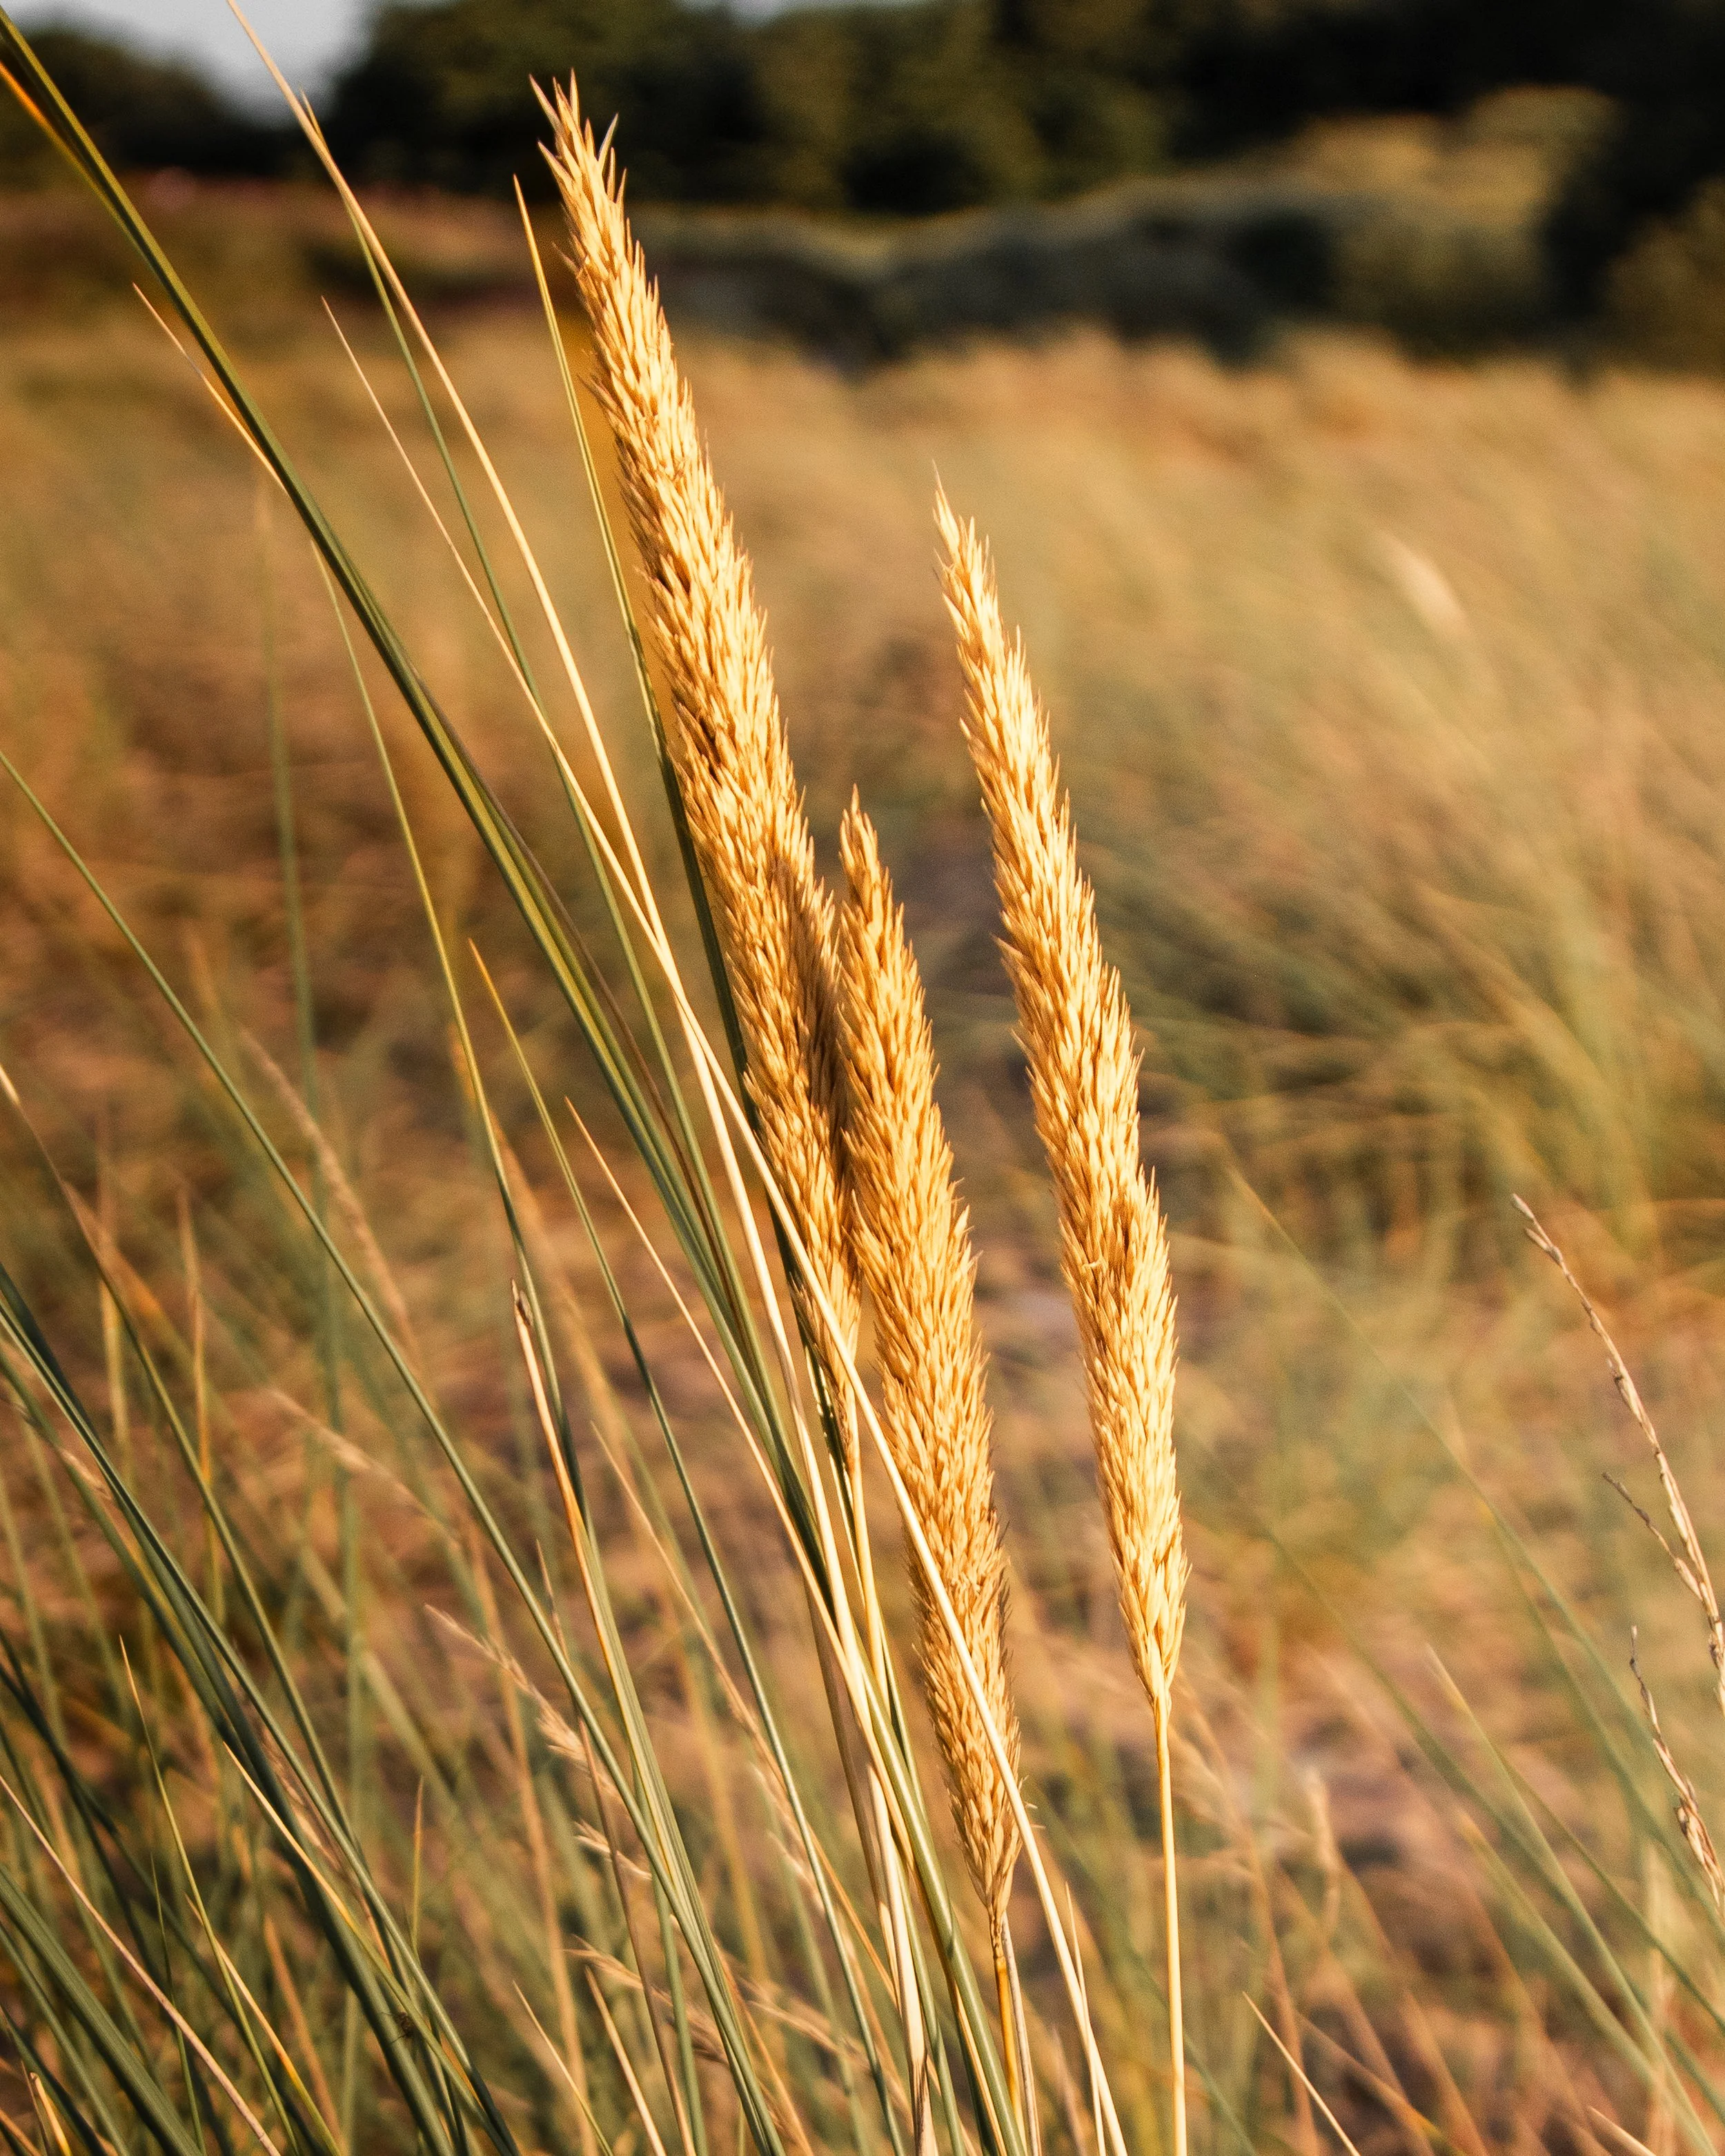
I work right next to the coast, and as a landscape photographer, it can be gruelling having to sit and watch the sunset knowing that there is nothing you can do to go out and shoot it. Somedays, you finish work and it’s already dark! When the weekend rolls around, you often find that you are too tired to want to get up early again and then life happens.
Before you know it, the weekend is gone (always too quickly) and you’re back in the car seeing the sunrise around you during your commute, wishing you could make some photos and you still haven’t had the camera out in weeks because of everything I have just mentioned above.
So then, the answer to the big question, is how do we get out of this ‘golden hour jail’. What’s the thing we do that is like playing the landscape photography version of a get out of jail free card? Let’s take a look…
I think the first thing to remember, is that why there may be no such thing as bad photography conditions, there can be bad light. This is often when the light is flat and the skies are completely and featureless and whilst these kinds of days aren’t ideal, though they are all too common in The Lake District, that doesn’t mean that you can’t go out and take images in them.
It hasn’t, and didn’t impact many of the great photographers. You can still go out to shoot in these conditions. Yes, it can be harder to find the compositions you want, but for me, that’s part of the joy of this kind of photography - it pushes us out of our comfort zone; usually this is because we are used to nature doing massive chunk of the work for us!
I think that that one of the best ways to help yourself shoot outside of these times is to stay in bed for an extra hour in the morning, have that extra cup of coffee and maybe a bigger breakfast and let the sunrise pass you by, or go and watch it and don’t take the camera. Certainly for me and the way I work, if I go out to shoot sunset, I am there for blue hour, golden hour and then once the sun is fully up and the colours have faded, I am heading back to the car, and at this time of the year, I am turning on the heated seat and driving home for food an warm drinks!
By passing this time doing something else, you take it out of the equation. You don’t have nature to do so much of the heavy lifting and you need to look for other things.
Going out to shoot when the weather is less than ideal is a great way to break free as well. One of the most fun shoots I had this year was in some local woodland whist it was pouring with rain. Did I get wet? Absolutely, but me and my camera survived and I learned a lot about photography and about myself as a photographer in this couple of hours. I wrote a blog about going out to shoot in unfavourable conditions, you can read it here.
But this blog isn’t about going out in poor conditions, this is about going out in conditions that aren’t what we associate with being good for photography.

Bright/Direct Sunlight
Here in The Lake District, landscape photography takes in all kinds of light that isn’t in one of the golden hours. We have the full gamut of weather here; rain, more rain, lot of rain, bright sun, cloudy skies and in winter we get plenty of snow up on the fells. Sometimes, if you get really lucky, you will get all of those within about 20 minutes!
We often associate bright sunlight with being poor for landscape photography. The photo next to this paragraph (usually below the paragraph if you’re reading on your phone), was taken on Castle Crag (the smallest of the Wainwright fells and also my first!, shows just how strong sunlight can really make the colours in your image pop, and this image was taken on an iPhone with minimal edits.
Is this the greatest photo I have ever taken? No. it isn’t. But… look at the way some of those colours are lit up and how the light is really helping to pull the yellow colour out of the petals on the flower.
The other great thing about shooting in the bright sunlight is that it can produce some really strong shadows, especially if you’re out in the middle of the day.
These shadows will be crisp but harsh, but even so, they are really good framing an aspect of the landscape you are shooting. If you’re a street photographer, you can do the same thing - go and looks at Fa Ho’s work if you want to see more of what I am talking about here, but he was incredible at working with harsh light.
Rain
This is one that I love, as things look great when they have had dose of rain on them, especially if you’re out in woodland.
Rain has the ability to make everything look better, the colours pop, the textures stand out and you just end up with a great looking photo.
If you’re into macro photography and you’re in the right place then raindrops make great subjects, and if you can capture some reflections in them as well, then you could really be on to a winner.
Overcast Skies:
For some landscape photographers, overcast skies are the worst. Everything looks flat, the sun is all but snuffed out and the cloud, even the sky has little no interest in it; you begin to wonder why you even thought it would be a good idea to leave the house.
I suppose what I like about these kinds of conditions is that even though the light isn’t the most beautiful, it’s pretty consistent and you don’t need to worry too much about wild variations in exposure because the cloud isn’t changing much and it’s already blotted out the sun.
For me, these are ideal conditions for working on some detail shots, looking at the textures that are around you and working on some stuff that’s a bit more abstract that I might normally do. Intentional camera movement can be something which is fun if you haven’t tried it before, or even if you have!
On these days, especially when there isn’t as much light as I might like, I find that taking out a small RGB light can be really useful as I like to take some detail or macro shots. Having this with me gives some more flexibility with my shutter speed, but can also be useful if I want to get creative with some lighting! I like this one from SmallRig.
My Top Tips for Getting out of Golden Hour Jail
Wait for the sunrise to happen and then leave to go on your shoot, enjoy that extra hour in bed in the morning. This takes the pressure off and stops you from going home once the sunrise has finished its display. Flip this evening and wait for blue hour, or even darkness!
Work on different “types” of photography - try some abstracts, try some macro, a bit of astro and maybe even some intentional camera movement.
Have a plan in mind and stick to it.
Look at your feet. The ground so often gets overlooked; I’m not talking starting a project cover footpaths, I’m talking about spotting the stuff that you’re not normally looking for - just make sure you stay aware of your surroundings.
Don’t rule anything out, you never know what you might see when you get it in post.
Try shooting in black and white, especially if you’re out in the day and have some shadows to play with. Black and white loves contrast, and you'll get that in abundance if you get out on the right day.
Be brave… look for things you wouldn’t usually consider - you never know, you might surprise yourself.
Go out, be brave and shoot in outside out of the times that we all cling so dearly to! There’s an awesome world out there, and sometimes, I don’t think that we as much of it as we could, because we often shoot and then walk away when the golden light is gone.
And hey, if none of this is your thing, have you heard about golden hour? It’s supposed to be a great time to take photos…